Chapter 4
Controlling the Flow of JavaScript
IN THIS CHAPTER
![]() Understanding how you control the flow of JavaScript
Understanding how you control the flow of JavaScript
![]() Setting up your code to make decisions
Setting up your code to make decisions
![]() Understanding code looping
Understanding code looping
![]() Setting up code loops
Setting up code loops
![]() Avoiding the dreaded infinite loop
Avoiding the dreaded infinite loop
In a minute there is time
For decisions and revisions which a minute will reverse.
— T. S. ELIOT
When the web browser comes across a <script> tag, it puts on its JavaScript hat and starts processing the statements. Not surprisingly, the browser doesn't just leap randomly around the script, parsing the statements willy-nilly. That would be silly. No, the browser puts its head down and starts processing the statements one at a time: the first statement, the second statement, and so on until there’s no more JavaScript left to parse.
That linear statement-by-statement progression through the code makes sense, but it doesn’t fit every situation. Sometimes you want your code to test some condition and then run different chunks of code depending on the result of that test. Sometimes you want your code to repeat a collection of statements over and over again, with some subtle or significant change occurring with each repetition. Code that runs tests and code that repeats itself all fall under the rubric of controlling the flow of JavaScript. In this chapter, you dive into this fascinating and powerful subject.
Understanding JavaScript’s Control Structures
There are lots of sites on the web that offer widgets and doodads that you can link to (or sometimes download) to add functionality to your web pages. Easy? For sure. Fast? Absolutely. Recommended? Nope. That’s because those doohickeys are black boxes where the code is hidden and unchangeable (at least by the likes of you and me). That, in turn, means you lose out on one of the main advantages of writing your own JavaScript code: that you end up with complete and exquisite control over what your code does and how it performs its tasks.
There are many ways to exert such control over your code, but there are two that you’ll find to be the most useful and powerful. The first of these are JavaScript statements that make decisions based on certain conditions, and then depending on the results of those decisions, send your code branching one way or another. The second are JavaScript statements that perform loops, which means that they run one or more statements over and over again, and you control the number of times this happens. The JavaScript statements that handle this kind of processing are known as control structures to those in the trade.
Making True/False Decisions with if() Statements
A smart script performs tests on its environment and then decides what to do next based on the results of each test. For example, suppose you’ve written a function that uses one of its arguments as a divisor in an expression. You should test the argument before using it in the expression to make sure that it isn’t 0.
The most basic test is the simple true/false decision (which could also be seen as a yes/no or an on/off decision). In this case, your program looks at a certain condition, determines whether it’s currently true or false, and acts accordingly. Comparison and logical expressions (covered in Book 3, Chapter 3) play a big part here because they always return a true or false result.
In JavaScript, simple true/false decisions are handled by the if() statement. You can use either the single-line syntax:
if (expression) { statement };
or the block syntax:
if (expression) {
statement1;
statement2;
…
}
In both cases, expression is a comparison or logical expression that returns true or false, and statement(s) represent the JavaScript statement or statements to run if expression returns true. If expression returns false, JavaScript skips over the statements.
 This is a good place to note that JavaScript defines the following values as the equivalent of
 false: 0, "" (that is, the empty string), null, and undefined. Everything else is the equivalent of true.
 This is the first time you've seen JavaScript’s braces (
{ and }), so let's take a second to understand what they do because they come up a lot. The braces surround one or more statements that you want JavaScript to treat as a single entity. This entity is a kind of statement itself, so the whole caboodle — the braces and the code they enclose — is called a block statement. Also, any JavaScript construction that consists of a statement (such as if()) followed by a block statement is called a compound statement. And, just to keep you on your toes, note that the lines that include the braces don’t end with semicolons.
Whether you use the single-line or block syntax depends on the statements you want to run if the expression returns a true result. If you have only one statement, you can use either syntax. If you have multiple statements, use the block syntax.
Consider the following example:
if (totalSales != 0) {
var grossMargin = (totalSales - totalExpenses) / totalSales;
}
This code assumes that earlier the script has calculated the total sales and total expenses, which are stored in the totalSales and totalExpenses variables, respectively. The code now calculates the gross margin, which is defined as gross profit (that is, sales minus expenses) divided by sales. The code uses if() to test whether the value of the totalSales variable is not equal to zero. If the totalSales != 0 expression returns true, then the grossMargin calculation is executed; otherwise, nothing happens. The if() test in this example is righteous because it ensures that the divisor in the calculation — totalSales — is never zero.
Branching with if()…else Statements
Using the if() statement to make decisions adds a powerful new weapon to your JavaScript arsenal. However, the simple version of if() suffers from an important drawback: A false result only bypasses one or more statements; it doesn't execute any of its own. This is fine in many cases, but there will be times when you need to run one group of statements if the condition returns true and a different group if the result is false. To handle this, you need to use an if()…else statement:
if (expression) {
statements-if-true
} else {
statements-if-false
}
The expression is a comparison or logical expression that returns true or false. statements-if-true represents the block of statements you want JavaScript to run if expression returns true, and statements-if-false represents the block of statements you want executed if expression returns false.
As an example, consider the following code:
var discountRate;
if (currMonth === "December") {
discountRate = 0.2;
} else {
discountRate = 0.1;
}
var discountedPrice = regularPrice * (1 – discountRate);
This code calculates a discounted price of an item, where the discount depends on whether the current month is December. The code assumes that earlier the script set the value of the current month (currMonth) and the item's regular price (regularPrice). After declaring the discountRate variable, an if()…else statement checks to see if currMonth equals December. If it does, discountRate is set to 0.2; otherwise, discountRate is set to 0.1. Finally, the code uses the discountRate value to calculate discountedPrice.
if()…else statements are much easier to read when you indent the statements within each block, as I've done in my examples. This lets you easily identify which block will run if there is a true result and which block will run if the result is false. I find that an indent of four spaces does the job, but many programmers prefer either two spaces or a tab.
The if()…else statements are very similar to the ternary operator (?:) that I discuss in Book 3, Chapter 3. In fact, for a very specific subset of if()…else statements, the two are identical.
The ?: operator evaluates a comparison expression and then returns one value if the expression is true, or another value if it's false. For example, if you have a variable named currentHour that contains the hour part of the current time of day, then consider the following statement:
var greeting = currentHour < 12 ? "Good morning!" : "Good day!";
If currentHour is less than 12, then the string "Good morning!" is stored in the greeting variable; otherwise, the string "Good day!" is returned. This statement does exactly the same thing as the following if()…else statements:
if (currentHour < 12) {
greeting = "Good morning!";
} else {
greeting = "Good day!";
}
The ternary operator version is clearly more efficient, both in terms of total characters typed and total lines used. So any time you find yourself testing a condition only to store something in a variable depending on the result, use a ternary operator statement instead of if()…else.
Making Multiple Decisions
The if()…else control structure makes only a single decision. The if() part calculates a single logical result and performs one of two actions. However, plenty of situations require multiple decisions before you can decide which action to take.
For example, to calculate the pre-tax price of an item given its total price and its tax rate, you divide the total price by the tax rate plus 1. In real-world web coding, one of your jobs as a developer is to make sure you're dealing with numbers that make sense. What makes sense for a tax rate? Probably that it’s greater than or equal to 0 and less than 1 (that is, 100%). That’s two things to test about any tax rate value in your code, and JavaScript offers multiple ways to handle this kind of thing.
Using the AND (??) and OR (||) operators
One solution to a multiple-decision problem is to combine multiple comparison expressions in a single if() statement. As I discuss in Book 3, Chapter 3, you can combine comparison expressions by using JavaScript’s AND (??) and OR (||) operators.
The following code shows an example if() statement that combines two comparison expressions using the && operator:
var retailPrice;
if (taxRate >= 0 && taxRate < 1) {
retailPrice = totalPrice / (1 + taxRate);
alert(retailPrice);
} else {
alert("Please enter a tax rate between 0 and 1.");
}
The key here is the if() statement:
if (taxRate >= 0 && taxRate < 1);
This tells the browser that only if the taxRate value is greater than or equal to 0 and less than 1 should the statements in the true block be executed. If either one is false (or if both are false), the user sees the message in the false block instead.
Nesting multiple if() statements
There is a third syntax for the if()…else statement that lets you string together as many logical tests as you need:
if (expression1) {
statements-if-expression1-true
} else if (expression2) {
statements-if-expression2-true
}
etc.
else {
statements-if-false
}
JavaScript first tests expression1. If expression1 returns true, JavaScript runs the block represented by statements-if-expression1-true and skips over everything else. If expression1 returns false, JavaScript then tests expression2. If expression2 returns true, JavaScript runs the block represented by statements-if-expression2-true and skips over everything else. Otherwise, JavaScript runs the block represented by statements-if-false. The second if() statement is said to be nested within the first if() statement.
The following code shows a script that uses a nested if() statement:
var greeting;
if (currentHour < 12) {
greeting = "Good morning!";
} else if (currentHour < 18) {
greeting = "Good afternoon!";
} else {
greeting = "Good evening!";
}
alert(greeting);
The code assumes that earlier in the script the current hour value was stored in the currentHour variable. The first if() checks to see if currentHour is less than 12. If so, then the string "Good morning!" is stored in the greeting variable; if not, the next if() checks to see if currentHour less than 18 (that is, less than 6:00 PM). If so, then greeting is assigned the string "Good afternoon!"; if not, greeting is assigned "Good evening" instead.
Using the switch() statement
Performing multiple tests with if()…else if is a handy technique — it's a JavaScript tool you’ll reach for quite often. However, it quickly becomes unwieldy as the number of tests you need to make gets larger. It’s okay for two or three tests, but any more than that makes the logic harder to follow.
For situations where you need to make a whole bunch of tests (say, four or more), JavaScript’s switch() statement is a better choice. The idea is that you provide an expression at the beginning and then list a series of possible values for that expression. For each possible result — called a case — you provide one or more JavaScript statements to execute should the case prove to be true. Here’s the syntax:
switch(expression) {
case Case1:
Case1 statements
break;
case Case2:
Case2 statements
break;
etc.
default:
Default statements
}
The expression is evaluated at the beginning of the structure. It must return a value (numeric, string, or Boolean). Case1, Case2, and so on are possible values for expression. JavaScript examines each case value to see whether one matches the result of expression. If expression returns the Case1 value, the code represented by Case1 statements is executed, and the break statement tells JavaScript to stop processing the rest of the switch() statement. Similarly, if expression returns the Case2 value, the code represented by Case2 statements is executed, JavaScript stops processing the rest of the switch() statement. Finally, the optional default statement is used to handle situations where none of the cases matches expression, so JavaScript executes the code represented by Default statements.
If you do much work with dates in JavaScript, it's likely that your code will eventually need to figure out how many days are in any month. There’s no built-in JavaScript property or method that tells you this, so you need to construct your own code, as shown here:
var daysInMonth;
switch(monthName) {
case "January":
daysInMonth = 31;
break;
case "February":
if (yearValue % 4 === 0) {
daysInMonth = 29;
}
else {
daysInMonth = 28;
}
break;
case "March":
daysInMonth = 31;
break;
case "April":
daysInMonth = 30;
break;
case "May":
daysInMonth = 31;
break;
case "June":
daysInMonth = 30;
break;
case "July":
daysInMonth = 31;
break;
case "August":
daysInMonth = 31;
break;
case "September":
daysInMonth = 30;
break;
case "October":
daysInMonth = 31;
break;
case "November":
daysInMonth = 30;
break;
case "December":
daysInMonth = 31;
}
This code assumes that the variable monthName is the name of the month you want to work with, and yearValue is the year. (You need the latter to know when you're dealing with a leap year.) The switch() is based on the name of the month:
switch(monthName)
Then case statements are set up for each month. For example:
case "January":
daysInMonth = 31;
break;
If monthName is "January", this case is true and the daysInMonth variable is set to 31. All the other months are set up the same, with the exception of February:
case "February":
if (yearValue % 4 === 0) {
daysInMonth = 29;
}
else {
daysInMonth = 28;
}
break;
Here you need to know whether you're dealing with a leap year, so the modulus (%) operator checks to see if yearValue is divisible by four. If so, it's a leap year, so daysInMonth is set to 29; otherwise, it’s set to 28.
 Time geeks will no doubt have their feathers ruffled by my assertion that a year is a leap year if it’s divisible by four. In fact, that only works for the years 1901 to 2099, which should take care of most people’s needs. The formula doesn’t work for 1900 and 2100 because, despite being divisible by 4, these years aren’t leap years. The general rule is that a year is a leap year if it’s divisible by 4 and it’s not divisible by 100, unless it’s also divisible by 400.
Understanding Code Looping
There are some who would say that the only real goal of the programmer should be to get the job done. As long as the code produces the correct result or performs the correct tasks in the correct order, everything else is superfluous. Perhaps, but real programmers know that the true goal of programming is not only to get the job done, but to get it done as efficiently as possible. Efficient scripts run faster, take less time to code, and are usually (not always, but usually) easier to read and troubleshoot.
One of the best ways to introduce efficiency into your coding is to avoid reinventing too many wheels. For example, consider the following code fragment:
var sum = 0;
var num = prompt("Type a number:", 1);
sum += Number(num);
num = prompt("Type a number:", 1);
sum += Number(num);
num = prompt("Type a number:", 1);
sum += Number(num);
alert("The total of your numbers is " + sum);
This code first declares a variable named sum. The code prompts the user for a number (see Book 3, Chapter 7 for a discussion of prompt() method) that gets stored in the num variable, adds that value to sum, and then repeats this prompt-and-sum routine two more times. (Note my use of the Number() function, which ensures that the value returned by prompt() is treated as a number rather than a string.) Finally, the sum of the three numbers is displayed to the user.
Besides being a tad useless, this code just reeks of inefficiency because most of the code consists of the following two lines appearing three times:
num = prompt("Type a number:", 1);
sum += Number(num);
Wouldn't it be more efficient if you put these two statements just once in the code and then somehow get JavaScript to repeat these statements as many times as necessary?
Why, yes, it would, and the good news is that not only is it possible to do this, but JavaScript also gives you a number of different methods to perform this so-called looping. I spend the rest of this chapter investigating each of these methods.
Using while() Loops
The most straightforward of the JavaScript loop constructions is the while() loop, which uses the following syntax:
while (expression) {
statements
}
Here, expression is a comparison or logical expression (that is, an expression that returns true or false) that determines how many times the loop gets executed, and statements represents a block of statements to execute each time through the loop.
Essentially, JavaScript interprets a while() loop as follows: “Okay, as long as expression remains true, I'll keep running through the loop statements, but as soon as expression becomes false, I'm out of there.”
Take a closer look at this. Here’s how a while() loop works:
- Evaluate the
expressionin thewhile()statement. - If
expressionistrue, continue with Step 3; ifexpressionisfalse, skip to Step 5. - Execute each of the statements in the block.
- Return to Step 1.
- Exit the loop (that is, execute the next statement that occurs after the
while()block).
The following code demonstrates how to use while() to rewrite the inefficient code I show in the previous section:
var sum = 0;
var counter = 1;
var num;
while (counter <= 3) {
num = prompt("Type a number:", 1);
sum += Number(num);
counter++;
}
alert("The total of your numbers is " + sum);
To control the loop, the code declares a variable named counter and initializes it to 1, which means the expression counter <= 3 is true, so the code enters the block, does the prompt-and-sum thing, and then increments counter. This is repeated until the third time through the loop when counter is incremented to 4, at which point the expression counter <- 3 becomes false and the loop is done.
To make your loop code as readable as possible, always use a two- or four-space indent for each statement in the while() block. This also applies to the for() and do…while() loops that I talk about later in this chapter.
The while() statement isn't the greatest loop choice when you know exactly how many times you want to run through the loop. (For that, use the for() statement, described in the next section.) The best use of the while() statement is when your script has some naturally occurring condition that you can turn into a comparison expression. A good example is when you're prompting the user for input values. You’ll often want to keep prompting the user until she clicks the Cancel button. The easiest way to set that up is to include the prompt inside a while() loop, as shown here:
var sum = 0;
var num = prompt("Type a number or click Cancel:", 1);
while (num != null) {
sum += Number(num);
num = prompt("Type a number or click Cancel:", 1);
}
alert("The total of your numbers is " + sum);
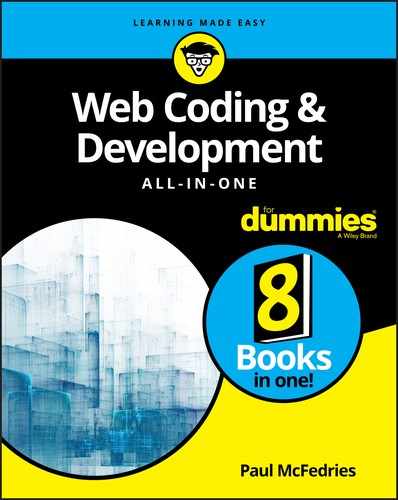
The first prompt() method displays a dialog box like the one shown in Figure 4-1 to get the initial value, and stores it in the num variable.

FIGURE 4-1: When prompting the user for multiple values, set up your while() expression so that the prompting stops when the user clicks the Cancel button.
Then the while() statement checks the following expression:
while (num != null);
Two things can happen here:
- If the user enters a number, this expression returns
trueand the loop continues. In this case, the value ofnumis added to thesumvariable, and the user is prompted for the next number. - If the user clicks Cancel, the value returned by
prompt()isnull, so the expression becomesfalseand the looping stops.
Using for() Loops
Although while() is the most straightforward of the JavaScript loops, the most common type by far is the for() loop. This is slightly surprising when you consider (as you will shortly) that the for() loop's syntax is a bit more complex than that of the while() loop. However, the for() loop excels at one thing: looping when you know exactly how many times you want to repeat a group of statements. This is extremely common in all types of programming, so it's no wonder for() is so often seen in scripts.
The structure of a for() loop looks like this:
for (var counter = start; counterExpression; counter++) {
statements
}
There's a lot going on here, so I take it one bit at a time:
counter: A numeric variable used as a loop counter. The loop counter is a number that counts how many times the procedure has gone through the loop. (Note that you only need to includevarif this is the first time you've used the variable in the script.)start: The initial value ofcounter. This is usually 1, but you can use whatever value makes sense for your script.counterExpression: A comparison or logical expression that determines the number of times through the loop. This expression usually compares the current value ofcounterto some maximum value.counter++: The increment operator applied to thecountervariable. This can be any expression that changes the value ofcounter, and this expression is run after each turn through the loop.statements: The statements you want JavaScript to execute each time through the loop.
When JavaScript sees the for() statement, it changes into its for-loop outfit and follows this seven-step process:
- Set
counterequal tostart. - Evaluate the
counterExpressionin thefor()statement. - If
counterExpressionistrue, continue with Step 4; ifcounterExpressionisfalse, skip to Step 7. - Execute each of the statements in the block.
- Increment (or whatever)
counter. - Return to Step 2.
- Exit the loop (that is, execute the next statement that occurs after the
for()block).
As an example, the following code shows how to use for() to rewrite the inefficient code shown earlier in this chapter:
var sum = 0;
var num;
for (var counter = 1; counter <= 3; counter++) {
num = prompt("Type a number:", 1);
sum += Number(num);
}
alert("The total of your numbers is " + sum);
This is the most efficient version yet because the declaring, initializing, and incrementing of the counter variable all take place within the for() statement.
To keep the number of variables declared in a script to a minimum, always try to use the same name in all your for() loop counters. The letters i through n traditionally are used for counters in programming. For greater clarity, you might prefer full words such as count or counter.
Here's a slightly more complex example:
var sum = 0;
var num, ordinal;
for (var counter = 1; counter < 4; counter++) {
switch (counter) {
case 1:
ordinal = "first";
break;
case 2:
ordinal = "second";
break;
case 3:
ordinal = "third";
}
num = prompt("Enter the " + ordinal + " number:", 1);
sum += Number(num);
}
alert("The average is " + sum / 3);
The purpose of this script is to ask the user for three numbers and then to display the average of those values. The for() statement is set up to loop three times. (Note that counter < 4 is the same as counter <= 3.) The first thing the loop block does is use switch to determine the value of the ordinal variable: If counter is 1, ordinal is set to "first", if counter is 2, ordinal becomes "second", and so on. These values enable the script to customize the prompt() message with each pass through the loop (see Figure 4-2). With each loop, the user enters a number and that value is added to the sum variable. When the loop exits, the average is displayed.
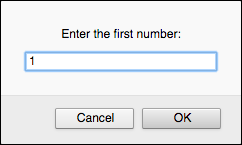
FIGURE 4-2: This script uses the current value of the counter variable to customize the prompt message.
It's also possible to use for() to count down. You do this by using the decrement operator instead of the increment operator:
for (var counter = start; counterExpression; counter--) {
statements
}
In this case, you must initialize the counter variable to the maximum value you want to use for the loop counter, and use the counterExpression to compare the value of counter to the minimum value you want to use to end the loop.
In the following example, I use a decrementing counter to ask the user to rank, in reverse order, his top three CSS colors:
var ordinal, color;
for (var rank = 3; rank >= 1; rank--) {
switch (rank) {
case 1:
ordinal = "first";
break;
case 2:
ordinal = "second";
break;
case 3:
ordinal = "third";
}
color = prompt("What is your " + ordinal + "-favorite CSS color?", "");
document.write(rank + ". " + color + "<br>");
}
The for() loop runs by decrementing the rank variable from 3 down to 1. Each iteration of the loop prompts the user to type a favorite CSS color, and that color is written to the page, with the current value of rank being used to create a reverse-ordered list, as shown in Figure 4-3.

FIGURE 4-3: The decrementing value of the rank variable is used to create a reverse-ordered list.
There's no reason why the for() loop counter has to be only incremented or decremented. You’re actually free to use any expression to adjust the value of the loop counter. For example, suppose you want the loop counter to run through only the odd numbers 1, 3, 5, 7, and 9. Here’s a for() statement that will do that:
for (var counter = 1; counter <= 9; counter += 2)
The expression counter += 2 tells JavaScript to increment the counter variable by 2 each time.
Using do…while() Loops
JavaScript also has a third and final type of loop that I've left until the last because it isn’t one that you’ll use all that often. To understand when you might use it, consider this code snippet:
var num = prompt("Type a number or click Cancel:", 1);
while (num != null) {
sum += Number(num);
num = prompt("Type a number or click Cancel:", 1);
}
The code needs the first prompt() statement so that the while() loop's expression can be evaluated. The user may not feel like entering any numbers, and they can avoid it by clicking Cancel in the first prompt box so that the loop will be bypassed.
That seems reasonable enough, but what if your code requires that the user enter at least one value? The following presents one way to change the code to ensure that the loop is executed at least once:
var sum = 0;
var num = 0;
while (num !== null || sum === 0) {
num = prompt("Type a number; when you're done, click Cancel:", 1);
sum += Number(num);
}
alert("The total of your numbers is " + sum);
The changes here are that the code initializes both sum and num as 0. This ensures that the while() expression — num !== null || sum === 0 — returns true the first time through the loop, so the loop will definitely execute at least once. If the user clicks Cancel right away, sum will still be 0, so the while() expression — num !== null || sum === 0 — still returns true and the loop repeats once again.
This works fine, but you can also turn to JavaScript's third loop type, which specializes in just this kind of situation. It’s called a do…while() loop, and its general syntax looks like this:
do {
statements
}
while (expression);
Here, statements represents a block of statements to execute each time through the loop, and expression is a comparison or logical expression that determines how many times JavaScript runs through the loop.
This structure ensures that JavaScript executes the loop's statement block at least once. How? Take a closer look at how JavaScript processes a do…while() loop:
- Execute each of the statements in the block.
- Evaluate the
expressionin thewhile()statement. - If
expressionistrue, return to Step 1; ifexpressionisfalse, continue with Step 4. - Exit the loop.
For example, the following shows you how to use do…while() to restructure the prompt-and-sum code I show you earlier:
var sum = 0;
var num;
do {
num = prompt("Type a number; when you're done, click Cancel:", 1);
sum += Number(num);
}
while (num !== null || sum === 0);
alert("The total of your numbers is " + sum);
This code is very similar to the while() code I show earlier in this section. All that's really changed is that the while() statement and its expression have been moved after the statement block so that the loop must be executed once before the expression is evaluated.
Controlling Loop Execution
Most loops run their natural course and then the procedure moves on. There might be times, however, when you want to exit a loop prematurely or skip over some statements and continue with the next pass through the loop. You can handle each situation with, respectively, the break and continue statements.
Exiting a loop using the break statement
You use break when your loop comes across some value or condition that would either prevent the rest of the statements from executing properly, or that satisfies what the loop was trying to accomplish. The following code demonstrates break with a simple example:
var sum = 0;
var num;
for (var counter = 1; counter <= 3; counter++) {
num = prompt("Type a positive number:", 1);
if (num < 0) {
sum = 0;
break;
}
sum += Number(num);
}
if (sum > 0) {
alert("The average of your numbers is " + sum / 3);
}
This script sets up a for() loop to prompt the user for positive numbers. For the purposes of this section, the key code is the if() test:
if (num < 0) {
sum = 0;
break;
}
If the user enters a negative number, the sum variable is reset to 0 (to prevent the alert box from appearing later in the script). Also, a break statement tells JavaScript to bail out of the loop altogether.
Here's a more complex example:
var numberToGuess = Math.ceil(Math.random() * 10);
var promptMessage = "Guess a number between 1 and 10:";
var totalGuesses = 1;
var guess;
do {
guess = Number(prompt(promptMessage, ""));
if (guess === null) {
break;
} else if (guess === numberToGuess) {
alert("You guessed it in " + totalGuesses +
(totalGuesses === 1 ? " try." : " tries."));
break;
} else if (guess < numberToGuess) {
promptMessage = "Sorry, your guess was too low. Try again:";
} else {
promptMessage = "Sorry, your guess was too high. Try again:";
}
totalGuesses++;
}
while (true);
This script is a game in which a number between 1 and 10 is generated and the user has to try and guess what it is. The first four lines set up some variables. The head-scratcher here is the expression for the numberToGuess variable. This uses a couple of methods of the Math object, which I discuss in Book 3, Chapter 8. For now, suffice it to say that this expression generates a random integer between (and including) 1 and 10.
Then a do…while() loop is set up with the following structure:
do {
statements
}
while (true);
This tells JavaScript just to run the loop without bothering with a comparison expression. As you'll see, the loop itself will take care of exiting the loop by using the break statement.
Next the user is prompted to enter a guess, which is stored in the guess variable. The script then checks to see if guess equals null, which would mean the user clicked Cancel. If so, then break is used to stop the game by exiting the loop:
guess = Number(prompt(promptMessage,""));
if (guess === null) {
break;
}
Otherwise, a series of if() statements tests the guessed number against the actual number. The first one checks to see if they're the same. If so, a message is displayed and then another break statement exits the loop because the game is finished:
else if (guess === numberToGuess) {
alert("You guessed it in " + totalGuesses +
(totalGuesses === 1 ? " try." : " tries."));
break;
}
Notice that the alert() statement contains a ternary operator expression:
totalGuesses === 1 ? " try." : " tries."
This illustrates an extremely common programming situation: You have to display a word to the user, but that word may be either singular or plural depending on the value of some variable or expression. In this case, if totalGuesses equals 1, you want to display the word try (as in 1 try); if totalGuesses is more than 1, you want to display the word tries (as in 2 tries). This is what the conditional expression does.
The other two tests check to see if the guess was lower or higher than the actual number, and a message to that effect is displayed, as shown in Figure 4-4.
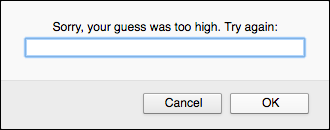
FIGURE 4-4: When the user clicks Cancel or guesses the correct number, the break statement exits the loop.
Bypassing loop statements using the continue statement
The continue statement is similar to break, but instead of exiting a loop entirely, continue tells JavaScript to bypass the rest of the statements in the loop block and begin a new iteration of the loop.
A good use for continue is when you want the user to enter one or more values no matter what. If they click Cancel in the prompt box, you want the script to keep on looping until the user enters the correct number of values. The following code shows one way to do this:
var counter = 0;
var sum = 0;
var num;
while (counter < 3) {
num = prompt("Type a number:", 1);
if (num === null) {
continue;
}
sum += Number(num);
counter++;
}
alert("The average of your numbers is " + sum / 3);
Because you don't know in advance how many times the code will have to run through the loop, a while() loop is a better choice than a for() loop. You need to count the number of values entered, however, so a variable named counter is initialized for that purpose. The script requires three numbers, so the while() statement is set up to continue looping as long as counter is less than 3. The prompt() result is stored in the num variable, which is then tested:
if (num === null) {
continue;
}
If the user enters a number, the if() expression returns false and the rest of the loop executes: sum is updated and counter is incremented.
However, if the user clicks Cancel, num equals null, so the if() expression returns true. What you want here is to keep looping, but you don't want the rest of the loop statements to execute. That’s exactly what the continue statement accomplishes.
Avoiding Infinite Loops
Whenever you use a while(), for(), or do…while() loop, there's always the danger that the loop will never terminate. This is called an infinite loop, and it has been the bugbear of programmers for as long as people have been programming. Here are some notes to bear in mind to help you avoid infinite loops:
- The statements in the
for()block should never change the value of the loop counter variable. If they do, then your loop may either terminate prematurely or it may end up in an infinite loop. - In
while()anddo…while()loops, make sure you have at least one statement within the loop that changes the value of the comparison variable. (That is, the variable you use in the loop's comparison statement.) Otherwise, the statement might always returntrueand the loop will never end. - In
while()anddo…while()loops, never rely on the user to enter a specific value to end the loop. She might cancel the prompt box or do something else that prevents the loop from terminating. - If you have an infinite loop and you're not sure why, insert one or more
debuggerand/orconsole.log()statements within the loop statement block to display the current value of the counter or comparison variable. (Wondering what the heck “debugger” and “console.log” might be? I cover them in Book 3, Chapter 9.) This enables you to see what happens to the variable with each pass through the loop.