
Chapter 4
Managing App Users
IN THIS CHAPTER
![]() Setting up your app’s user class
Setting up your app’s user class
![]() Creating new user accounts
Creating new user accounts
![]() Signing users in and out of the web app
Signing users in and out of the web app
![]() Handling forgotten passwords
Handling forgotten passwords
![]() Managing user accounts flexibly and securely
Managing user accounts flexibly and securely
The craft of programming begins with empathy, not formatting or languages or tools or algorithms or data structures.
— KENT BECK
If your web app enables users to create data items, then those users will come with the more than reasonable expectation that your web app will preserve that data. The simplest web apps honor that expectation by saving user data locally in the web browser, a topic that I talk about in Book 8, Chapter 1. However, your users might also come with the further expectation that their data should be available to them no matter which device or web browser they happen to be using. This level of expectation is certainly still reasonable, but it’s considerably more complex because now you’re in the realm of managing user accounts on the server. This means creating user accounts, securely storing passwords, verifying new accounts, managing both sign-ins and sign-outs, updating user credentials, handling forgotten passwords, and more.
Yep, it’s a big job, but I have a feeling you’re more than up to the task. In this chapter, you explore the fascinating world of user management and delve into all the details required to set up a bulletproof and secure user account system.
Configuring the Home Page
One of the main changes you need to make when you want to add support for user accounts is configuring the web app’s home page to show a different set of tags depending on whether the user is signed in or not:
- If a user is signed in, show the user’s data and a Sign Out button.
- If the visitor doesn’t have an account or isn’t signed in, show an introductory screen and a Sign Up button that encourages those without an account to create one, and show a Sign In button so that users with accounts can access their data.
Fortunately, you don’t need to create two different home pages. Instead, you can use some inline PHP to check whether a user is signed in and display the appropriate HTML tags and text depending on the result.
 To make this sort of thing easier, PHP has an alternative
 if()…else syntax that you can use to add HTML tags to a page based on one or more conditions. Here's the general structure:
<?php
if(condition):
?>
HTML tags to display if condition is TRUE
<?php
else:
?>
HTML tags to display if condition is FALSE
<?php
endif;
?>
The condition in your web app will be something that returns TRUE if the user is signed in, and FALSE otherwise. There are various ways to approach this, but the easiest is to set a session variable when the user signs in. Because a username is required to sign in, it makes sense to use the username as the session variable. For example, assuming your web app has some sort of sign-in form (more on that in a bit) that includes a username field, then the following PHP statement would store a sanitized version of the username in a session variable named username:
$_SESSION['username'] = htmlentities($_POST['username'], ENT_QUOTES);
You can then use isset($_SESSION['username']) as the condition to determine what HTML tags the user sees. Here's a partial modification of the FootPower! index.php file:
<?php
include_once '../private/common/initialization.php';
if(isset($_SESSION['username'])) {
$page_title = 'Your Activity Log';
} else {
$page_title = 'Welcome to FootPower!';
}
include_once 'common/top.php';
if(isset($_SESSION['username'])):
?>
The rest of the Activity Log code goes here (see Book 7, Chapter 3)
<?php
else:
?>
<section class="footpower-intro" role="contentinfo">
<p>
Are you a walker, a runner, or a cyclist? Heck, maybe you're all three! Either way, you know the joy and satisfaction of propelling yourself across the face of the Earth using nothing but the power of your own two feet.
</p>
<p>
Have you walked, ran, or cycled recently? If so, we salute you! But why relegate the details of that activity to the dim mists of history and memory? Why not save your effort for posterity? Just sign up for a free FootPower! account and you'll never forget a walk, run, or ride again!
</p>
<div>
<img src="images/walk-large.png" alt="Drawing of a walker.">
<img src="images/run-large.png" alt="Drawing of a runner.">
<img src="images/cycle-large.png" alt="Drawing of a cyclist.">
</div>
</section>
</article>
<?php
endif;
include_once 'common/sidebar.php';
include_once 'common/bottom.php';
?>
If the username session variable is set, the user is logged in, so display the Activity Log for that user. Otherwise, display an introductory message.
You also need conditional code that determines the buttons the user sees. Here's the modified version of the FootPower! top.php file:
<body>
<header class="top-header" role="banner">
<div class="top-header-logo">
<img src="images/footpower-logo.png" alt="FootPower! logo">
</div>
<div class="top-header-user">
<?php
if(isset($_SESSION['username'])):
?>
<button id="show-user-account-button" class="btn-plain">Your Account</button>
<button id="user-sign-out-button" class="btn">Sign Out</button>
<?php
else:
?>
<button id="show-sign-in-page-button" class="btn-plain">Sign In</button>
<button id="show-sign-up-page-button" class="btn">Sign Up</button>
<?php
endif;
?>
</div>
</header>
<main role="main">
When the user is signed in, she sees the Your Account and Sign Out buttons; otherwise, she sees both a Sign In and a Sign Up button. Figure 4-1 shows the FootPower! home page when a user is not signed in.

FIGURE 4-1: The FootPower! home page when a user is not signed in.
Setting Up the Back End to Handle Users
Most web apps that manage users need to implement at least the following tasks:
- Signing up new users: Includes not only capturing the user’s email address (to use as a username) and password, but also sending out a verification email to make sure the user isn’t a bot or spammer
- Signing in users: Enables each user to access her own data
- Signing out users: Prevents others from accessing a user’s account when his computer is left unattended
- Updating user data: Enables each user to change her password and to reset a forgotten password
- Deleting users: Enables a user to remove his account and data from the server
The rest of this chapter shows you how to implement each of these functions. Before I get to that, here’s the bird’s-eye view of what I’ll be doing:
- Build a class for handling user interactions. That class includes one method for each of the preceding tasks.
- Provide the user with an interface for signing up, signing in, signing out, modifying account data, and deleting the account.
- To start processing a user task, set up an event handler for each account-focused interface element. If you’re using a sign-in form, for example, then you might set up a
submitevent handler for that form. - Use each event handler to send the form data to a single PHP script via Ajax. Importantly, that form data includes the value of a hidden field that specifies the type of “user verb” being performed (sign up, sign in, reset password, and so on).
- In the PHP script, create a new object from the class of Step 1, check the user verb sent by the Ajax call, and then call the corresponding class method. For example, if the event is signing up a new user, the script would call the class method that handles creating new user accounts.
The next couple of sections cover setting up the first part of the user class and building the PHP script that handles the Ajax requests.
Starting the web app's user class
The class for your web app’s users needs to do at least the following three things:
- Accept a parameter that references the current
MySQLiobject. - Define a method for each of the user verbs.
- Define any helper functions required by the user verbs.
With these goals in mind, here’s the skeleton class file:
<?php
class User {
// Holds the app's current MySQLi object
private $_mysqli;
// Use the class constructor to store the passed MySQLi object
public function __construct($mysqli) {
$this->_mysqli = $mysqli;
}
// Here are the user chores we need to handle
public function createUser() {
}
public function verifyUser() {
}
public function signInUser() {
}
public function sendPasswordReset() {
}
public function resetPassword() {
}
public function getDistanceUnit() {
}
public function updateDistanceUnit() {
}
public function deleteUser() {
}
}
?>
The class declares the private property $_mysqli, which it uses to store the current instance of the MySQLi object (created earlier in the initialization.php script). Store this file in private/classes/user_class.php.
To create an instance of this class, you'd use a statement similar to the following:
$user = new User($mysqli);
Creating a user handler script
The various user verbs will be initiated via Ajax calls to a single PHP script. Each Ajax call needs to specify the user verb required, and the PHP code routes the request to the corresponding method in the User class.
Here’s the PHP script, which I’ll save as public/handlers/user_handler.php:
<?php
// Initialize the app
include_once '../../private/common/initialization.php';
// Include the User class
include_once '../../private/classes/user_class.php';
// Initialize the results
$server_results['status'] = 'success';
$server_results['control'] = '';
$server_results['message'] = '';
// Make sure a user verb was passed
if (!isset($_POST['user-verb'])) {
$server_results['status'] = 'error';
$server_results['control'] = 'form';
$server_results['message'] = 'Error: No user verb specified!';
}
// Make sure a token value was passed
elseif (!isset($_POST['token'])) {
$server_results['status'] = 'error';
$server_results['control'] = 'form';
$server_results['message'] = 'Error: Invalid user session!';
}
// Make sure the token is legit
elseif ($_SESSION['token'] !== $_POST['token']) {
$server_results['status'] = 'error';
$server_results['control'] = 'form';
$server_results['message'] = 'Timeout Error! Please refresh the page and try again.';
}
// If we get this far, all is well, so go for it
else {
// Create a new User object
$user = new User($mysqli);
// Pass the user verb to the appropriate method
switch ($_POST['user-verb']) {
// Sign up a new user
case 'sign-up-user':
$server_results = json_decode($user->createUser());
break;
// Sign in an existing user
case 'sign-in-user':
$server_results = json_decode($user->signInUser());
break;
// Send a request to reset a user's password
case 'send-password-reset':
$server_results = json_decode($user->sendPasswordReset());
break;
// Reset a user's password
case 'reset-password':
$server_results = json_decode($user->resetPassword());
break;
// Get the user's distance unit
case 'get-distance-unit':
$server_results = json_decode($user->getDistanceUnit());
break;
// Update distance unit
case 'update-unit':
$server_results = json_decode($user->updateDistanceUnit());
break;
// Delete a user
case 'delete-user':
$server_results = json_decode($user->deleteUser());
break;
default:
$server_results['status'] = 'error';
$server_results['control'] = 'token';
$server_results['message'] = 'Error: Unknown user verb!';
}
}
// Create and then output the JSON data
$JSON_data = json_encode($server_results, JSON_HEX_APOS | JSON_HEX_QUOT);
echo $JSON_data;
?>
After initializing the app by including initialization.php, the code also includes the User class file. The code then sets up an array named $server_results, which holds the results that the script sends back to the front end:
$server_results['status']will be eithersuccessorerror.$server_results['message']holds the success or error message to display.
The code next runs through a series of checks: making sure a verb was passed, making sure a token value was passed, and then comparing that token value with the session token. If the code gets past those tests, a switch() statement runs through the possible values for $_POST['user-verb'] and calls the corresponding User method.
In the rest of this chapter, I fill in the details for the various User methods and the front-end interfaces that support them.
Signing Up a New User
The process of signing up a new user takes four general steps:
-
 Present the user with a form that asks for the person's username (usually just her email address) and a password.
 - Send the data to the server and provisionally add the user to the
userstable. - Send to the user a verification email that includes a unique link that the user must click to verify her account.
- Verify the user.
Once the user is verified, and each subsequent time the user signs in to the app, you need to set a session variable that the app can use to check whether the user is signed in. I like to keep things simple here and just set $_SESSION['username'] to the current account's username.
Building the form
When the user clicks the Sign Up button, he sees the sign_up.php page:
<?php
include_once '../private/common/initialization.php';
if(isset($_SESSION['username'])) {
$page_title = 'You're Already Signed Up';
} else {
$page_title = 'Sign Up For a Free FootPower! Account';
}
include_once 'common/top.php';
// Is the user already signed in?
if(isset($_SESSION['username'])):
?>
<section>
<p>
You already have an account, so nothing to see here.
</p>
<p>
Did you want to <a href="create_data.php">log an activity</a>, instead?
</p>
<p>
Or perhaps you want to <a href="sign_out.php">sign out</a>?
</p>
</section>
<?php
else:
?>
<p>Your feet will thank you.</p>
<form id="user-sign-up-form">
<div class="form-wrapper">
<div class="control-wrapper">
<label for="username">Email</label>
<input id="username" class="form-control" name="username" type="email" aria-label="Type your email address." required/>
<span id="username-error" class="error error-message"></span>
</div>
<div class="control-wrapper">
<label for="password">Password</label>
<div>
<input id="password" class="form-control" name="password" type="password" minlength="8" aria-label="Type your password." required>
<br>
<input id="password-toggle" type="checkbox"><label for="password-toggle" class="label-horizontal">Show password</label>
</div>
<span id="password-error" class="error error-message"></span>
</div>
<button id="sign-me-up-button" class="btn btn-form" type="submit">Sign Me Up</button>
<span id="form-error" class="error error-message form-error-message"></span>
<span id="form-message" class="form-message"></span>
<input type="hidden" id="user-verb" name="user-verb" value="sign-up-user">
<input type="hidden" id="token" name="token" value="<?php echo $_SESSION['token']; ?>">
</div>
</form>
<?php
endif;
include_once 'common/sidebar.php';
include_once 'common/bottom.php';
?>
This page plays it safe and checks to see if the user is already logged in, in which case it lets the user know and offers some links. Otherwise, the code displays the Sign Up form, shown in Figure 4-2.

FIGURE 4-2: The FootPower! form for signing up a new user.
Sending the data to the server
Clicking Sign Me Up invokes the form’s submit event, so you need to add a handler for this:
$('#user-sign-up-form').submit(function(e) {
// Prevent the default submit
e.preventDefault();
// Disable the Sign Me Up button to prevent double submissions
$('#sign-me-up-button').prop('disabled', true);
// Clear and hide all the message spans ($ = "ends with")
$('span[id$="error"').html('').css('display', 'none');
$('#form-message').html('').css('display', 'none');
// Get the form data and convert it to a POST-able format
formData = $(this).serializeArray();
// Submit the data to the handler
$.post('/handlers/user_handler.php', formData, function(data) {
// Convert the JSON string to a JavaScript object
var result = JSON.parse(data);
if(result.status === 'error') {
// Display the error
$('#' + result.control + '-error').html(result.message).css('display', 'inline-block');
// Enable the Sign Me Up button
$('#sign-me-up-button').prop('disabled', false);
} else {
$('#form-message').html(result.message).css('display', 'inline-block');
}
});
});
This code prevents the default submission, disables the Sign Me Up button to prevent the user from accidentally clicking it again, clears the messages, and then sends the form data to the server. When the user_handler.php script sees that the user-verb is set to sign-up-user, it routes the task to the User object's createUser() method. The first part of this method validates and sanitizes the username and password:
public function createUser() {
// Store the default status
$server_results['status'] = 'success';
// Was the username sent?
if(empty($_POST['username'])) {
$server_results['status'] = 'error';
$server_results['control'] = 'username';
$server_results['message'] = 'Um, you really do need to enter your email address.';
} else {
// Sanitize it
//$username = htmlentities($username);
$username = $_POST['username'];
$username = filter_var($username, FILTER_SANITIZE_EMAIL);
if (!$username) {
$server_results['status'] = 'error';
$server_results['control'] = 'username';
$server_results['message'] = 'Hmmm. It looks like that email address isn't valid. Please try again.';
} else {
// Make sure the username doesn't already exist in the database
$sql = "SELECT *
FROM users
WHERE username=?";
$stmt = $this->_mysqli->prepare($sql);
$stmt->bind_param("s", $username);
$stmt->execute();
$result = $stmt->get_result();
// If the username already exists, num_rows will be greater than 0
if ($result->num_rows > 0) {
$server_results['status'] = 'error';
$server_results['control'] = 'username';
$server_results['message'] = 'Whoops! That email address is already being used. Please try again.';
}
}
}
// If all is still well, check the password
if($server_results['status'] === 'success') {
// Was the password sent?
if(empty($_POST['password'])) {
$server_results['status'] = 'error';
$server_results['control'] = 'password';
$server_results['message'] = 'That's weird: the password is missing. Please try again.';
} else {
// Sanitize it
$password = $_POST['password'];
$password = filter_var($password, FILTER_SANITIZE_STRING);
// Is the password still valid?
if (!$password) {
$server_results['status'] = 'error';
$server_results['control'] = 'password';
$server_results['message'] = 'Sorry, but the password you used was invalid. Please try again.';
}
// Is the password long enough?
elseif (strlen($password) < 8 ) {
$server_results['status'] = 'error';
$server_results['control'] = 'password';
$server_results['message'] = 'Sorry, but the password must be at least 8 characters long. Please try again.';
} else {
// If all's well, hash the password
$password = password_hash($password, PASSWORD_DEFAULT);
}
}
}
For the username, the code makes sure it was entered and that it’s a legit email address. It also runs a prepared SQL SELECT statement to make sure the user isn't already signed up. The password is checked for validity, sanitized, and checked for length (minimum eight characters). If those checks pass, the password is hashed using PHP’s password_hash() function (see Book 7, Chapter 2).
Sending a verification email
If both the username and password check out, the next step is to send the user a verification email. The createUser() method continues:
if($server_results['status'] === 'success') {
// Create a random, 32-character verification code
$ver_code = bin2hex(openssl_random_pseudo_bytes(16));
// Send the verification email
$send_to = $username;
$subject = 'Please verify your FootPower! account';
    $header = 'From: FootPower! <[email protected]>' . "
" .
'Content-Type: text/plain';
$body = <<<BODY
You have a new account at FootPower!
Your username is the email address you provided: $username
Please activate your account by clicking the link below.
https://footpower.mcfedries.com/verify_user.php?vercode=$ver_code&username=$username
If you did not create a FootPower! account, you can safely delete this message.
Thanks!
Paul
footpower.mcfedries.com
BODY;
$mail_sent = mail($send_to, $subject, $body, $header);
This code uses our old friends bin2hex() and openssl_random_pseudo_bytes() to generate a random 32-character string that's used as a unique verification code for the user. The code sets up the email by specifying the recipient, subject, headers, and message body. Note, in particular, that the body includes a link that the user must click to verify her account. That link’s URL includes both the verification code and the username:
https://footpower.mcfedries.com/verify_user.php?vercode=$ver_code&username=$username
Finally, the code runs PHP’s mail() function to send the message.
 For the
 mail() function to work, you need a mail server installed and configured. If you're coding the app in your local development environment, you almost certainly won’t have a mail server running, so the mail() function will fail. You can comment out the function for now, then try it after you have your code on the web.
Adding the user to the database
Now it’s time to add the user to the users table. Here’s the rest of the createUser() method:
if($mail_sent) {
// Create and prepare the SQL template
$sql = "INSERT INTO users
(username, password, verification_code)
VALUES (?, ?, ?)";
$stmt = $this->_mysqli->prepare($sql);
$stmt->bind_param("sss", $username, $password, $ver_code);
$stmt->execute();
$result = $stmt->get_result();
if($this->_mysqli->errno === 0) {
$server_results['control'] = 'form';
$server_results['message'] = 'You're in! We've sent you a verification email.<br>Be sure to click the link in that email to verify your account.';
} else {
$server_results['status'] = 'error';
$server_results['control'] = 'form';
$server_results['message'] = 'MySQLi error #: ' . $this->_mysqli->errno . ': ' . $this->_mysqli->error;
}
} else {
$server_results['status'] = 'error';
$server_results['control'] = 'form';
$server_results['message'] = 'Error! The verification email could not be sent, for some reason. Please try again.';
}
}
// Create and then return the JSON data
$JSON_data = json_encode($server_results, JSON_HEX_APOS | JSON_HEX_QUOT);
return $JSON_data;
The code checks the return value of the mail() function: If it's TRUE, the code continues. (If you’re coding in a local development environment that doesn’t have a mail server, add $mail_sent = TRUE before running the if() statement to ensure your code adds the user successfully.) The code prepares an SQL INSERT statement that adds the user's username, password, and verification code. After checking for errors, the code returns the JSON data to the front end.
Verifying the user
With the verification email sent, it’s now up to the user to click the link in the sent message. That links calls up the verify_user.php page, which includes the following code:
<?php
// Initialize the results
$server_results['status'] = 'success';
$server_results['control'] = '';
$server_results['message'] = '';
// Make sure a verification code was passed
if (!isset($_GET['vercode'])) {
$server_results['status'] = 'error';
$server_results['control'] = 'form';
$server_results['message'] = 'Error: Invalid URL. Sorry it didn't work out.';
}
// Make sure the username was passed
elseif (!isset($_GET['username'])) {
$server_results['status'] = 'error';
$server_results['control'] = 'form';
$server_results['message'] = 'Error: Invalid user.';
}
// If we get this far, all is well, so go for it
else {
// Include the User class
include_once '../private/classes/user_class.php';
// Create a new User object
$user = new User($mysqli);
// Verify the new account
$server_results = json_decode($user->verifyUser(), TRUE);
}
}
include_once 'common/top.php';
if(isset($_SESSION['username'])):
?>
The code initializes the usual $server_results array, then uses $_GET to check that both the verification code and the username were sent in the URL's query string. If all’s well, a new User object is created and the verifyUser() method is called.
The verifyUser() method does a ton of important work in the app, so take a careful look at the code. Here's the first part:
public function verifyUser() {
// Store the default status
$server_results['status'] = 'success';
// Get the query string parameters
$ver_code = $_GET['vercode'];
$username = $_GET['username'];
// Sanitize them
$ver_code = filter_var($ver_code, FILTER_SANITIZE_STRING);
$username = filter_var($username, FILTER_SANITIZE_EMAIL);
// Prepare the SQL SELECT statement
$sql = "SELECT *
FROM users
WHERE verification_code=?
AND username=?
AND verified=0
LIMIT 1";
$stmt = $this->_mysqli->prepare($sql);
$stmt->bind_param("ss", $ver_code, $username);
$stmt->execute();
$result = $stmt->get_result();
// Was there an error?
if ($this->_mysqli->errno !== 0) {
$server_results['status'] = 'error';
$server_results['control'] = 'form';
$server_results['message'] = 'MySQLi error #: ' . $this->_mysqli->errno . ': ' . $this->_mysqli->error;
}
The first part of the method sets up the standard $server_results array, then grabs and sanitizes the verification code and the username from the URL’s query string using $_GET. Then the code prepares an SQL SELECT statement that queries the users table for a record that matches both the verification code and the username, and where the verified field equals 0. The code then checks for an error. If no error occurred, execution continues with the following code:
// Otherwise, if a row is returned, it means the user can be verified
elseif ($result->num_rows === 1) {
// Set the success message
$server_results['message'] = 'Your account is now verified.<p>You're signed in, so go ahead and <a href="create_data.php">log a walk, run, or ride.</a>';
// Sign in the user
$_SESSION['username'] = $username;
// Get the user's ID and distance unit
$row = $result->fetch_all(MYSQLI_ASSOC);
$user_id = $row[0]['user_id'];
$distance_unit = $row[0]['distance_unit'];
$_SESSION['distance_unit'] = $distance_unit;
// Set the user's verified flag in the database
$sql = "UPDATE users
SET verified=1
WHERE username=?";
$stmt = $this->_mysqli->prepare($sql);
$stmt->bind_param("s", $username);
$stmt->execute();
$result = $stmt->get_result();
// Create a master data record (in this case, an activity log) for the user
$sql = "INSERT INTO logs
(user_id)
VALUES (?)";
$stmt = $this->_mysqli->prepare($sql);
$stmt->bind_param("i", $user_id);
$stmt->execute();
$result = $stmt->get_result();
// Get the user's log ID
$sql = "SELECT *
FROM logs
WHERE user_id=?
LIMIT 1";
$stmt = $this->_mysqli->prepare($sql);
$stmt->bind_param("i", $user_id);
$stmt->execute();
$result = $stmt->get_result();
$row = $result->fetch_all(MYSQLI_ASSOC);
$log_id = $row[0]['log_id'];
$_SESSION['log_id'] = $log_id;
There is a ton of important app stuff going on here, so here's a summary of what’s happening:
- The
elseifstatement checks to see if a row was returned — in which case,$result->num_rowswould be equal to1. If that's true, then the rest of the code executes. - The success message is set.
- The
$_SESSION['username']variable is set to$username, meaning the user is signed in to her account. - The user's record is fetched and stored in the
$rowvariable, which enables the code to then determine the user’s ID and preferred unit of distance (miles or kilometers). The latter is used in other parts of the app, so it’s stored in the$_SESSION['distance_unit']variable. - A prepared SQL
UPDATEstatement changes the user'sverifiedfield value to1. - A prepared SQL
INSERTstatement creates a new master data record for the user. Note that this data record is tied to the user by the commonuser_idfield value. - A prepared SQL
SELECTstatement returns the user's master data record, which enables the code to determine the ID of that record. The master data ID is used throughout the app, so it gets stored in the$_SESSION['log_id']variable.
Here’s the rest of the verifyUser() method:
} else {
// Handle the case where the user is already verified
// Prepare the SQL SELECT statement
$sql = "SELECT username
FROM users
WHERE verification_code=?
AND username=?
AND verified=1";
$stmt = $this->_mysqli->prepare($sql);
$stmt->bind_param("ss", $ver_code, $username);
$stmt->execute();
$result = $stmt->get_result();
// Was there an error?
if($this->_mysqli->errno === 0) {
$server_results['status'] = 'error';
$server_results['control'] = 'form';
$server_results['message'] = 'MySQLi error #: ' . $this->_mysqli->errno . ': ' . $this->_mysqli->error;
}
// Otherwise, if a row is returned, it means the user is already verified
elseif ($result->num_rows > 0) {
$server_results['status'] = 'error';
$server_results['control'] = 'form';
$server_results['message'] = 'Yo, you're already verified.<p>Perhaps you'd like to <a href="create_data.php">log a walk, run, or ride</a>?';
} else {
$server_results['status'] = 'error';
$server_results['control'] = 'form';
$server_results['message'] = 'Yikes. A database error occurred. These things happen.';
}
}
// Create and then return the JSON data
$JSON_data = json_encode($server_results, JSON_HEX_APOS | JSON_HEX_QUOT);
return $JSON_data;
}
This portion of the code handles the case where the user is already verified. For example, the user might click the verification link a second time, or reload the verify_user.php page.
The users table has a creation_date field that defaults to the date and time each user is added. This enables you to purge users who never verify their accounts. For example, you could run an SQL DELETE command that purges any records where the creation _date value is more than a month old.
Signing a User In and Out
The user gets signed in automatically during the verification procedure, but the user will also need to sign in manually if, say, the session token expires or the user signs out manually (discussed later in the “Signing out a user” section). To handle sign-ins, I created the sign_in.php page.
Checking for a signed-in user
All pages that deal with user interactions need a defensive strategy:
- For a page that requires the user to be signed in, handle the case where the user accesses the page while signed out.
- For a page that requires the user to be signed out, handle the case where the user accesses the page while signed in.
For your sign-in page, the assumption is that the user is signed out, but he just might end up on the page while signed in. This means your code needs to check whether the $_SESSION['username'] variable is set. Here's how I do this in sign_in.php:
<?php
include_once '../private/common/initialization.php';
// Set the page title depending on whether the user is signed in
if(isset($_SESSION['username'])) {
$page_title = 'You're Signed In to Your Account';
} else {
$page_title = 'Sign In to Your Account';
}
include_once 'common/top.php';
// Is the user already signed in?
if(isset($_SESSION['username'])):
?>
<section>
<p>
You're already signed in, so nothing to see here.
</p>
<p>
Did you want to <a href="create_data.php">log an activity</a>, instead?
</p>
<p>
Or perhaps you want to <a href="sign_out.php">sign out</a>?
</p>
</section>
<?php
else:
?>
The sign-in form code will go here
<?php
endif;
include_once 'common/sidebar.php';
include_once 'common/bottom.php';
?>
This code actually checks the $_SESSION['username'] variable twice:
- At the top of the script, I use the result of
isset($_SESSION['username'])to set the$page_titlevariable accordingly. - The second time, if
isset($_SESSION['username'])returnsTRUE, then I display a message to the user telling him he's already signed in and offering a couple of links to move on.
Adding the form
If the user isn’t signed in, then the code from the previous section displays the sign-in form:
<form id="user-sign-in-form">
<div class="form-wrapper">
<div class="control-wrapper">
<label for="username">Email</label>
<input id="username" class="form-control" name="username" type="email" aria-label="Type your email address." required/>
<span id="username-error" class="error error-message"></span>
</div>
<div class="control-wrapper">
<label for="password">Password</label>
<div>
<input id="password" class="form-control" name="password" type="password" minlength="8" aria-label="Type your password." required>
<br>
<input id="password-toggle" type="checkbox"><label for="password-toggle" class="label-horizontal">Show password</label>
</div>
<span id="password-error" class="error error-message"></span>
</div>
<button id="sign-me-in-button" class="btn btn-form" type="submit">Sign Me In</button>
<span id="form-error" class="error error-message form-error-message"></span>
<span id="form-message" class="form-message"></span>
<input type="hidden" id="user-verb" name="user-verb" value="sign-in-user">
<input type="hidden" id="token" name="token" value="<?php echo $_SESSION['token']; ?>">
</div>
</form>
<div>
<a href="request_new_password.php">Forgot your password?</a>
</div>
Figure 4-3 shows the form.
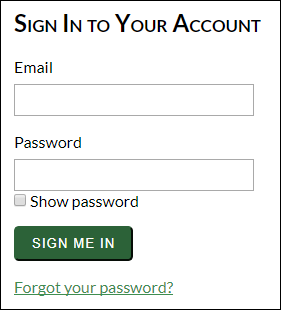
FIGURE 4-3: The FootPower! sign-in form.
The form looks quite simple, but it has a few interesting features:
- Both
<input>tags are followed by<span>tags that are used to display field-specific error messages. -
The Password field is accompanied by a Show Password checkbox that, when checked, shows the password in plain text instead of dots. Enabling the user to see the password means you don't have to burden the user with having to enter the password twice as a verification. To show the password, the code changes the
<input>tag’stypevalue totext. Here's the click event handler that controls this (this code is inpublic/js/user.js):$('#password-toggle').click(function() {// Is the checkbox checked?if($(this).prop('checked') === true) {// If so, change the <input> type to 'text'$('#password').attr('type', 'text');$('label[for=password-toggle').text('Hide password');} else {// If not, change the <input> type to 'password'$('#password').attr('type', 'password');$('label[for=password-toggle').text('Show password');}}); - Below the
<button>tag are two<span>tags used to display the form-level error and success messages. - A hidden field sets the
user-verbvalue tosign-in-user. - Below the form is a
Forgot your password?link, which I discuss later in this chapter.
When the user fills in the form and then clicks Sign Me In, the form's submit event fires, and that event is handled by the following code in public/js/user.js:
$('#user-sign-in-form').submit(function(e) {
// Prevent the default submit
e.preventDefault();
// Disable the Sign Me In button to prevent double submissions
$('#sign-me-in-button').prop('disabled', true);
// Clear and hide all the message spans ($ = "ends with")
$('span[id$="error"').html('').css('display', 'none');
$('#form-message').html('').css('display', 'none');
// Get the form data and convert it to a POST-able format
formData = $(this).serializeArray();
// Submit the data to the handler
$.post('/handlers/user_handler.php', formData, function(data) {
// Convert the JSON string to a JavaScript object
var result = JSON.parse(data);
if(result.status === 'error') {
// Display the error
$('#' + result.control + '-error').html(result.message).css('display', 'inline-block');
// Enable the Sign Me In button
$('#sign-me-in-button').prop('disabled', false);
} else {
// The user is now signed in, so display the home page
window.location = 'index.php';
}
});
});
This code is nearly identical to the sign-up code I talk about earlier.
Checking the user's credentials
When the user_handler.php script gets the sign-in form data, it detects that the user-verb value is sign-in-user and routes the Ajax request to the User object's signInUser() method:
public function signInUser() {
// Store the default status
$server_results['status'] = 'success';
// Was the username sent?
if(empty($_POST['username'])) {
$server_results['status'] = 'error';
$server_results['control'] = 'username';
$server_results['message'] = 'Doh! You need to enter your email address.';
} else {
// Sanitize it
$username = $_POST['username'];
$username = filter_var($username, FILTER_SANITIZE_EMAIL);
if (!$username) {
$server_results['status'] = 'error';
$server_results['control'] = 'username';
$server_results['message'] = 'Well, it appears that email address isn't valid. Please try again.';
} else {
// Make sure the username exists in the database
$sql = "SELECT *
FROM users
WHERE username=?
LIMIT 1";
$stmt = $this->_mysqli->prepare($sql);
$stmt->bind_param("s", $username);
$stmt->execute();
$result = $stmt->get_result();
// If the username doesn't exist, num_rows will be 0
if ($result->num_rows === 0) {
$server_results['status'] = 'error';
$server_results['control'] = 'username';
$server_results['message'] = 'Sorry, but that email address isn't associated with an account. Please try again.';
} else {
// If all is still well, check the password
// Was the password sent?
if(empty($_POST['password'])) {
$server_results['status'] = 'error';
$server_results['control'] = 'password';
$server_results['message'] = 'That's weird: the password is missing. Please try again.';
} else {
// Sanitize it
$password = $_POST['password'];
$password = filter_var($password, FILTER_SANITIZE_STRING);
// Is the password still valid?
if (!$password) {
$server_results['status'] = 'error';
$server_results['control'] = 'password';
$server_results['message'] = 'Sorry, but the password you used was invalid. Please try again.';
} else {
// Get the user data
$row = $result->fetch_all(MYSQLI_ASSOC);
// Confirm the password
if(!password_verify($password, $row[0]['password'])) {
$server_results['status'] = 'error';
$server_results['control'] = 'password';
$server_results['message'] = 'Sorry, but the password you used was incorrect. Please try again.';
} else {
// Sign in the user
$_SESSION['username'] = $username;
$user_id = $row[0]['user_id'];
$distance_unit = $row[0]['distance_unit'];
$_SESSION['distance_unit'] = $distance_unit;
// Get the user's log ID
$sql = "SELECT *
FROM logs
WHERE user_id=?";
$stmt = $this->_mysqli->prepare($sql);
$stmt->bind_param("i", $user_id);
$stmt->execute();
$result = $stmt->get_result();
$row = $result->fetch_all(MYSQLI_ASSOC);
$log_id = $row[0]['log_id'];
$_SESSION['log_id'] = $log_id;
}
}
}
}
}
}
// Create and then return the JSON data
$JSON_data = json_encode($server_results, JSON_HEX_APOS | JSON_HEX_QUOT);
return $JSON_data;
}
This code is a long series of validity checks and sanitization:
- For the username, the code checks that it was sent, sanitizes it as an email address, then uses a prepared SQL
SELECTstatement to check that the username exists in theuserstable. If all that checks out, the code moves on to the password. - For the password, the code checks that it was sent, sanitizes it as a string, then fetches the user data from the
SELECTresult. The user's password is stored in the table as a hashed value, so to check the correctness of the received password you must use PHP’spassword_verify()function:password_verify(password, hashed_password)-
password: The password entered by the user in the sign-in form hashed_password: The hashed password value from the database
If both the username and password check out, then the code signs in the user by setting the $_SESSION['username'] variable, and then sets the other session variables: $_SESSION['distance_unit'] and $_SESSION['log_id'].
Signing out a user
Signing out a user means ending the user's session, so here’s the full code of the sign_out.php page:
<?php
session_start();
// Free up all the session variables
session_unset();
?>
<!-- Display the sign-in page -->
<meta http-equiv="refresh" content="0;sign_in.php">
PHP’s session_unset() function frees up all the session variables, then the user is redirected to the sign-in page.
Resetting a Forgotten Password
The user can change her password in one of two ways:
- If the user has forgotten her password, she can click the
Forgot your password?link in the sign-in form. - If the user wants to change her password, she can click the
Change Your Passwordlink in the Your Account page (your_account.php).
Either way, the user winds up at the Request a New Password page (request_new_password.php), shown in Figure 4-4.
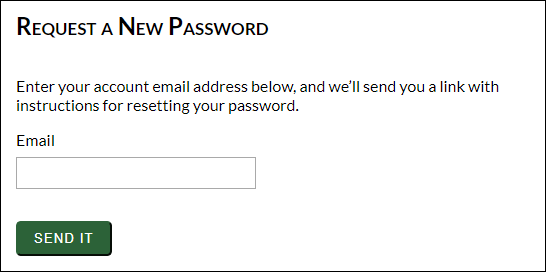
FIGURE 4-4: The FootPower! Request a New Password form.
Here's the page code:
<?php
include_once '../private/common/initialization.php';
$page_title = 'Request a New Password';
include_once 'common/top.php';
?>
<p>
Enter your account email address below, and we'll send you a link with instructions for resetting your password.
</p>
<form id="user-send-password-reset-form">
<div class="form-wrapper">
<div class="control-wrapper">
<label for="email">Email</label>
<input id="username" class="form-control" name="username" type="email" aria-label="Type your email address." required/>
<span id="username-error" class="error error-message"></span>
</div>
<button id="send-reset-password-button" class="btn btn-form" type="submit">Send It</button>
<span id="form-error" class="error error-message form-error-message"></span>
<span id="form-message" class="form-message"></span>
<input type="hidden" id="user-verb" name="user-verb" value="send-password-reset">
<input type="hidden" id="token" name="token" value="<?php echo $_SESSION['token']; ?>">
</div>
</form>
<?php
include_once 'common/sidebar.php';
include_once 'common/bottom.php';
?>
Note that the hidden user-verb value is send-password-request. The user_handler.php script routes this verb to the User object's sendPasswordReset() method:
public function sendPasswordReset() {
// Store the default status
$server_results['status'] = 'success';
// Was the email address entered?
if(empty($_POST['username'])) {
$server_results['status'] = 'error';
$server_results['control'] = 'username';
$server_results['message'] = 'Um, you really do need to enter your email address.';
} else {
// Sanitize it
$username = $_POST['username'];
$username = filter_var($username, FILTER_SANITIZE_EMAIL);
if (!$username) {
$server_results['status'] = 'error';
$server_results['control'] = 'username';
$server_results['message'] = 'Hmmm. It looks like that email address isn't valid. Please try again.';
} else {
// Make sure the email address exists in the database
$sql = "SELECT *
FROM users
WHERE username=?
LIMIT 1";
$stmt = $this->_mysqli->prepare($sql);
$stmt->bind_param("s", $username);
$stmt->execute();
$result = $stmt->get_result();
// If the email doesn't exist, num_rows will be 0
if ($result->num_rows === 0) {
$server_results['status'] = 'error';
$server_results['control'] = 'username';
$server_results['message'] = 'Sorry, but that email address isn't associated with an account. Please try again.';
} else {
// Get the user's verification code
$row = $result->fetch_all(MYSQLI_ASSOC);
$ver_code = $row[0]['verification_code'];
}
}
}
// If we're still good, it's time to get the reset started
if($server_results['status'] === 'success') {
// Send the password reset email
$send_to = $username;
$subject = 'Reset your FootPower! password';
        $header = 'From: FootPower! <[email protected]>' . "
" .
'Content-Type: text/plain';
$body = <<<BODY
You're receiving this message because you requested a password reset for your FootPower! account.
Please click the link below to reset your password.
https://footpower.mcfedries.com/reset_password.php?vercode=$ver_code&username=$username
If you do not have a FootPower! account, you can safely delete this message.
Thanks!
Paul
footpower.mcfedries.com
BODY;
if(mail($send_to, $subject, $body, $header)) {
// Unset the user's verified flag in the database
$sql = "UPDATE users
SET verified=0
WHERE username=?";
$stmt = $this->_mysqli->prepare($sql);
$stmt->bind_param("s", $username);
$stmt->execute();
$result = $stmt->get_result();
if($this->_mysqli->errno === 0) {
$server_results['control'] = 'form';
$server_results['message'] = 'Okay, we've sent you the reset email.<br>Be sure to click the link in that email to reset your password.';
} else {
$server_results['status'] = 'error';
$server_results['control'] = 'form';
$server_results['message'] = 'MySQLi error #: ' . $this->_mysqli->errno . ': ' . $this->_mysqli->error;
}
} else {
$server_results['status'] = 'error';
$server_results['control'] = 'form';
$server_results['message'] = 'Error! The reset email could not be sent, for some reason. Please try again.';
}
}
// Create and then return the JSON data
$JSON_data = json_encode($server_results, JSON_HEX_APOS | JSON_HEX_QUOT);
return $JSON_data;
}
This method is very similar to the verifyUser() method I discuss earlier, but there are two main differences to note:
sendPasswordReset()uses a prepared SQLUPDATEstatement to set the user'sverifiedfield in the database to0.sendPasswordReset()sends an email message to the user with a link to thereset_password.phppage, with the user's verification code and username in the query string. When the user clicks that link, she’s sent to the page shown in Figure 4-5.

FIGURE 4-5: The FootPower! Reset Your Password form.
Here’s the code for the reset_password.php page:
<?php
include_once '../private/common/initialization.php';
// Initialize the results
$server_results['status'] = 'success';
$server_results['control'] = '';
$server_results['message'] = '';
// Make sure a verification code was passed
if (!isset($_GET['vercode'])) {
$server_results['status'] = 'error';
$server_results['control'] = 'form';
$server_results['message'] = 'Error: Invalid URL. Sorry it didn't work out.';
}
// Make sure the email address was passed
elseif (!isset($_GET['username'])) {
$server_results['status'] = 'error';
$server_results['control'] = 'form';
$server_results['message'] = 'Error: Invalid email address.';
}
// If we get this far, all is well, so go for it
else {
// Get the query string parameters
$ver_code = $_GET['vercode'];
$username = $_GET['username'];
// Sanitize them
$ver_code = filter_var($ver_code, FILTER_SANITIZE_STRING);
$username = filter_var($username, FILTER_SANITIZE_EMAIL);
}
$page_title = 'Reset Your Password';
include_once 'common/top.php';
if($server_results['status'] === 'error'):
?>
<div class="result-message"><?php echo $server_results['message'] ?></div>
<?php
else:
?>
<p>
You're resetting the password for <?php echo $username ?>.
</p>
<p>
If this is not your FootPower! email address, please <a href="request_new_password.php">send a new password reset request</a>.
</p>
<form id="user-reset-password-form">
<div class="form-wrapper">
<div class="control-wrapper">
<label for="password">Password</label>
<div>
<input id="password" class="form-control" name="password" type="password" minlength="8" aria-label="Type your password." required>
<br>
<input id="password-toggle" type="checkbox"><label for="password-toggle" class="label-horizontal">Show password</label>
</div>
<span id="password-error" class="error error-message"></span>
</div>
<button id="reset-password-button" class="btn btn-form" type="submit">Reset Password</button>
<span id="form-error" class="error error-message form-error-message"></span>
<span id="form-message" class="form-message"></span>
<input type="hidden" id="username" name="username" value="<?php echo $username ?>">
<input type="hidden" id="vercode" name="vercode" value="<?php echo $ver_code ?>">
<input type="hidden" id="user-verb" name="user-verb" value="reset-password">
<input type="hidden" id="token" name="token" value="<?php echo $_SESSION['token']; ?>">
</div>
</form>
<?php
endif;
include_once 'common/sidebar.php';
include_once 'common/bottom.php';
?>
The submit event handler sends the form data to user_handler.php, which uses the hidden user-verb value of reset-password to route the Ajax request to the User object's resetPassword() method:
public function resetPassword() {
// Store the default status
$server_results['status'] = 'success';
// Get the form data
$username = $_POST['username'];
$ver_code = $_POST['vercode'];
$password = $_POST['password'];
// Sanitize the username and verification code, just to be safe
$username = filter_var($username, FILTER_SANITIZE_EMAIL);
$ver_code = filter_var($ver_code, FILTER_SANITIZE_STRING);
// Verify the user:
// First, prepare the SQL SELECT statement
$sql = "SELECT *
FROM users
WHERE username=?
AND verification_code=?
AND verified=0";
$stmt = $this->_mysqli->prepare($sql);
$stmt->bind_param("ss", $username, $ver_code);
$stmt->execute();
$result = $stmt->get_result();
$row = $result->fetch_all(MYSQLI_ASSOC);
// If a row is returned, it means the user is verified so the password can be reset
if ($result->num_rows > 0 AND $this->_mysqli->errno === 0) {
// Was the password sent?
if(empty($password)) {
$server_results['status'] = 'error';
$server_results['control'] = 'password';
$server_results['message'] = 'That's weird: the password is missing. Please try again.';
} else {
// Sanitize it
$password = filter_var($password, FILTER_SANITIZE_STRING);
// Is the password still valid?
if (!$password) {
$server_results['status'] = 'error';
$server_results['control'] = 'password';
$server_results['message'] = 'Sorry, but the password you used was invalid. Please try again.';
}
// Is the password long enough?
elseif (strlen($password) < 8 ) {
$server_results['status'] = 'error';
$server_results['control'] = 'password';
$server_results['message'] = 'Sorry, but the password must be at least 8 characters long. Please try again.';
} else {
// If all's well, hash the password
$password = password_hash($password, PASSWORD_DEFAULT);
// Set the distance unit session variable
$distance_unit = $row[0]['distance_unit'];
$_SESSION['distance_unit'] = $distance_unit;
}
}
} else {
$server_results['status'] = 'error';
$server_results['control'] = 'form';
$server_results['message'] = 'Oh, man, a database error occurred! Please try again.';
}
// If we're still good, it's time to reset the password and reverify the user
if($server_results['status'] === 'success') {
// Get the user's ID
$row = $result->fetch_all(MYSQLI_ASSOC);
$user_id = $row[0]['user_id'];
// Set the user's password and verified flag in the database
$sql = "UPDATE users
SET password=?, verified=1
WHERE username=?";
$stmt = $this->_mysqli->prepare($sql);
$stmt->bind_param("ss", $password, $username);
$stmt->execute();
$result = $stmt->get_result();
// Was there an error?
if ($this->_mysqli->errno === 0) {
// if not, sign in the user
$_SESSION['username'] = $username;
// Get the user's log ID
$sql = "SELECT *
FROM logs
WHERE user_id=?";
$stmt = $this->_mysqli->prepare($sql);
$stmt->bind_param("i", $user_id);
$stmt->execute();
$result = $stmt->get_result();
// Set the log_id session variable
$row = $result->fetch_all(MYSQLI_ASSOC);
$log_id = $row[0]['log_id'];
$_SESSION['log_id'] = $log_id;
} else {
$server_results['status'] = 'error';
$server_results['control'] = 'form';
$server_results['message'] = 'Yikes. A database error occurred. Please try again.';
}
}
// Create and then return the JSON data
$JSON_data = json_encode($server_results, JSON_HEX_APOS | JSON_HEX_QUOT);
return $JSON_data;
}
This code is very similar to verifyUser(), which I discuss earlier.
Deleting a User
The final user task the app needs to handle is deleting a user's account. This is accomplished by clicking the Delete Your Account link in the Your Account page (your_account.php). This displays the delete_account.php page, shown in Figure 4-6.

FIGURE 4-6: The FootPower! Delete Your Account form.
Here's the delete_account.php page code:
<?php
include_once '../private/common/initialization.php';
$page_title = 'Delete Your FootPower! Account?';
include_once 'common/top.php';
// Is the user signed in?
if(isset($_SESSION['username'])):
?>
<p>
Whoa, are you sure you want to do this? You'll lose all your data!
</p>
<form id="user-delete-form">
<div class="form-wrapper">
<div class="control-wrapper">
<label for="password">Password</label>
<div>
<input id="password" class="form-control" name="password" type="password" minlength="8" aria-label="Type your password." required>
<br>
<input id="password-toggle" type="checkbox"><label for="password-toggle" class="label-horizontal">Show password</label>
</div>
<span id="password-error" class="error error-message"></span>
</div>
<button id="delete-user-button" class="btn btn-form" type="submit">Yep, I'm Sure</button>
<span id="form-error" class="error error-message form-error-message"></span>
<span id="form-message" class="form-message"></span>
<input type="hidden" id="username" name="username" value="<?php echo $_SESSION['username'] ?>">
<input type="hidden" id="user-verb" name="user-verb" value="delete-user">
<input type="hidden" id="token" name="token" value="<?php echo $_SESSION['token']; ?>">
</div>
</form>
<?php
else:
?>
<!-- Display the sign-in page -->
<meta http-equiv="refresh" content="0;sign_in.php">
<?php
endif;
include_once 'common/sidebar.php';
include_once 'common/bottom.php';
?>
When the user clicks the Yep, I’m Sure button, the form’s submit event handler sends the form data to the user_handler.php script, which uses the hidden user-verb value of delete-user to route the Ajax request to the User object's deleteUser() method:
public function deleteUser() {
// Store the default status
$server_results['status'] = 'success';
// Get the username and password
$username = $_POST['username'];
$password = $_POST['password'];
// Sanitize the username, just to be safe
$username = filter_var($username, FILTER_SANITIZE_EMAIL);
// Make sure the username exists in the database
$sql = "SELECT *
FROM users
WHERE username=?
LIMIT 1";
$stmt = $this->_mysqli->prepare($sql);
$stmt->bind_param("s", $username);
$stmt->execute();
$result = $stmt->get_result();
// Get the user's ID
$row = $result->fetch_all(MYSQLI_ASSOC);
$user_id = $row[0]['user_id'];
// If the username doesn't exist, num_rows will be 0
if ($result->num_rows === 0) {
$server_results['status'] = 'error';
$server_results['control'] = 'form';
$server_results['message'] = 'Sorry, but we can't find your account. Please try again.';
} else {
// Now check the password
// Was the password sent?
if(empty($_POST['password'])) {
$server_results['status'] = 'error';
$server_results['control'] = 'password';
$server_results['message'] = 'That's weird: the password is missing. Please try again.';
} else {
// Sanitize it
$password = filter_var($password, FILTER_SANITIZE_STRING);
// Is the password still valid?
if (!$password) {
$server_results['status'] = 'error';
$server_results['control'] = 'password';
$server_results['message'] = 'Sorry, but the password you used was invalid. Please try again.';
} else {
// Confirm the password
if(!password_verify($password, $row[0]['password'])) {
$server_results['status'] = 'error';
$server_results['control'] = 'password';
$server_results['message'] = 'Sorry, but the password you used was incorrect. Please try again.';
} else {
// Delete the user
$sql = "DELETE
FROM users
WHERE username=?
LIMIT 1";
$stmt = $this->_mysqli->prepare($sql);
$stmt->bind_param("s", $username);
$stmt->execute();
$result = $stmt->get_result();
// Was there an error?
if ($this->_mysqli->errno !== 0) {
$server_results['status'] = 'error';
$server_results['control'] = 'form';
$server_results['message'] = 'MySQLi error #: ' . $this->_mysqli->errno . ': ' . $this->_mysqli->error;
} else {
// Get the user's log ID
$sql = "SELECT *
FROM logs
WHERE user_id=?
LIMIT 1";
$stmt = $this->_mysqli->prepare($sql);
$stmt->bind_param("i", $user_id);
$stmt->execute();
$result = $stmt->get_result();
$row = $result->fetch_all(MYSQLI_ASSOC);
$log_id = $row[0]['log_id'];
// Delete the user's activities
$sql = "DELETE
FROM activities
WHERE log_id=?";
$stmt = $this->_mysqli->prepare($sql);
$stmt->bind_param("i", $log_id);
$stmt->execute();
$result = $stmt->get_result();
// Was there an error?
if ($this->_mysqli->errno !== 0) {
$server_results['status'] = 'error';
$server_results['control'] = 'form';
$server_results['message'] = 'MySQLi error #: ' . $this->_mysqli->errno . ': ' . $this->_mysqli->error;
} else {
// Delete the user's master data record (log)
$sql = "DELETE
FROM logs
WHERE log_id=?
LIMIT 1";
$stmt = $this->_mysqli->prepare($sql);
$stmt->bind_param("i", $log_id);
$stmt->execute();
$result = $stmt->get_result();
// Was there an error?
if ($this->_mysqli->errno !== 0) {
$server_results['status'] = 'error';
$server_results['control'] = 'form';
$server_results['message'] = 'MySQLi error #: ' . $this->_mysqli->errno . ': ' . $this->_mysqli->error;
} else {
// Free up all the session variables
session_unset();
}
}
}
}
}
}
}
// Create and then return the JSON data
$JSON_data = json_encode($server_results, JSON_HEX_APOS | JSON_HEX_QUOT);
return $JSON_data;
}
After performing the usual data validation and sanitization, the code runs three prepared SQL DELETE statements to delete the user from the users table, delete the user's data from the activities table, and delete the user’s log from the logs table.