

Burp Proxy is a tool that intercepts HTTP and HTTPS traffic. It allows a Penetration Tester to examine an application, its vulnerabilities, and the two-way traffic between a client and a web server. Burp Proxy is very popular because of its ability to not only examine the traffic, but also, it manipulates requests. We will examine how Burp Proxy is used to manipulate, reply, and steal authentication.
It is important to remember that Burp Proxy is actually a part of Burp Suite, which is a collection of tools. When a user enters a URL in their web browser such as http://www.DrChaos.com, they expect to be directed to the website. A proxy server will intercept that request and send it on behalf of a client. Proxy servers are usually put in place to inspect the traffic and protect the clients from harmful data. As a Penetration Tester, you can use a proxy server to intercept traffic from a client, copy the request, or manipulate it:

To launch Burp Suite, simply navigate to: Kali | Sniffing/Spoofing | Web Sniffers and select Burp Suite.
Once Burp Suite is launched, you will be presented with the Burp launch dashboard:

To configure Burp, click on the Proxy tab. By default, the Intercept button is selected in this tab. When the Intercept option is enabled, Burp stops all requests from a web browser to the web server. The feature allows a Penetration Tester the ability to examine a connection. The Penetration Tester can manually allow the connection to continue once it's viewed.
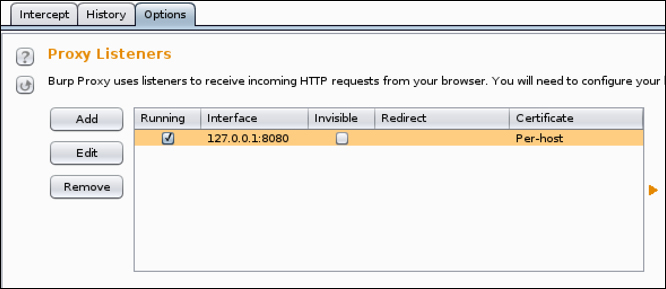
The next configuration setting is found on the Options submenu. This section will allow users to check or change the default port on which Burp is running, as well as configure the interface or network seen by Burp. By default, Burp is set to run on the loopback interface, as shown in the following screenshot. A loopback interface is a special interface that usually has the IP address of 127.0.0.1 associated with it. It does not have a physical hardware connection tied to it, but is a way for the operating system to reference itself. In other words, when you want to communicate with yourself in networking, you could use a loopback. If you plan on testing Burp Suite beyond the local machine, you should add your Ethernet interface and IP address.
We will use the loopback interface for our example:
The next step is configuring the browser to use Burp Suite. All browsers have a similar way of using a proxy server. In the next example, we have depicted the settings for configuring a proxy server on Firefox:

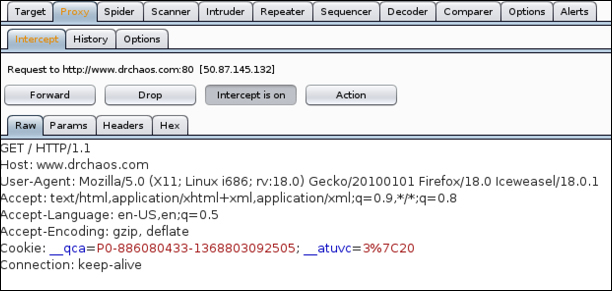
For the following example, we will go to a URL, such as www.DrChaos.com in Firefox. You will notice that nothing happens. This is because the Intercept feature is enabled by default, as we discussed earlier. You can now see the Intercept tab in Burp has changed colors to indicate a new request has been intercepted.
When you click on the Intercept tab, you will see the exact nature of the request. You can now click on Forward or Drop to allow or deny the request specifically from continuing:
When you click on the Forward button, you will see the request continuing to the server, as well as the response from the server. Also, you should see the webpage successfully loaded in the web browser. Some web pages have multiple components, so you may need to select the Forward button multiple times before the web page loads.
Another cool feature is Burp Spider. Burp Spider offers a way of mapping web applications in an automated fashion. How Burp Spider works is that you first setup Burp to proxy your Internet usage, as we had explained earlier. Next, you enable Burp Spider, and while it is running, Burp will map all the requests and offer the ability to spider any captured request to find new targets.
To use the Spider, click the Spider tab to bring up the default configuration page. Click on the Spider is paused button to change the status to Spider is running:

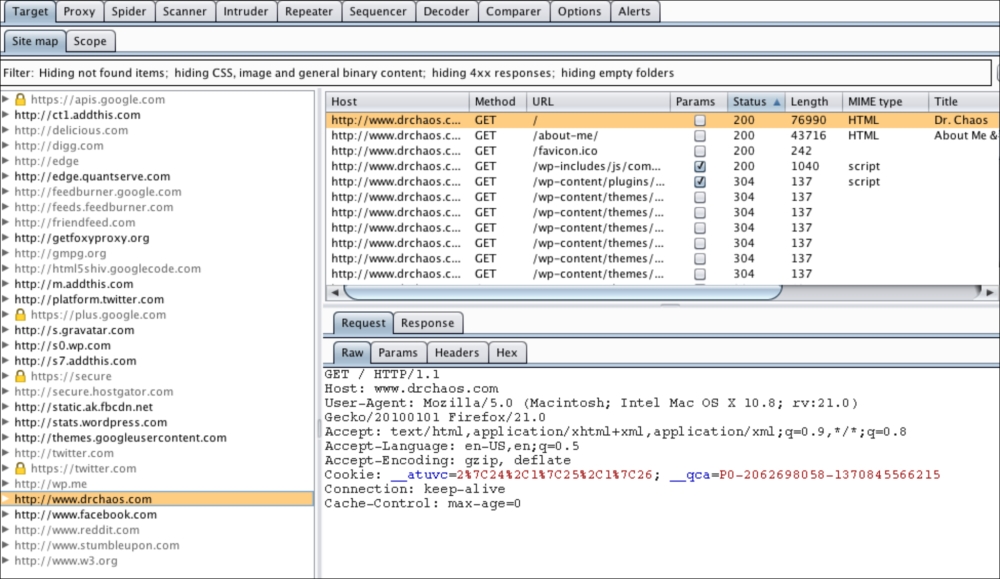
Burp maps all requests seen by the proxy under the Target tab. Click on the Target tab to see what has been captured. There will be a list of targets that are being used on the proxy. URLs that are in gray means that you have not directly browsed those targets, while URLs in black are sites to which you have explicitly browsed to:
To use the Spider function, right-click on a target and select Spider this host:

When you go to the Spider tab in Burp, you will notice the Spider Status counts have changed from 0 to an accumulating number:
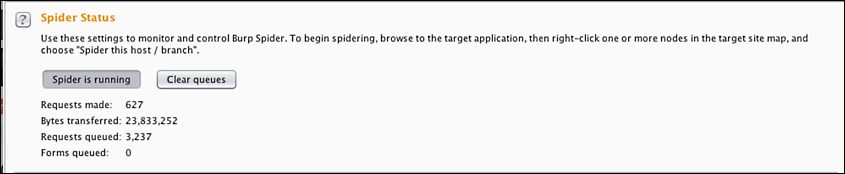
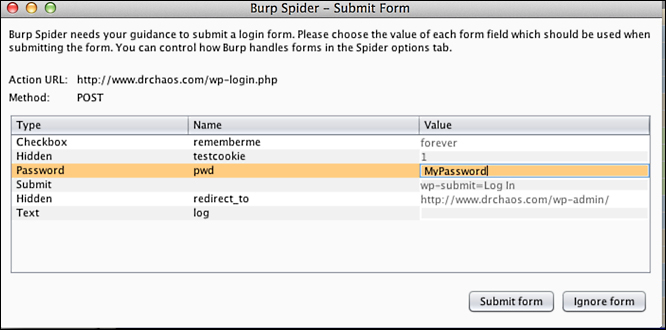
If Burp encounters any forms, it will prompt you to fill out the forms or ignore them. If you fill out the forms, Burp will continue to see what else it can spider on pages past the forms:
When the Spider process is complete, go back to Targets tab and find the host you originally selected to spider. Click on the triangle next to the host to expand it. You will see all the spider results under your original target:

Burp shows all pages and links that the Spider process has captured. In addition, it will capture the root directory, web page styles, sub-folders, and Java scripts. The next example shows multiple, captured sub-folders on the site www.Drchaos.com.
Burp has the ability to filter items using the gray Filter bar on top of the page. When you click on the Filter button, it will expand out the options available to filter the results:

The Spider option in Burp allows a web Penetration Tester to view how a web application or a website is configured, what links are contained, and to where those links lead. An analogy of this concept is being in a room with many doors and having the ability to explore each door simultaneously.