
In this recipe, we will learn how to display the camera feed in our application. This simple yet powerful feature can be integrated in many ways to your applications. Indeed, you can envision applications that allow a live video feed, such as Skype.
Create a new solution named CameraTest and open it in Xamarin Studio. This recipe will only work on a physical device.
- Open the
AndroidManifest.xmlfile under thePropertiesfolder and request the Camera, CaptureVideoOutput and Write external permissions. - Now add the following statement to the
AndroidManifest.xmlfile:<application android:hardwareAccelerated="true"/>
- In the minimum and target Android version, choose the following: Override – Android 4.4 (API level 19), as shown in the following screenshot:
- Import the
Android.Hardwarepackage in yourMainActivityclass. - Add the following two variables to your activity:
Camera2 _camera;
TextureView _textureView;
- Make your main activity implement
TextureView.ISurfaceTextureListenerand implement theOnSurfaceTextureAvailable(),OnSurfaceTextureAvailable(),OnSurfaceTextureSizeChanged(),andOnSurfaceTextureUpdated()methods with the following code:public void OnSurfaceTextureAvailable (Android.Graphics.SurfaceTexture surface, int w, int h) { _camera = Camera2.Open (); _textureView.LayoutParameters = new FrameLayout.LayoutParams (w, h); try { _camera.SetPreviewTexture (surface); _camera.StartPreview (); } catch (Java.IO.IOException ex) { Console.WriteLine (ex.Message); } } public bool OnSurfaceTextureDestroyed (Android.Graphics.SurfaceTexture surface) { _camera.StopPreview (); _camera.Release (); return true; } public void OnSurfaceTextureSizeChanged (Android.Graphics.SurfaceTexture surface, int width, int height) { // Camera takes care of that } public void OnSurfaceTextureUpdated (Android.Graphics.SurfaceTexture surface) { // Camera takes cares of that too } - Add the following code in the
OnCreate()method:base.OnCreate (bundle); _textureView = new TextureView (this); _textureView.SurfaceTextureListener = this; SetContentView (_textureView);
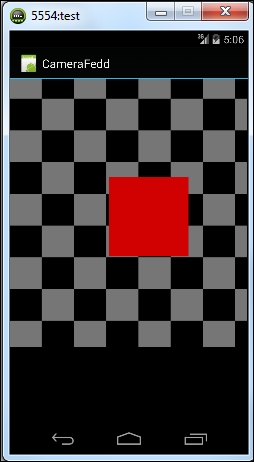
- Run your application and see the following results:
In this section, we will see how we manage to display a stream from the camera in our application. First of all, in addition to the classical Activity class, our activity implements the TextureView.ISurfaceTextureListener interface. This interface is available since API 14, which explained why we can't use it with devices running API 13 or less, and it's a listener that can be used to be notified when the associated surface texture view is available. We associate the surface in the OnCreate() method of the MainActivity class with the following statements:
_textureView = new TextureView (this);
_textureView.SurfaceTextureListener = this;

SetContentView (_textureView);
The four methods defined in this interface are:
onSurfaceTextureAvailable(SurfaceTexture surface, int width, int height): This is invoked when aSurfaceTextureinstance is ready to be used.onSurfaceTextureDestroyed(SurfaceTexture surface): This is invoked when the specifiedSurfaceTextureis about to be destroyed. If the method returnstrue, no rendering should happen inside the surface texture after this method is invoked. Otherwise, if it returnsfalse, the client needs to callrelease(). Most applications should returntrue.onSurfaceTextureSizeChanged (SurfaceTexture surface, int width, int height): This is invoked when theSurfaceTextureinstance's buffer's size changed.onSurfaceTextureUpdated (SurfaceTexture surface): This is invoked when the specifiedSurfaceTextureis updated through theupdateTexImage()method.
The most interesting method is OnSurfaceTextureAvailable, which takes care of effectively displaying the stream from the camera to our texture.
Now consider the following snippet:
_camera = Camera.Open();

_textureView.LayoutParameters = new FrameLayout.LayoutParams (w, h);

try {
  _camera.SetPreviewTexture (surface);
  _camera.StartPreview ();

}
catch (Java.IO.IOException ex) {
  Console.WriteLine (ex.Message);
}
In this snippet, we first give the _camera instance the value of Camera.Open(), which will return a new Camera object to access the first, rear camera of the device. Then, we block out an area of size w, h on the screen to display our feed using the new FrameLayout.LayoutParams(w, h). Finally, we set the surface to be used for the camera preview with SetPreviewTexture and start the preview itself.
As we are starting to play with hardware and, more specifically, hardware emulation of the camera, several things could go wrong in this recipe. In what follows, I will try to cover the most common errors related to both Android and Xamarin.
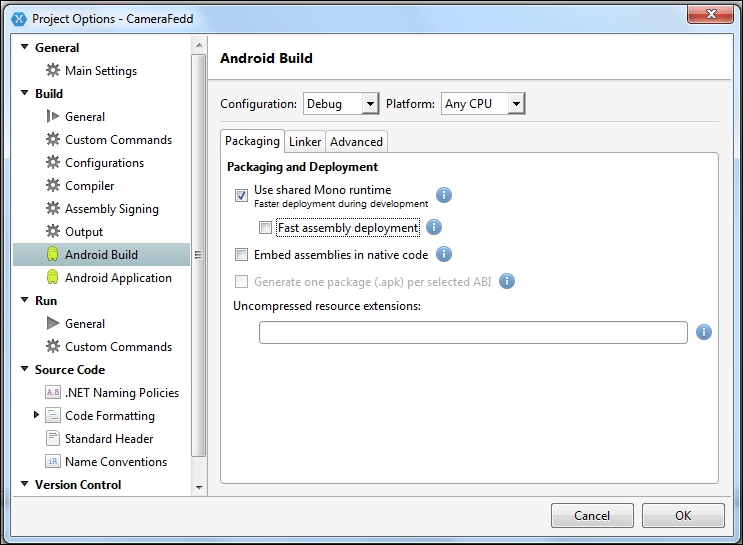
When deploying applications containing hardware acceleration, I found that the error Deployment failed. FastDev directory creation failed was appearing from time to time. This is related to the fast assembly deployment feature of Xamarin. The workaround here is to simply deactivate the feature by unchecking it in the Android Build section of the Project Options, as shown in the following screenshot:
If you add the following statement to your AndroidManifest.xml file, as indicated in the second step of this recipe, and A TextureView or a subclass can only be used with hardware acceleration enabled error message still appears, then it means that the device you are testing simply doesn't support the hardware acceleration. The minimum versions are API 15 (Android 4.0.3) for a physical device and API 17 (Android 4.2) for an emulated device. If you don't see an emulator superior to API 17 while running your project, you can create a new emulator in the Manage devices menu.
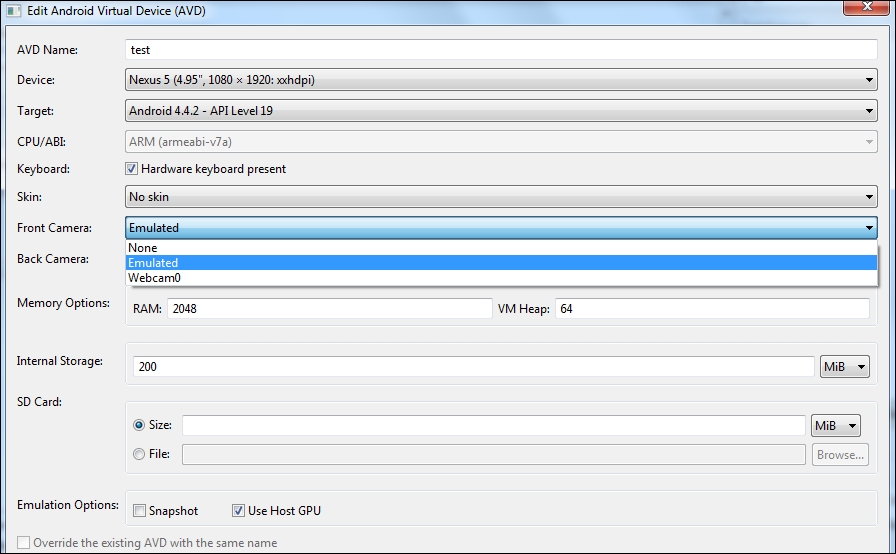
If your application starts normally but you only get a black screen in the emulator, then it might indicate that your emulated device doesn't have a rear camera. Indeed, Camera.Open automatically opens the rear camera, even if your device doesn't have one. You can set the camera in the Edit Android Virtual Device (AVD) option, as shown in the following screenshot:
See also, the next recipe to see how to take pictures with the camera. You can find more information at http://developer.xamarin.com/recipes/android/ and http://developer.android.com/reference/android/hardware/Camera.html.