
Chapter 3
Placing and Tracing Artwork
IN THIS CHAPTER
![]() Managing artwork from other Illustrator files or outside Illustrator
Managing artwork from other Illustrator files or outside Illustrator
![]() Integrating artwork from Adobe Draw
Integrating artwork from Adobe Draw
![]() Tracing sketches, photos, and other raster art
Tracing sketches, photos, and other raster art
![]() Cropping graphics with Illustrator
Cropping graphics with Illustrator
Not everything that ends up in an Illustrator project begins life as an Illustrator object. The genesis of an Illustrator project might start with a raster image, such as a photo. Or an Illustrator project might start with a hastily sketched drawing on an Android or iOS mobile device using Adobe Draw.
Sometimes you'll bring objects into Illustrator as rasters and convert them to vector graphics. Other times you'll bring objects into Illustrator as rasters and they will stay in the project as rasters. Illustrator vector-based graphics are often hybrids, a mix of raster and vector objects.
In this chapter, I explain how to bring all kinds of files into an Illustrator file and describe the essential choices you have when integrating those files into an Illustrator project.
Placing Artwork
In Illustrator, place refers to bringing files into an existing document. Placed files can be embedded in a document or linked from an external source and included in an Illustrator document.
When files are linked, changes to the original file are reflected in the Illustrator document. When files are embedded in an Illustrator document, the umbilical cord, so to speak, is cut, and changes made to the original file are not reflected in the Illustrator document.
Embedding and linking files
To embed or link a file in an open Illustrator document, follow these steps:
-
Choose File ⇒ Place, navigate to the file in the dialog that opens, and click the file, as shown in Figure 3-1.
By default, the Link option is selected. If you know you want to embed the file, not link it, deselect the Link option. If you’re not sure, leave Link selected (because it’s easier to change a linked object to an embedded one than vice versa).
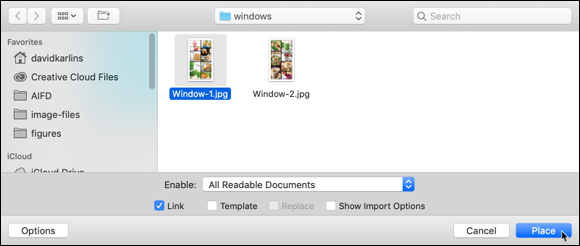
FIGURE 3-1: Selecting an object to place.
- Select or deselect Link.
- To place the object in your document full size, simply click with the icon that appears. Or click and drag to size the placed object, as shown in Figure 3-2.
Managing linked files
When a linked file is selected, it appears with a big X on the Illustrator canvas. The file can be transformed, moved, or sized like any object, but as long as it is linked, it can’t be edited.

FIGURE 3-2: Locating and sizing a placed object.
You manage the status of linked files in the Links panel. A number of options for managing the status of a linked file are available, but the most important and widely applicable is updating the connection when a linked file has been changed so that the latest version of the file appears in your Illustrator document.
When a linked file has been updated outside Illustrator (for example, when a photo is touched up in Photoshop, or replaced with a different photo using the same filename), a warning icon appears next to the file in the Links panel. To update the placed content, click the Update Link icon in the Links panel (to refresh the link), as shown in Figure 3-3.
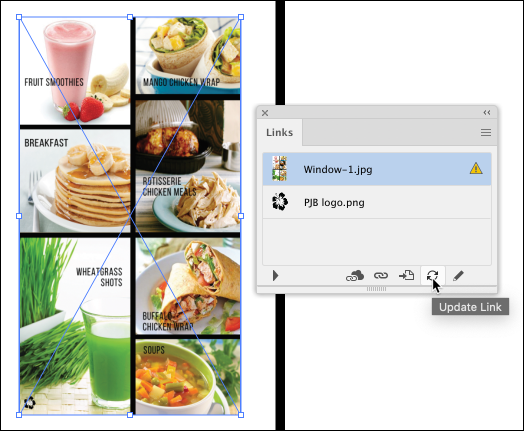
FIGURE 3-3: Updating a placed object.
Embedding linked files
If you placed a file as a linked file but decide you want to edit it in your Illustrator document, you can easily convert the file from linked to embedded.
 After you break a link and embed a placed file, any changes to the original file will not be reflected in the Illustrator document.
To change a placed object from linked to embedded, select it and choose Embed from the Links panel menu, as shown in Figure 3-4.
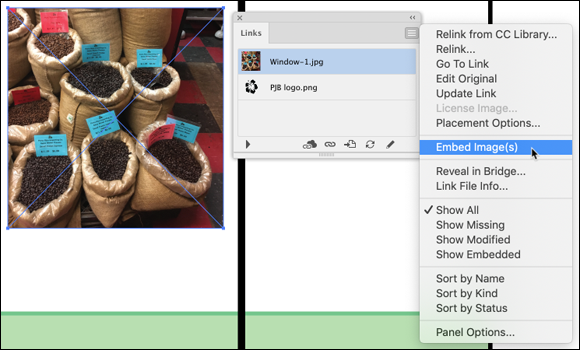
FIGURE 3-4: Converting a placed object from linked to embedded.
Placing text in a shape or path
You can place text files (in TXT or RTF format) from a word processor. The placed text will be embedded, not linked. But it will automatically pour into the selected shape. The following steps place text in a selected shape.
- Select the shape into which you are placing text.
-
Choose File ⇒ Place and navigate to the text file.
 When you choose File ⇒ Place and select a text file, the Show Import Options check box becomes active. Ignore it. Whether or not you select that check box, the next dialog that will open is the Microsoft Word Options dialog.
 -
Click Place.
The Microsoft Word Options dialog opens. Use the options in this dialog if you want to include a table of contents or an index, not import a table of contents or an index, and include (or not include) formatting. Available options depend on the source of the text file.
- Click OK to approve your import options.
- Click the edge of the shape to insert the placed text inside the shape, as shown in Figure 3-5.
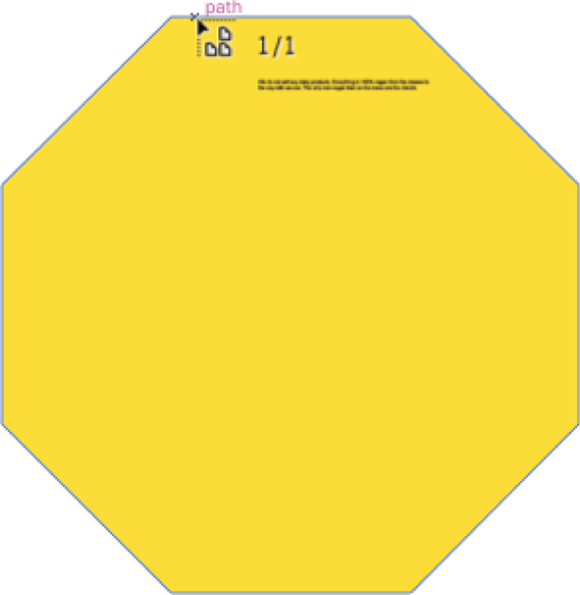
FIGURE 3-5: Placing text in an octagon.
Cropping rasters
You can crop placed raster artwork in Illustrator. Cropping a linked raster image breaks the linkage to the original file, so before you can crop a raster image you need to change a linked image to an embedded image. You can do so on the fly with the following steps.
- Select the image, right-click, and choose Crop Image from the menu that appears, as shown in Figure 3-6.

FIGURE 3-6: Selecting a placed image to crop.
- If a dialog appears, reminding you that cropping the image changes the link status to embedded, click OK.
- Use the side and corner cropping handles to crop the image, as shown in Figure 3-7.
- Hold down the Shift key to maintain the original height-to-width ratio while you crop.
- Hold down the Alt key (Windows) or Option key (Mac) to maintain the original center point as you crop.
- Click and drag on the center point to move the crop area. The area to be cropped appears dimmed.

FIGURE 3-7: Cropping a linked image.
- Press Enter (or Return) to crop to the area you defined in the preceding step.
Using clipping masks
What if you need to crop a placed image or define an irregular shape that determines what part of the image shows through but also maintain the text file’s linked status? One solution is to draw and apply a clipping mask.
Clipping masks hide sections of an image without cropping the image. To create and apply a clipping mask, follow these steps:
-
Draw a shape or path over the image demarcating a crop area, as shown in Figure 3-8.
Normally, this shape will be a rectangle, like the one shown in Figure 3-8, but it can be any shape or path.
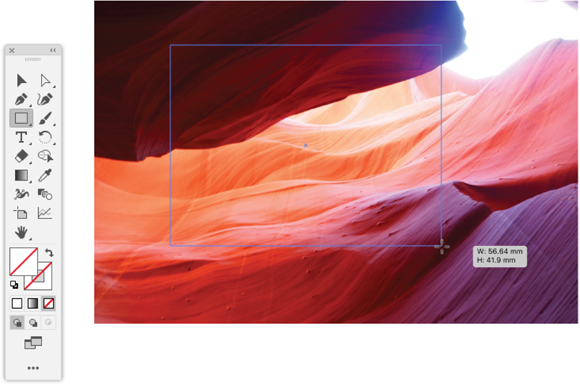
FIGURE 3-8: Drawing a clipping mask.
-
Select both the rectangle and the placed image by using Shift-click or any other selection technique, and then choose Object ⇒ Clipping Mask ⇒ Make.
The result looks like a crop, but the placed (and linked) image only appears to be cropped. The entire placed image is still in the Illustrator document.
If you want to display the entire image in your illustration, you can release the clipping mask by selecting the placed image and choosing Object ⇒ Clipping Mask ⇒ Release.
-
To change the location of the clipped image, choose Object ⇒ Clipping Mask ⇒ Edit, and select and move the mask, as shown in Figure 3-9.
To edit an existing clipping mask for a selected object, choose Edit ⇒ Clipping Mark ⇒ Edit Contents.

FIGURE 3-9: Editing a clipping mask.
Importing Sketches from Adobe Illustrator Draw
For millennia, okay, for a couple decades, digital artists have had to deal with the challenge of transferring sketches to Illustrator. They could draw in their sketchbook and scan the artwork into Illustrator. Ouch! Illustrator has powerful tracing tools, and I show you how to use them in the “Tracing Raster Images” section. But tracing scanned sketches and converting them to vectors is a hassle and usually produces unsatisfactory results.
You can sketch directly in Illustrator with a drawing tablet, such as a Wacom tablet. But what if inspiration strikes while you’re out in the field? If you grab your sketchbook, you have to wrestle with scanning the sketch into Illustrator. But if you have a mobile device and a stylus, or even a fingernail, you have all the tools you need to sketch on the spot and access the results in Illustrator.
The first step is to install Adobe Illustrator Draw on your iOS or Android device, using the appropriate app store. The app is free!
When you install Adobe Illustrator Draw, you’ll be prompted to sign in with your Adobe ID and password. Doing that links Adobe Illustrator Draw with your Adobe account and your desktop Illustrator app.
After you launch Adobe Illustrator Draw on your digital device, you’ll see simple but intuitive drawing tools. I can’t squeeze in an overview of those tools here, but you can find documentation at www.adobe.com/products/draw.html. For a quick-and-dirty sketch, just draw on the screen with your fingernail like I did when I confronted the odd creature in Figure 3-10, left. The easiest way to open the file directly in Illustrator on your laptop or desktop is to click the share icon in Draw, and choose Adobe Desktop Apps ⇒ Illustrator CC, as shown in Figure 3-10, right.
Presto! That’s all it takes to open an Adobe Illustrator Draw file in Illustrator.
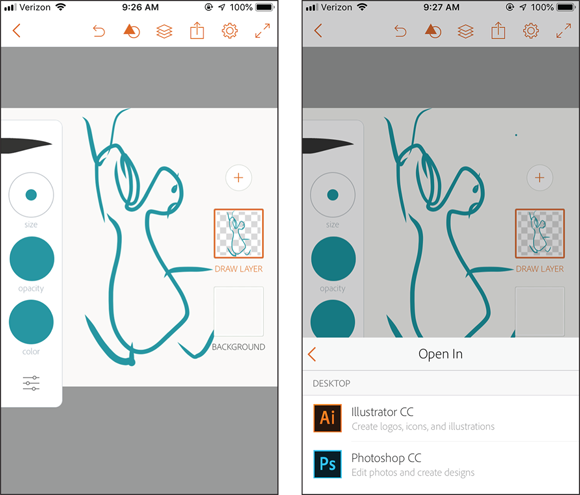
FIGURE 3-10: Sketching in Adobe Illustrator Draw (left) and setting the sketch to open in Illustrator or Photoshop (right).
Tracing Raster Images
Two basic workflows lead to tracing raster images in Illustrator:
- You're working with a sketch created in a raster program such as Photoshop or scanned from a drawing, and you need to convert that artwork to a vector image.
- You're starting with a photo or other raster image, and you want to experiment with artistic effects produced by vectorizing that image.
As much as possible, you want to avoid the first scenario, so that you are working with vectors from the start. Illustrator has powerful tracing capacity, but the results take time and usually require more than a bit of work.
Why is the tracing process so characterized by trial-and-error? Put yourself in Illustrator’s shoes: It takes a lot of brain power to convert raster artwork to vectors. Of course Illustrator doesn’t have a brain, but it does have powerful processing capacity to “think about” how to transform sets of dots (raster images) into vectors. Thus, tracing a raster image usually involves trial and error to find settings that produce the best result, followed by tweaking with the Pen tool to restore lost or corrupted details.
You can trace rasters in multiple ways. Both the Control and Properties panels have a Trace drop-down list, but I suggest using the Image Trace panel instead. That panel provides the most available and most accessible options. The following steps are used to select and apply an image trace from the Image Trace panel:
- With the Image Trace panel displayed (choose Window ⇒ Image Trace if it's not selected), select the raster object to be traced.
-
Select the Preview check box in the Image Trace panel.
You'll need to experiment with different settings to find the ones that produce the optimal trace, so you'll want to preview the effect of your settings before launching trace.
You can undo a trace and start over again, but try to avoid that. Tracing takes significant time, and it's more efficient to preview the result of a trace before applying it.
- Experiment with trace settings:
- Choose one of the intuitively named presets from the Preset drop-down list, shown in Figure 3-11.

FIGURE 3-11: Image Trace presets are intuitively named for different types of artwork.
- Continue choosing presets until you find one that produces something close to your desired result.
- Use that preset's options to tweak the trace settings by previewing the result. The options are specific to the type of preset you selected. For example, if you choose a color preset, you can edit how many colors will be generated, as shown in Figure 3-12.
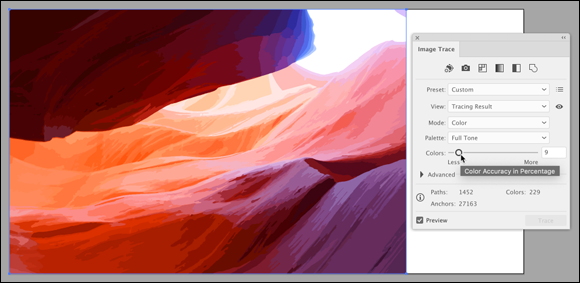
FIGURE 3-12: Customizing and previewing trace settings in the Image Trace panel.
- Choose one of the intuitively named presets from the Preset drop-down list, shown in Figure 3-11.
-
When you achieve the result you want, deselect the Preview check box and then click the Trace button in the Image Trace panel.
You can continue to change trace settings after turning off Preview, and you can toggle back into Preview at any time by selecting the Preview check box.
The Trace button becomes active (not dimmed) when you deselect Preview. Illustrator may warn you that the process will take some time.
-
Choose Object ⇒ Expand to convert the traced object to paths and to make it possible to edit the vector artwork produced by the trace.
Alternately, you can click the Expand button in the Control or Properties panel.
The result is a set of paths, all ready to edit, as shown in Figure 3-13.
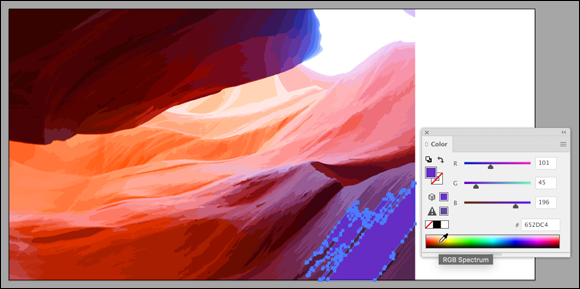
FIGURE 3-13: Editing a traced image.
Image tracing is an inexact science. Illustrator has to guess at how to convert a sea of dots into coherent vectors, and the results are never perfect. Expect to put in some time with editing tools (such as the Pen tool, the Anchor Point tool, and the Direct Selection tool) and other techniques to put the finishing touches on the vector graphics produced by your traced artwork.