
Chapter 6
Organizing Documents with Layers
IN THIS CHAPTER
![]() Understanding why and how to use layers
Understanding why and how to use layers
![]() Working from a template layer
Working from a template layer
![]() Defining layer properties
Defining layer properties
![]() Organizing layers
Organizing layers
![]() Styling with layers
Styling with layers
![]() Expediting export with layers
Expediting export with layers
Layers help organize large projects in Illustrator. In this chapter, I explain how to add layers, organize objects with layers, and take advantage of other unique features available in layers.
Before you starting generating additional layers in a document, a caveat: You might not need layers to organize your project. Chapter 5 demonstrates how grouping can organize many projects, how you can select cohorts of similar objects, and how to move objects in front of and behind each other. All that without layers.
If you’re coming to Illustrator from a Photoshop background, welcome! Note that many of the techniques I just listed, such as making selections and moving objects in front of and behind each other, require layers when working in Photoshop. But accomplishing those tasks is more easily accessible in Illustrator without layers.
Why start with a caveat that notes when you don't necessarily need layers? Organizing objects in layers adds a layer (sorry) of complexity to a project that you might not need. And ruling out when you don’t need layers helps zero in on when and why you do need to organize objects into layers.
So, when do you need layers? You should organize your Illustrator document into layers when you
- Are using a template layer to help create vector artwork from placed sketches and photos.
- Need to keep track of and organize hundreds, even thousands of objects with layers when your project gets to that scale.
- Can make your workflow more productive by applying styling to entire layers.
- Want to be able to move content front-to-back with layers on a larger scale with layers than you can by simply working with groups of objects.
- Need to avail yourself of export features that are available for objects organized into layers that are, among other things, particularly valuable for exporting animation frames.
- Want to easily lock/hide layer content to isolate and work on the content of a specific layer (or layers).
- Are creating alternate text content for a multilanguage document.
Using a Template Layer
One of the most widely used and easiest-to-access features of Illustrator layers is the capability to create a template layer. You might start an illustration project with a sketch or photo, and then use Illustrator tools to draw on top of that original artwork. After the project is finalized, the template layer will not be printed or included in screen output.
The following steps create a template layer:
- In an open document (with or without existing content), choose File ⇒ Place, navigate to and select an image you want to trace or use as a basis for a vector object, but do not click Place.
- In the dialog that displays the selected file, click the Template check box, as shown in Figure 6-1, and then click Place.

FIGURE 6-1: Selecting an image to use as a template layer.
-
If the Layers panel is not displayed, choose Window ⇒ Layers to display it and examine the options for the template layer.
The template layer name is displayed in italics to indicate that it's a template. Template layers do not print. The icon in the first column in the Layers panel, shown in Figure 6-2, toggles between displaying and hiding the layer.

FIGURE 6-2: Hiding or displaying a template layer.
The icon in the second column toggles between locking and unlocking the template layer. Normally, you want the template layer locked so you don’t have to worry about corrupting the size and location while you work in other layers. But if you need to resize or move a placed file within a layer, you can temporarily unlock the layer.
To rename the layer, or to change the percentage of dimming, double-click the template layer icon to open the Layer options dialog, change the settings, and click OK.
- Select a non-template layer, as shown in Figure 6-3, and begin to design your illustration.
-
Toggle the template display to hidden to see your project as it emerges.
If your document is destined for print output, you don’t need to hide the template layer before printing because it's hidden by default. If your document is being handed off for screen design, you need to hide the display of the template layer before exporting to PNG format.

FIGURE 6-3: Designing on top of a template layer.
See Chapter 2 for advice on printing in Illustrator. See Chapter 17 for advice on exporting raster artwork for screens, or Chapter 18 for saving artwork as web-friendly vector images.
Organizing and Arranging Objects in Layers
There’s no need to teach you how to create an initial layer. When you create a document in Illustrator, an initial layer is generated automatically. But if you're going to organize and arrange objects in layers (plural), you will need to create additional layers.
You can create that set of additional layers before you start creating an illustration. Or you can add layers at any stage of the process.
An effective way to understand how to use layers to organize and arrange objects is to dive in and experiment. Try that, along with me, in the following steps:
-
Create a new document in Illustrator, using any preset.
To keep things simple, hide the artboard if it's visible (choose View ⇒ Hide Artboards).
If you want to keep this file handy for future reference, save the file. For help creating a document and saving it, see Chapter 2.
- View the Layers panel and create three layers named Triangles, Squares, and Circles:
- If the Layers panel isn’t visible, choose Window ⇒ Layers.
- In the Layers panel, double-click the default layer name (Layer 1) and change the layer name to Triangles, as shown in Figure 6-4.

FIGURE 6-4: Renaming a layer.
- Click the Create New Layer icon in the Layers panel, as shown in Figure 6-5, and rename the layer Squares.
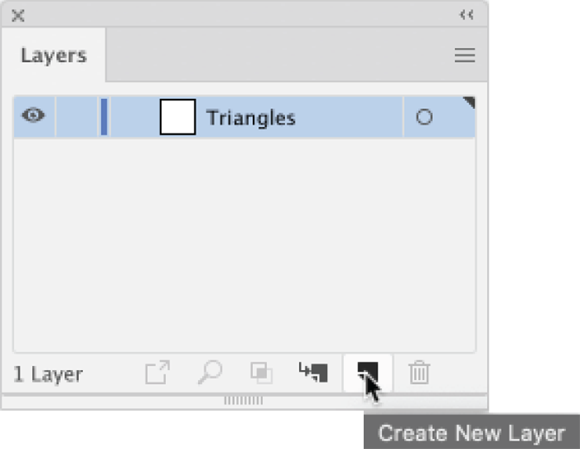
FIGURE 6-5: Creating a new layer.
- Create a third layer, and name it Circles.
- On the Layers panel menu, choose Panel Options. In the Layers Panel Options dialog, bump up the size of the rows to 60 pixels and then click OK in the dialog. You’re not creating a lot of layers here, so size isn’t an issue, and these nice big rows will make it easier to explore how layers work. Your Layers panel should look like the one in Figure 6-6.
- Populate the Circles layers with two intersecting circles and change their stacking order in the Layers panel:
- Click the Circles layer in the Layers panel and draw two intersecting circles with different color fills. Refer to Chapter 4 for guidance on drawing shapes if necessary.
- Expand the Circles layer and examine the circles you drew in the Layers panel.
- Rearrange the order of the circles in the Layers panel by dragging the bottom circle to the top of the Circles layer, as shown in Figure 6-7.

FIGURE 6-6: The Layers panel with three layers and 60 px high rows.

FIGURE 6-7: Moving circles front-to-back in the Circles layer.
-
Using the techniques in Step 3, add two squares in the Squares layer, and two triangles in the Triangles layer.
Your document and Layers panel should look something like the one in Figure 6-8.
- Drag the Triangles layer to the top of the Layers panel to move the objects in this layer to the top of the stacking order, as shown in Figure 6-9.

FIGURE 6-8: A document with three layers.
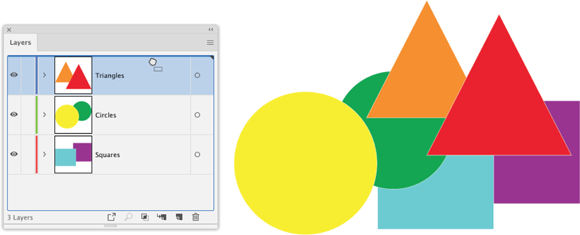
FIGURE 6-9: Changing the stacking order of layers.
There’s a lot more to layers. But the quick set of steps you just worked through demonstrate the most essential features of layers. Following is a summary of the essential things you need to know about layers:
- Every new document opens with a single layer named Layer 1.
- If the Layers panel is not visible, choose Window ⇒ Layers to display it.
- Edit the display of all layers by choosing Panel Options on the Layers panel menu.
- Create a layer by clicking the Create New Layer icon at the bottom of the Layers panel.
- Rename a layer by double-clicking its name in the Layers panel.
- Move objects within a layer or within a document by dragging them up or down in the Layers panel.
Organizing Content within and between Layers
You can move content from one layer to another. This feature can be useful when you want to regroup content in layers so you can more effectively reorder the layers, or if you want to apply styling to a layer and include an object in that layer.
Locating objects in the Layers panel
In complex designs with many objects, it’s difficult to determine on which layer an object is located.
To locate an object in the Layers panel, click the object on the Illustrator canvas, and then choose Locate Object on the Layers panel menu. The layer on which the object is located and the object itself are selected in the Layers panel, as indicated by a little red box next to the object in the panel.
In Figure 6-10, I’m locating the purple square in the Layers panel, so I can easily move it within the layer or into another layer.
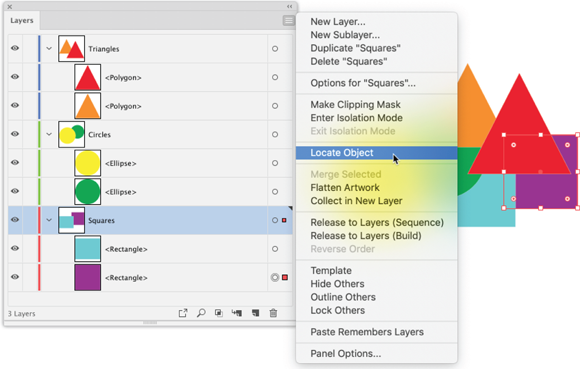
FIGURE 6-10: Locating an object in the Layers panel.
Arranging objects within and between layers
To move objects within a layer (and, in the process, change their stacking order), click and drag the object icon in the Layers panel.
Similarly, to move an object from one layer to another, drag it from the initial layer to the target layer. In Figure 6-11, I’m dragging the purple square from the Squares layer to the Triangles layer, and placing it on top of the existing objects in the Triangles layer.

FIGURE 6-11: Moving an object from one layer to another.
Styling with Layers
You can make wholesale changes to the appearance of all objects in a layer. Among those changes, you can
- Change stroke and fill attributes
- Apply effects (such as Drop Shadow or Pucker & Bloat)
- Apply transparency
Targeting layers
The first step in changing the appearance of all objects in a layer is to make the layer active by clicking its target icon, a little circle in the Layers panel. When you do, little boxes filled with the color associated with the layer appear next to objects in the Layers panel, as shown in Figure 6-12.
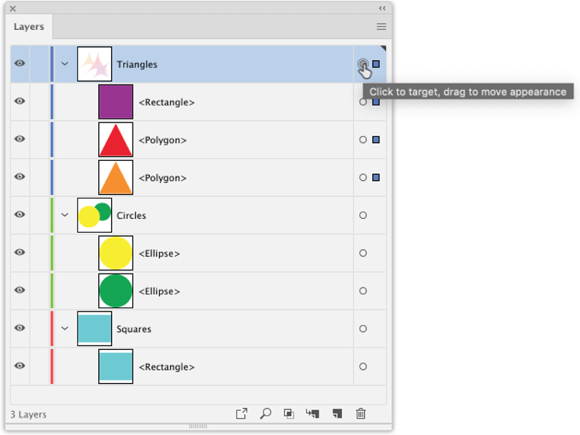
FIGURE 6-12: Targeting a layer.
 To keep track of what content is on which layer, change the default colors to colors that reflect the content of the layer. You can change the color associated with a layer by selecting the layer in the Layers panel and choosing Options for (the selected layer) on the Layers panel menu.
Note that you can not only target an entire layer but also target objects within layers, using the target icons associated with those objects. All the changes you can make to the appearance of all objects in an entire layer can be made also to selected objects within a layer.
To target more than one layer, or to target multiple objects within a layer, hold down the Shift key as you click the target icons associated with those layers or objects.
Changing the appearance of objects in layers
With a layer targeted, you can apply styling, such as effects or transparency, to all the objects in the targeted layer. In Figure 6-13, I applied Pucker & Bloat and transparency to all the objects in the top (Triangles) layer in the document.
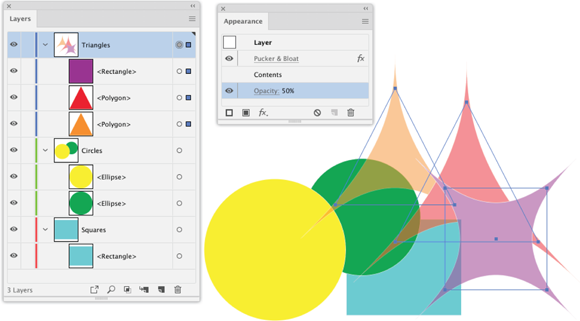
FIGURE 6-13: Applying transparency and Pucker & Bloat effect a layer.
See Chapter 14 to learn to define and apply effects, and Chapter 12 for a step-by-step guide to applying transparency.
Applying Layers in Real-World Challenges
To help get your head around how layers are used to organize projects, let me share a couple real-life examples.
In Figure 6-14, the poster has four layers, one for the borders, one for the type (targeted in the figure), one for the string (decorative) elements, and one for the dark background. Any combination of these layers can be hidden, or locked so the designer can focus on type, decoration, borders, or background.
In Figure 6-15, only one of the five layers (the rug) is unlocked, so it can be edited without fear of distorting objects on other layers.
Those two examples demonstrate common ways that layers are used. But different illustrators have come up with all kinds of ways to use layers.

FIGURE 6-14: A poster with the Type layer targeted.

FIGURE 6-15: Only one layer is unlocked for editing.
Some veteran designers eschew using artboards to combine similar graphics in a single file and use layers instead. Layers are sometimes part of the workflow in preparing documents for commercial printing. In Chapter 2, I share advice from a printing expert on how to create separate layers for distinct spot colors in CMYK and Pantone print projects. I sometimes bring illustrations with multiple layers into Photoshop, where I convert those layers into animated GIFs — a low-fi, lean technique for creating animated objects for web and social media ads.
In short, layers are a tool that can be applied to solve all kinds of workflow and design challenges.