
Chapter 17
Exporting Raster Files
IN THIS CHAPTER
![]() Exporting vector graphics to raster formats
Exporting vector graphics to raster formats
![]() Defining the appropriate resolution and size for raster export
Defining the appropriate resolution and size for raster export
![]() Navigating Illustrator’s raster export options
Navigating Illustrator’s raster export options
![]() Exporting artwork to PNG, JPEG, and TIFF formats
Exporting artwork to PNG, JPEG, and TIFF formats
The Adobe Illustrator community loves the capability to create powerful vector graphics that are micro in file size and, infinitely scalable without distortion. We thrive on creating graphics that take advantage of vector-powered drawing tools to create all kinds of curves. And often we can hand off the resulting Illustrator files in a savable vector format, SVG for screens, and AI, EPS, or PDF for print. (If handing off SVG files is an option for your project, see Chapter 18. If you're turning over projects to a printer, see Chapter 2.)
But as an Illustrator designer working in different design environments, you will encounter a wide array of situations in which you need to turn over Illustrator projects as raster images. Those raster files are defined not by coherent sets of points, curves, and fills, but by bits of data — dots of different colors and intensity — mapped on a page or screen (thus the alternate term for rasters: bitmaps).
In this chapter, I show you how to solve several essential issues that are posed when you need to export an Illustrator vector graphic to a raster format. They include the following:
- Which raster format works best for your project
- What resolution is best for your raster output
- How to maintain a workflow that does not lose your editable Illustrator artwork
Exporting in a Hurry
In the bulk of this chapter, I explain in detail why and how to translate vector artwork to specific raster formats. And I show you how to use artboards for the most productive workflow.
But first, I show you how to hand off a raster version of an Illustrator graphic when you aren’t too fussy about fine-tuning the resulting raster artwork.
The best way to quickly generate a raster without messing around with a lot of detail is to use the Export As option to export your artwork to PNG format. This method is quick because the options are simple, and good because PNG is a good format for most print and web projects.
Scenario: You saw a slug on the ground, got inspired, sketched the slug on your phone, and then opened and tweaked the sketch in Illustrator. Here’s how you produce a PNG file to use on your blog:
- Use the Selection tool to select the object(s) you want to export, as shown in Figure 17-1.

FIGURE 17-1: Selecting artwork to export to a PNG file.
-
Choose File ⇒ Export Selection to export the selection, and select and name the selected asset.
The Export for Screens dialog opens with the Assets tab selected. Your selection of objects for export is considered an asset. In simple terms, an asset is something you can export.
- Select the asset(s) to export. If you generated assets from your open document previously, more than one asset will appear. Use the check boxes that appear to deselect objects you do not want to export and select objects you do want to export.
- Click under your selected asset and enter a name that will serve as a filename for the exported file. In Figure 17-2, I chose to export only one object, and I named it Slug.
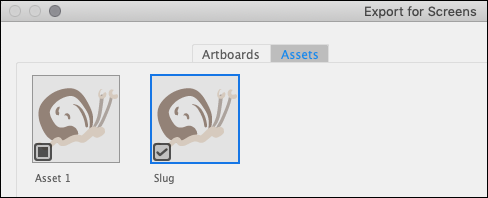
FIGURE 17-2: Selecting an asset to export.
- Export the asset as a medium-quality PNG file by deselecting everything except the following formats:
- 1x: Exports the file as the same scale (size) it has in your document.
- mdpi: Indicates to designers this is a medium resolution file (Medium Dots Per Inch).
- PNG: Works well for screens and print output and is the most widely applicable raster format.
-
Use the Export to box to navigate to the folder to which you want to export the raster file, and deselect the Create Subfolder check box.
Creating a subfolder is useful when you export multiple versions of a graphic (as explained in the following section on exporting for screens) but unnecessary when exporting a single asset. Your dialog should look something like Figure 17-3.
-
Click Export Asset to generate the PNG file.
Your operating system opens the folder to which you exported the file, making it easy to open the file or send it to a collaborator.
You can open the file from your operating system’s file manager to see how it looks. In Figure 17-4, I opened the generated file in the Firefox web browser.

FIGURE 17-3: Preparing to export a selected object as a PNG file.
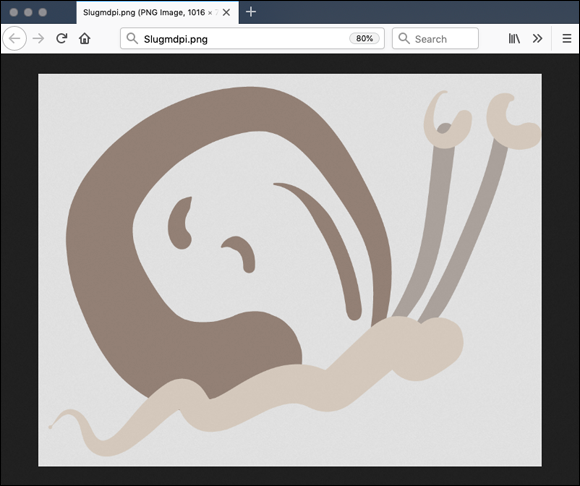
FIGURE 17-4: Viewing an exported PNG in a browser.
In many situations, these simple steps are all you need to post an image to social media or use it in a website or print project. But if you need more control over the end result of your export, read the remainder of this chapter.
Maximizing Illustrator’s Export Options
Before launching into how to expertly export Illustrator artwork to raster files in the most effective and efficient ways, let me emphasize something: You might not need to export Illustrator files to raster formats. Many print scenarios accept AI, EPS, or PDF vector files, and more and more screen projects accept SVG (vector) files. If you can hand off artwork as Illustrator-compatible vector artwork, do so because it allows you to maintain a small file size and infinite zoomability.
But when you do have to turn over artwork as raster files, turn to this section.
Understanding the vector to raster journey
Vector graphic designers are constantly faced with a need to translate graphics from vector to raster with specific specifications for file format, resolution, and dimensions.
For example, I design Twitter cards and Facebook graphs in Illustrator, and I must adhere to the specs defined by Facebook and Twitter for PNG, GIF, or JPEG files. I also create infographics for technical print publications that have to be handed off in TIFF format. None of these formats (JPEG, GIF, PNG, or TIFF) are vector formats; they are raster (bitmap) formats. And, again, I have to not only adhere to the proper format but also meet different specs for image dimensions and resolution.
 For an exploration of the differences between raster (bitmap) images and vector graphics, see Chapter 1.
Orchestrating vector to raster workflow
Let me share a couple essential tips on managing the process of exporting artwork to raster files:
- Be sure to save your files as Illustrator files. Do not just export them.
- Organize your graphics into artboards. Doing so allows you to batch-export graphics more quickly and easily. Later in the chapter, you walk through a scenario in which multiple graphics are exported together.
Saving before exporting
 When you export Illustrator graphics to raster files, the resulting files can't be edited in Illustrator. That fact should seem alarming because it is. If all you do is create a graphic, export it to a JPEG, PNG, or TIFF file, and then close the file, you’ve lost the capability to edit that image, and you don’t want to do that!
The solution is to be sure to save your file as an Illustrator file in addition to exporting it to a raster image. To return to the example I shared about creating multiple web graphics for social media, I typically create an Illustrator document with a separate artboard for each graphic (the meme, the Twitter card, the Facebook graph, a Google ad, and so on). Before I do anything else, I save that file as an Illustrator file. Then (and only then) I export each artboard to a separate raster file to turn over to my client. And when the client comes back to me with edits and changes, I make those changes to the saved Illustrator file, and then re-export the set of raster files.
Batch-exporting artboards
Why did I emphasize organizing your content onto artboards before exporting? Many projects, ranging from sets of web icons to different packaging elements, involve exporting individual graphics from a larger Illustrator document to unique raster files.
Illustrator has useful features that allow you to batch-export multiple files easily. But those features are much more accessible if your graphics are organized in separate artboards. See Chapter 2 for details on how to avail yourself of multiple artboards.
Defining raster dimensions
Defining an illustration’s size in a unit of measurement such as dots per inch (DPI) or pixels per inch (PPI) is usually not a critical or defining issue when working with pure vector graphics. Why not? Because vector graphics are infinitely scalable and don’t degrade even when reproduced at very large sizes. So whether a vector image is destined for a billboard or a palm card, the same Illustrator file can be used for both.
However, dimensions do matter when you export artwork to raster files. When you export to raster formats, you convert Illustrator’s define curves and fills into bunches of dots (for printers) or pixels (for screens). If you create a 1-inch square graphic, for example, with a resolution of 72 ppi (pixels per inch), that image will look fine if reproduced as a 1-inch square graphic on a screen with 72 dpi resolution. But the same image file will look awful when enlarged to a 10-inch square on that same screen.
I hate to get bogged down in math (grab your calculator at this point if it helps), but consider what happens when you turn a 1-inch-square, 72 ppi (or dpi in print terms) file over to a print designer who is creating a 300 dpi image. To maintain the integrity of the image, the print designer would have to reduce the image dimensions to less than ¼ inch. Or, if he uses the image as a 1-inch graphic, the resolution will degrade to less than 25 percent of the intended display.
In this scenario, it would have been appropriate to size the image at three times 72 pixels wide and high (216 pixels).
How do you know what resolution is appropriate for raster output for any particular project? And how do you set up your document to produce that resolution? The answer: Ask. Ask the team to whom you're handing over your graphic what resolution and image size they require.
Defining raster resolution
In Chapter 2, I explain how to define raster resolution when you create a document. In short, you choose File ⇒ New, click the More Settings button in the New Document dialog that opens, and select one of three options in the Raster Effects drop-down: 72 ppi, 150 ppi, or 300 ppi. This selection determines at which resolution the raster effect will be initially rendered.
That workflow usually works for print and screen projects, and allows you to easily apply one of three resolutions to raster output.
When you export a file to a raster format, however, you can specify any resolution, including 600 ppi. The details vary significantly depending on which raster format you export to, and which of Illustrator’s three output pathways you use, so I walk you through the details later in the sections of this chapter that zero in on exporting to PNG, JPEG, and TIFF files.
Navigating Illustrator’s Raster Output Options
Choices, choices, choices! Literally, I’m talking about three choices. To summarize what I've explained to this point, when you export files from Illustrator to raster formats, you choose the following:
- The output format (such as PNG, JPEG or TIFF)
- The output dimensions (as I just discussed, this choice requires knowing the resolution of the target project)
- The output resolution (in dpi for print or ppi for web)
But wait! You have another set of choices, choices, choices. Illustrator provides three basic pathways for exporting graphics to raster output: Export for Screens; Save for Web (Legacy); and just plain Export As. These three options have significant overlap in what they do. However, in general, the following notes guide you in choosing an option:
- Export for Screens is the go-to option when you're exporting multiple artboards or assets. For example, if you're exporting multiple images for both iOS (Apple) and Android apps, you can batch the process with Export for Screens.
- Export As is used for exporting to print output formats. In this chapter, I focus on the TIFF format, but you can use Export As to send files to Photoshop’s PSD files and other raster formats. Export As allows you to batch-export multiple artboards too.
- Save for Web (Legacy) has features specific to saving images for the web, such as side-by-side previews of image quality and estimates of download times. Save for Web (Legacy) does not allow you to batch multiple artboards.
In the following section, I demonstrate using all three of these pathways: Export for Screens for PNG and JPEG; Export as for TIFF; and Save for Web (Legacy) for GIF output.
Exporting to Specific Raster Formats
Illustrator provides dozens of options for exporting files. For example, if you're collaborating with engineers and architects, Illustrator can export your artwork to different versions of DXF or DWG formats with different options. In this chapter, I focus on three of the most widely applicable formats: PNG, JPEG and TIFF. If you need to export to other formats, you will find the steps I take you through in this chapter applicable. For specific details and options, go to https://helpx.adobe.com/illustrator/using/exporting-artwork.html.
To summarize the three file types I focus on here: TIFF files are for print only. JPEG files are compressed, resulting in smaller file sizes of variable quality because they lose file data as they are compressed (they are lossy). PNG images are not compressed, retain more data, and usually are of significantly larger file size than JPEG files. PNG format supports transparency, but JPEG does not.
Exporting PNGs
Scenario: You're tasked with exporting a set of graphics to be used in advertisements for appliances targeted for Apple mobile devices. A web or app designer requires three versions of each graphic — low-resolution, medium-resolution, and high-resolution — to implement responsive design and match image resolution to different versions and screen resolutions of mobile Apple devices. High-resolution screens will display the highest resolution images, lower-resolution screens will display medium resolution images, and older smartphones and tablets will display the low-resolution version of the images. The images should have transparent backgrounds, so the background color or pattern of the web page shows through.
To batch-export a set of graphics as multiple-resolution PNGs, follow these steps:
-
Make sure each object is in an individual artboard, and the artboard is sized to fit the object. For the smoothest workflow, name each artboard with a name that will translate well into a web-compatible file name.
Avoid spaces and special characters, except the underscore and hyphen, when naming the files. I explain how to define, name, and size artboards in Chapter 2. Your canvas should look something like the one in Figure 17-5.

FIGURE 17-5: Graphics organized into artboards for export.
- Choose File ⇒ Export ⇒ Export for Screens and select the Artboards tab in the Export for Screens dialog.
- In the Select section, click All.
- In the Export To section of the dialog, navigate to a folder to which you will export the files.
-
To easily access the files after they're generated, select the Open Location after Export option.
This option will open your operating system’s file manager with the exported files accessible.
-
To organize all the versions of the exported files into subfolders, select the Create Sub-folders option.
Because I am creating three versions of each file, I am organizing them into subfolders to turn over to my web design team.
-
Use the Add Scale button in the Formats section to add different resolution outputs.
In Figure 17-6, I added two additional resolutions, 2x for medium resolution screens and 3x for high resolution screens.
The iOS (Apple mobile devices) and Android (mobile devices using the Android operating system) buttons in the Format section of the Export for Screens dialog automatically generate sets of output recommended for developers and designers targeting those respective environments.
FIGURE 17-6: Defining three output resolutions for a set of exported artboards.
- To define anti-aliasing, interlacing, and transparency, click the gear icon (settings) in the Format section.
- In the Format Settings dialog that opens, leave PNG set as the file format.
- If you have type in your artwork, choosing Type Optimized (Hinted) will reduce jaggies that sometimes occur when type is converted to raster graphics.
-
 To have graphics fade in from lower resolution to higher resolution in screens, rather than dropping in from top to bottom, select the Interlaced check box. I strongly recommend this option for all web graphics.
 - Transparent background color is the default selection, and allows the web page background to show through. Alternative options are to choose a white or black background, as shown in Figure 17-7.
-
Click Save Settings to return to the Export for Screens dialog, and then click the Export Artboard button.
All artboards are exported into distinct folders for the low-resolution, medium-resolution (2x), and high-resolution (3x) versions of the PNG files. The files are ready to turn over to a web or app designer.

FIGURE 17-7: Defining settings for export to PNG.
Optimizing JPEGS
Scenario: A client needs a file, small in dimensions and file size, to post at ETSY to promote her beautiful artwork. You will resize a large poster to a thumbnail-sized JPEG that will load quickly in any device, even with a poor Internet connection.
The Save for Web (Legacy) dialog is still here after being branded Legacy a few versions of Illustrator back because it's handy for specific tasks, especially fine-tuning JPEGs for export. The following steps guide you through the basic settings in that dialog:
-
Prepare your artwork for export to JPEG by making sure the artwork you're exporting is in a single, selected artboard.
See details on placing artwork in an artboard and selecting an artboard in Chapter 2.
-
Choose File ⇒ Export ⇒ Save for Web (Legacy).
The Save for Web dialog appears.
- To compare before-and-after versions of your file, choose the 2-Up tab at the top of the dialog, and experiment with different compression settings:
- To avoid exporting objects that are not part of the illustration, select the Clip to Artboard check box.
- Because you're exporting to JPEG, select JPEG from the File drop-down.
- Select the Progressive check box so the exported image fades in instead of dropping down line by line as it loads in a browser.
- In the Image Size section of the dialog, enter the dimensions of the target output.
- If your image is mostly art, choose Art Optimized in the drop-down in the Image Size area of the dialog. If it's mostly Type, choose Type Optimized. If your artwork is equal parts type and art, choose None.
- Because JPEG images do not export with transparent backgrounds, choose a background color from the Matte drop-down.
- Use trial-and-error to see if the Browser Dither check box, which manages the transition from your artwork to the web page background, improves the appearance of the edges of your artwork.
- Experiment with different quality output by using the drop-down (with options ranging from Low to Maximum) or by entering percent values in the quality slider. As you adjust quality, note the output preview quality on the right side of the 2-Up screen and the output file size, as shown in Figure 17-8.
- When you arrive at the optimal relationship between export quality (which you want to maximize) and file size (which you want to minimize for faster loading), click Save.
- In the dialog that opens, navigate to a folder and choose Save again.
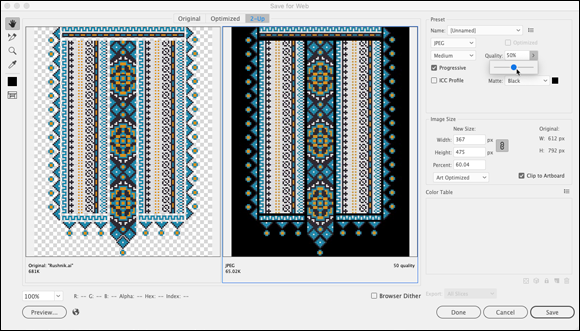
FIGURE 17-8: Experimenting with export quality and file size for a JPEG.
Handing off TIFF artwork to print
Scenario: You have designed a poster to be featured in a full-color commercially printed book using four-color printing. (For more on that process, see Chapter 2.) The publisher may want to have his or her own design team make some tweaks to the file, but the team isn’t Illustrator-fluent and works only in Photoshop. The publisher has specified that the file should be in desktop-publishing-friendly TIFF format. (File size is not an issue.)
The TIFF files are usually stored uncompressed, and because they aren’t downloaded into screens, file size usually isn’t an issue. Also, TIFF format files can store layers. TIFF images support printer-compatible CMYK.
Follow these steps to export artwork within one selected artboard to a TIFF file. (I explain how to place artwork in an artboard and select an artboard in Chapter 2.)
- Choose File ⇒ Export ⇒ Export As, navigate to a folder, and enter a file name in the dialog that appears.
- In the Format drop-down, choose TIFF (tif).
-
To not include stray objects or other artboards, select Use Artboards.
If you have an artboard selected, 1 appears in the Range box.
- Click Export to display the TIFF Options dialog, and choose a color model, resolution, anti-aliasing, and other options, as shown in Figure 17-9:
- Color Model: Determines the color model of the exported file. In most cases, for commercial printing, that will be CMYK.
- Resolution: Determines quality of the exported rasterized image. Higher resolution results in better quality.
-
Anti-Aliasing: Minimizes jagged edges in artwork but that is often not an issue for high-resolution print so unless your printer recommends this, don’t select it.
LZW Compression: Reduces file size without reducing image quality. This process is lossless.
Embed ICC Profile: Maintains color consistency between your screen and print output.
- Click OK to save the file.

FIGURE 17-9: Exporting a print project to TIFF.
Relying on Your Team
I close this chapter by repeating some essential advice: Start with output and rely on your output team. If you're working with animator or game designers, ask them what file format and resolution they need for raster artwork. The same goes for working with printers, app developers, or web designers.
Early in the process, make a connection with the team to whom you are handing off artwork. Printers often accept Illustrator files — but not always. Screen designers might accept Illustrator files, but translating an Illustrator file to a web-compatible raster isn’t their job.
Avoid hand-off breakdowns by working backward from your final output, establish communication from the beginning of your design process, and communicate.