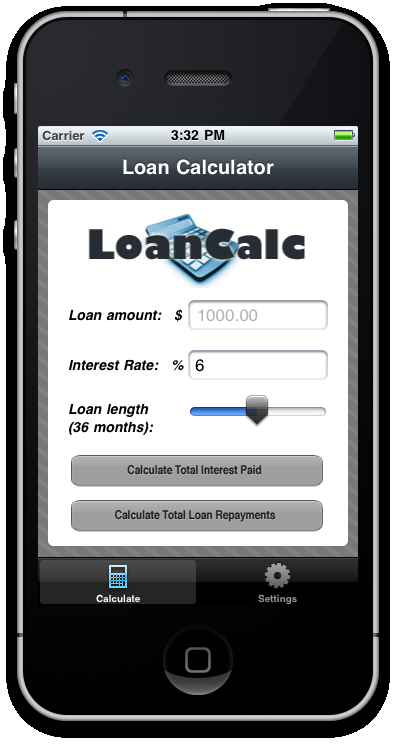
In any given app, you will find that creating buttons and capturing their click events is one of the most common tasks you will do. This recipe will show you how to declare a Button control in Titanium and attach the click event to it. Within that click event, we will perform a task and log it to the Info window in Titanium Studio.
This recipe will also demonstrate how to implement some of the default styling mechanisms available to you via the API.
The complete source code for this recipe can be found in the /Chapter 1/Recipe 8 folder.
Open up your app.js file and type in the following code. If you're following along with the LoanCalc app, this code should go after you created and added the TextField controls to the View:
//calculate the interest for this loan button
var buttonCalculateInterest = Titanium.UI.createButton({
   image: 'calculateInterestButton.png',
  id: 1,
  top: 255,
  width: 252,
  height: 32,
  left: 23
});

//add the event listener
buttonCalculateInterest.addEventListener('click', calculateAndDisplayValue);

//add the first button to our view
view.add(buttonCalculateInterest);

//calculate the interest for this loan button
var buttonCalculateRepayments = Titanium.UI.createButton({
   image: 'calculateRepaymentsButton.png',
  id: 2,
  top: 300,
  width: 252,
  height: 32,
  left: 23
});

//add the event listener
buttonCalculateRepayments.addEventListener('click',
                          calculateAndDisplayValue);

//add the second and final button to our view
view.add(buttonCalculateRepayments);
Now that we have created our two buttons and added their event listeners, let's extend the calculateAndDisplayValue() function to do some simple fixed interest mathematics and produce the results that we will log to the Titanium Studio console:
//add the event handler which will be executed when either of //our calculation buttons are tapped
function calculateAndDisplayValue(e)
{
   //log the button id so we can debug which button was tapped
  Ti.API.info('Button id = ' + e.source.id);

    if (e.source.id == 1)
    {
       //Interest (I) = Principal (P) times Rate Per Period
       //(r) times Number of Periods (n) / 12
       var totalInterest = (tfAmount.value * (interestRate /
       100) * numberMonths) / 12;

      //log result to console
      Ti.API.info(totalInterest);
    }
    else
    {
      //Interest (I) = Principal (P) times Rate Per Period (r)
      //times Number of Periods (n) / 12
      var totalInterest = (tfAmount.value * (interestRate /
      100) * numberMonths) / 12;

      var totalRepayments = Math.round(tfAmount.value) +
      totalInterest;

      //log result to console
      Ti.API.info(totalRepayments);
    }

} //end functionMost controls in Titanium are capable of firing one or more events, such as focus
, onload
, or as in our recipe, click. The click event is undoubtedly the one you will use more often than any other. In the previous source code, you'll note that in order to execute code from this event we are adding an event listener to our button, which has a signature of 'click'. This signature is a string and forms the first part of our event listener, the second part is the executing function for the event.
It's important to note that other component types can also be used in a similar manner. For example, an ImageView could be declared which contains a custom button image, and could have a click event attached to it in exactly the same way a regular button can.

