Intents are the Android terminology for an operation that is to be performed on the system. Most significantly, it is used for launching activities. The primary parameters of an intent are:
- The "action": A general action to be performed, such as
ACTION_VIEW - The "data": The data to operate the action on, such as database record or contact person data
In this recipe we are going to use intents in conjunction with Android's Notification Manager in order to create a local notification which will appear in our user's Android notification bar.
You will need the package identifier (in the format of com.yourcompany.yourapp—you can find it on the Edit tab in Titanium Studio) and the class name of your Android app. You can find the class name by opening the Build/Android folder in your project, and then opening the Android.manifest.xml file contained within. Under the application node you will find a section that looks like the following:
<activity
  android:name=".NativeapisActivity"
  android:label="NativeAPIs"
  android:theme="@style/Theme.Titanium"
  android:configChanges="keyboardHidden|orientation"
>
...
Your className property is a combination of your application identifier and the android:name attribute in the previous XML. In our case, this className property is com.boydlee.nativeapis.NativeapisActvitity.
With these two values written down, open your project's app.js file in your IDE and enter in the following code (deleting any existing):
//create root window
var win1 = Titanium.UI.createWindow();

if(Titanium.Platform.osname == 'android')
{
  var intent = Titanium.Android.createIntent({
    action: Titanium.Android.ACTION_MAIN,
    className: 'com.boydlee.nativeapis.NativeapisActivity',
    packageName: 'com.boydlee.nativeapis'
  });

  intent.addCategory(Titanium.Android.CATEGORY_LAUNCHER);

  var pending = Titanium.Android.createPendingIntent({
    activity: Titanium.Android.currentActivity,
    intent: intent,
    type:
    Titanium.Android.PENDING_INTENT_FOR_ACTIVITY,
    flags: Titanium.Android.FLAG_ACTIVITY_NEW_TASK
  });

  var notification =
  Titanium.Android.createNotification({
    contentIntent: pending,
    contentTitle: 'New Notification',
    contentText: 'Hey there Titanium Developer!!',
    tickerText: 'You have a new Titanium message...',
    ledARGB: 1,
    number: 1,
    when: new Date().getTime()
  });

  Ti.Android.NotificationManager.notify(1,
  notification);
}
//finally, open the window
win1.open();
When finished, run your application in the Android emulator to test it. Once your application has launched you should be able to then exit and pull down the Android notification bar to see the results.
In this recipe we are using intents and activities in conjunction with a notification message. The notification object itself is relatively simple. It takes in a number of parameters including the title and message of the notification, along with a badge number and when parameter (the datetime that the notification will show, which we have set to the default value 'now'). The ledARGB parameter is the color to flash on the device LED, which we have set to the device default.
You'll notice that we also added a category to our intent, using the addCategory method, such as intent.addCategory(Titanium.Android.CATEGORY_LAUNCHER);. In our example, we used CATEGORY_LAUNCHER, which means that our intent should appear in the Launcher as a top-level application.
Coupled with our notification is an object called pending. This is our intent, and that intent has been written in order to launch an activity. In our case, the activity is to launch our application again. You can also add URL properties to intents so that your application can launch specific code on re-entry.
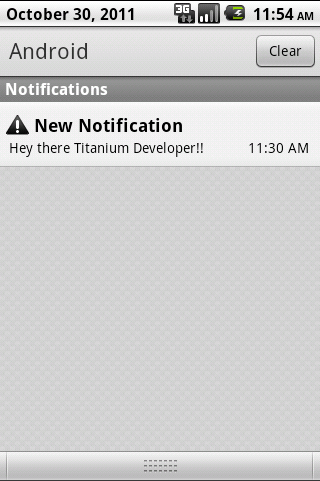
The following screenshot shows an example of our notification message in action: