Lesson 4
Use the Command-Line Interface
Goals
![]() Describe when the command-line interface is useful
Describe when the command-line interface is useful
![]() Use man (manual) pages to find more information about commands
Use man (manual) pages to find more information about commands
![]() Manipulate files in the command-line interface
Manipulate files in the command-line interface
Use the command-line interface (CLI) to access additional administrative functionality.
Reference 4.1 CLI Basics
The CLI includes these advantages:
![]() Additional administrative and troubleshooting options are available from the CLI. For example, the following apps have CLI equivalents that include additional options: System Information (system_profiler), Installer (installer), Software Update (softwareupdate), Disk Utility (diskutil), and Spotlight (mdfind). These are just a few instances, as nearly every administrative function has both a graphical and a command-line tool.
Additional administrative and troubleshooting options are available from the CLI. For example, the following apps have CLI equivalents that include additional options: System Information (system_profiler), Installer (installer), Software Update (softwareupdate), Disk Utility (diskutil), and Spotlight (mdfind). These are just a few instances, as nearly every administrative function has both a graphical and a command-line tool.
![]() From the CLI you have more access to the file system. For example, the Finder hides many files and folders that are visible in the CLI. Also, there are many file-system permissions settings that the Finder doesn’t display.
From the CLI you have more access to the file system. For example, the Finder hides many files and folders that are visible in the CLI. Also, there are many file-system permissions settings that the Finder doesn’t display.
![]() You can remotely log in to a Mac computer’s CLI using the Secure Shell (SSH) protocol. This remote access allows administrators to make changes at the command line without alerting the user to their work.
You can remotely log in to a Mac computer’s CLI using the Secure Shell (SSH) protocol. This remote access allows administrators to make changes at the command line without alerting the user to their work.
![]() By using the sudo command, any administrator can run commands as the System Administrator user, also known as root. This enables great administrative flexibility in the CLI. Read Reference 7.1, “User Accounts,” for more information about the root account.
By using the sudo command, any administrator can run commands as the System Administrator user, also known as root. This enables great administrative flexibility in the CLI. Read Reference 7.1, “User Accounts,” for more information about the root account.
![]() If you are comfortable with the CLI syntax, you can apply it to a command-line script. This enables you to automate repetitive tasks.
If you are comfortable with the CLI syntax, you can apply it to a command-line script. This enables you to automate repetitive tasks.
![]() If you combine CLI instructions with Apple Remote Desktop (ARD), you can remotely administer multiple, even thousands, of Mac computers simultaneously. ARD enables you to remotely send the same command to many Mac computers with one click. For more information about Apple Remote Desktop, go to www.apple.com/remotedesktop.
If you combine CLI instructions with Apple Remote Desktop (ARD), you can remotely administer multiple, even thousands, of Mac computers simultaneously. ARD enables you to remotely send the same command to many Mac computers with one click. For more information about Apple Remote Desktop, go to www.apple.com/remotedesktop.
Access the CLI
A shell is the first command that runs when you access the CLI. It displays the CLI. You can access the CLI in several ways:
![]() You can use Terminal. It’s in /Applications/Utilities/Terminal. Terminal has a customizable interface. It includes a tabbed interface for multiple command-line sessions, multiple split panes for viewing history, support for full-screen mode, and Touch Bar shortcuts.
You can use Terminal. It’s in /Applications/Utilities/Terminal. Terminal has a customizable interface. It includes a tabbed interface for multiple command-line sessions, multiple split panes for viewing history, support for full-screen mode, and Touch Bar shortcuts.
![]() At startup, press and hold Command-S to start a Mac that does not have the Apple T2 Security Chip in single-user mode. This mode starts the minimum system required to provide you with a command-line prompt so that you can enter commands to repair a Mac that can’t fully start up. Read more about single-user mode in Lesson 28, “Troubleshoot Startup and System Issues.”
At startup, press and hold Command-S to start a Mac that does not have the Apple T2 Security Chip in single-user mode. This mode starts the minimum system required to provide you with a command-line prompt so that you can enter commands to repair a Mac that can’t fully start up. Read more about single-user mode in Lesson 28, “Troubleshoot Startup and System Issues.”
![]() SSH remote login enables you to securely log in from a remote computer to access your Mac computer’s command line. SSH is a common standard, so you can use any operating system that supports SSH to remotely log in to your Mac.
SSH remote login enables you to securely log in from a remote computer to access your Mac computer’s command line. SSH is a common standard, so you can use any operating system that supports SSH to remotely log in to your Mac.
Work in the Command Line
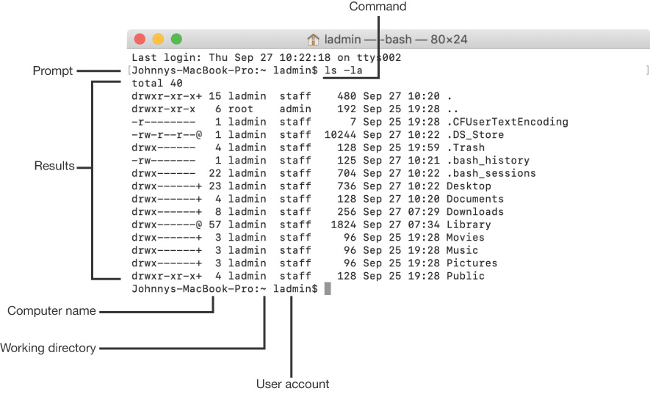
The first thing you’ll see at the command line is the prompt. The prompt indicates that you can enter a command. By default, the prompt shows you the name of the Mac you’re using, followed by where you are in the file system, followed by your current user account name, and ending with a $. The $ at the end of the prompt indicates that you’re using the standard Bash shell. Where you are in the computer’s file system is called the working directory, and it changes as you navigate through the file system.
At the prompt you enter your command string, often more than one word, and press Return to initiate or execute the command. An executing command will take over the Terminal window with a text interface, show the results of the command and return to the prompt, or perform some work and return to the prompt when complete. Many commands display results only if a problem occurs. Read what the command returns to make sure it doesn’t indicate a problem.
Some commands take time to execute and may not give a progress indication. If you don’t see a new prompt, generally assume your last command is still running.
Command String
The command string includes a few parts:
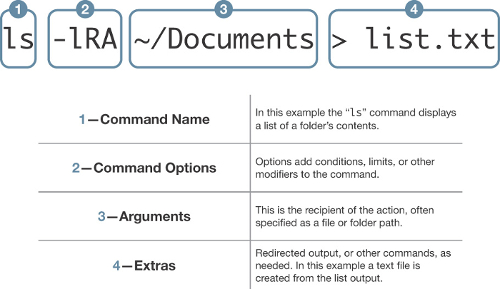
![]() Command name (1)—Some commands just need you to enter their name to execute.
Command name (1)—Some commands just need you to enter their name to execute.
![]() Command options (2)—After a command name, you might specify options (or flags) that change a command’s default behavior. Options might not be required and can be different for every command. Options start with one or two dashes to distinguish them from arguments. Many commands can include several single-letter options after a single dash. For example, ls -lA is the same as ls -l -A.
Command options (2)—After a command name, you might specify options (or flags) that change a command’s default behavior. Options might not be required and can be different for every command. Options start with one or two dashes to distinguish them from arguments. Many commands can include several single-letter options after a single dash. For example, ls -lA is the same as ls -l -A.
![]() Arguments (3)—After the command and its options, you typically specify an argument (or parameter), which is the item or items you want the command to modify. An argument is needed only if the command requires an item to act upon.
Arguments (3)—After the command and its options, you typically specify an argument (or parameter), which is the item or items you want the command to modify. An argument is needed only if the command requires an item to act upon.
![]() Extras (4)—Extras aren’t necessary, but they can enhance the capabilities of a command. For example, you could add items that redirect the command output, include other commands, or generate a document.
Extras (4)—Extras aren’t necessary, but they can enhance the capabilities of a command. For example, you could add items that redirect the command output, include other commands, or generate a document.
Command-Line Example
Here is an example in which the user Joan works on a Mac called MyMac and her working directory is Documents. She deletes an app called Junk inside the /Applications folder. Joan presses Return after she enters her command.
MyMac:Documents joan$ rm -R /Applications/Junk.app
MyMac:Documents joan$
In this example the command was entered and executed properly, and macOS returns to a new prompt. This is an example of a command that returns information only if it didn’t execute properly. The Mac will usually let you know if you entered something incorrectly by returning an error message or help text. macOS won’t prevent or warn you from entering a destructive command, such as accidentally deleting your home folder. Always double-check your typing.
Use Manual (man) Pages
When you want to learn more about a command, you enter man followed by the name of the command. Manual (man) pages include detailed information about commands and references to other commands. After you open a man page, use navigation shortcuts to move through it:
![]() Use the Up Arrow and Down Arrow keys to scroll.
Use the Up Arrow and Down Arrow keys to scroll.
![]() Use the Space bar to move down one screen at a time.
Use the Space bar to move down one screen at a time.
![]() Enter a slash (/) and a keyword to search through a man page.
Enter a slash (/) and a keyword to search through a man page.
![]() Exit the man page by typing q.
Exit the man page by typing q.
If you don’t know the name of the command you’re looking for, enter man -k and a keyword to search the database. For example, you enter man -k owner to return a short list of commands used for changing file and folder ownership, including the command chown.
Enter the apropos command and a search term like network, and commands that are related to network are displayed.
Reference 4.2 CLI Navigation
The command line is case-sensitive and requires that you use full filenames with filename extensions. For example, the CLI won’t locate the “itunes” app, but it will locate the “iTunes.app” app.
A path represents a file or folder’s location in the file system. For instance, Disk Utility’s file system path is /Applications/Utilities/Disk Utility.app. In the CLI, you use the pathname to navigate through the file system and to identify the location of items.
There are two types of file-system pathnames:
![]() Absolute pathnames are full descriptions of an item location, starting from the root (or beginning) of the system (startup) volume. An absolute path begins with a forward slash (/) to indicate the beginning of the file system. An example of the absolute path to the user Joan’s drop box folder is /Users/joan/Public/Drop Box, which means: Start from the startup volume; go to the Users folder, then to the joan subfolder, and then to the Public subfolder; and select the item named Drop Box.
Absolute pathnames are full descriptions of an item location, starting from the root (or beginning) of the system (startup) volume. An absolute path begins with a forward slash (/) to indicate the beginning of the file system. An example of the absolute path to the user Joan’s drop box folder is /Users/joan/Public/Drop Box, which means: Start from the startup volume; go to the Users folder, then to the joan subfolder, and then to the Public subfolder; and select the item named Drop Box.
![]() Relative paths are partial descriptions of an item location. They’re based on where you’re currently working in the file system. When you first open Terminal, your session starts at your home folder. The relative path from your home folder to your drop box is Public/Drop Box. This means: From where you are now, go into the Public subfolder, and select the item named Drop Box.
Relative paths are partial descriptions of an item location. They’re based on where you’re currently working in the file system. When you first open Terminal, your session starts at your home folder. The relative path from your home folder to your drop box is Public/Drop Box. This means: From where you are now, go into the Public subfolder, and select the item named Drop Box.
Navigate with Commands
You use three commands to navigate the file system: pwd, ls, and cd. Short for “print working directory,” pwd reports the absolute path of your current working location:
MyMac:~ joan$ pwd
/Users/joan
Short for “list,” ls lists the folder contents of your current working location. Enter a pathname following the ls command to list the contents of the specified item. The ls command has additional options for listing file and folder information that are covered throughout this lesson.
Short for “change directory,” cd is the command you use to navigate. Enter a pathname following the cd command to change your current working location to the specified folder. Entering cd without specifying a path returns you to your home folder.
Use Special Characters
You can use special characters at the prompt or in pathnames to save time and to be able to use special characters in filenames and pathnames.
Enter a space between command items to separate the items. If you don’t want the space character to separate items, use the backslash () before a space character.
MyMac:~ joan$ cd Public/Drop Box
MyMac:Drop Box joan$ pwd
/Users/joan/Public/Drop Box
Another way to enter filenames and paths with spaces is to surround filenames and paths with quotation marks:
MyMac:~ joan$ cd "Public/Drop Box"
MyMac:Drop Box joan$ pwd
/Users/joan/Public/Drop Box
You can drag and drop items from the Finder to Terminal. When you do this, Terminal enters an item’s absolute path with the appropriate backslash characters before spaces in names. Use the Tab key completion feature that’s built into the command line to automatically complete filenames and pathnames.
Other special characters include !, $, &, *, ;, |, , parentheses, quotes, and brackets. The Finder drag-and-drop and Tab key completion parse these characters. In the CLI you can enter a backslash before any special character to treat that special character as regular text rather than as a special character.
Use double periods (..) to indicate a parent folder. For example, if you are in your home folder at /Users/username, enter cd .. to navigate to the /Users folder.
Use the tilde (~) to indicate the current user home folder in a pathname. For example, say the current user’s drop box is in ~/Public/. Use the tilde to specify another user’s home folder. For example, ~jill/Public specifies Jill’s Public folder.
Use Tab Key Completion
Use Tab key completion to automatically complete filenames, pathnames, and command names. Tab key completion prevents you from making typos and verifies that the item you’re entering exists.
Here’s an example of Tab key completion. Start from your home folder by entering cd, then P, and then press the Tab key. The Terminal window will flash quickly and you may hear an audible alert, letting you know there is more than one choice for items that begin with “P” in your home folder. Press the Tab key again, and the Mac will display your two choices, Pictures and Public. Now, enter u after the initial P, and then press the Tab key again, and the Mac will automatically finish Public/ for you. Finally, enter D and press the Tab key one last time, and the computer will finish the path with Public/Drop Box/.
When completing a folder name, Tab key completion puts a forward slash (/) at the end. It assumes that you want to continue the path. Most commands ignore the trailing slash, but a few behave differently if it’s there. You should delete the / at the end of a path.
Tab key completion reads only into folders you have permission to access. You might run into issues trying to use this feature for items that are readable only by a root user.
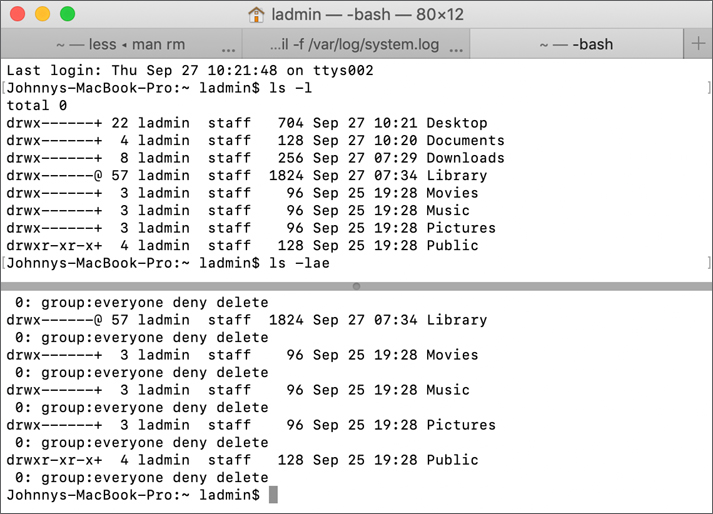
View Invisible Items
The CLI and the Finder hide many files and folders from view. The hidden items are often macOS support items. In the Finder, these items are set with a hidden file flag. The CLI ignores the hidden file flag and shows most hidden items. If you enter the ls command, you won’t see filenames that begin with a period. To see hidden items in long format at the command line, add the -a option to the -l option when you enter the ls command:
MyMac:~ joan$ ls -la
total 16
drwxr-xr-x+ 14 joan staff 448 Oct 26 01:06.
drwxr-xr-x 5 root admin 160 Oct 26 00:54 ..
-r-------- 1 joan staff 7 Oct 26 00:54 .CFUserTextEncoding
drwx------ 5 joan staff 160 Oct 26 01:06 .Trash
-rw------- 1 joan staff 139 Oct 26 01:06 .bash_history
drwx------ 6 joan staff 192 Oct 26 11:29 .bash_sessions
drwx------+ 4 joan staff 128 Oct 26 01:06 Desktop
drwx------+ 3 joan staff 96 Oct 26 00:54 Documents
drwx------+ 3 joan staff 96 Oct 26 00:54 Downloads
drwx------@ 54 joan staff 1728 Oct 26 09:17 Library
drwx------+ 3 joan staff 96 Oct 26 00:54 Movies
drwx------+ 3 joan staff 96 Oct 26 00:54 Music
drwx------+ 3 joan staff 96 Oct 26 00:54 Pictures
drwxr-xr-x+ 4 joan staff 128 Oct 26 00:54 Public
Any item with a period at the beginning of its name is hidden by default in the CLI and the Finder. These items are created and used by macOS. Leave them alone.
Navigate to Other Volumes
In the CLI, the system volume is also known as the root volume, and it’s identified by a lone forward slash. Other nonroot volumes appear as part of the main file system in the Volumes folder.
Use Marks and Bookmarks
Add marks and bookmarks as you work; then use them to quickly navigate through lengthy Terminal output.
Select a line in Terminal, then choose Edit > Marks > Mark to add a mark. By default, Mark > Automatically Mark Prompt Lines is selected, so each prompt line sets a mark. Then you can choose Edit > Select Between Marks, or choose Edit > Navigate > Jump to Previous Mark, or just press Command-Up Arrow.
Choose Edit > Marks > Mark as Bookmark to add a bookmark. Then choose Edit > Bookmarks to see a list of bookmarks. Choose a bookmark to jump to that bookmark.
Reference 4.3 Manipulate Files in the CLI
When you manage and edit files in the CLI, you have more options—and more chances to make mistakes.
File Examination Commands
Use the cat, less, file, and find commands to locate and examine files. Read the man pages for these commands to find out more about them.
Short for concatenate, the cat command displays a file sequentially to Terminal. The syntax is cat, followed by the path to the item you want to view. Use the cat command to append to text files using the >> redirect operator. In the following example, Joan uses the cat command to view the content of two text files in her Desktop folder, TextDocOne.txt and TextDocTwo.txt. Then she uses the cat command with the >> redirect operator to append the second text file to the end of the first text file.
MyMac:~ joan$ cat Desktop/TextDocOne.txt
This is the content of the first plain text document.
MyMac:~ joan$ cat Desktop/TextDocTwo.txt
This is the content of the second plain text document.
MyMac:~ joan$ cat Desktop/TextDocTwo.txt >> Desktop/TextDocOne.txt
MyMac:~ joan$ cat Desktop/TextDocOne.txt
This is the content of the first plain text document.
This is the content of the second plain text document.
Use the less command to view long text files. It enables you to browse and search the text. Enter less, followed by the path to the item you want to view. The less interface is the same interface you use to view man pages, so the navigation shortcuts are the same.
The file command determines a file type based on its content. This is useful for identifying files that don’t have a filename extension. The syntax is file, followed by the path to the file you’re trying to identify. In the following example, Joan uses the file command to locate the file type of two documents in her Desktop folder: PictureDocument and TextDocument:
MyMac:~ joan$ code-b>ls Desktop/
PictureDocument.tiff TextDocument.txt
MyMac:~ joan$ file Desktop/PictureDocument
Desktop/PictureDocument.tiff: TIFF image data, big-endian
MyMac:~ joan$ file Desktop/TextDocument
Desktop/TextDocument.txt: ASCII English text
Use the find command to locate items based on search criteria. The find command doesn’t use Spotlight, but it does enable you to set search criteria and use filename wildcards. (Filename wildcards are covered in the next section.) The syntax is find, followed by the beginning path of the search, then an option defining your search criteria, and then the search criteria within quotation marks. In the following example, Joan uses the find command to locate picture files with a .tiff filename extension in her home folder by searching only for files with names that end in .tiff:
MyMac:~ joan$ find /Users/joan -name "*.tiff"
/Users/joan/Pictures/FamilyPict.tiff
/Users/joan/Pictures/MyPhoto.tiff
When you use the find command to start a search at the root of the system drive, you should also use the -x option to avoid searching the /Volumes folder.
To use Spotlight from the command line, enter the mdfind command. The syntax is mdfind followed by your search criteria.
Use Wildcard Characters
You can use wildcard characters to define pathname and search criteria. Here are three of the most common wildcards:
![]() Use the asterisk (*) wildcard to match any string of characters. For instance, entering * matches all files, and entering *.tiff matches all files that end in .tiff.
Use the asterisk (*) wildcard to match any string of characters. For instance, entering * matches all files, and entering *.tiff matches all files that end in .tiff.
![]() Use the question mark (?) wildcard to match a single character. For example, entering b?ok matches book but not brook.
Use the question mark (?) wildcard to match a single character. For example, entering b?ok matches book but not brook.
![]() Use square brackets ([ ]) to define a range of characters. For example, [Dd]ocument locates items named Document or document, and doc[1-9] matches files named doc#, where # is a number between 1 and 9.
Use square brackets ([ ]) to define a range of characters. For example, [Dd]ocument locates items named Document or document, and doc[1-9] matches files named doc#, where # is a number between 1 and 9.
You can combine filename wildcards. Consider a collection of five files with the names ReadMe.rtf, ReadMe.txt, read.rtf, read.txt, and It’s All About Me.rtf. Using wildcards to specify these files:
![]() *.rtf matches ReadMe.rtf, read.rtf, and It’s All About Me.rtf
*.rtf matches ReadMe.rtf, read.rtf, and It’s All About Me.rtf
![]() ????.* matches read.rtf and read.txt
????.* matches read.rtf and read.txt
![]() [Rr]*.rtf matches ReadMe.rtf and read.rtf
[Rr]*.rtf matches ReadMe.rtf and read.rtf
![]() [A-Z].* matches ReadMe.rtf, ReadMe.txt, and It’s All About Me.rtf
[A-Z].* matches ReadMe.rtf, ReadMe.txt, and It’s All About Me.rtf
Use Recursive Commands
When you direct a command to execute a task on an item, it touches only the item you specify. If the item you specify is a folder, the command won’t navigate inside the folder to execute the command on the enclosed items. If you want a command to execute on a folder and its contents, you must tell the command to run recursively. Recursive means “Execute the task on every item inside every folder starting from the path I specify.” Many commands accept -r or -R as the option to indicate that you want the command to run recursively.
Modify Files and Folders
The mkdir, touch, cp, mv, rm, rmdir, vi, and nano commands enable you to modify files and folders.
Short for “make directory,” mkdir is used to create folders. The syntax is mkdir, followed by the paths of the folders you want to create. The –p option tells mkdir to create intermediate folders if they don’t already exist in the paths you specify. In the following example, Joan uses the mkdir command with the -p option to create a folder called Private with two folders inside it called Stocks and Bonds:
MyMac:~ joan$ mkdir -p Private/Stocks Private/Bonds
Use the touch command to update the modification date of a specified item. The touch command creates an empty file if it doesn’t exist.
Use the cp (copy) command to copy items from one place to another. The syntax is cp, followed by the path to the original item, ending with the destination path for the copy. If you specify a destination folder but no filename, cp makes a copy of the file with the same name as the original. If you specify a destination filename but not a destination folder, cp makes a copy in your current working folder. Unlike the Finder, the cp command won’t warn you if your copy replaces an existing file. It deletes the existing file and replaces it with the copy you told it to create.
Use the mv (move) command to move items from one place to another. The syntax is mv, followed by the path to the original item, ending with the new destination path for the item. The mv command uses the same destination rules as the cp command.
Use the rm (remove) command to permanently delete items. There is no Trash in the CLI. The rm command removes items forever. The syntax is rm, followed by the paths of the items you wish to delete.
Use rmdir (remove directory) to permanently delete folders. The rmdir command removes folders forever. The syntax is rmdir, followed by the paths of the folders you want to delete. The rmdir command can remove a folder only if it’s empty. You can use the rm command with the recursive option, -R, to remove a folder and all its contents.
Use the vi (visual) command to edit files in the CLI. vi is one of several built-in text editors in the CLI. Enter vi and the pathname to a file to edit it. macOS redirects vi to a newer version, vim. For basic functions you probably won’t notice the difference. Like the less command, vi takes over the Terminal window with the contents of the text file. When you first open vi, it’s in command mode and you must type predefined characters to tell vi which operation you want to complete. Use the arrow keys to browse a file in command mode. Enter the letter a to begin editing the text. In command mode, vi inserts new text wherever the cursor is. Use the arrow keys to move the cursor keys. Press the Esc (Escape) key to reenter vi command mode. After you’re in command mode, enter ZZ to save changes and quit vi.
The text editor nano features a list of commonly used keyboard shortcut commands at the bottom of the screen.
Reference 4.4 Manage macOS from the CLI
In this section, you look at commands that enable you to access items normally restricted by file-system permissions.
Use the su (substitute user identity or super user) command to switch to another user account. Enter su followed by the short name of the user you want to switch to and enter the account password. The password won’t display. The command prompt changes, indicating that you have the access privileges of a different user. Enter who –m to verify your currently logged-in identity. You remain logged in as the substitute user until you quit Terminal or enter the exit command. In the following example, Joan uses the su command to change her shell to Johnny’s account, and then she will exit back to her account:
MyMac:~ joan$ who -m
joan ttys001 Aug 20 14:06
MyMac:~ joan$ su johnny
Password:
bash-3.2$ who -m
johnny ttys001 Aug 20 14:06
bash-3.2$ exit
exit
MyMac:~ joan$ who -m
joan ttys001 Aug 20 14:06
Use sudo
Precede a command with sudo (substitute user do) to tell macOS to run the command using root account access. You must have an administrator user account to use sudo. sudo works even when the root user account is disabled in the graphical interface. Be careful with sudo and limit access to it.
System Integrity Protection (SIP) prevents changes to parts of macOS, even for the root user. Read Reference 15.2, “System Integrity Protection,” for more information about the specific resources that are protected.
If, as an administrator user, you need to execute more than one command with root account access, you can temporarily switch the entire command-line shell to have root level access. Enter sudo -i and your password to switch the shell to root access. You remain logged in as the root user until you quit Terminal or enter the exit command.
Reference 4.5 Command-Line Tips and Tricks
Here are some command-line tips that help you customize your experience and save time:
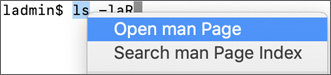
![]() Control-click a command and choose Open man Page to read more about that command.
Control-click a command and choose Open man Page to read more about that command.
![]() If your Mac has a Touch Bar, type a command and press the button for that command in the Touch Bar to view the man page. The figure shows the Touch Bar displaying a button for the defaults command man page.
If your Mac has a Touch Bar, type a command and press the button for that command in the Touch Bar to view the man page. The figure shows the Touch Bar displaying a button for the defaults command man page.
![]() Use Tab key completion when you enter file paths.
Use Tab key completion when you enter file paths.
![]() Drag and drop files and folders from the Finder to Terminal to automatically enter their locations at the command line.
Drag and drop files and folders from the Finder to Terminal to automatically enter their locations at the command line.
![]() Type open. (“open” followed by a space, followed by a period) at the prompt to open your current command-line location in the Finder.
Type open. (“open” followed by a space, followed by a period) at the prompt to open your current command-line location in the Finder.
![]() Explore Terminal preferences (from the menu bar, choose Terminal > Preferences or press Command-Comma) to customize the look and feel of your command line.
Explore Terminal preferences (from the menu bar, choose Terminal > Preferences or press Command-Comma) to customize the look and feel of your command line.
![]() To cancel a command or clear your current command entry, use Control-C.
To cancel a command or clear your current command entry, use Control-C.
![]() You can edit commands before submitting. The Left and Right Arrow keys and the Delete key work as you would expect.
You can edit commands before submitting. The Left and Right Arrow keys and the Delete key work as you would expect.
![]() At the command prompt, use the Up Arrow and Down Arrow keys to view and reuse your command history. This includes editing old commands before rerunning them. Enter the history command to see your recent command history.
At the command prompt, use the Up Arrow and Down Arrow keys to view and reuse your command history. This includes editing old commands before rerunning them. Enter the history command to see your recent command history.
![]() To clear the Terminal screen, enter the clear command or press Control-L.
To clear the Terminal screen, enter the clear command or press Control-L.
![]() To move the cursor to the beginning of the current line, press Control-A.
To move the cursor to the beginning of the current line, press Control-A.
![]() To move the cursor to the end of the current line, press Control-E.
To move the cursor to the end of the current line, press Control-E.
![]() To move the cursor forward one word, press Esc-F.
To move the cursor forward one word, press Esc-F.
![]() To move the cursor back one word of the line, press Esc-B.
To move the cursor back one word of the line, press Esc-B.
![]() To move the cursor to a location in a command string, Option-click where you’d like the cursor to be.
To move the cursor to a location in a command string, Option-click where you’d like the cursor to be.
![]() Use the inspector to view and manage running processes, and edit window titles and background colors. To open the inspector, press Command-I. To send a command to a process, select it, click the action pop-up menu, then choose a command from the Signal Process Group.
Use the inspector to view and manage running processes, and edit window titles and background colors. To open the inspector, press Command-I. To send a command to a process, select it, click the action pop-up menu, then choose a command from the Signal Process Group.
For more information about Terminal, read Terminal Help at support.apple.com/guide/terminal/welcome.
Exercise 4.1 Command-Line Navigation
![]() Prerequisite
Prerequisite
![]() You must have created the Local Administrator account (Exercise 3.1, “Configure a Mac for Exercises”).
You must have created the Local Administrator account (Exercise 3.1, “Configure a Mac for Exercises”).
In this exercise, you use commands to navigate the file system, to view items that aren’t visible from the Finder, and to access the manual (man) pages that tell you about commands.
View Your Home Folder
If necessary, log in as Local Administrator.
Click Launchpad in the Dock.
In the Search field at the top of the screen, enter Terminal.
Click Terminal.
A new Terminal window opens.
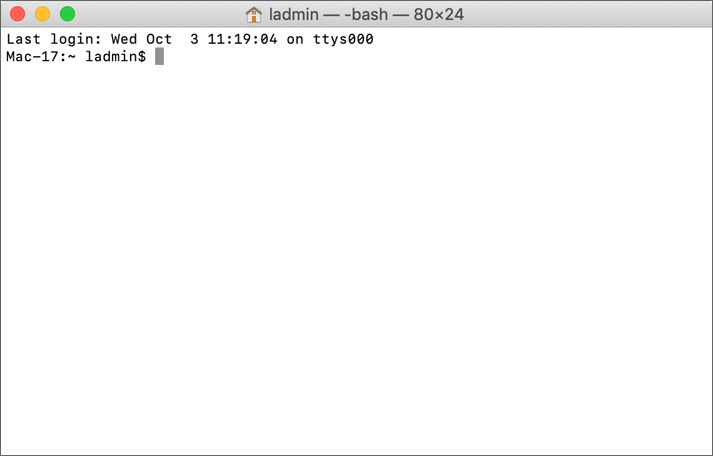
The second line you see includes your computer and user name followed by a prompt—for example:
Mac-17:~ ladmin$
In this example, Mac-17 is the name of the Mac you logged in to. The colon separates the computer name from the path to your current working directory. The path is ~ (the tilde [~] is shorthand for your home folder). After the space, you see the name of the logged-in user. The $ is the prompt.
At the prompt, type ls and press Return.
You will see output that looks something like this, followed by another prompt:
Desktop Downloads Movies Pictures
Documents Library Music Public
Switch to the Finder. If you don’t see a Finder window that’s open, go to File > New Finder Window or press Command-N.
Select ladmin’s home folder in the Finder sidebar and compare the contents of the home folder in the Finder and Terminal.
With the exception of the Library folder, what you see in Terminal is the same as in the Finder. (User Library folders are hidden in the Finder by default; see Reference 14.1, “Examine Hidden Items.”)
Switch back to Terminal and type ls -A (lowercase LS followed by space, a hyphen, and an uppercase A) at the prompt.
In general, the command-line environment is case-sensitive. For example, ls –a isn’t the same as ls -A.
You will see some extra files in the list that begin with a period. Files beginning with a period are hidden in directory listings unless you ask for them by entering ls -A. The Finder doesn’t show files beginning with a period (sometimes called dot-files).
Examine and Change Your Current Working Directory
Think of your current working directory as the place you are in the file system. When you open a new Terminal window, your default working directory is your home folder. Use the cd command to change your current working directory.
At the prompt, type pwd.
The period (.) ends the sentence and isn’t part of the command, so don’t type it. This book tells you if a trailing “.” is part of the command. Also, press Return at the end of each step, unless otherwise instructed.
You will see:
/Users/ladmin
This is where Local Administrator’s home folder exists in the file system. It’s the folder you’re “in” in this Terminal window.
At the prompt, type cd Library.
This changes your current working directory to the Library folder inside your home folder.
This command uses a relative path. A relative path means “Start in my current working directory.”
Your prompt changes to something like this:
Mac-17:Library ladmin$
The path component of the prompt indicates the folder you are in, not the entire path.
The cd command changed your working directory without providing feedback. A command that completes and doesn’t need to provide feedback will exit silently. If you get an error message, you should investigate its cause before continuing.
At the prompt, type pwd. Terminal displays:
/Users/ladmin/Library
You changed to the Library folder that was inside your previous working directory.
Type ls to view what files and folders are in this Library folder.
At the prompt, type cd /Library. Note the / that precedes Library this time.
At the prompt, type pwd. You will see output like this:
/Library
This is a different folder.
A path that starts with a leading / is an absolute path. It means “Start at the root folder and navigate from there.” A path that doesn’t start with a leading / is a relative path. It means “Start in your current working directory and navigate from there.” For more information on file system structure, see Reference 15.1, “macOS File Resources.”)
Enter ls to view the files and folders that are in this Library folder.
There is some overlap in the item names in this Library and the one in ladmin’s home folder, but the names aren’t entirely the same.
At the prompt, type cd and a space character. Don’t press the Return key.
Terminal enables you to drag and drop items from the Finder to Terminal and have the path to the items appear in the command line.
In this part of the exercise, you use the Finder to locate a folder you want to use as your working directory in Terminal.
Switch to the Finder.
When you don’t know exactly what you are looking for, it’s sometimes faster and easier to find a file or folder in the Finder.
Open a new Finder window if necessary.
Click Macintosh HD in the sidebar.
Open the Users folder.
Drag and drop the Shared folder to Terminal.
Terminal fills in the path (/Users/Shared). Macintosh HD doesn’t appear in the path that Terminal fills in.
The Finder shows you volume names to make locating a particular volume easier. Terminal doesn’t show volume names in the same way.
Switch to Terminal and press Return.
Type pwd at the prompt.
You are in the Shared folder.
Read About ls in the Man Pages
In Terminal, you can read the details about commands using the man command.
Open Terminal.
At the prompt, type man ls.
This opens the man page for the ls command.
Each man page is divided into various parts. The number in parentheses on the top line indicates in which section of the manual this command is documented. In this case, ls is documented in section 1, which is for general-use commands. Next you see the name of the command and a terse summary of what the command does: “list directory contents.” The synopsis is supposed to be a formal representation of how to use the command. Anything contained in square brackets is optional. The synopsis isn’t always completely accurate. For example, a few options for ls are mutually exclusive of each other, but this synopsis does not indicate that. Options or switches (which change the behavior of a command) immediately follow the command, and arguments (which tell the command what to operate on) follow options or switches. The description, which describes the various uses of the command, follows the synopsis.
Type q to quit viewing the man page for ls.
At the prompt, enter man man.
Read about the man command.
You can also Control-click, or on a MacBook Pro with Touch Bar, tap the icon for a man page to open it.
When you are done, type q to exit.
Exercise 4.2 Manage Files and Folders with Commands
![]() Prerequisite
Prerequisite
![]() You must have created the Local Administrator account (Exercise 3.1, “Configure a Mac for Exercises”).
You must have created the Local Administrator account (Exercise 3.1, “Configure a Mac for Exercises”).
In this exercise, you learn to copy, move, rename, and delete files and folders with commands.
Create Files
If you aren’t logged in as Local Administrator, log in now.
Open TextEdit.
TextEdit is in your Dock if you performed Exercise 3.3, “Download Participant Materials.” If it isn’t in your Dock, you can find it in /Applications.
In the TextEdit menu bar, choose Format > Make Plain Text, or press Command-Shift-T.
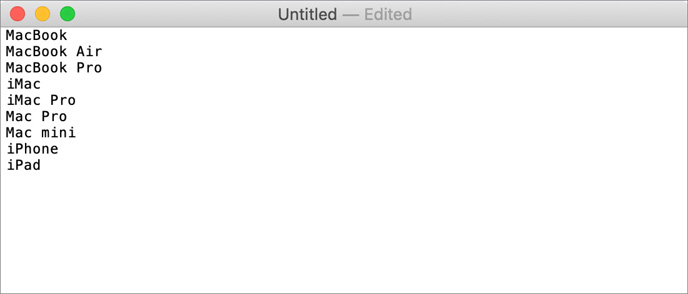
Add the following names to the yet Untitled (default) TextEdit document:
MacBook
MacBook Air
MacBook Pro
iMac
iMac Pro
Mac Pro
Mac mini
iPhone
iPad
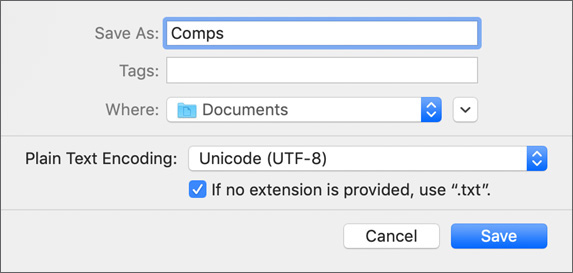
From the TextEdit menu bar, choose File > Save and name the document Comps.
Leave the document in the Documents folder.
Close the Comps.txt document window.
Open a new document in TextEdit and change the format to Plain Text.
Save and name the new document Empty. Leave the document in the Documents folder.
Quit TextEdit.
Copy and Move Files and Create a Folder
Switch to or open Terminal.
Enter cd ~/Documents to change to the Documents folder.
Enter ls to view the files in the Documents folder.
When you save a plain text file from TextEdit, the program adds the filename extension “.txt” to it.
Enter cp to make a copy of Comps.txt and rename it MacModels.txt.
Mac-17:Documents ladmin$ cp Comps.txt MacModels.txt
Many commands that take a source and a destination list the source first.
Enter less to view both files.
MacModels.txt is an exact copy of Comps.txt.
Mac-17:Documents ladmin$ less MacModels.txt
Mac-17:Documents ladmin$ less Comps.txt
When you are done, type q to exit.
Create a Folder and Copy a File to It
Create a new folder in the Documents folder:
Mac-17:Documents ladmin$ mkdir AppleInfo
Because AppleInfo is a relative path, the folder is created in the Documents folder.
Enter cp to copy MacModels.txt into AppleInfo (don’t forget to try Tab key completion):
Mac-17:Documents ladmin$ cp MacModels.txt AppleInfo
Enter ls to view the contents of AppleInfo:
Mac-17:Documents ladmin$ ls AppleInfo
Fix a Naming Error
The text list in MacModels.txt includes a couple of items that are not technically Mac computers. Let’s rename the file and clean up the extra copies.
Remove the Comps.txt file from the Documents folder and the MacModels.txt file from the AppleInfo folder:
 Mac-17:Documents ladmin$ rm Comps.txt AppleInfo/MacModels.txt
You entered the command once to delete both files. The command line doesn’t have an undo function. Any change you make is permanent.
Move the MacModels.txt file into the AppleInfo folder using the mv command:
Mac-17:Documents ladmin$ mv MacModels.txt AppleInfoEnter cd to change your working directory to AppleInfo.
Enter mv to rename the MacModels.txt file to AppleHardware.txt.
Mac-17:AppleInfo ladmin$ mv MacModels.txt AppleHardware.txt
You can also move and rename a file in one command:
$ mv MacModels.txt AppleInfo/AppleHardware.txt
Remove a Folder
Change your working directory back to the Documents folder. You can do so in one of three ways:
Use the absolute path /Users/ladmin/Documents. Use the home folder shortcut ~/Documents. Use the relative path (..).The .. notation refers to the parent directory of the current directory. Because your current working directory is /Users/ladmin/Documents/AppleInfo, .. refers to /Users/ladmin/Documents.
Occasionally, you see the .. notation in the middle of a path instead of at the beginning—for example, /Users/ladmin/Documents/../Desktop. It still has the same meaning, so in this example, it refers to Local Administrator’s Desktop folder.
Similarly, a single . refers to the current directory or location in the path.
Each directory contains a reference to both itself and its parent. These are visible if you use ls -a (note the lowercase a instead of the uppercase A you used previously).
Move the AppleHardware.txt file to Documents and rename it AppleHardwareInfo.txt.
Don’t press the Return key until you enter AppleHardwareInfo.txt.
Mac-17:Documents ladmin$ mv AppleInfo/AppleHardware.txt AppleHardwareInfo.txt
The path AppleHardwareInfo.txt is relative to your current working directory, so this step moves AppleInfo/AppleHardware.txt to the current working directory (Documents) and renames it AppleHardwareInfo.txt.
Enter rmdir to remove the AppleInfo directory:
Mac-17:Documents ladmin$ rmdir AppleInfo
rmdir succeeds because AppleInfo is empty. rmdir removes only folders that are empty. Enter rm –r to remove a folder that contains files:
Mac-17:Documents ladmin$ rm -r AppleInfo
Create and Edit a Text File
macOS includes several command-line text editors. In this exercise, you use the nano editor to create and edit a file.
Enter nano to create a new file named fruit.txt:
Mac-17:Documents ladmin$ nano fruit.txt
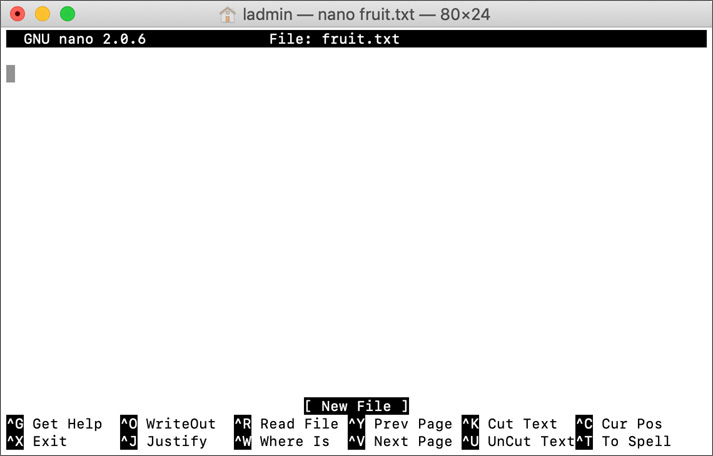
Enter the following words in the file on separate lines. Press Return at the end of each line.
apple
pineapple
grapefruit
pear
banana
blueberry
strawberry
Press and hold the Control key and press and release X (Control-X) to quit nano.
You’ll see “Save modified buffer (ANSWERING ‘No’ WILL DESTROY CHANGES)?”
Enter Y.
You’ll see “File Name to Write: fruit.txt.”
Press Return.
nano saves your file in the Documents folder inside your home folder, or ~/Documents, and exits, returning you to the prompt.
Quit Terminal.