Lesson 19
Manage Files
Goals
![]() Use Launch Services and Quick Look to open files
Use Launch Services and Quick Look to open files
![]() Describe how Launch Services uses the app database
Describe how Launch Services uses the app database
![]() Preview files with Quick Look and the Preview pane
Preview files with Quick Look and the Preview pane
![]() Learn how to browse document versions and go back to an older version in apps that support Auto Save and Versions
Learn how to browse document versions and go back to an older version in apps that support Auto Save and Versions
![]() Open documents that were saved to iCloud
Open documents that were saved to iCloud
![]() Save documents to iCloud
Save documents to iCloud
![]() Optimize local storage to reclaim space on the system volume
Optimize local storage to reclaim space on the system volume
In this lesson you learn about tools that help you manage documents, beginning with Launch Services and continuing with Quick Look for previewing most document types. Then you learn about Auto Save, Versions, and document management in iCloud. You see how macOS attempts to resume documents and apps. Finally, you learn how macOS can help you optimize storage to reclaim space on your system volume.
Reference 19.1 Open Files
In macOS, you double-click a file in the Finder or select a file in the Finder and choose File > Open to open it. When you do this, you also tell macOS to launch the appropriate app for the file. macOS uses Launch Services to do this. Launch Services uses a filename extension to know which app to open.
A filename extension is a string of characters preceded by a period (.) at the end of a filename. For example, filename.jpg is a file with a .jpg extension.
Joint Photographic Experts Group (JPEG) is a format for compressing many file types. Sometimes there can be more than one filename extension that indicates a file type. For example, a JPEG file can have the filename extension .jpg or .jpeg.
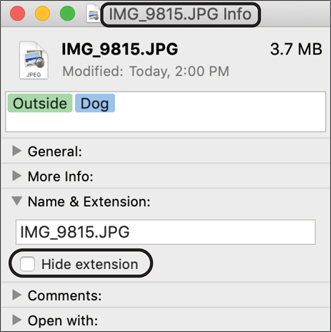
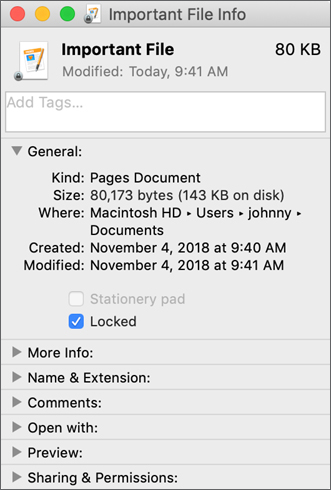
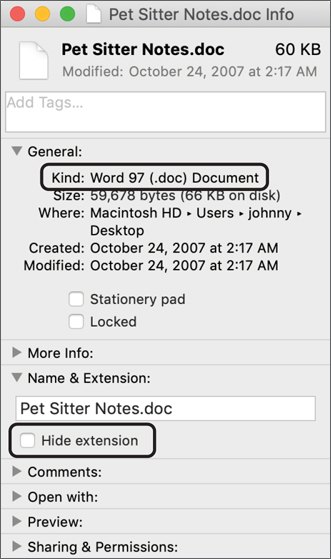
By default, the Finder hides filename extensions. If you want to see them, select a file, choose File > Get Info, and click the disclosure triangle to display the Name & Extension information. In the following screenshot, the “Hide extension” option is deselected for the file, so its filename extension isn’t hidden. The name that’s displayed at the top of the Info window changes too.
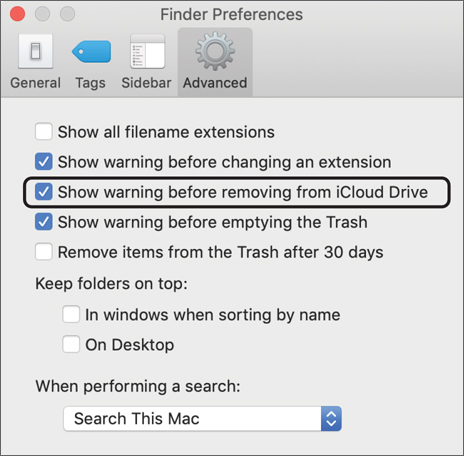
You can choose Finder > Preferences, click the Advanced button, and select the checkbox next to “Show all filename extensions” to see filename extensions for all documents.
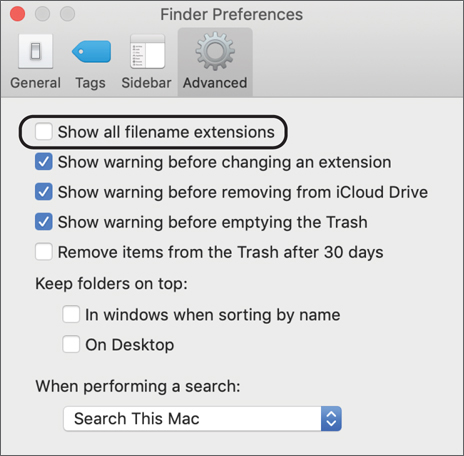
If you choose to show all filename extensions in the Finder, you override the individual file attribute that hides a filename extension.
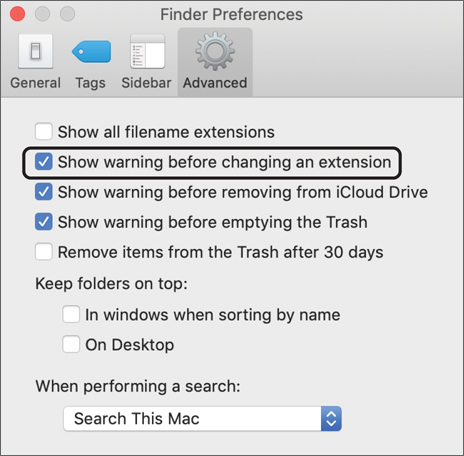
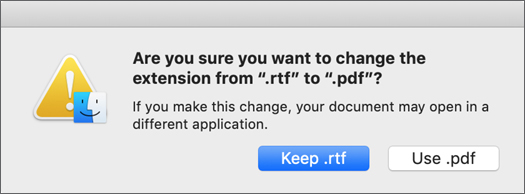
If you leave the option “Show warning before changing an extension” selected in the Finder preferences, you’ll get a warning before you try to make a filename extension change or remove a filename extension. This might prevent you from accidentally changing a file extension.
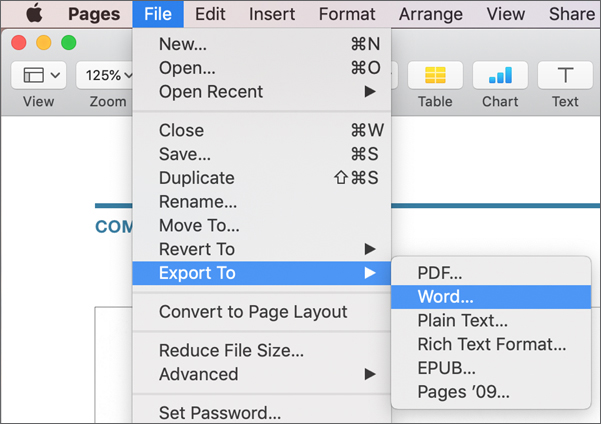
If you need to change the file type of an existing file, use an app to export the file as a different type. For example, in Pages, you can use File > Export To and choose a different file type.
App Registration
When you try to open a file, Launch Services reads from a database of apps and file types to determine the correct app for the file type. When it finds a match, it caches it. So when you try to open the file again, Launch Services can quickly find the match. After you startup or log in, a background process scans for new apps and updates the database. The Finder and Installer track new apps and add their supported file types to the database.
If macOS displays a message that there is no app to open a file, you probably don’t have the correct app for the file. Launch Services maps many common file types to Preview and TextEdit if the appropriate app is missing. For example, Numbers or Microsoft Excel spreadsheets open in Preview; Pages and Microsoft Word documents open in TextEdit.
With Quick Look you can preview many common file types, even without having the appropriate apps installed. This includes Pages, Keynote, Numbers, and Microsoft Office documents. Quick Look details are covered later in this lesson in the section “Preview Documents with Quick Look.”
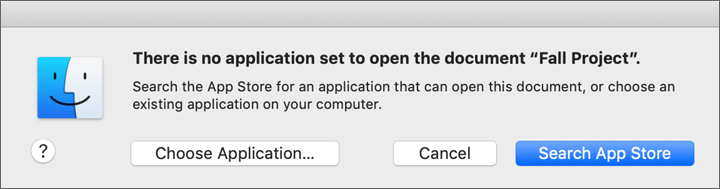
If Preview, or other apps, can’t open a file, change Launch Services settings to force the files to open in an appropriate app, as outlined in the following section. Launch Services might not have an app set to use for the file type. If you try to open a file type that isn’t stored in the Launch Services database, macOS prompts you to find an app that supports the file in the App Store.
Manage Launch Services
If you prefer to open a file with an app different than that file type’s default app, you can override the Launch Services default app settings for any file type. To override the default app settings for a file, use the Info or Inspector window in the Finder. Using the Info window is detailed in Lesson 13, “Manage Permissions and Sharing.”
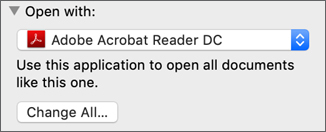
After you select the files for which you want to change Launch Services settings and open the Inspector, click the “Open with” disclosure triangle to reveal the default app selected by Launch Services. To change just the selected files’ default app, select another app from the menu. This information is saved to the files’ metadata and defines Launch Services settings only for the selected items.
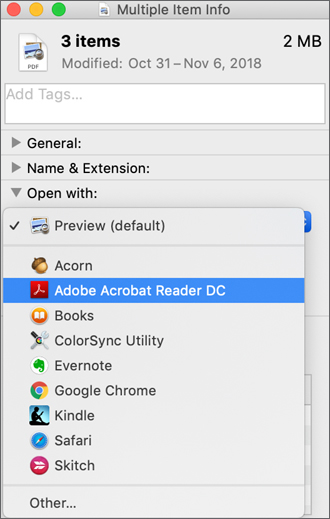
To change the default app for all files of the type of files selected, select the app you want to define as the default, and then click the Change All button.
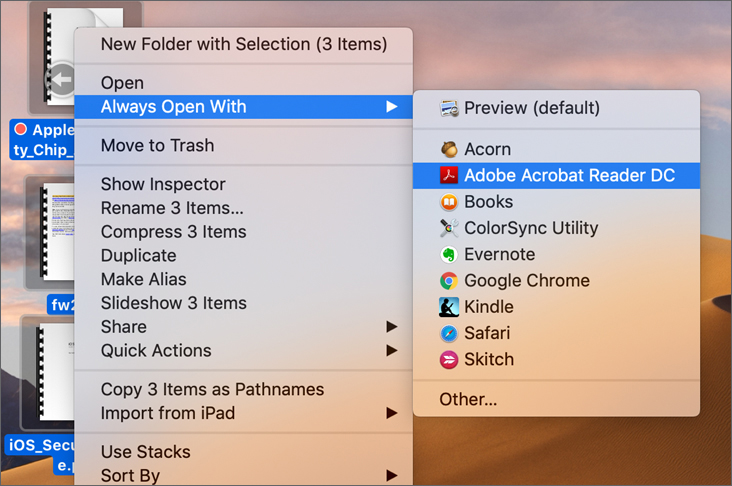
You can also modify Launch Services settings in the Finder. Control-click the selected files and then choose Open With from the shortcut menu. Press and hold the Option key to change the menu command to Always Open With.
This setting is saved per user, so one user’s app preferences don’t override another’s. A user’s custom Launch Services settings are saved to the com.apple.LaunchServices.plist preference file in each user’s ~/Library/Preferences folder.
Preview Documents with the Finder Preview Pane
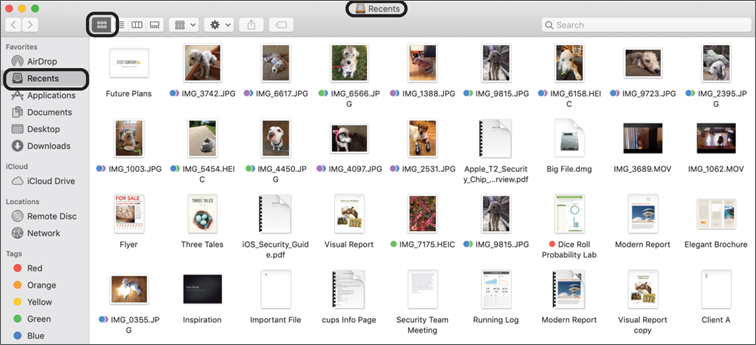
By default, when you open a new Finder window, it opens a folder named Recents, which displays files you’ve recently opened. By default, the Finder shows items in this folder as icons.
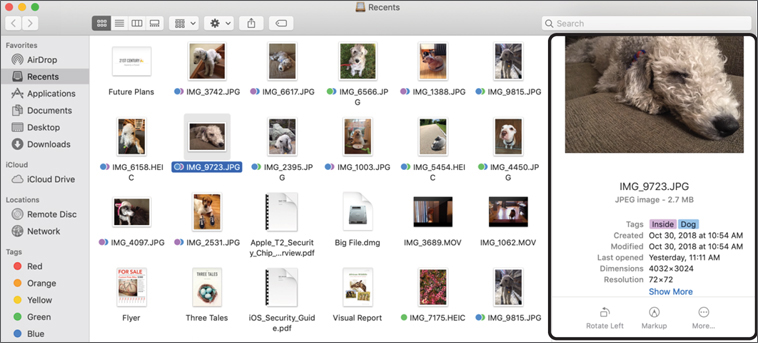
The Preview pane in the Finder is a new feature of macOS Mojave. You can use the Finder Preview pane to get a view of more information about a selected file, including:
![]() A preview of the contents of a document or image
A preview of the contents of a document or image
![]() A list of the metadata for the file (metadata is covered in detail in Reference 16.1, “File-System Metadata”)
A list of the metadata for the file (metadata is covered in detail in Reference 16.1, “File-System Metadata”)
![]() Quick Actions buttons for the selected file if available
Quick Actions buttons for the selected file if available
If you don’t see the Preview pane on the right side of the Finder window, choose View > Show Preview (or press Shift-Command-P). The following figure illustrates the Preview pane.
To change how the Finder displays items in the selected Finder window, you can click the View menu and choose any of the following:
![]() as Icons
as Icons
![]() as List
as List
![]() as Columns
as Columns
![]() as Gallery
as Gallery
Or you can click the icons, list, columns, or gallery buttons in the Finder toolbar.

The Finder automatically displays the Preview pane when you show items in columns or in a gallery. But you can also show the Preview pane when viewing items in the Finder as icons or as a list. To change how the Finder displays a window, choose View > Show View Options (or press Command-J). The options vary depending on whether you’re viewing as icons, in a list, in columns, or in a gallery.
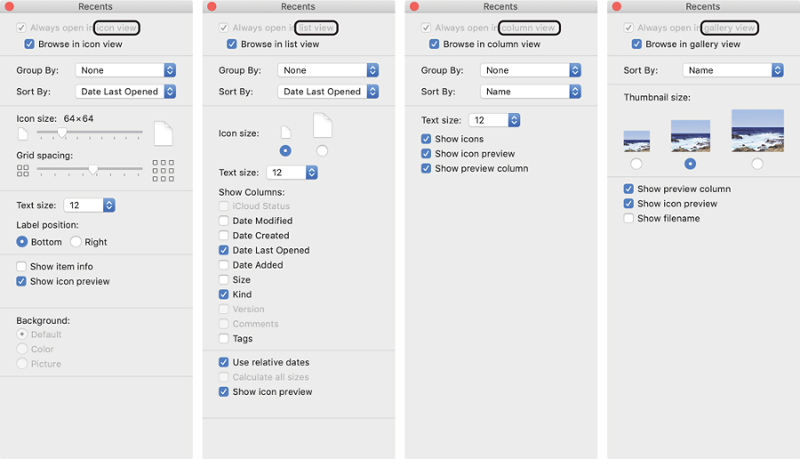
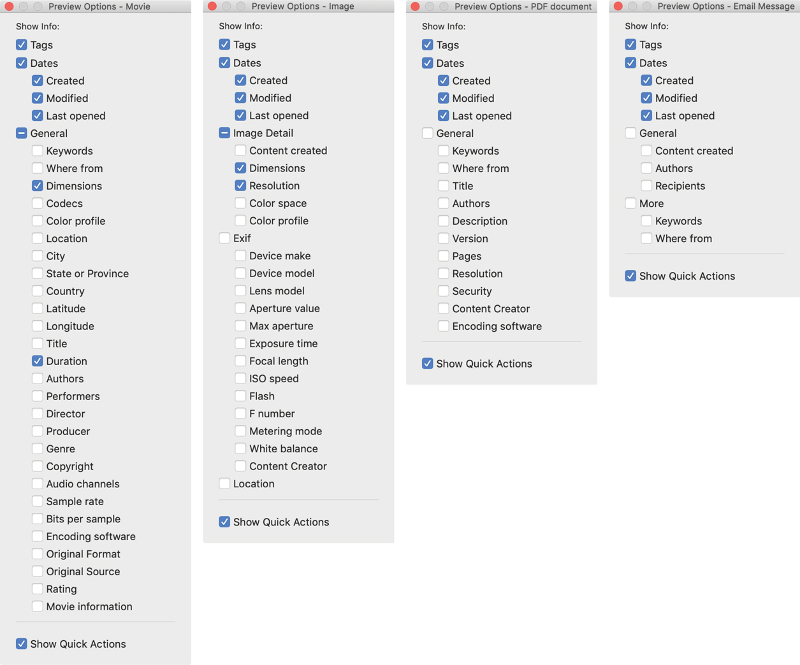
If the Finder displays the Preview pane, you can choose View > Show Preview Options to control whether the Preview pane shows Quick Actions and to select the metadata that the Preview pane shows for the type of file selected. The following figure displays a few kinds of file types.
Preview Documents with Quick Look
Quick Look enables you to preview most file types without opening additional apps or when you don’t have the appropriate apps installed.
You can open and close Quick Look previews by selecting a file and pressing the Space bar in the following contexts:
![]() In the Finder (you can also press Command-Y instead of the Space bar)
In the Finder (you can also press Command-Y instead of the Space bar)
![]() In the Time Machine restore interface
In the Time Machine restore interface
![]() In most Open and Save browser dialogs
In most Open and Save browser dialogs
![]() In Mail
In Mail
![]() In active printer queues
In active printer queues
![]() In any app that supports Quick Look
In any app that supports Quick Look
After you open Quick Look, macOS keeps the Quick Look preview window open in the Finder until you close the Quick Look preview window. If you select another file, the Finder changes the Quick Look preview to the file you selected. If you select an audio or video file, Quick Look automatically plays it and displays a progress bar at the bottom of the Quick Look window.
The Quick Look close button is in the upper-left corner of a preview window. Press the Space bar (or Command-Y) to dismiss a Quick Look preview. You can drag an edge of a Quick Look window to resize it. Click the Full Screen button (which looks like twin arrows that point away from each other) at the top left of a preview window to view the full screen, then the click Exit Full Screen button (which looks like twin arrows pointing toward each other). Press Option-Command-Y to open one or more selected items in a slide show.
Quick Look provides the Finder with the previews that the Finder displays when you view files on your desktop and when you view files in a Finder window.
Quick Look Plug-ins
Quick Look previews file types using plug-ins. Each Quick Look plug-in previews specific file types. Many Quick Look plug-ins are included in macOS by default. Apple and third-party developers create additional plug-ins to expand the Quick Look preview capabilities.
Included Quick Look plug-ins enable you to:
![]() Preview audio or video file that can be decoded by QuickTime
Preview audio or video file that can be decoded by QuickTime
![]() Preview graphics files, including digital camera files, PDF files, EPS files, and standard graphics files
Preview graphics files, including digital camera files, PDF files, EPS files, and standard graphics files
![]() Preview productivity files, including standard text files, script files, and files you create with Pages, Numbers, Keynote, and Microsoft Office suites
Preview productivity files, including standard text files, script files, and files you create with Pages, Numbers, Keynote, and Microsoft Office suites
![]() Preview Internet-centric files, including mailboxes, Messages transcripts, and web archives
Preview Internet-centric files, including mailboxes, Messages transcripts, and web archives
Quick Look plug-ins are stored in Library folders. Built-in Apple Quick Look plug-ins are in /System/Library/QuickLook/ and /Library/QuickLook/. Install third-party plug-ins in /Library/QuickLook/ or ~/Library/QuickLook/ depending on who must access them.
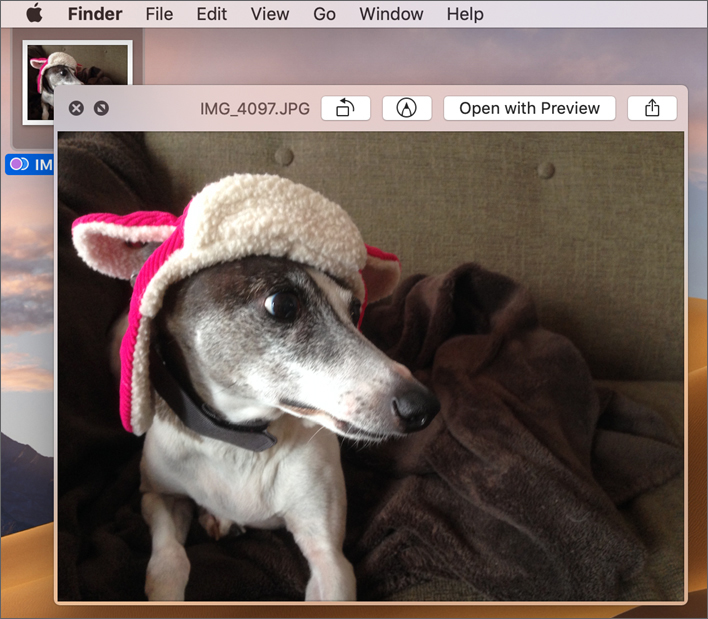
Quick Look Window
In the right portion of the title bar of the Quick Look window, you’ll find other options for previewing a selected item. The options vary depending on the type of file you’ve selected and the app extensions installed on your Mac. Read Reference 20.2, “Manage App Extensions,” for more information on adding app extensions to the Share menu.
For many types of apps, the Quick Look window displays the “Open with App” button, where App is the name of the default app for the selected file. For ZIP files, instead of “Open with App,” the button displays Uncompress. For a disk image file, the button displays Mount.
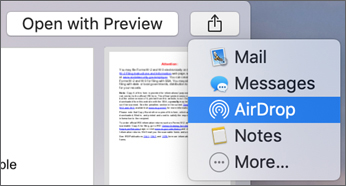
The Share button (the box with the up-pointing arrow) enables you to share a document.The list of options in the Share menu varies depending on the file type of the item you’re previewing and the installed app extensions. Find out more about managing app extensions in Lesson 20, “Manage and Troubleshoot Apps.”
If you’ve selected multiple files when you open Quick Look, use the arrow keys to navigate and preview the items adjacent to the original previewed item in the Finder. If the previewed file has multiple pages, you’ll be able to scroll through the document. In some cases—Keynote presentations, for example—Quick Look shows a thumbnail preview of each slide, enabling you to scroll through the thumbnails.
If you select multiple items to preview, the Quick Look window allows some basic slideshow features with buttons at the top left of the window. To start a slide show of files in the Finder, select the files, Control-click, press the Option key, then choose Slideshow number of selected files Items.
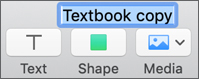
For some files, the Quick Look window also displays one or more Quick Actions, like in the following figure. Quick Actions are discussed in the next section.

Quick Actions
The Quick Actions feature enables you to perform tasks right from the Finder without opening another app. There are three ways to use Quick Actions in the Finder:
![]() Click the Quick Action that appears in the Quick Look window.
Click the Quick Action that appears in the Quick Look window.
![]() Click the Quick Action that appears in the Preview Pane.
Click the Quick Action that appears in the Preview Pane.
![]() Control-click a file, then choose Quick Actions.
Control-click a file, then choose Quick Actions.
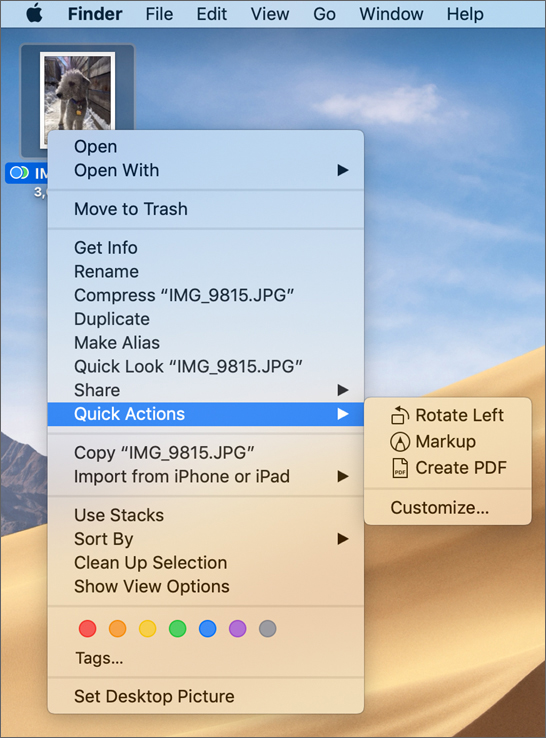
The list of actions available in Quick Actions depends on the kind of file or files you selected. The built-in Quick Actions include:
![]() Rotate an image or movie—Rotate Left is the default command, but you can press and hold the Option key to change it to Rotate Right.
Rotate an image or movie—Rotate Left is the default command, but you can press and hold the Option key to change it to Rotate Right.
![]() Mark up a document or image—After you choose Markup, the file opens in a Markup window. Read more about the Markup window in the next section.
Mark up a document or image—After you choose Markup, the file opens in a Markup window. Read more about the Markup window in the next section.
![]() Trim a movie or audio file—Choose Trim, and then use the yellow handles in the trimming bar. Click Play to test your changes, then click Revert, or click Done to save your changes and close the window. After you click Done, macOS prompts you to replace your original file, cancel, or save your changes in a new clip.
Trim a movie or audio file—Choose Trim, and then use the yellow handles in the trimming bar. Click Play to test your changes, then click Revert, or click Done to save your changes and close the window. After you click Done, macOS prompts you to replace your original file, cancel, or save your changes in a new clip.
![]() Create a PDF—macOS creates a new PDF file from one or more selected files when you choose Create PDF. Enter a filename, or you can just leave the suggested name. Press Return or click somewhere else when you’re done entering the filename.
Create a PDF—macOS creates a new PDF file from one or more selected files when you choose Create PDF. Enter a filename, or you can just leave the suggested name. Press Return or click somewhere else when you’re done entering the filename.
![]() Customize—Choose Customize to open the Extensions preferences in System Preferences. You can use Automator to create custom workflows for Quick Actions. Learn more about the Extensions preferences in Lesson 20.
Customize—Choose Customize to open the Extensions preferences in System Preferences. You can use Automator to create custom workflows for Quick Actions. Learn more about the Extensions preferences in Lesson 20.
Mark Up Files
Quick Look and Quick Actions enable you to mark up files without opening a separate app. If you’re viewing a file in Quick Look or the Finder Preview pane, click the Markup tool (looks like the tip of a marker). If you’re using Quick Actions, choose Markup. The collection of tools offered by Markup depends on the type of file you’re working on. The collection can include:
![]() Sketch—Sketch a shape with a single stroke. macOS replaces your stroke with a shape if it recognizes your stroke as a standard shape, and you can select your original stroke.
Sketch—Sketch a shape with a single stroke. macOS replaces your stroke with a shape if it recognizes your stroke as a standard shape, and you can select your original stroke.
![]() Draw—Draw a shape with a single stroke. This only appears if you have a Force Touch trackpad. Use a firmer press to draw a heavier, darker line.
Draw—Draw a shape with a single stroke. This only appears if you have a Force Touch trackpad. Use a firmer press to draw a heavier, darker line.
![]() Shapes—Click the Shape button, select a shape, and then drag the shape where you want it. Use the blue handles to resize the shape. Use the green handles to change the shape. Select the Loupe tool to magnify an area. Select the Highlight tool, and then use the blue handles to modify the highlighted area.
Shapes—Click the Shape button, select a shape, and then drag the shape where you want it. Use the blue handles to resize the shape. Use the green handles to change the shape. Select the Loupe tool to magnify an area. Select the Highlight tool, and then use the blue handles to modify the highlighted area.
![]() Text—Enter text, then drag the text where you want it.
Text—Enter text, then drag the text where you want it.
![]() Highlight Selection—Highlight selected text.
Highlight Selection—Highlight selected text.
![]() Sign—Create a new signature with a trackpad or your Mac computer’s built-in camera, and select one of your signatures to insert it. Then you can drag and resize it.
Sign—Create a new signature with a trackpad or your Mac computer’s built-in camera, and select one of your signatures to insert it. Then you can drag and resize it.
![]() Shape Style—Change the thickness and type of lines in a shape, and add or remove a shadow to the lines in the shape.
Shape Style—Change the thickness and type of lines in a shape, and add or remove a shadow to the lines in the shape.
![]() Border Color—Change the color of the lines in the shape.
Border Color—Change the color of the lines in the shape.
![]() Fill Color—Change the color inside the shape.
Fill Color—Change the color inside the shape.
![]() Text Style—Change the font, color, size, and characteristics of text.
Text Style—Change the font, color, size, and characteristics of text.
![]() Rotate Right—Rotate to the right.
Rotate Right—Rotate to the right.
![]() Rotate Left—Rotate to the left.
Rotate Left—Rotate to the left.
![]() Crop
Crop ![]() —Drag the corner handles until only the area you want to keep is shown within the frame’s border. You can also drag the frame to reposition it. When you’re ready, click the button with the “Crop” text label.
—Drag the corner handles until only the area you want to keep is shown within the frame’s border. You can also drag the frame to reposition it. When you’re ready, click the button with the “Crop” text label.
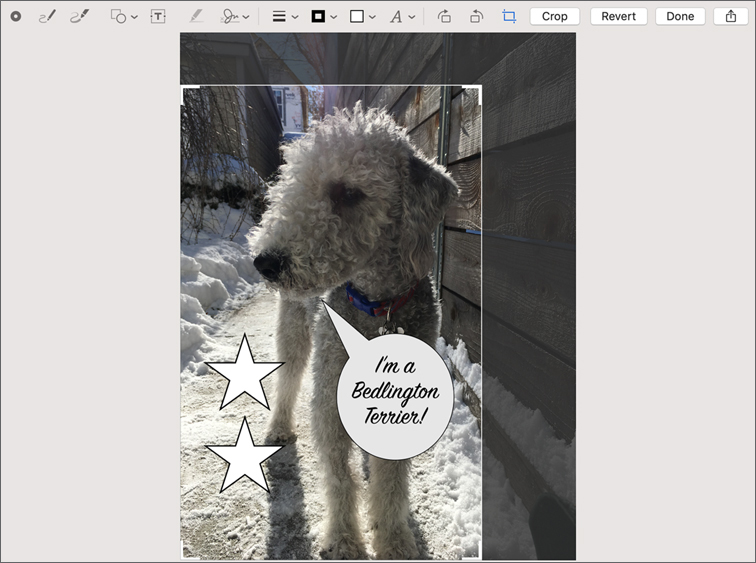
When you’re finished with your markup, click Done, or click Revert to discard your changes. Once you click Done, you can’t undo your changes.
Reference 19.2 Save Documents
macOS apps save files for you, and they can also maintain a version history of your files. In this section, you learn how Auto Save and Versions work together. These two features work with Locked and Resume to maintain the current state of your work environment even if you log out or restart your Mac.
About Auto Save and Versions
For apps that support Auto Save, after you save a file the first time, the app doesn’t ask you again if it should save changes. If you want to use the file in another app or share it with other users, you don’t have to remember to save the latest version of the file. The file you see in the Finder is the same as the file you see in the app. The location where you first saved a file is always the latest version.
Apps that support Auto Save also support document versions. This provides an environment where macOS maintains a history of changes for any document. You can return a document to a previous state with a few clicks, or you can navigate to an earlier version of a document and copy elements to the latest version.
You can access a document version history using an interface similar to the Time Machine Restore interface. The document version histories are saved in a hidden folder named .DocumentRevisions-V100 at the root of the disk containing the original document. The most recent version of a document is always saved to its original location, and you can copy or share it with other apps or users immediately after you make a change.
For information about how restore versions of Pages, Numbers, and Keynote documents, read Apple Support article 205411, “Restore previous versions of iWork documents.”
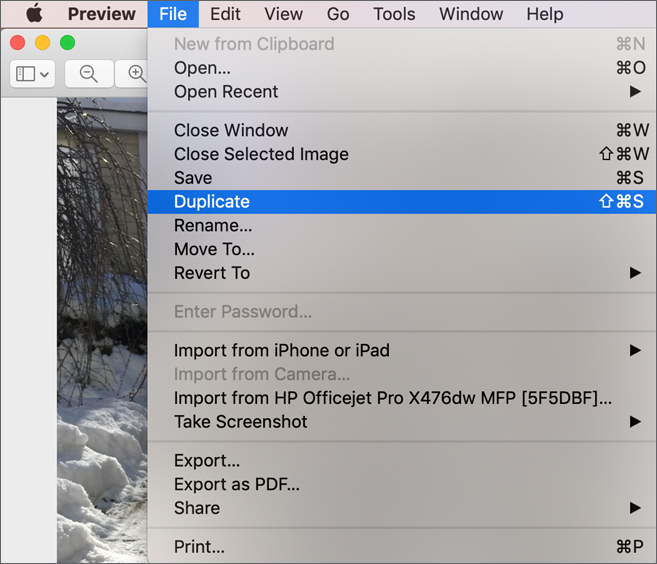
Apps that support macOS Auto Save and Versions are identified by the content of the File menu in the app. Apps that support Auto Save have the following commands in the File menu:
![]() Duplicate (instead of Save As)
Duplicate (instead of Save As)
![]() Rename
Rename
![]() Move To
Move To
Updated apps offer the File > Save command for saving a document the first time, but after you save a document, the behavior of this menu option changes to saving a version of the document. Most Apple-designed apps, including TextEdit, Preview, Pages, Numbers, and Keynote, support Auto Save and Versions.
Automatically Save Document Changes
When you open an app that supports Auto Save for the first time, one of two things happens. If you are not signed in to iCloud or the app doesn’t support saving to iCloud, the app opens a new document (or displays a Choose a Template dialog). If you are signed in to iCloud and the app supports saving documents to iCloud, you are prompted with an Open dialog.
Saving documents to iCloud is covered in the next section of this lesson.
When you open a new document in an app that supports Auto Save, it’s saved, even though you haven’t set a location for it. Changes you make to the new document are saved, even if you have yet to manually save the document. The document is saved to the Versions history database on the system volume.
By default, if you choose to close a document window or app, macOS prompts you to save the document if you haven’t saved the document yet. You can also choose File > Save, or press Command-S. The resulting Save dialog enables you to choose a name and location for the document. You can expand a minimized Save dialog to show a full file-system browser. Click the small arrow to the right of the filename.
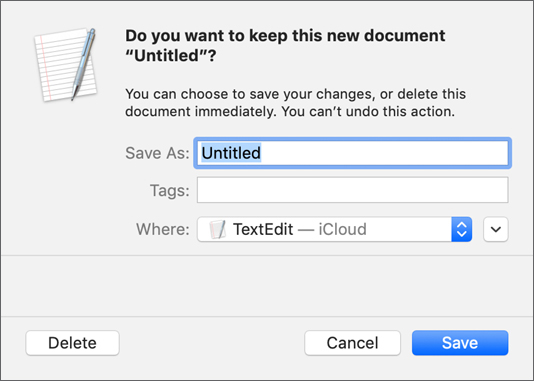
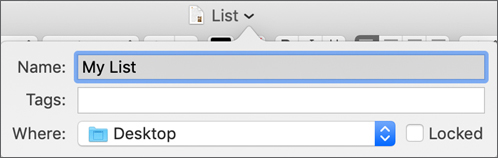
You can also click the document name in the title bar to save it. This reveals a dialog similar to the Save dialog, except there are no Cancel and Save buttons.
When you enter a change in the dialog, it’s saved after you click anywhere outside the title bar. You can return to the dialog to save changes to the document. For example, to rename a document enter a new name and then click elsewhere to dismiss the dialog.
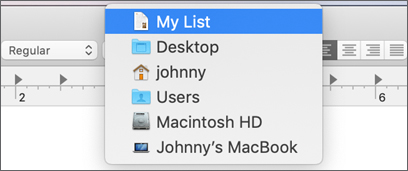
Hold the Command key and click the document name in the title bar to reveal its path in the file system.
Auto-saves occur:
![]() When you make a change to a document
When you make a change to a document
![]() When you close a document window
When you close a document window
![]() When you close an app
When you close an app
![]() When you select the document in the Finder
When you select the document in the Finder
![]() When you attempt to access the document from another app
When you attempt to access the document from another app
![]() During pauses in your work
During pauses in your work
![]() Every five minutes as you work
Every five minutes as you work
As you make changes to a document, you might see “Edited” in the document title bar. This is a visual cue to let you know macOS is saving changes. You can test this by making changes to a document and immediately using Quick Look to preview the document by selecting it in the Finder and pressing the Space bar. The Quick Look preview is identical to the open document in the app.
Save Duplicate Documents
To save a copy of a document, use Duplicate. With the document open, choose File > Duplicate (Shift-Command-S). A new window appears with a copy of the document. The filename in the title bar is highlighted, indicating that you can change the name of the duplicate document.
The Move To command in the File menu moves the original document to a new location without creating a new copy. Even though the document is moved, in most cases the version history is preserved.
The document is saved in the same folder as the original document. With Auto Save you never have to manually save this document again.
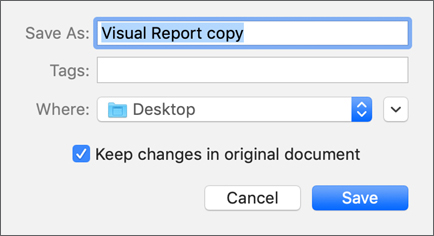
If you press and hold the Option key, the File > Duplicate menu option changes to File > Save As. You can also press Option-Shift-Command-S.
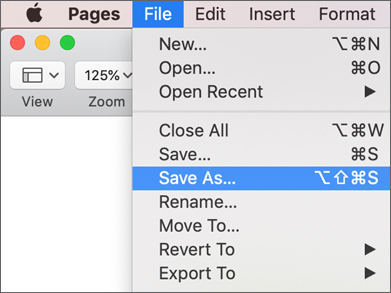
Choosing the Save As command is the same as choosing Duplicate, except that it presents the full Save dialog, enabling you to choose a different filename and location, and then it closes the original document. The new document replaces the original document in the active window. You have the option to also save the changes to the original document. This option is enabled by default, meaning that any changes made up to this point will also be saved to the original document. If you disable this option, you revert the original document to its previous state (before you made changes) and save a new document with the latest changes.
Explore Document Versions
With Versions, apps maintain a history of your changes. Whenever a document is saved, automatically or manually, a new document version is also saved. When you manually save by choosing File > Save or by pressing Command-S, macOS saves another version of the document in the version history.
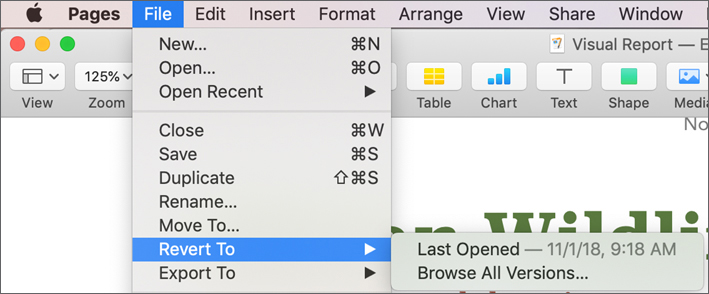
If you’re editing a document and have yet to trigger a manual or automatic save, you can revert to the previously saved state by choosing File > Revert To > Last Saved or File > Revert To > Last Opened. If a deeper version history is available, macOS enables you to browse the history of a document. To open the version history browser, choose File > Revert To > Browse All Versions.
A document’s version history isn’t saved within the document. Instead, document history is stored on the volume where the original document is saved—specifically, in the .DocumentRevisions-V100 folder at the root of the volume. When you share the document by creating or sending a copy of the document, other users won’t have access to the document version history.
Version history isn’t always maintained on files being edited from a shared network volume. If you want to ensure that a version history is maintained, you must copy the shared file to a local disk.
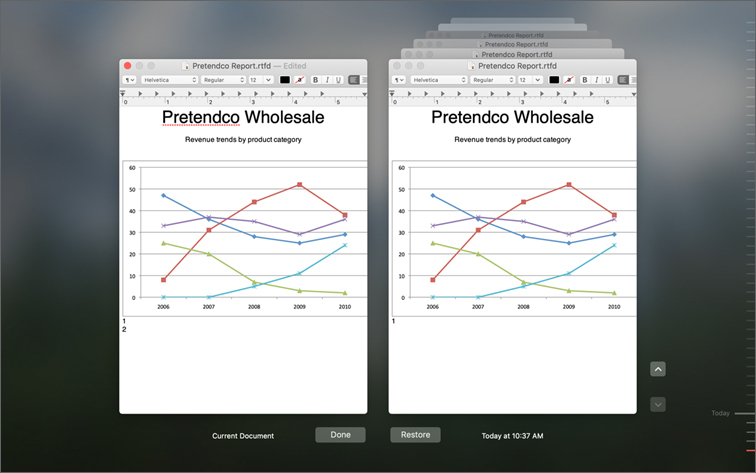
The Versions browser interface looks similar to Time Machine. In fact, if you have Time Machine enabled, as covered in Lesson 17, “Manage Time Machine,” an app’s version history can go much deeper by showing you versions that are also saved in the Time Machine backup.
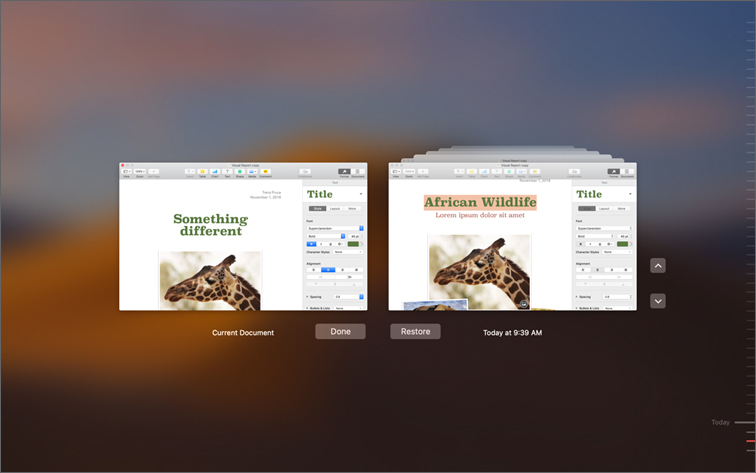
To the left you see the current version of the document, and to the right you see previous versions. Navigate by clicking a previous version’s title bar or by using the timeline to the right.
To restore a previous version, click Restore. If you want a specific section of a previous version copied to the latest version, make a selection inside the previous document and then copy and paste to the current document. When you are done making targeted edits, click Done to return to the standard app interface.
In the Versions browser, you can copy and paste using the Command-C and Command-V keyboard shortcuts or by Control-clicking to reveal a shortcut menu.
To delete a previous document version, in the Versions browser select the document name in the title bar to reveal a menu enabling you to choose Delete This Version.
Locked Files
The APFS and Mac OS Extended file systems include a file and folder attribute that trumps all write privileges and administrator user access. Users can choose to lock a file or folder that they own from the Finder Info window or any app that supports Auto Save.
Locking an item renders it unchangeable by any user except the item’s owner. Even administrator users are prevented from making changes to another user’s locked file in the graphical interface.
Locking a document prevents users—or, more appropriately, their apps—from accidentally auto-saving changes.
Manage File Locking with the Finder
Use the Finder and the Info or Inspector window to view and change a file’s lock state. After an item is locked, no other users can modify, move, delete, or rename it in the Finder. Using the Info window to inspect files and folders is detailed in Lesson 13, “Manage Permissions and Sharing.”
After the file is locked, the Finder prevents the owner from moving, renaming, or changing ownership and permissions for the locked item. If you as the owner try to move a locked item, the Finder defaults to making a copy. However, unlike other users, the owner can return the file to the normal state by disabling the locked attribute from the Info or Inspector window.
Duplicating a locked document in the Finder results in another locked copy of the document. In macOS, apps that support Auto Save can create an unlocked duplicate of a locked file.
Manage File Locking with an App
Apps that support Auto Save also provide access to document locking. As long as you are the owner of a document, which is often the case if you created the document or are editing a copy of the document, you can manually lock it to prevent further changes. To manually lock a document in an app that supports Auto Save, select the document’s filename in the title bar. You’ll see a dialog that enables you to select the Locked checkbox.
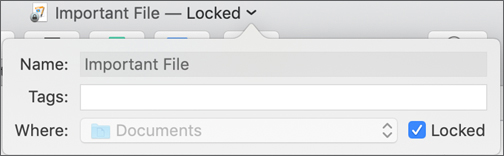
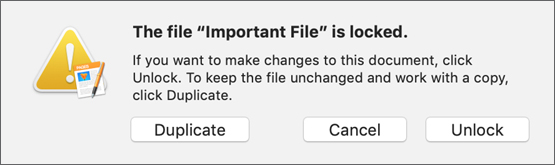
In the title bar, locked documents are labeled “Locked” and display a small lock icon. As long as you are the owner of a document, you can deselect the Locked checkbox to enable changes. You can also open a locked document that you own. You’ll see a dialog that enables you to select what you want to do with the file. You can duplicate the file and keep the previous version unchanged. You can unlock the file to edit it. And, you can cancel and do neither.
If you aren’t the owner of a locked document, you aren’t allowed to unlock it—which means you aren’t allowed to edit it. Also, as covered in Lesson 13, if you don’t have write file permissions, you aren’t allowed to edit a document. In both cases, the document’s title bar displays “Locked.”
You can treat a locked document as a template by duplicating the document and editing the copy. If you try to edit a locked, or otherwise unwritable, document, you see a prompt that enables you to duplicate the document.
You can manually duplicate a locked document. Choose File > Duplicate or File > Revert To > Browse All Versions. After the app makes a copy, you can save the copy as you would a new document.
Reference 19.3 Manage Automatic Resume
Auto Save allows supported apps to maintain their current state even if you log out or quit the app. When an app quits, any open documents and the app state are saved.
macOS can quit apps that support Resume when resources, specifically memory, run low. macOS quits only apps that are idle (not in active use).
Manage Resuming After Logout
By default, macOS automatically resumes apps and windows after you log out. To prevent this, deselect the option “Reopen windows when logging back in” when you see the dialog that asks if you want to quit all apps and log out. Your selection remains active until you change it.
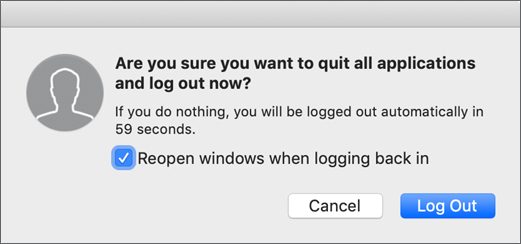
If “Reopen windows when logging back in” isn’t selected, you can temporarily enable it by pressing and holding down the Option key when you log out.
Manage Resuming After Quit
By default, macOS closes associated open files and windows when you quit an app. In General preferences you can deselect “Close windows when quitting an app” to make macOS resume previously open files and windows when you open an app.
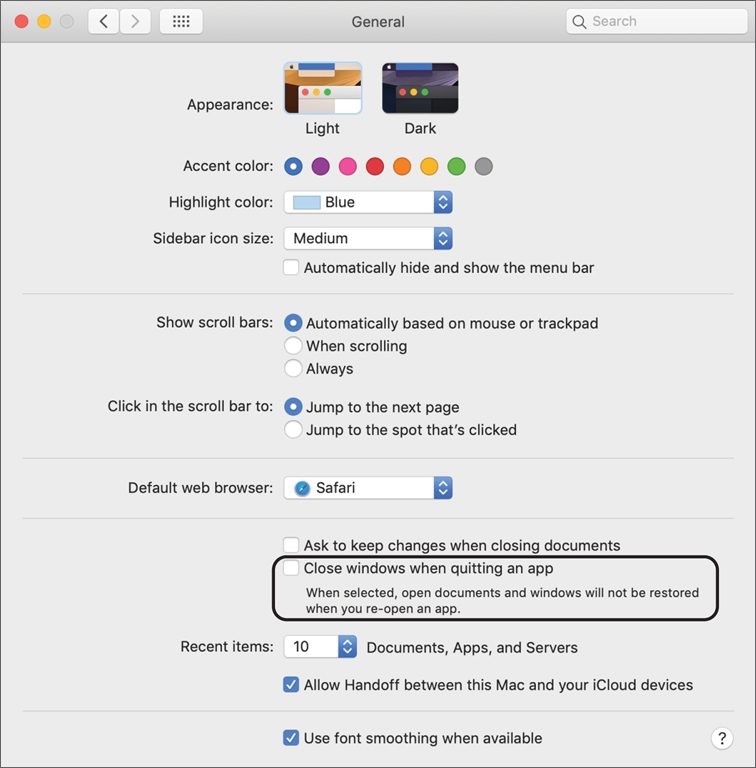
Disable Auto Save
Select “Ask to keep changes when closing documents” to disable the Auto Save feature for any app that supports it. Even if you disable the Auto Save feature, apps that support Auto Save still retain the rest of their document management behavior. For example, apps that support Auto Save offer a Duplicate menu option and automatically maintain a version history whenever you manually save documents.
Reference 19.4 Store Documents in iCloud
With iCloud Drive, you can safely store your presentations, spreadsheets, PDFs, images, and any other kind of file in iCloud. You can access them from your iPhone, iPad, iPod touch, Mac, or PC. You can also invite people to work on the same file with you—without creating copies, sending attachments, or managing versions.
Turn On iCloud Drive
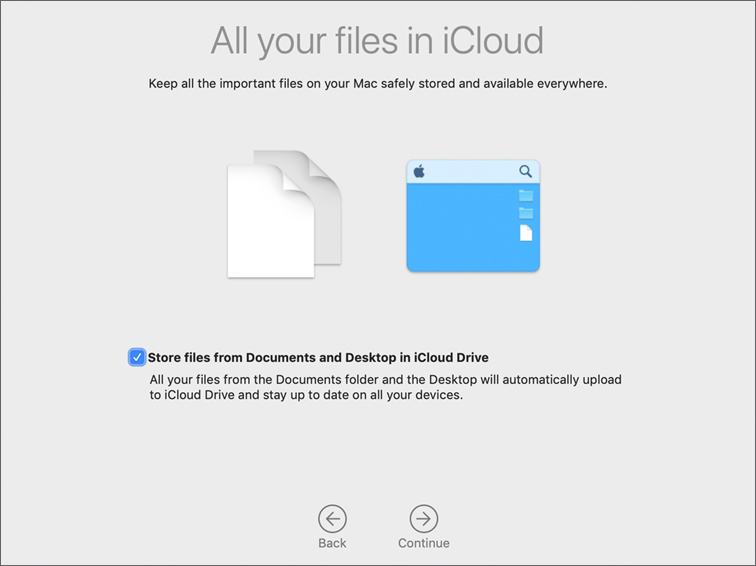
When you provide your Apple ID during Setup Assistant, macOS automatically turns on the iCloud Drive service. Before Setup Assistant completes, it asks if you want to save the contents of your Desktop and Documents folders to iCloud Drive.
If you don’t provide your Apple ID during Setup Assistant, you can turn on the iCloud Drive service in iCloud preferences. First provide your Apple ID name and password; then select “Use iCloud for your documents and data.” This turns on iCloud Drive automatically, but it doesn’t automatically save the contents of your Desktop and Documents folders to iCloud Drive.

You can verify that iCloud Drive is enabled from iCloud preferences.

If iCloud Drive is turned on, you can click the Options button to configure app-specific iCloud Drive settings. Details about iCloud Drive options are covered later in this lesson.
If your existing Apple ID doesn’t have the iCloud Drive service turned on, and you sign in to an iOS 8 or OS X Yosemite 10.10 or newer device, you’re asked to upgrade your iCloud account to use iCloud Drive. iCloud Drive is compatible with iOS 8 or OS X Yosemite 10.10 or newer, and the upgrade process to iCloud Drive is one-way.
If you didn’t choose to enable iCloud Drive during Setup Assistant, you can enable it in iCloud preferences. Just select iCloud Drive. You’ll be asked to verify the upgrade.
You can find out more about iCloud Drive from Apple Support article HT201104, “iCloud Drive FAQ,” and the iCloud Drive website at www.apple.com/icloud/icloud-drive/.
Use iCloud Drive
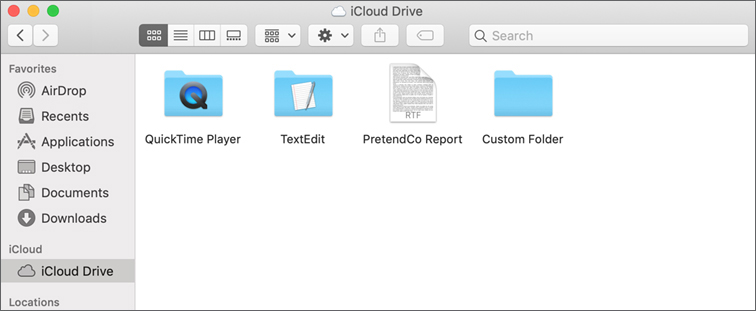
With iCloud Drive, iCloud storage appears as if it were an external storage device. All Finder file management features (move, copy, rename, folder creation, and more) work on files that you store in iCloud Drive.
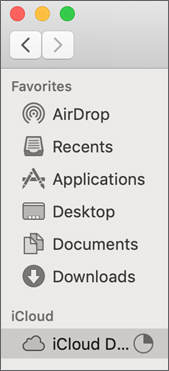
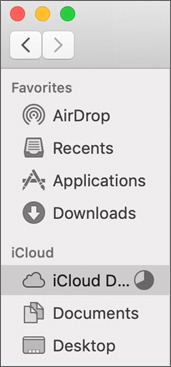
A pie chart indicator immediately to the right of iCloud Drive in the Finder sidebar gives you the status of a file copy to iCloud Drive. If you don’t see a pie chart icon, the copy is complete.
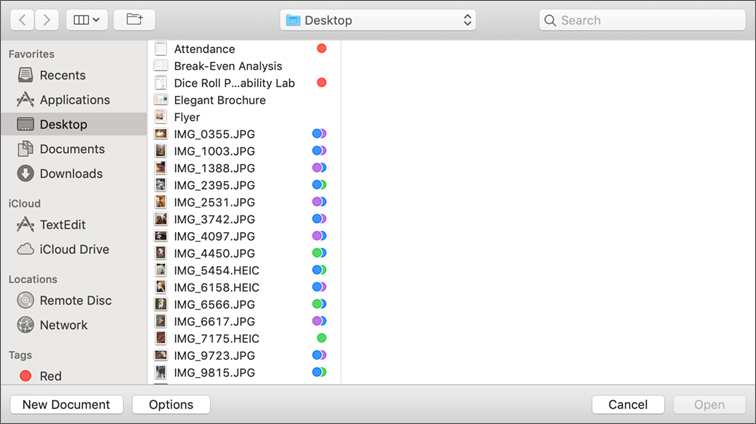
iCloud Drive also appears in Open and Save dialogs for any app. In iCloud Drive, you can create custom folder hierarchies and save documents inside any folder you choose. Apps can create folders in iCloud Drive with app-specific folders to facilitate document management. For example, for some apps like Pages, Numbers, and Keynote, when you create a new document and make any change to that document, the app automatically creates an app-specific folder in iCloud Drive before you save the document.
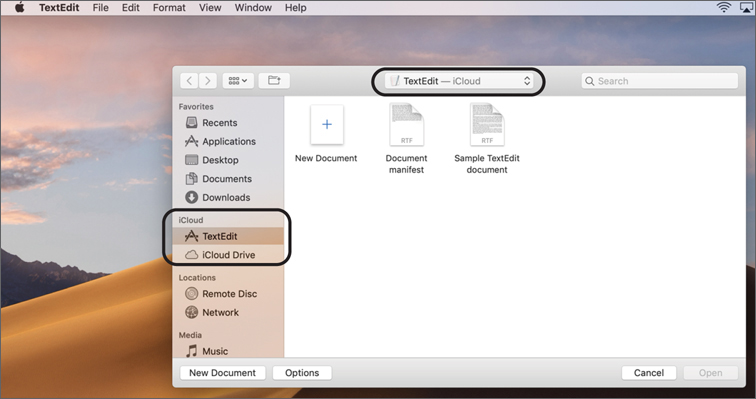
For example, the following screenshot shows the Open dialog for TextEdit. The menu at the top of the Open dialog contains a TextEdit-specific folder. The sidebar of the Open dialog contains an iCloud section with two items: a TextEdit-specific folder in iCloud Drive, and the top level of iCloud Drive.
For some apps, the Save dialog offers an iCloud Library section in the menu. The following two screenshots show the iCloud Drive folder in two states.
In the first screenshot, the Finder window shows that iCloud Drive doesn’t yet have a custom folder for Pages. There’s a blank Pages file open.
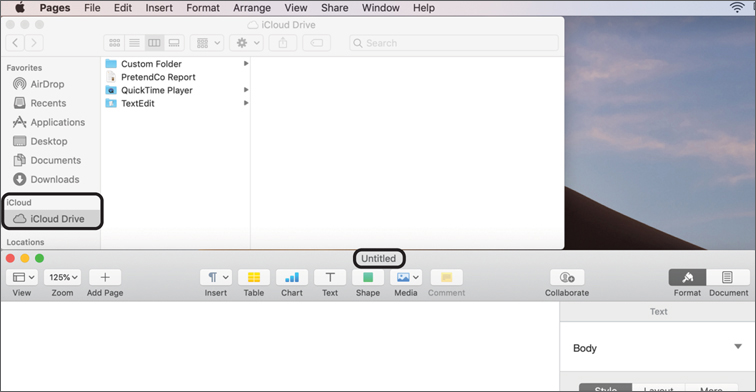
In the second screenshot, you see that immediately after text was entered into the previously blank document, macOS created a Pages-specific folder and automatically saved the Untitled document in that folder.

You can access custom folders and documents that were saved to iCloud Drive with the iCloud website (www.icloud.com), with the iCloud Drive app on iOS devices with iOS 10, and with the Files app on iOS devices with iOS 11 and newer. Further, you can share items in iCloud Drive with others, which enables collaborative document editing.
Store Desktop and Documents in iCloud Drive
You can save the content in your Desktop and Documents folders to iCloud Drive. Unlike upgrading to iCloud Drive, choosing to save your Desktop and Documents folders to iCloud is reversible.
You can enable and disable saving Desktop and Documents in iCloud Drive in the iCloud Drive options in iCloud preferences.
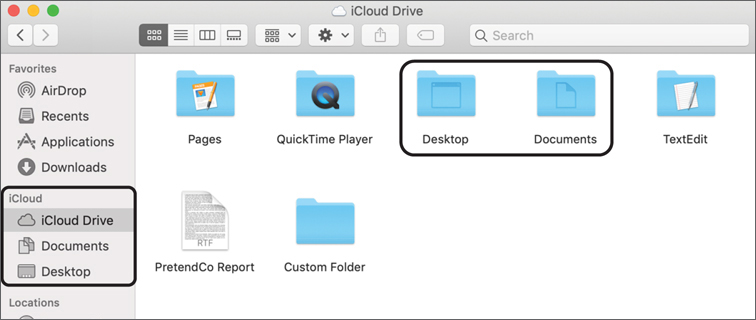
When you turn on Desktop & Documents Folders in iCloud preferences for the first time per iCloud account, the Desktop and Documents folders from your home folder on that Mac are moved to iCloud Drive. Items in your Desktop folder still appear in the Finder and on your desktop background. Accessing your Desktop and Documents folders in the Finder with the Keyboard shortcuts (Shift-Command-D to open your Desktop folder and Shift-Command-O to open your Documents folder) and the Go menu work as before. Your Desktop and Documents folders appear in iCloud Drive and in the Finder sidebar under iCloud.
When you use Terminal, your Desktop and Documents folders appear in their normal location at the root of your home folder, but the Finder doesn’t display these folders at the root of your home folder.
An iCloud account can have only one set of Desktop and Documents folders in iCloud Drive. So, the first Mac on which you enable Desktop & Documents Folders in iCloud preferences defines the base contents in iCloud Drive.
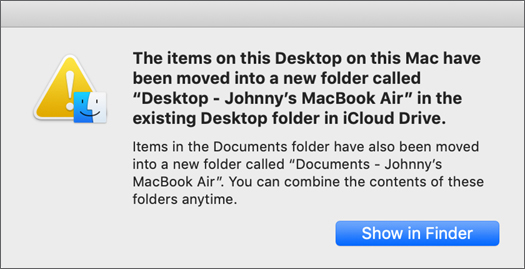
When you enable Desktop & Documents Folders in iCloud on an additional Mac, and you have items in the Desktop folder or the Documents folder on the additional Mac, you’ll see a message on the additional Mac that your existing items were moved to a new folder (or folders) in iCloud Drive.
Content from additional Mac computers is represented by new subfolders.
Make sure the initial upload to iCloud Drive is fully complete (wait until there is no pie chart status icon to the right of iCloud Drive in the Finder’s sidebar) before you enable Desktop & Documents Folders in iCloud Drive on another Mac. This ensures that all items are available to all Mac computers with iCloud Drive.
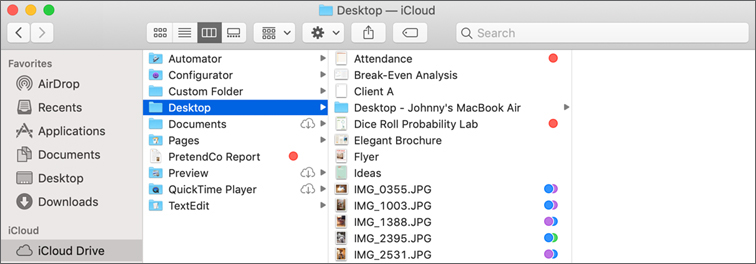
In the following screenshot, another Mac, named Johnny’s MacBook Air, was added as a second computer with Desktop & Documents Folders in iCloud preferences enabled for the account. This move was necessary so that the items already in the Desktop and Documents folders in iCloud Drive on the original Mac that turned on Desktop & Documents Folders in iCloud (Johnny’s MacBook) could replace the local Desktop and Documents folders on Johnny’s MacBook Air. Now the content from the Desktop and Documents folders on the original Mac and on Johnny’s MacBook Air are available on both computers.
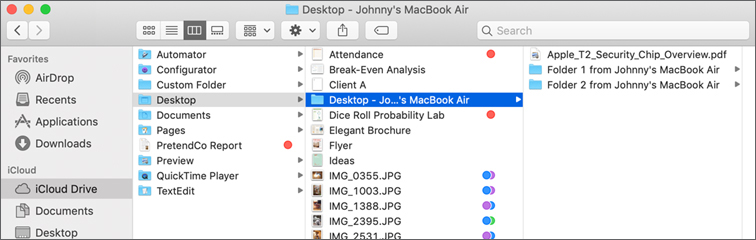
After you set up additional Mac computers, if you want to have a unified Desktop and Documents folder experience, move the items out of the computer-named subfolders to the base folders. With iCloud Drive, changes made on one Mac automatically apply to other Mac computers with the same iCloud account. Reorganization of your Desktop and Documents folders on one Mac automatically applies to your configured Mac computers. If you move all items out of the computer-named subfolders, the folders can be deleted, leaving you with the content in one set of Desktop and Documents folders available to all your Mac computers with iCloud Drive.
You can find out more about using iCloud Drive by reading Apple Support article HT206985, “Add your Desktop and Documents files to iCloud Drive.”
Remove Items from iCloud Drive
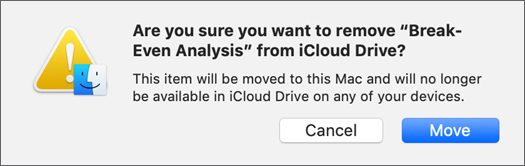
To remove an item from iCloud Drive, move it out of an iCloud Drive folder to the Trash or any other local file on your Mac. Moving something from iCloud Drive to a local folder on your Mac removes the item from iCloud and other Apple devices configured for iCloud Drive.
Because iCloud Drive items appear alongside locally stored items on your Mac, you might accidentally remove an item from iCloud Drive. macOS warns you when you move something out of iCloud Drive.
You can configure whether macOS shows this warning in the Advanced tab of the Finder preferences.
iCloud Drive Local Storage
With the exception of the Desktop and Documents folders, items saved in iCloud Drive are maintained locally in each user’s ~/Library/Mobile Documents/ folder. It doesn’t matter whether or not Desktop and Documents storage in iCloud Drive is enabled; those items are maintained locally in their normal locations, ~/Desktop and ~/Documents. Although you can see the Mobile Documents folder in the Finder, double-clicking this folder will redirect you to the root iCloud Drive view in the Finder.
App-specific folders, custom user folders, and all documents are visible in Terminal. Avoid using Terminal to modify content directly in the Mobile Documents folder. Any changes you make to the contents of the Mobile Documents folder are immediately saved to iCloud Drive.
Multiple devices on the same network that share an iCloud account transfer the data locally to improve performance. If you make changes to iCloud Drive while offline, macOS caches the changes and then silently pushes them the next moment an Internet connection to the iCloud servers is available.
Consider using content caching to speed up downloads from iCloud. See Reference 25.1, “Enable Host-Sharing Services,” for more details.
iCloud Drive Optimized Storage
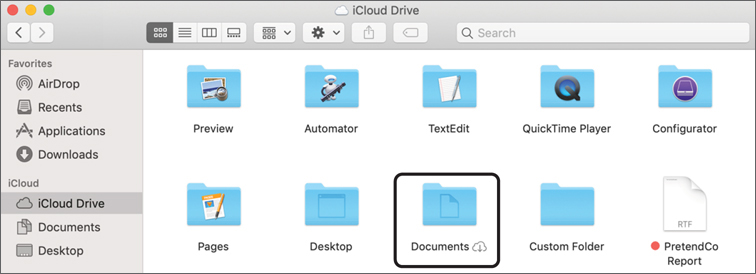
iCloud Drive keeps older files and infrequently used files only in iCloud Drive. Items in iCloud Drive that aren’t downloaded locally to a Mac appear with an iCloud download icon (which looks like a cloud).
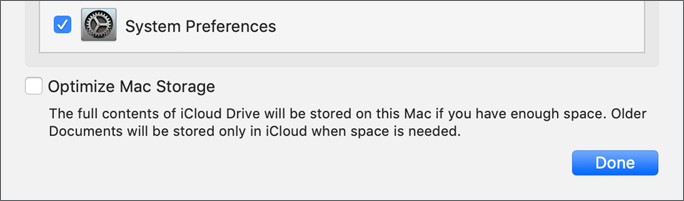
When you try to access items that aren’t downloaded, they download to your Mac. This might take a few moments if the items are large or your Internet connection is slow. If you want to prevent iCloud Drive from optimizing storage, force it to save items locally too. In iCloud preferences, deselect Optimize Mac Storage at the bottom of the iCloud Drive options dialog to make the change.
Turn Off iCloud Drive Features
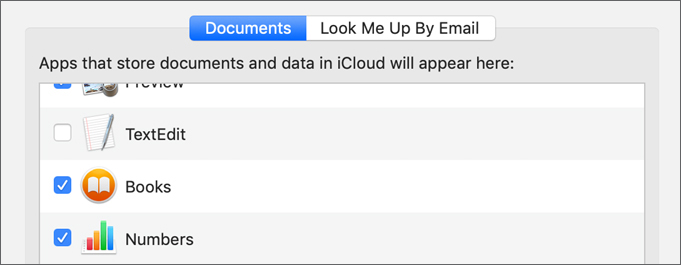
By default, when you turn on iCloud Drive, compatible apps save files to iCloud. If you want to stop an app from saving content to iCloud Drive, in the iCloud preferences options dialog, deselect it.
This doesn’t delete existing data in iCloud. It prevents an app from accessing iCloud Drive and hides the associated folder from the Finder.
You can also deselect Desktop & Documents Folders to stop content from being saved to them. If you do this, you won’t remove already stored content from iCloud Drive or from other Apple devices.
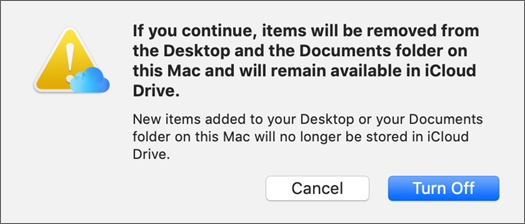
If you click Turn Off, you revert the iCloud Drive configuration for the Mac back to using local-only Desktop and Documents folders.
In this case, your home folder on the local Mac will have new, empty Desktop and Documents folders. You can still access the Desktop and Documents folders in iCloud Drive.
Nothing is lost, but you must move or copy items from iCloud Drive back to the local folders on your Mac. Moving something from iCloud Drive to another folder on your local Mac removes the item from iCloud Drive and configured Apple devices.
If you decide to completely turn off all iCloud Drive features, you can do so by deselecting the iCloud Drive checkbox in the iCloud preferences. Turning off iCloud Drive completely presents you with two options.

If you have Desktop & Documents Folders enabled, the dialog also notifies you that this affects your Desktop and Documents folders.
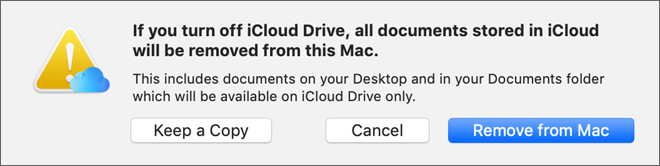
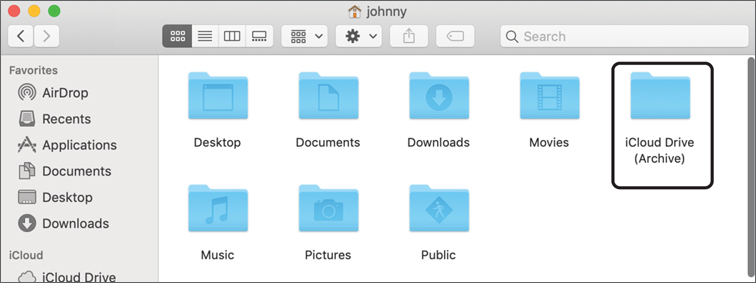
Neither option removes items from iCloud Drive or removes items from other Apple devices configured for it. Instead, selecting the “Remove from Mac” button removes iCloud Drive items only from the local Mac. Selecting the “Keep a Copy” button creates an iCloud Drive (Archive) folder in your home folder on the local Mac. If you click “Keep a Copy” but you haven’t yet finished downloading files from iCloud, you see a dialog with a progress bar and the message, “iCloud Drive needs to finish updating before being turned off. Your documents will be downloaded and copied to a folder named ‘iCloud Drive (Archive)’ in your home folder on this Mac.”
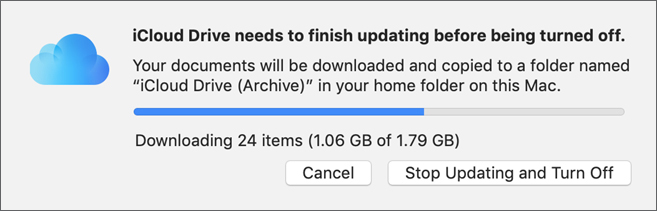
This local archive folder contains copies of items currently in your iCloud Drive.
Reference 19.5 Optimize Local Storage
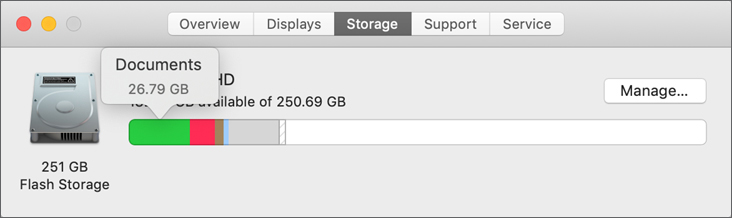
To see a summary of how the storage space on your Mac is being used, choose About This Mac from the Apple menu, and then click the Storage button. The Storage button shows an overview of your free space and the space used by different categories of files, including apps, documents, and photos, for each disk. Each segment of the bar is an estimate of the storage space used by a category of files. Move your pointer over each segment for more detail.
The calculations are based on storage optimization techniques that you can further inspect and implement by clicking the Manage button to open the Storage Management window. For more information, read Apple Support article HT202867, “What is ‘other’ and ‘Purgeable’ in About This Mac?”
System Information includes storage optimization features that are available in Storage Management. The Storage Management interface dynamically changes based on what features you enable. It might not look as it appears in this guide.
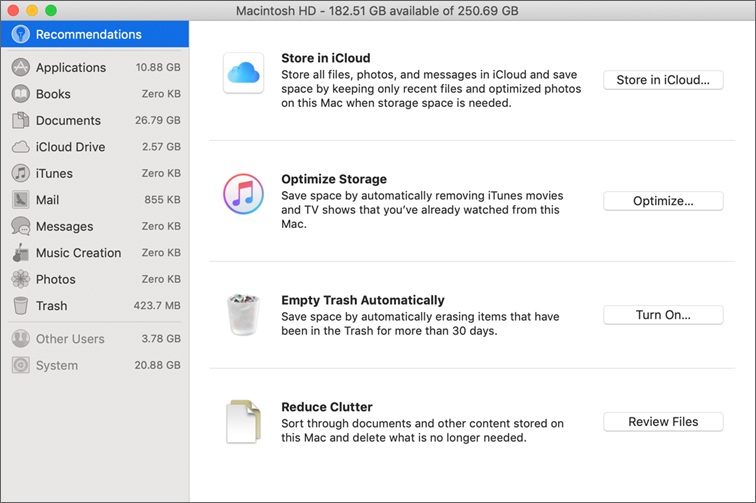
Storage Management opens with Recommendations, which offers suggestions to optimize local storage. You can also inspect and implement space-saving optimizations by selecting items from the list on the right of the Storage Management pane.
Recommendations offers various ways you can optimize storage:
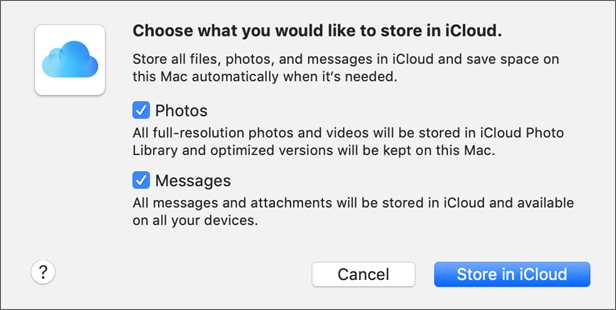
![]() Store in iCloud—Click “Store in iCloud” to bring up a dialog that may vary based on your current iCloud Drive settings. You can choose what you would like to store in iCloud by selecting Desktop and Documents, Photo, and Messages. These selections can save considerable local space by relegating infrequently used items to iCloud storage only. You can also reach these settings from iCloud and Photos preferences.
Store in iCloud—Click “Store in iCloud” to bring up a dialog that may vary based on your current iCloud Drive settings. You can choose what you would like to store in iCloud by selecting Desktop and Documents, Photo, and Messages. These selections can save considerable local space by relegating infrequently used items to iCloud storage only. You can also reach these settings from iCloud and Photos preferences.
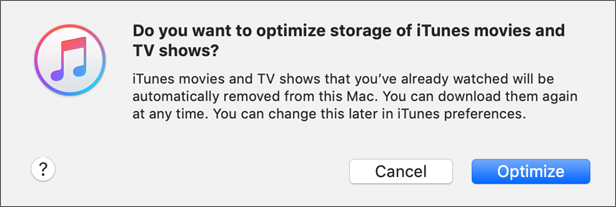
![]() Optimize Storage—Click Optimize to reveal a dialog that enables you to turn on the automatic removal of watched movies and TV shows in iTunes. These settings can also be accessed from iTunes preferences.
Optimize Storage—Click Optimize to reveal a dialog that enables you to turn on the automatic removal of watched movies and TV shows in iTunes. These settings can also be accessed from iTunes preferences.
![]() Empty Trash Automatically—Click Turn On to enable the option for the Finder to automatically empty local items from the Trash if they were there for longer than 30 days.
Empty Trash Automatically—Click Turn On to enable the option for the Finder to automatically empty local items from the Trash if they were there for longer than 30 days.
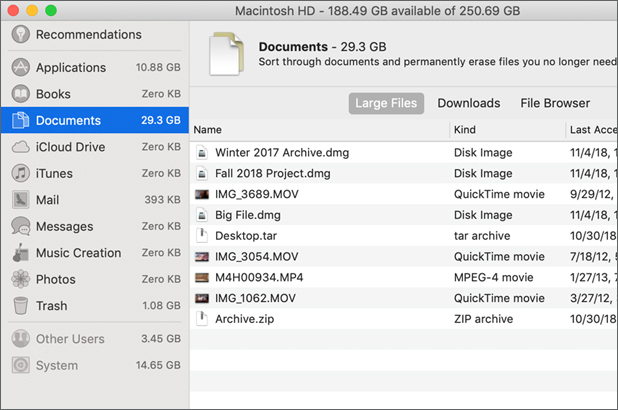
![]() Reduce Clutter—Click Review Files to open the Documents view of the Storage Management window. From here you can view your largest and least used documents on the local Mac. You can delete items you no longer need by selecting an item and then clicking Delete in the lower-right corner of the window.
Reduce Clutter—Click Review Files to open the Documents view of the Storage Management window. From here you can view your largest and least used documents on the local Mac. You can delete items you no longer need by selecting an item and then clicking Delete in the lower-right corner of the window.
In the Storage Management window, you can select a storage category in the far-left column to inspect, and potentially remove, large files that you might not need. For example, every iOS device you sync to your Mac using iTunes creates backup and app update files that can consume a large portion of the system volume.
For more information, read Apple Support article HT206996, “How to free up storage space on your Mac.”
Exercise 19.1 Use Alternate Apps
![]() Prerequisite
Prerequisite
![]() You must have created the Johnny Appleseed account (Exercise 7.1, “Create a Standard User Account”).
You must have created the Johnny Appleseed account (Exercise 7.1, “Create a Standard User Account”).
In this exercise, you configure which apps open files when you make a one-time choice to use a different app and when you choose to change the default app that opens a file type. You also use Quick Look to see what’s in a file.
View a File with Quick Look
If necessary, log in as Johnny Appleseed.
In the Finder, open the ParticipantMaterials/Lesson19 folder.
Press and hold the Option key, then drag the file Pet Sitter Notes to copy it to your desktop.
The file has no visible extension, although the icon may indicate its file type.
Select (single-click) the Pet Sitter Notes document on your desktop.
Choose File > Quick Look “Pet Sitter Notes” (or press Command-Y).
Quick Look displays a preview of the document. You could click the button near the top right to open the document in TextEdit (currently the default app for this document type). You could select the document and press the Space bar to use Quick Look, or Control-click the document and choose Quick Look from the shortcut menu.
Press Command-Y to close the Quick Look window.
Choose an App to Open a File Once
Double-click Pet Sitter Notes on your desktop.
The file opens in TextEdit. TextEdit doesn’t display the document headings or background image.
Without closing the document, on your desktop, Control-click the file.
In the shortcut menu, mouse over the Open With choice.
A submenu opens and shows the apps that can open this document type.
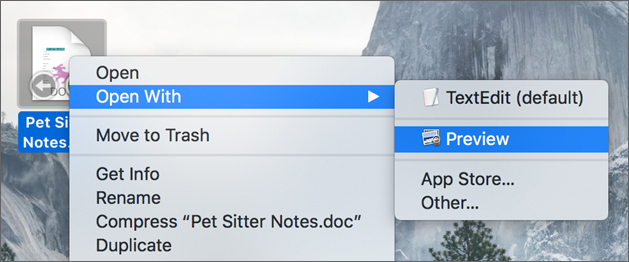
In the Open With submenu, choose Preview.
The file opens in Preview.
If you edit the same file in two apps at the same time, you might have unpredictable results. Here, you only view the file, so there isn’t a problem.
Compare how the file is displayed in TextEdit and in Preview.
Preview gives a richer view of the file, showing a background image and headings that TextEdit does not show. TextEdit lets you edit its content, whereas Preview doesn’t. Depending on what you want to do with the document, you might prefer either one.
Close the document in both apps.
Double-click the document again.
The document opens in TextEdit because the Open With choice you made earlier wasn’t a permanent setting.
Close the document.
Change the Default App for a File Type
In the Finder, select the Pet Sitter Notes document.
Choose File menu > Get Info (or press Command-I).
If necessary, expand the General and Name & Extension sections of the Info window.
This is a Word 97 document, and it has a hidden .doc file extension.
Deselect “Hide extension.” The extension is visible in the view of your desktop in the Finder.
Expand the “Open with” section of the Info window, and choose Preview from its menu.
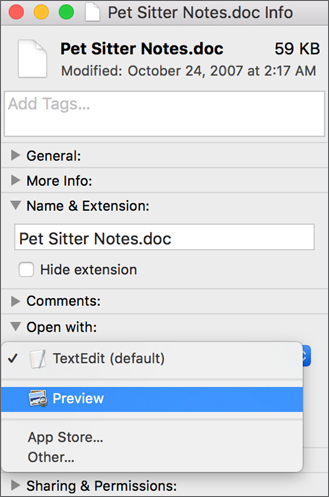
This menu shows the same possible apps as the Open With submenu in the Finder. If you choose an app here, you make a permanent setting but only for this file.
Click Change All.
In the confirmation dialog, click Continue.
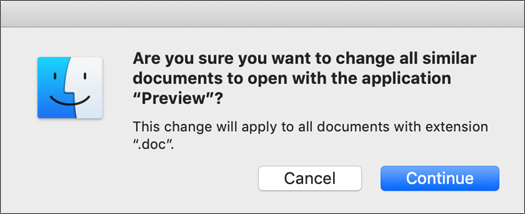
You changed the default app for opening documents with the extension .doc in Johnny Appleseed’s account.
Close the Info window.
Double-click the document on your desktop.
Confirm the document opens in Preview.
Quit Preview.
Move Pet Sitter Notes.doc from your desktop to the Trash.
In the Finder, reopen the ParticipantMaterials/Lesson19 folder, and examine the original Pet Sitter Notes document.
The filename extension isn’t shown. When you used Get Info to show the extension of the copy on your desktop, it affected only that file.
Double-click the original Pet Sitter Notes.
Pet Sitter Notes opens in Preview because you used Change All in the Info window to apply the setting to all Word 97 documents.
Quit Preview.
Exercise 19.2 Practice Auto Save and Versions
![]() Prerequisite
Prerequisite
![]() You must have created the Johnny Appleseed account (Exercise 7.1, “Create a Standard User Account”).
You must have created the Johnny Appleseed account (Exercise 7.1, “Create a Standard User Account”).
In this exercise, you edit a file in TextEdit, save several versions, and roll back to an earlier version.
Experiment with Auto Save
If necessary, log in as Johnny Appleseed.
Open System Preferences, and click General.
Ensure that “Ask to keep changes when closing documents” isn’t selected and that “Close windows when quitting an app” is selected.
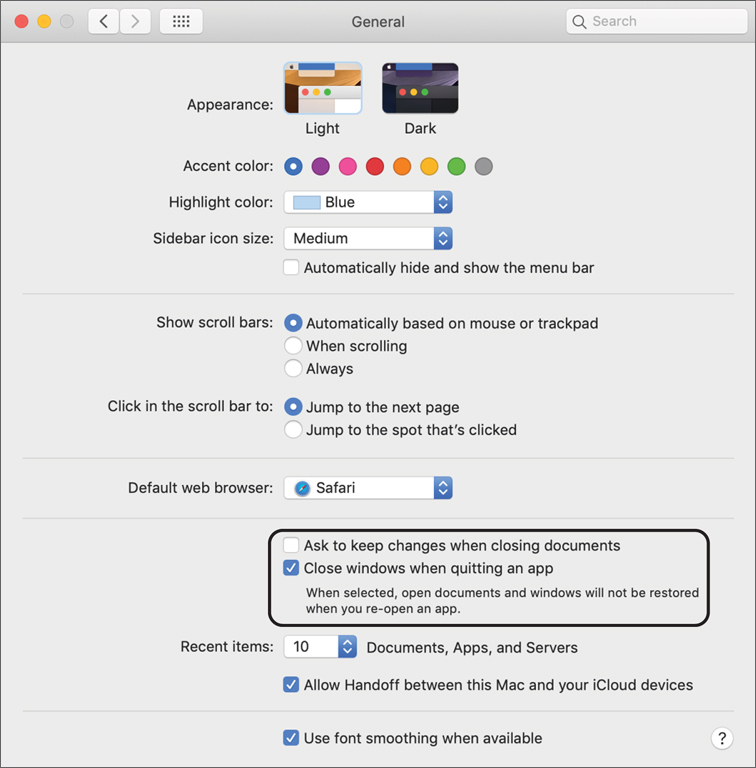
These are the default settings in macOS Mojave. If you select “Ask to keep changes when closing documents” you turn off the Auto Save feature you’re about to test. If you deselect “Close windows when quitting an app,” you make apps remember open documents and windows when you quit and reopen an app.
Quit System Preferences.
If necessary, navigate to ParticipantMaterials/Lesson19.
Copy Pretendco Report.rtfd to your desktop, and open the copy.
Add some text to the file.
The window title bar indicates the file status as Edited.

Switch to the Finder, select your copy of the Pretendco Report file, and choose File > Get Info (or press Command-I).
It was modified recently (your edits were saved automatically).
Close the Info window.
Switch to TextEdit, and add additional text to the file.
Select the file in the Finder, and choose File > Quick Look “Pretendco Report.rtfd” (or press Command-Y).
The Quick Look view shows the text you added to the file.
Close the Quick Look window.
Work with Multiple Versions
Switch to TextEdit, and choose File > Save (or press Command-S).
This save looks normal, but it saves a restorable version of the file.
TextEdit saves changes to a document you’re editing frequently, but it saves a restorable version only when you tell it to.
Delete the graphic from the document.
Quit TextEdit.
You aren’t prompted to save changes; they were saved automatically.
Reopen the Pretendco Report file.
Choose File > Revert To > Previous Save.
The graphic is restored.
Add more text to the document, and choose File > Save (or press Command-S).
Add more text, and examine the File > Revert To submenu.
It lists options to restore to the last-saved version, to restore to the last-opened version, or to browse all versions.
Choose File > Revert To > Browse All Versions.
TextEdit displays a full-screen version browser and shows the document state on the left and saved versions on the right. This view is similar to the Time Machine restore interface and shows versions from the Time Machine backups and restorable versions that TextEdit created.
Experiment with the two windows. Click the arrows to the right of the stack or use the timeline on the right side of the screen to switch between saved versions. You can copy and paste content from old versions to the current document.
Click Done to exit the history browser.
Quit TextEdit.
Exercise 19.3 Manage Document Locking
![]() Prerequisites
Prerequisites
![]() You must have created the Local Administrator (Exercise 3.1, “Configure a Mac for Exercises”) and Johnny Appleseed (Exercise 7.1, “Create a Standard User Account”) accounts.
You must have created the Local Administrator (Exercise 3.1, “Configure a Mac for Exercises”) and Johnny Appleseed (Exercise 7.1, “Create a Standard User Account”) accounts.
In this exercise, you lock documents to prevent accidental changes.
Lock and Unlock a Document
Log in as Johnny Appleseed.
If you haven’t completed Exercise 19.2, “Practice Auto Save and Versions,” copy ParticipantMaterials/Lesson19/Pretendco Report.rtfd to your desktop.
Select your copy of the Pretendco Report document, and choose File > Get Info (or press Command-I).
In the General section of the Info window, select the Locked checkbox.
The document icon has a small lock in its corner.
Close the Info window.
Open the document.
The window title bar indicates the file is locked.

Attempt to add some text to the document.
A dialog appears telling you the file is locked and gives you options for the locked file.
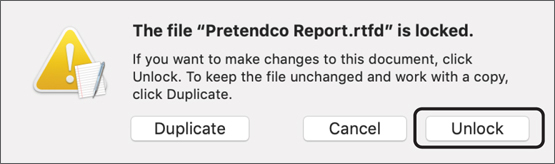
Click Unlock.
The lock is gone from the document icon on your desktop.
Add text to the document.
Click the document name in the title bar and select the Locked checkbox.
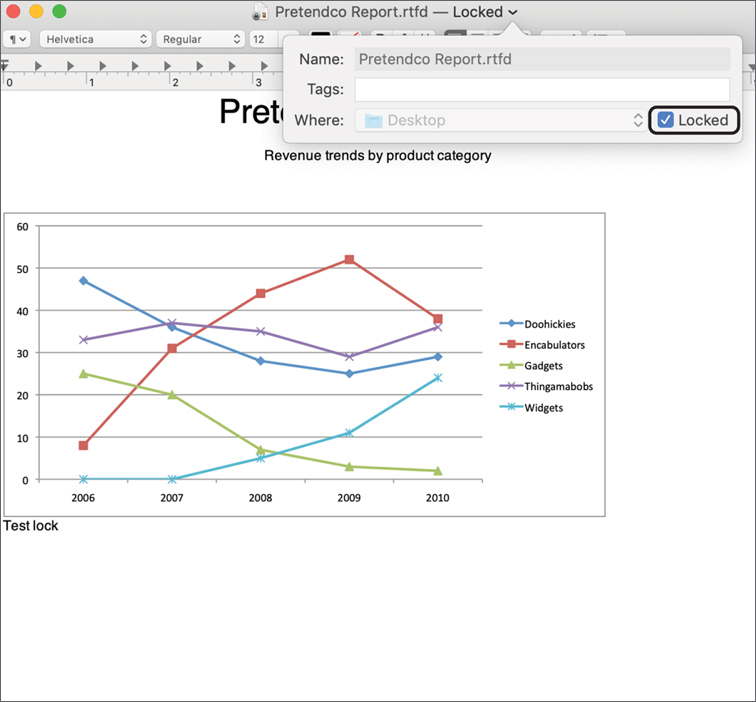
The lock reappears on the document icon on your desktop.
Since you are the owner of the document, you can lock and unlock it in the Finder or an editor that supports Auto Save.
Quit TextEdit.
Exercise 19.4 Store Documents in iCloud
![]() Prerequisites
Prerequisites
![]() You must have created the Johnny Appleseed (Exercise 7.1, “Create a Standard User Account”) and Emily Davidson (Exercise 8.1, “Restore a Deleted User Account”) accounts.
You must have created the Johnny Appleseed (Exercise 7.1, “Create a Standard User Account”) and Emily Davidson (Exercise 8.1, “Restore a Deleted User Account”) accounts.
You can save documents to the Internet with iCloud Drive and access them from Apple devices that are connected to the same iCloud account.
Enable iCloud Features
Log in as Johnny Appleseed.
Open System Preferences, and then click iCloud.
If you are already signed in to iCloud, skip to the next section, “Configure iCloud Drive.”
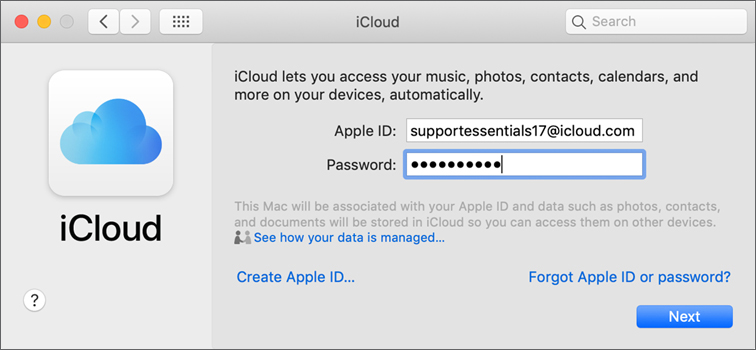
If you aren’t signed in to iCloud, enter your facilitator-provided Apple ID, and click Next.
Enter your password, and click Next.
If you are prompted to accept the iCloud terms and conditions, read through the new terms. If they are acceptable to you, agree and click Continue; otherwise, click Cancel and skip this exercise.
If the Apple ID is protected by two-factor authentication, follow the prompts to complete the authentication process.
If you are prompted to set up two-factor authentication, click Not Now, and click Don’t Upgrade in the confirmation dialog.
When you are prompted to enter your Mac password to continue, type Johnny’s password, and click OK.
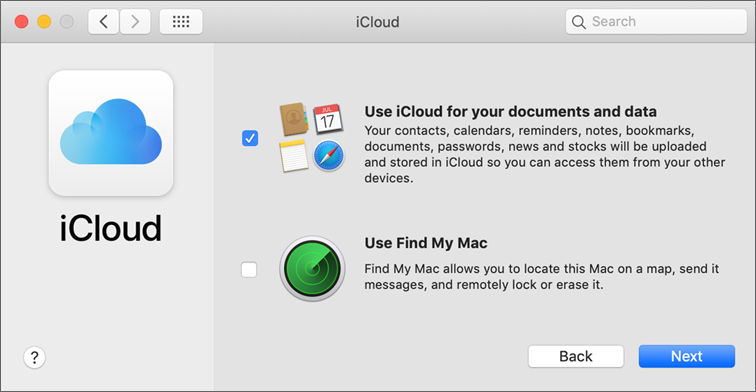
When you are prompted features to set up, leave “Use iCloud for your documents and data” selected, deselect Use Find My Mac, and click Next.
If a dialog appears and asks if you want to upgrade to iCloud Drive, it indicates that your iCloud account is being used to store documents in an older format and you must upgrade to iCloud Drive.
To upgrade the iCloud account to iCloud Drive, click Continue in the confirmation dialog.
If a dialog appears recommending requiring a password to unlock your screen, click Not Now.
If a dialog appears asking for your Apple ID password to set up iCloud Keychain, click Cancel.
Skip to step 6 of the next section.
Configure iCloud Drive
If iCloud preferences requires you to enter your password, click Enter Password and authenticate to iCloud. Don’t enable Two-Factor Authentication.
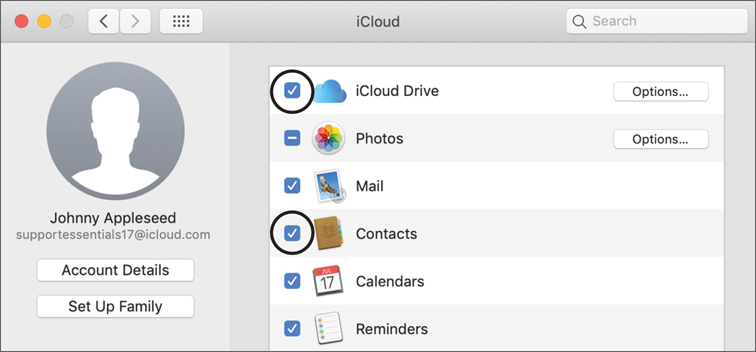
If necessary, select Contacts.
If necessary, select iCloud Drive.
Click the Options button to the right of iCloud Drive.
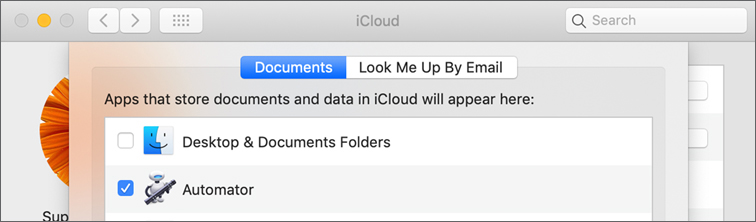
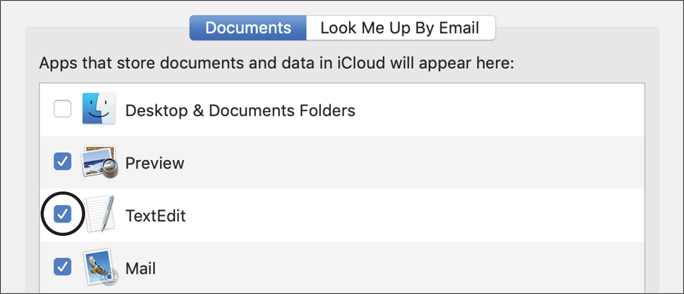
The iCloud Drive options dialog enables you to control which apps have access to your iCloud documents and your email address.
In the Documents tab, make sure TextEdit is selected.
Click Done.
Quit System Preferences.
Save a Document to iCloud
If you haven’t performed Exercise 19.2, “Practice Auto Save and Versions,” copy ParticipantMaterials/Lesson19/Pretendco Report.rtfd to your desktop.
Open the Pretendco Report document.
Click the document name in the title bar.
If necessary, deselect Locked.
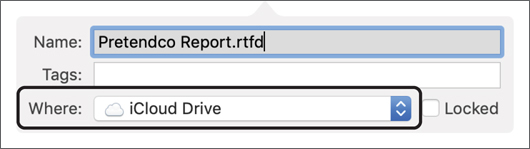
From the Where menu, choose iCloud Drive.
If a dialog appears and indicates that an item with the same name (Pretendco Report.rtf) exists in the same folder, a previous participant might have left this item in the iCloud account. Click Replace to replace the previous item with yours.
The document icon disappears from your desktop.
Quit TextEdit.
In the Finder, navigate to ParticipantMaterials/Lesson19.
Open the file vCards.vcf.
Contacts opens, and a dialog appears to confirm that you want to add the contacts.
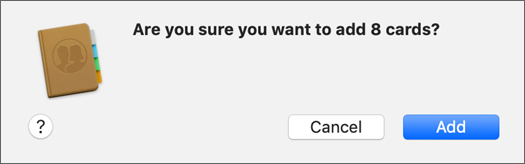
If the dialog indicates that some cards are duplicates, this might be because a previous participant left them in the iCloud account.
Click Add or Import.
This imports eight vCards into Contacts and pushes them to your iCloud account.
Quit Contacts, and log out as Johnny Appleseed.
Open a Document from iCloud
Your document and contacts are stored in iCloud. They’re available from any Mac account tied to the same iCloud account. Use the Emily Davidson account on your Mac to practice.
Log in to the Emily Davidson account (password: Apple321!).
Open System Preferences and click iCloud.
If iCloud isn’t set up in Emily’s account, enter the Apple ID and password you used with the Johnny Appleseed account, and click Next.
If the Apple ID is protected by two-factor authentication, follow the prompts to complete the authentication process.
If you are prompted to set up two-factor authentication, click Not Now, and then click Don’t Upgrade in the confirmation dialog.
When you are prompted to enter your Mac password to continue, type Emily’s password and click OK.
If you are prompted to enter the password you use to unlock your Mac, enter Johnny Appleseed’s password and click Continue.
When you are prompted for features to set up, leave “Use iCloud for your documents and data” selected, deselect Use Find My Mac, and then click Next.
If a dialog appears recommending requiring a password to unlock your screen, click Not Now.
If a dialog appears asking for your Apple ID password to set up iCloud Keychain, click Cancel.
Make sure that iCloud Drive and Contacts are selected.
Quit System Preferences.
In the Finder, choose Go > iCloud Drive (or press Shift-Command-I).
If Pretendco Report isn’t downloaded to Emily’s account, it has a cloud icon indicating that it’s available from iCloud.
Double-click Pretendco Report.
The document downloads (if necessary), and opens in TextEdit.
Add text to the document.
Your edits are saved to the iCloud servers and are available to other Mac computers using this iCloud account.
Quit TextEdit.
In the Finder, choose Go > Recents (or press Shift-Command-I).
Pretendco Report is listed. The Recents view shows local documents and those in iCloud Drive.
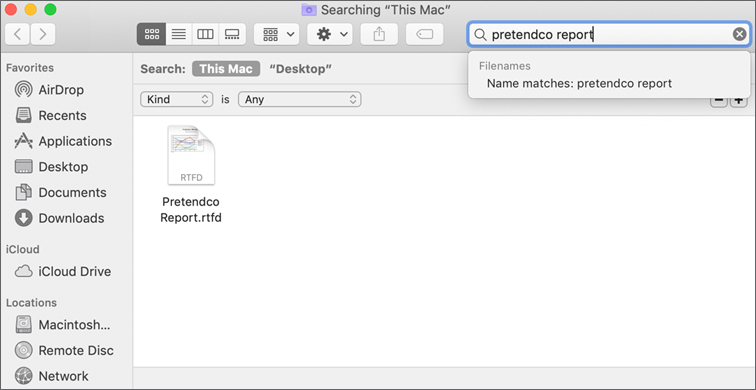
In the Search field, enter pretendco report.
Pretendco Report is shown, even though it is stored in iCloud Drive.
Use Contacts from iCloud
Open Contacts.
The contacts from the Johnny Appleseed account appear.
Quit Contacts, and log out as Emily Davidson.
Verify Your Changes as Johnny Appleseed
Log back in as Johnny Appleseed.
In the Finder, choose Go > iCloud Drive (or press Shift-Command-I).
Open Pretendco Report.
Verify that the edit you made as Emily appears. You might have to wait for the document to update.
Quit TextEdit.