
Lesson 2. Managing Projects and Takes
In the previous lesson you learned that preparation goes a long way toward making a session fluid and effective. Templates can go only so far, however, as you will quickly exceed basic setups, especially with a large track count.
This section describes techniques you can use to make your tracking sessions more efficient and productive, which in turn will set you up for a more trouble-free editing stage.
Using Project Folders
Logic Pro organizes sessions by grouping related files in a project folder. At its most basic, a project folder contains two items:
• A project file
• An Audio Files folder containing related audio files
Often it also contains some or all of the following elements (depending on the project data, instrument choices, and plug-in choices):
• A Sampler Instruments folder, containing the sampler instruments used in the project
• A Samples folder, containing the audio files referenced by the sampler instruments used in the project
• An Ultrabeat Samples folder, containing the audio files referenced by any Ultrabeat instruments used in the project.
• An Impulse Responses folder, containing the impulse response files used by the project’s instantiations of the Space Designer plug-in (convolution reverb)
• A Movie Files folder, containing video files referenced by the Logic project file
Creating a Project Folder
When dealing with multiple dependent files, it is absolutely necessary to keep everything in the right place for Logic’s retrieval. Not to worry, however, as Logic automatically generates the appropriate folders in their correct locations when creating a new project. This helps to keep your sessions organized from start to finish.
Note
If you didn’t complete Lesson 1, a version of the template used in this lesson is included with the Lesson 2 files in the following folder: Music > Logic 8_BTB_Files > Lessons > Templates. In order to do the exercises in this lesson, you must copy the file to the following location on your hard disk: ~/Library/Application Support/Logic/Project Templates.
- Choose File > New.
Note
If you chose to have Logic load the template you created in the last lesson at startup, all you need do is open Logic, then skip to step 3.
You should be looking at the Templates dialog that you explored in Lesson 1 (in the “Using Project Templates” section).
- Click the My Templates folder in the Collection column, and select Advanced Logic from the Template column.
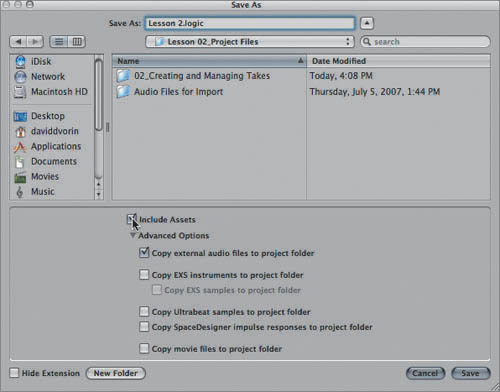
This is the project file you created in the last lesson. The Save As file window appears.
- In the Save As field, enter Lesson 2.
- Browse to Music > Logic 8_BTB_Files > Lessons > Completed.
Note
By default, the file path for projects is set to a folder named Logic, which is created in your ~/Music directory. However, you might have a preferred location for your work (such as a separate location or an external drive); you can type in a path for a location where you want new work to be saved.
- Select the Include Assets checkbox, if needed.
The window expands to show additional settings.
- Select the “Copy external audio files to project folder” checkbox, if needed.
- Select the “Copy EXS instruments to project folder” checkbox, if needed.
When you select this checkbox, the “Copy EXS samples to project folder” option becomes available.
- Select the “Copy EXS samples to project folder” checkbox, if needed.
- Select the “Copy SpaceDesigner impulse responses to project folder” checkbox, if needed.
- Click Save to create a new project folder.
To better understand what you just did, look in Logic’s Browser to locate the files and folders that you created.
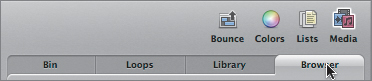
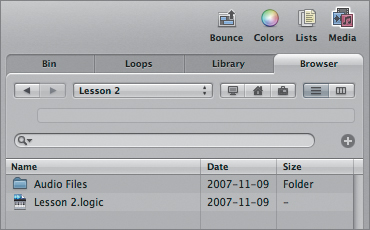
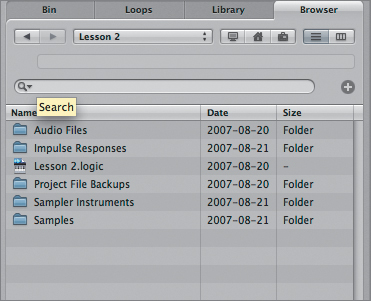
- In the open Media area (the Library is currently displayed), click the Browser tab.
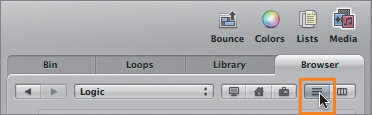
In effect, the Browser is your direct portal to the media files on your hard disk(s) from within Logic. To find your files, the Browser provides bookmark and navigation buttons, a Path menu, and a search field.
- Click the List button, if it is not already on.
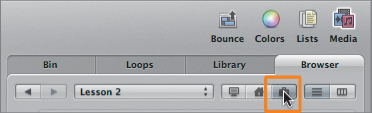
- Click the Project button, one of the bookmark buttons at the top of the Browser.
The Project button provides access to all media associated with the project. Notice that the project folder contains a new project file, also named Lesson 2, as well as an Audio Files folder.
In effect, you have created a new project, based upon your template, that organizes all the files related to that project. The Audio Files folder is created automatically to contain any audio tracks that will be associated with the project file, recorded or imported.
Note
The next time you save the project, Logic will automatically create a safety copy of the project file within a Project File Backups folder located within the Project folder.
Working with Assets
The options you selected in the Include Assets section of the Save As window will determine how Logic handles dependent files (files that are referenced by the project) for the new project. When these options are enabled, Logic automatically creates copies of related elements (such as imported audio files, EXS24 instruments and samples, and impulse responses used by the Space Designer plug-in) and places them in organized folders in the project folder. As a result, the project folder will have all project-related files located in one convenient, transportable folder, maintaining their dependent relationships.
Importing Audio Files into a Project
To better understand the relationship and organization of dependent files, you’ll load some audio files to use in creating a quick arrangement.
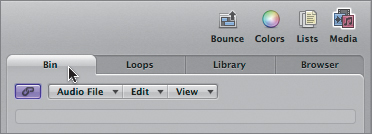
- At the top of the Media area, click the Bin tab.
- In the Audio Bin’s local menu bar, choose Audio File > Add Audio File.
A file selector box opens. You can use the file selector to load a block of audio files that you will use for the project.
- Navigate to Music > Logic 8_BTB_Files > Lessons > 02_Audio Files for Import.
- Click the Add All button.
- Click the Done button.
All the files located in the folder are added to the project’s Audio Bin.
Note
Audio files can be auditioned from this window by selecting them and then clicking the Play button in the Open file window.
Now let’s bring them into the arrangement, all at once. To do this, you must select the first track to which you want to import.
- In the track list, select the Audio 1 track (track 1).
Imported files are placed at the current playhead location. In this case, you want them to be placed at the beginning of the project, so you need to make sure that the playhead is at 1 1 1 1.
- Click the Go To Beginning button in the Transport bar, if needed.
- From the Audio Bin’s local menu bar, choose Edit > Select All.
All the audio files are selected.
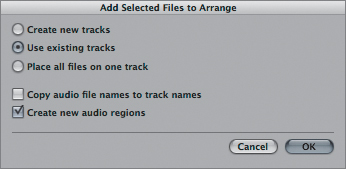
- Choose Audio File > Add to Arrange.
The Add Selected Files to Arrange dialog appears.
- Select “Use existing tracks” and “Create new audio regions,” if not already selected.
- Click OK.
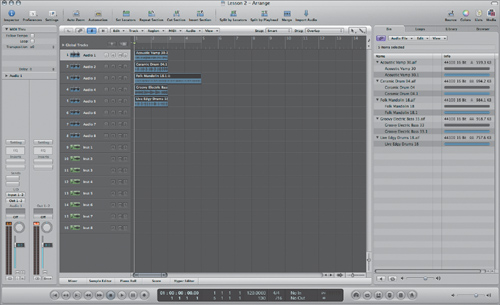
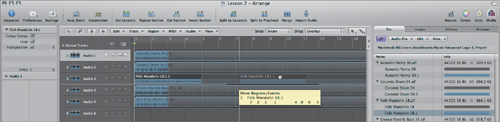
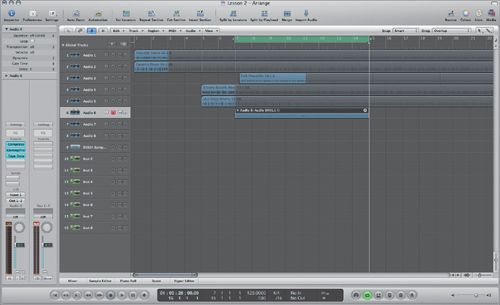
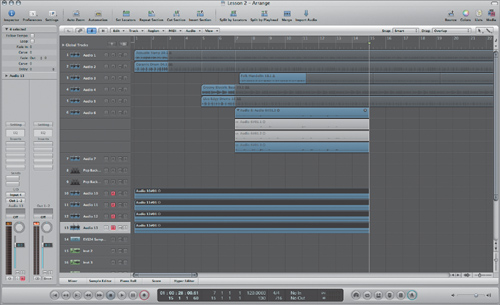
The selected audio files are placed in the first five audio tracks, starting at bar 1.
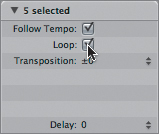
- At the top of the Region Parameter box, located on the left side of the Arrange window, select the Loop checkbox.
The selected regions are now displayed as looping in the Arrange area.
- Click the background of the Arrange area to deselect the regions.
- Drag the Folk Mandolin region on track 3 to the second beat of measure 7 (7 2 1 1).
- Drag the Groovy Electric Bass region on track 4 to measure 5 (5 1 1 1).
- Drag the Live Edgy Drums region on track 5 to measure 5 (5 1 1 1).


Importing EXS Instruments and Samples into a Project
Now that you have a few audio files imported and situated within the Arrange area, you’ll add a few more elements to work with in the project.
- In the Media area, click the Library tab.
The Library is a database of all factory- and user-created settings, such as channel strip settings, software instrument programs, and plug-in presets. The database is unique in that it is context sensitive: the settings it displays depend on what element is highlighted in the channel strip.
- Select the Inst(rument) 1 track.
Look at the Arrange channel strip in the Inspector. Notice that the Setting button has a faint white border, indicating that the channel strip settings are the focus of the Library. All the listings in the Library should now reflect only channel strip settings.
- In the Library tab, choose 12 Logic Basics > EXS24 Sampler.
As soon as you click the entry in the list, a “blank” (no sampler instrument) EXS24 is instantiated, along with a bypassed suite of useful insert effects.
- In the channel strip’s I/O area, click EXS24.
The Library focus changes to EXS sampler instruments.
The Library also has a sophisticated search function that enables you to search for settings by text name.
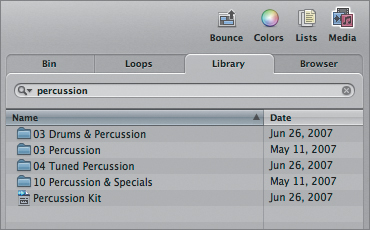
- Type percussion into the search field, and press Return.
The Library now displays all EXS sampler instruments with the word percussion in their names.
- Select Percussion Kit.
The EXS24 mkII loads the Percussion Kit sampler instrument.
- Play your MIDI keyboard to audition the Percussion Kit.
- Clear the search field by clicking the cancel (X) button on the far right of the search field.


Importing Space Designer Impulse Responses
Logic’s Space Designer also uses dependent files. Being a convolution reverb, it relies on a library of recorded audio files (impulse responses) to function. It is sometimes advisable to save these dependent files along with the project for transportability, especially when using nonfactory settings. A Space Designer reverb plug-in is already inserted on the EXS24 track, instantiated when you selected the EXS24 sampler channel strip in the Library.
- Option-click the Space Designer Insert slot to turn the plug-in on. (It is currently bypassed.)
The plug-in becomes active, and the Library now displays Space Designer presets.
- In the Library, choose 03 Small Spaces > 01 Rooms > 0.4s Live Chamber.
- Play your MIDI keyboard to audition the Percussion Kit through the Space Designer reverb.
- In the main menu bar, choose File > Save.
A Progress window appears, indicating that Logic is copying dependent audio files (Apple Loops, samples, impulse response files, and so on).
- After Logic completes the copying, click the Browser tab in the Media area.
- Click the Project button, if not already selected.
The project folder that previously contained only the project file, Audio Files folder, and Project Backups folder now includes other folders (Impulse Responses, Sampler Instruments, and Samples).
- Double-click the Audio Files folder to view its contents.
All the audio files used in the project are listed.
- Click the Back button to return to the project contents.


When creating a project, Logic keeps track of all dependent files by placing them in organized folders. In this example, the folders are:
• Audio Files folder—five audio files that you imported
• Impulse Responses folder—an impulse response audio file used by the drum reverb
• Project File Backups folder—an automatically created backup of the project
• Sampler Instruments folder—the Percussion Kit EXS instrument added to the Inst 1 track
• Samples folder—audio files used by the EXS Percussion Kit instrument
These files have been copied, not moved, to this new location. This way, you are able to bring all the elements related to a project from one system to another while still maintaining the locations of the original files that were installed with Logic.
Quickly Accessing Additional Tracks
No matter what the size of your computer display may be, only so much can fit onscreen. Because of this, it doesn’t make sense to create templates with large track counts of every type (audio, software instrument, and MIDI) in the Arrange area. Displaying 128 audio and 64 software instrument tracks in the track list would be impractical, as scrolling up and down the huge list would take up valuable time.
Logic is an object-oriented application; all audio and MIDI channel strips (tracks, software instruments, auxiliaries, MIDI devices, and so on) are represented in the Environment. Beginning with Logic Pro 8, channel strip objects are automatically created and managed in the Environment when new tracks are created, eliminating the need to first create channel objects in the Environment, and then assign them in the track list. This new system is extremely flexible because it creates new channels as your project grows.
Note
If you don’t wish to have Logic manage channel strips in such a manner, you can choose File > Project Settings > Audio and deselect the Automatic Management of Channel Strip Objects checkbox. However, even if the new mode is active, you can create channels of any type in the Environment and freely assign tracks to them by Control-clicking in the track list and choosing Reassign Track Object from the shortcut menu.
In the previous lesson, you created multiple tracks using the New Tracks dialog. In this exercise, you will quickly create and assign tracks for takes and overdubs that are related to the channels already present in the project’s track list.
Creating Tracks Automatically While Recording
Often, takes and overdubs are performed within an isolated section of a composition—an instrument solo or vocal chorus, for example. Logic’s Cycle mode enables you to concentrate on these smaller sections, playing them over and over.
Cycle mode is also helpful for grabbing multiple takes, recording one pass after another in rapid succession. This is especially useful if you wear the hats of engineer, producer, and artist while working; often it is impractical to put down your instrument to get your hands on the computer keyboard.
In this exercise, you will set up Logic to automatically record multiple takes in succession to create a simple part.
Note
For the sake of this exercise, you are encouraged to record with any audio input signal you choose, playing along with the project. If it is impractical to do so, follow the steps of the exercise by recording “blank” (no input) parts. Later, you can open a premade project with multiple takes of a simple guitar part for your examination. That project can be found in Music > Logic 8_BTB_Files > Lessons > 02_Creating and Managing Takes.
- Close the Browser by clicking the Media button.
- On the Audio 6 track, click the Record Enable button.
Note
Depending on your Audio Record Path settings, a Save As window may appear when you’re record-enabling the track. If a window appears, use the default name of Untitled Audio and write the file to the lesson’s Audio Files folder in Music > Logic 8_BTB_Files > Lessons > Completed > Lesson 2.
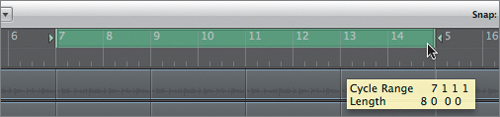
- Create an eight-bar cycle area from 7 1 1 1 to 15 1 1 1 by dragging in the Bar ruler.
The Cycle button on the Transport bar will turn green to indicate that Cycle mode is on.
- Play the project.
Note
Because you haven’t done any mixing on the previously imported audio files, the output level is quite hot, peaking at 6.0 dB. If the output sounds distorted (or you need to lower the listening volume a bit), reduce the Master Level slider to –8.0 dB to compensate.
Observe how playback is looped within the eight-bar cycle you set.
- Try playing along with the playback, creating a part that fits with the meter (4/4) and key (C major/A minor) of the tracks.
- Stop the project when you’re comfortable with a simple impromptu part.
- Put Logic into record mode by clicking the Record button, and perform your part along with the tracks.
- When the cycle reaches the end (bar 15), immediately try recording the part again, building takes in passes.
- If you’re feeling adventurous, record a third take.
- Click the Stop button after you have finished.
- Logic recorded each pass over the previous take. What results is a single take folder, containing all passes of the recording.
Note
MIDI recordings can also be recorded as take folders. Choose File > Project Settings > Recording to open the Recording project settings. In the MIDI section, choose “Create take folders” from the Overlapping recordings pop-up menu. If you want to record in an overdub fashion, adding a layer at a time to the same region, then choose “Merge only in Cycle record.”
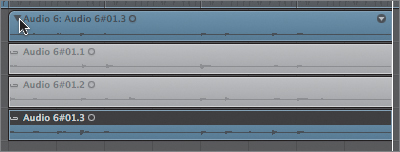
- Open the take folder by clicking the disclosure triangle to the left of the name.
The take folder should contain each pass that you recorded. Each region is automatically labeled with numbers corresponding to the channel (Audio 6), take (#01) and pass (.1 to .3).
The last take is highlighted, and the top lane displays its name and waveform information. The top lane simply provides an overview of what is selected in the take folder and, more important, what will be heard during playback.
- Close the project.
- Open the following premade file to continue with the lesson: Music > Logic 8_BTB_Files > Lessons > 02_Creating and Managing Takes.logic (mentioned earlier).
- Play the project.
- While it’s playing, click each of the three take regions one at a time, listening to them in the context of the project.
- Stop the project.
More Info
One of the best applications of take folders is an easy method for assembling composite tracks, described in depth in Lesson 6, “Advanced Audio Editing.”
Creating Channels for Double-Tracking
Double-tracking (the doubling of a recorded track) is an often-used technique for creating a fuller sound by blending two or more overdubs of the same part. Each overdub channel needs to have an identical channel strip setting to maintain the same sonic signature as the original. This process differs from recording takes, as the tracks need to be on separate channels in order to hear them both upon playback.
- Select the Audio 8 track (track 8).
- Open the Library by clicking the Media button and clicking the Library tab.
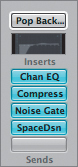
- With the channel strip setting field highlighted, in the Library, choose 06 Voice > 01 Choral > Pop Backing Vocals.
Several plug-ins are instantiated on the Audio 8 channel.
Let’s pretend that you just recorded a pass of backing vocals for a session. The artist immediately wants to record another pass of the part to thicken the sound. You must quickly create a new track that is assigned to a new channel and has the same channel strip settings.
- From the Arrange area’s local menu bar, choose Track > New with Duplicate Setting.
A new audio track, Audio 9, is created below the selected track with a channel strip—complete with any plug-ins and input and channel settings—identical to the previous channel strip. The new channel strip is also adjacent to the previous one, which will help keep things organized.
Recording Multiple Tracks Simultaneously
In Logic, recording multiple tracks simultaneously closely parallels the recording of single tracks—with a few differences. In this exercise, you will record several audio and MIDI tracks at the same time.
Note
This lesson is geared toward setups with audio interfaces that have four or more inputs. Don’t worry If you are working with a stereo input device; you can easily substitute two inputs whenever four are mentioned in the exercise. By recording with both inputs as mono sources, you will still get a feel for multitrack audio recording in Logic.
Let’s start by recording four audio tracks from separate inputs. To do this with existing tracks, you need to assign different inputs to each channel on which you want to record, then record-enable them one at a time. However, if your existing tracks are already filled, in the New Tracks dialog you can create new tracks that are already assigned to ascending inputs and are record-enabled.
- In the Transport bar, turn off Cycle mode.
- Click the Stop button to return to the beginning of the project.
- In the Arrange area’s local menu bar, choose Track > New.
The New Tracks dialog appears.
- In the New Tracks dialog, enter 4 in the Number field.
- Select the Audio button, if necessary.
- From the Format menu, choose Mono.
- From the Input menu, choose Input 1.
- Select the Ascending checkbox next to the Input menu.
- Select the Record Enable checkbox near the bottom of the dialog.
- Click Create.
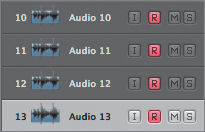
Four new mono audio tracks are created (Audio 10 through 13), assigned to Inputs 1 through 4, respectively, and record-enabled.
- In the Transport bar, click the Record button.
- After about 30 seconds, click the Stop button. (You can, of course, record a full pass if you’re playing along.)
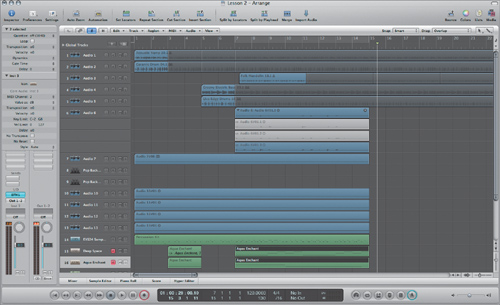
In the Arrange area, you should see four audio regions recorded on the Audio 10 through Audio 13 tracks (tracks 10 through 14).
- Disable record-enable for all tracks.


Recording MIDI and Audio at the Same Time
The process of recording MIDI and audio simultaneously works in a manner similar to that of multitrack audio recording. Logic directs the incoming signals to the appropriate track (MIDI input to MIDI track, and audio input to audio track).
Note
If you have another person in your studio to participate in the recording, feel free to have him or her supply the audio performance while you supply the MIDI input.
- In the track list, first record-enable Audio 7 (track 7), and then the EXS24 Sampler track (track 14).
- Locate to the beginning of the project, and put Logic into record mode.
- Play your MIDI controller to input some data (otherwise the EXS24 Sampler track will appear to not contain a recording).
- Click the Stop button after about 30 seconds.
- Turn off the Record Enable button on the audio track.
You just recorded an audio track (Audio 7) and a MIDI track (EXS24 Sampler) simultaneously.

Recording Layered MIDI Tracks
When you’re recording multiple MIDI tracks simultaneously, you can build complex sounds by layering the output of different instruments. In effect, the MIDI input is routed to multiple tracks with separate channel objects, recording the same part to multiple tracks in a single pass.
Note
All multitrack MIDI techniques discussed here work equally well with classic MIDI tracks and hardware, such as synthesizers and samplers.
Let’s look at this process by creating a simple layer of sounds from two of Logic’s software instruments.
- In the track list, select Inst 2.
- In the Arrange channel strip, click the Instrument slot and choose ES E (Ensemble Synth) > Stereo.
- Click the Preset menu and choose Deep Space.
- Close the ES E window.
- Play your MIDI controller to familiarize yourself with the ES E patch.
- In the track list, select Inst 3.
- In the Arrange channel strip, click the Instrument slot and choose EFM1 (FM Synth) > Stereo.
- Click the Setting menu and choose 07 Warped FM > Aqua Enchant.
- Close the EFM1 window.
- Play your MIDI controller to familiarize yourself with the EFM1 patch.
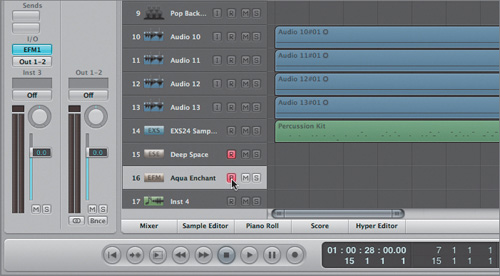
- Click the Record Enable buttons for both the Inst 2 and Inst 3 tracks, one at a time.
The Record Enable buttons should be active on both tracks (shaded red).
- Play your MIDI controller.
You should hear the software instruments playing simultaneously.
- Alternate selecting the enabled tracks while adjusting the volume level in the channel strips to achieve a good blend of the sounds. Try playing the C2 note on your MIDI controller as you adjust. (This is the note you will record in the next step.)
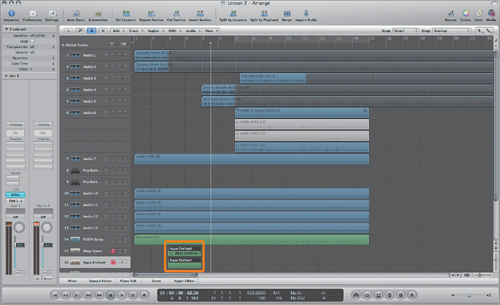
- With either track selected, record a sustained C2 note at measure 3 for two bars.
Logic automatically creates both a MIDI region on the highlighted track and an alias for the other track.
This alias mirrors the MIDI region in every way and reflects any change made to the original. When layering MIDI instruments, Logic creates an alias for every track except the one selected at the time of recording.
Recording Multiplayer MIDI Tracks
In addition to layering instruments as described in the previous exercise, you can record multiple performers using separate software instruments on multiple tracks. In this case, MIDI channels are used to differentiate incoming data, routing each player’s MIDI controller to the right track.
Note
This exercise is geared toward setups with two MIDI controllers. If you don’t have two controllers at your disposal, you can use one controller and change its MIDI channel output as you record.
- Set one MIDI controller to output on MIDI channel 1.
- Set the other MIDI controller to output on MIDI channel 2.
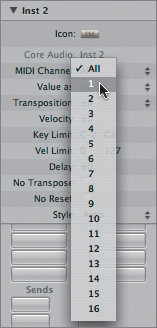
- Select the Deep Space track (Inst 2, or track 15).
- In the Track Parameter box, click the disclosure triangle to display its contents.
By default, software instruments are set to receive on all MIDI channels. To separate the incoming MIDI data while you’re recording, you need to set your tracks to receive on separate MIDI channels.
- Click the MIDI Channel menu and choose 1.
- Select the Aqua Enchant track (Inst 3, or track 16).
- In the Track Parameter box, change the MIDI Channel menu option to 2.
One last step remains to set up recording in multiplayer mode. It determines Logic’s behavior when recording multiple MIDI tracks and is set within the project settings.
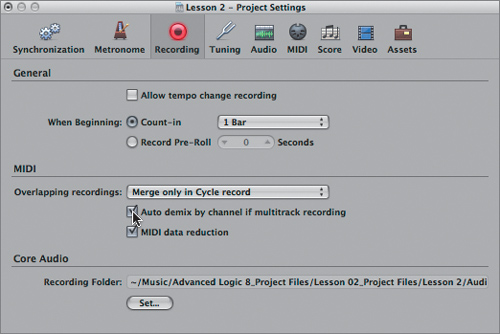
- Choose File > Project Settings > Recording.
- In the MIDI section, select the “Auto demix by channel if multitrack recording” checkbox.
Both tracks should still be record-enabled from the previous exercise, which will ensure that the instruments are receiving MIDI data. You are now ready to test the setup.
- Close the Project Settings window.
- Play each MIDI controller one at a time, making sure that each is connected to the appropriate software instrument channel.
- Try recording a short impromptu part from each MIDI controller (ideally you should record from them simultaneously) starting from measure 7.
Each track should have regions containing only the routed MIDI data from a single MIDI controller.

Deleting Unused Tracks
You now have a few too many empty tracks showing in the track list. Since you now know how to create tracks on demand, you can safely delete those extra tracks.
- Select the Audio 8 track (track 8).
- Press Delete.
This is Logic’s most basic technique for deleting tracks. Let’s look at a few others.
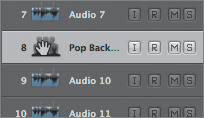
- Position the pointer over the icon at the left of the Audio 9 track (which is now track 8 after you deleted the last track).
The pointer should change to a hand when it’s in the right position.
- Grab the track by clicking the track icon, and drag the track to the left so that it is positioned outside the track list.
- Release the mouse button.
The track is removed from the track list.
Both of these techniques are useful for quickly deleting single tracks, but cleaning up a tracking session often requires the deletion of multiple blank tracks of different types (audio, software instruments, and so on). Logic’s Delete Unused function comes in handy for these situations.
- From the Arrange area’s local menu bar, choose Track > Delete Unused.
Any track that does not have a region is deleted from the Arrange area’s track list.
- Choose File > Save to save the work you performed in this lesson.
Lesson Review
1. What does a project folder contain?
2. How are tracks and channels managed by Logic?
3. What happens when Logic records multiple passes within a cycle area?
4. What must you do first to record multiple audio tracks simultaneously?
5. What must you do first to route MIDI and audio tracks when recording both simultaneously?
6. What are the two ways that Logic can record multiple MIDI tracks simultaneously?
Answers
1. A project folder contains all dependent files associated with a given project, organized in folders of the same file type.
2. Logic automatically creates and manages channels strips in the Environment when new tracks are created.
3. When recording multiple passes within a cycle area, Logic automatically creates a take folder containing each overdub.
4. Recording multiple audio tracks simultaneously requires that you set the tracks to separate inputs.
5. Although Logic handles the routing of MIDI and audio when recording both types simultaneously, you have to select the MIDI track before initiating recording in order for it to receive input.
6. MIDI tracks can be multitracked via layering sounds or by triggering separate sounds via multiple MIDI controller inputs (a multiplayer recording).
7. Unused tracks can be deleted individually or all at once using the Delete Unused command.