Lesson 12. Working with Notation
Logic was built from the ground up with musical notation as a central part of MIDI sequencing. (In fact, Logic evolved from a 1980s notation application called Notator.) As a result, Logic includes comprehensive notation capabilities for creating and printing parts and scores. You can enter notes directly into the Score Editor or automatically transcribe an existing MIDI recording.
This marriage of notation and MIDI data is integral to Logic. Every note in the score represents a MIDI note event. Logic is often called a notating sequencer because you can access all the powerful arranging and composing functionality of Logic’s sequencer within the notation environment of the Score Editor.
In this lesson you will explore Logic’s Score Editor, inputting notation and transcribing audio and MIDI regions for the composition “Sintra,” which you worked on earlier in this book.
Creating Notation
There are a variety of methods for inputting notation, including graphic input, step input, and real-time transcription. In this exercise you will focus on the first two techniques, entering notes directly into the Score Editor.
Let’s start by opening the project file you will be using for this chapter: the composition “Sintra,” which you worked on in the Advanced Editing section of this book. This time, you will be notating the rhythm guitar part, transcribing the audio file into notation.
Note
You will need to set the Display Middle C As preference to C3 (Yamaha) to accurately follow the directions within this exercise and others throughout the book. This option can be found in Logic Pro > Preferences > Display > General.
- Choose File > Open.
- In the file browser, go to Music > Logic 8_BTB_Files > Lessons and open 12_Sintra_Start.logic.
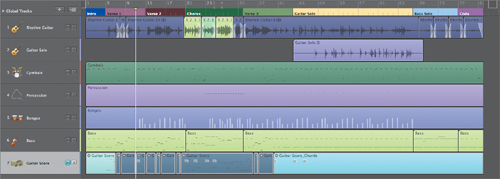
- Play the song to familiarize yourself with the material.
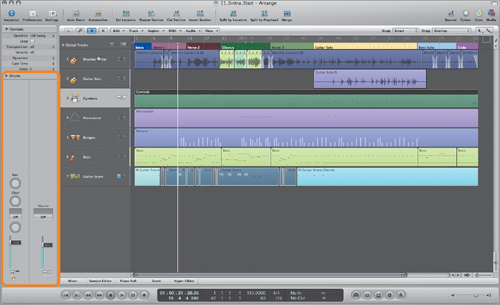
As you can see in the Arrange area, the song mainly consists of software instrument tracks outputting to Logic’s EXS24 mkII software sampler, mixed with audio recordings of nylon string guitar. Because the Score Editor interprets MIDI data to create notation, you will be working with a transcription of the main nylon string guitar part (track 11), inputting and adjusting notes where needed.
- If the first region (Guitar Score_Intro) in the Guitar Score track (track 11) is not already selected, click to select it.
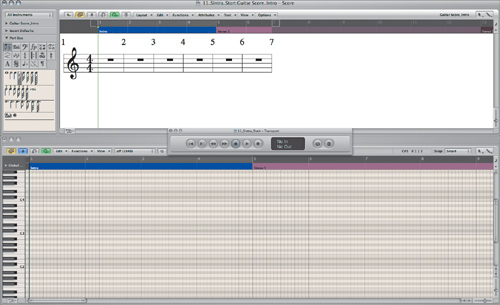
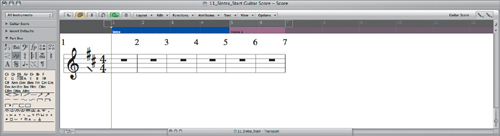
- Open Screenset 3.
This screenset places the Score Editor in the top half of the screen, Piano Roll Editor in the bottom half, and Transport in the middle. Both editors display the contents of the selected Guitar Score track.
You are viewing a blank region that was created as a place for you to input notational data. Notice that rests are automatically displayed.
Entering Notes Using Graphic Input
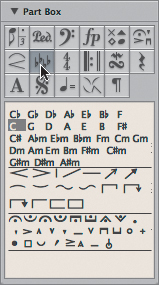
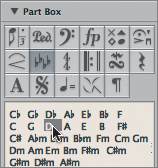
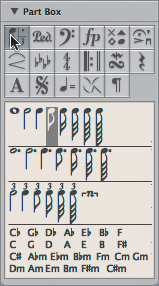
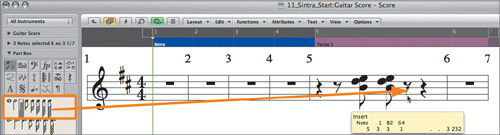
You can graphically input notes and other notational elements in the Score Editor by selecting them from the Part box, a palette of notational symbols in the Inspector (at the far left of the Score Editor).
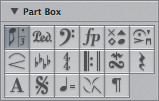
- In the Part box group menu (the upper section), click each object group button.
The object group is displayed in the panel just below the group menu. The most recently selected object group appears at the top of the panel.
- In the group menu, click the key signature button.
- Choose the Pencil tool.
- Since the song is in the key of D major, click D in the key signature object group.
- Click the staff between the treble clef and the time signature.
A D major key signature is inserted.
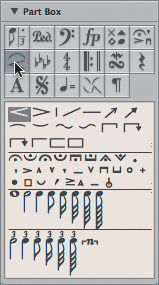
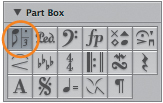
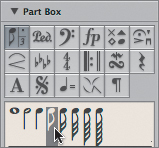
In the Part box, look at the notes group button and you’ll see that it contains three areas, represented by an eighth note, a dot, and a triplet symbol. When you click these symbols, you open groups of notes with different rhythmic lengths.
- Click the triplet, dotted-note, and eighth-note symbols on the notes group button to view those object groups.
Various rhythmic lengths are displayed in each group.
- If the eighth note is not already selected, select it in the object group.
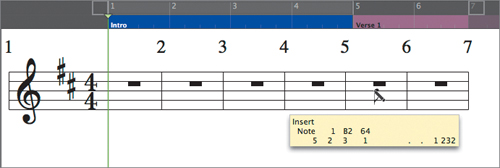
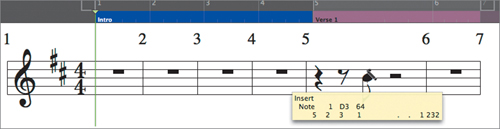
- Using the Pencil tool in the Score Editor, hold down the B line in the middle of measure 5, using the help tag to position an eighth note at 5 2 3 1. Then release the mouse button.
Note
When the MIDI Out button is enabled (at the top of the Score Editor), you’ll get aural as well as visual feedback as you drag a note around the staff. The note is played by the EXS24 mkII plug-in (using a classical guitar sampler instrument) on the current track.
An eighth note is inserted on the B line at 5 2 3 1.
- Use the same technique to insert a note on the D line above the first note you created.
Tip
Setting up the Pencil tool as the alternate Command-click tool works especially well for graphically entering notation. Doing so allows you to switch between selecting the note duration with the Pointer tool and inserting the note into the staff with the Pencil tool.
You might find it a little tricky to land on the correct pitch when graphically inserting a note. If your composition falls into a consistent key, you can make input easier by turning on the Diatonic Insert feature. With this feature activated, you are limited to entering only those notes within the current key signature.
- Choose Options > Diatonic Insert.
- Still using the Pencil tool, click anywhere above the D eighth note you created, and drag up and down while looking at the help tag.
The pitch choices are limited to diatonic pitches (so in D major, your pitch choices will not include C natural or F natural).
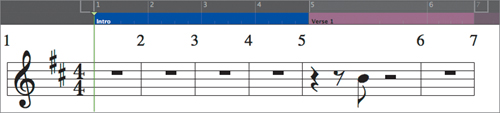
- Release the mouse button to place an eighth note at E above the eighth-note D you previously created.
Just as in any of the other MIDI editors in Logic, note data can be copied and pasted.
- Choose the Pointer tool.
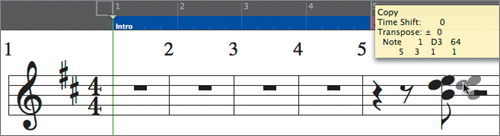
- In the Score Editor, drag a selection rectangle around the chord you just created.
- Option-drag the chord to 5 3 1 1.
A copy of the chord is created at the new position.
Dragging Notes into the Score
Another way to input notes is by dragging them directly from the Part box.
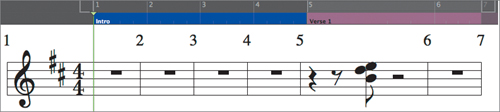
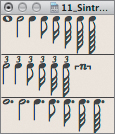
- Drag a quarter note from the notes object group to the B line at 5 3 3 1.
A quarter note is created where you dropped the note.
While this can be a good way to input notes with a variety of durations, journeying back and forth across the screen can get tedious. Fortunately, you can open an object group as a floating palette and position it anywhere on the screen.
- Double-click the notes button in the group menu.
A floating palette opens with all the objects in the group, including the dotted-note and triplet versions.
- Drag the palette near the measure you are working on.
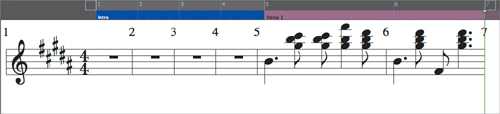
- Drag two more quarter notes from the floating palette, dropping them on the D and A above the B you just input, to create a chord.
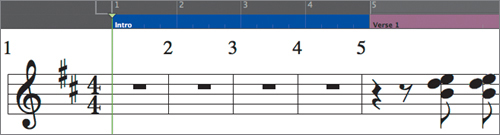
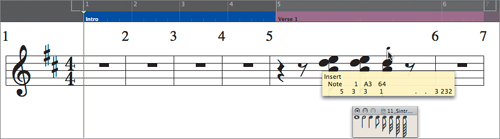
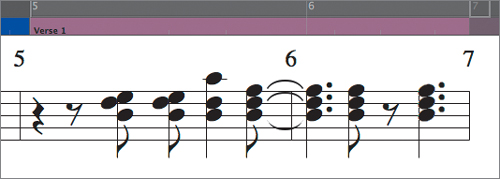
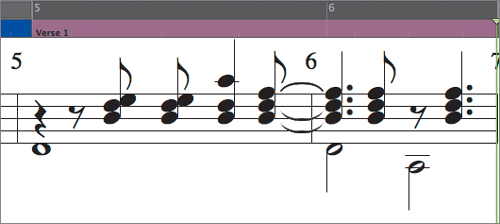
- Create another chord at 5 4 3 1 by dragging half notes to B (on the same line as the previous B), and to D and F
 , above the previous B.
A chord lasting two beats is created, tied across the bar line between measures 5 and 6.

Adjusting Note Length
Musical notation depicts note length using a specific set of symbols (sixteenth notes, eighth notes, and so on). Therefore, note length must be edited differently in the Score Editor than in the Piano Roll Editor (where you can lengthen a note by graphically dragging it, for example). To change the length of a note (or a group of notes) in the Score Editor, it is necessary to make an adjustment in the Event Parameter box.
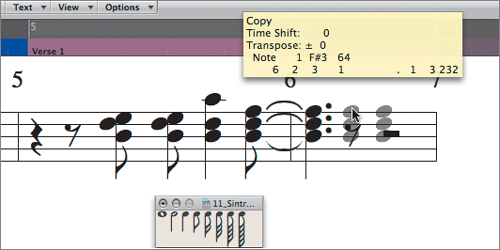
- Drag a selection rectangle around the final chord, and Option-drag it to 6 2 3 1.
- In the Inspector, click the disclosure triangle for the selected chord to display the Event Parameter box.
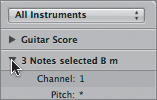
The Event Parameter box displays the parameters for the selected chord, indicated by “3 Notes selected” in the header.
Notice that Logic also supplies a chord analysis of the selected notes (identifying these notes as a B minor chord).
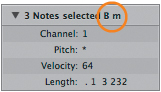
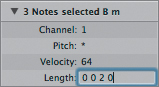
- In the Event Parameter box, double-click the numbers next to the Length parameter and enter 0.0.2.0 (signifying an eighth note) in the text field. Press Return.
The lengths of the selected notes change from half notes to eighth notes.
- Option-drag the chord to 6 3 3 1.
A copy of the chord is placed at the new position and is selected, making it ready for editing.
- In the Event Parameter box, double-click the numbers next to the Length parameter, and enter 0.1.2.0 (a dotted quarter note). Press Return.
Note
When entering numbers into the Event Parameter box, you can also use spaces, instead of periods, to separate the digits.
The note lengths of the chord change to dotted quarter notes.
- Close the floating notes group palette.
Entering Notes Using Step Input
Although graphic input allows the precise entry of notes, it can be slow. A faster technique is step input, which allows you to insert notes at the current playhead position while Logic automatically moves the playhead forward based on the selected rhythmic length. You can set a note’s pitch and length by clicking an onscreen piano keyboard, pressing a key on your computer keyboard, or using MIDI input.
To begin step input, you need to place the playhead at the position where you want to begin.
- Option-click the staff at 5 1 1 1 (use the help tag) to place the playhead at the beginning of measure 5.
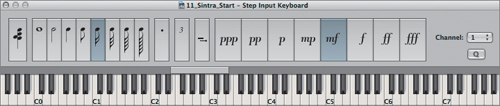
- In the main menu bar, choose Options > Step Input Keyboard.
The Step Input Keyboard window opens. Buttons in this window can be clicked to set the pitch, length, and dynamics (velocity) of a note.
Tip
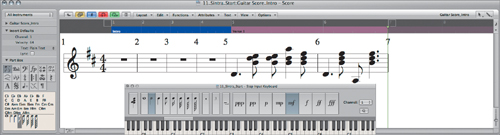
The Step Input Keyboard can be used in any Logic editor, and it is especially effective when controlled with an extensive set of key commands (including commands for specific note pitches). This allows you to quickly input notes entirely from your computer keyboard for non-real-time purposes such as creating notation.
- If necessary, reposition the Step Input Keyboard so it does not cover up the score.
- Click the whole-note button at the left side of the window.
- Click the D2 key on the Step Input Keyboard.
A D note is inserted just below the staff, and the playhead jumps to the end of the inserted whole-note value.
Note
Don’t panic! The note you just input is displayed as a dotted quarter note for a reason explained in “Creating a Polyphonic Staff Style” later in this lesson.
Instead of clicking the note on the Step Input Keyboard, you can also use a MIDI controller to insert notes by clicking the MIDI In button in any editor so that MIDI incoming data can be received. When MIDI In is enabled, Logic “listens” for MIDI note input.
- While looking at the MIDI Activity display within the Transport bar, find the D2 and A1 keys on your MIDI controller.
- In the Score Editor, click the MIDI In button to turn it on.
- On the Step Input Keyboard, click the half-note button.
- On your MIDI controller, press the D2 key, then the A1 key.
A D note is created at 6 1 1 1 and an A note at 6 3 1 1 (spaced by a half-note interval).
As long as the MIDI In button is on, Logic assumes that you are using step input, and it will create notes based on MIDI input. For this reason, it is necessary to turn off the MIDI In button when you are finished using MIDI for note input.
- Click the MIDI In button to turn MIDI input off.
- Close the Step Input Keyboard.


Using Staff Styles
Just as text can be formatted depending on the context (such as paragraphs for standard text, stanzas in poetry, and outlines), so music notation can be displayed in a variety of formats, depending on the instrument, transposition, number of voices, and so on.
Logic allows you to format notes using staff styles, which incorporate multiple attributes of the notes in a MIDI region, such as clef, staff size, instrument transposition, and various voice-display parameters.
A staff style acts like a notation-display filter and can be changed at any time. Let’s try out a few staff styles to observe their effects on the part you just input.
- In the Inspector, click the Guitar Score disclosure triangle to show the Display Parameter box.
The Display Parameter box contains parameters that affect the display of the selected MIDI region. The Style parameter designates the staff style assigned to the region.
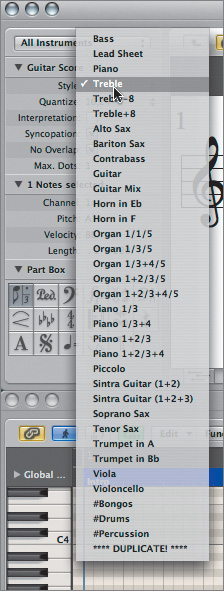
- Click the Style pop-up menu.
The staff style options are displayed.
Logic comes with many staff styles that each contain several attributes, such as clef assignment and display transposition.
- From the Style menu, choose Alto Sax.
The notation in the Score Editor changes because the Alto Sax is an E
 -transposing instrument. As a result, the part is transposed up nine semitones and notated in the key of B major.
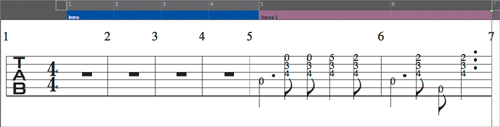
 - From the Style menu, choose Guitar.
The notation in the Score Editor changes to display guitar tablature.
As you can see, staff styles are extremely versatile in their displays of note data.
- From the Style menu, choose Treble, returning the notation to its default setting.
Creating a Polyphonic Staff Style
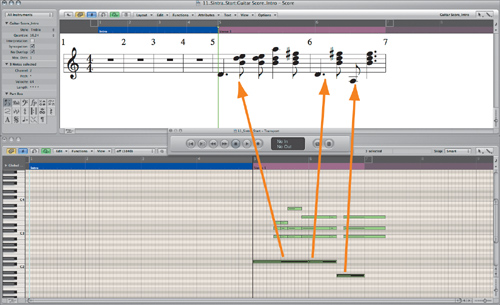
You probably noticed that the three bass notes you created by step input are displayed incorrectly in the Score Editor. The notes do not appear to sustain for the full amount of time and are cut off by the notes that follow. However, if you look at the notes in the Piano Roll Editor (in the bottom half of the screen), you’ll notice that the lengths of those notes are displayed correctly.
Our guitar part was input as a single voice, and therefore the note lengths are cut off because there is no voice independence. To solve this problem, you need to create a polyphonic staff style that can display multiple independent voices at once.
- Shift-click to select the three notes you just created via step input (D2, D2, A1).
The corresponding notes are highlighted in the Piano Roll Editor.
Notice the difference in the representation of the notes in the Piano Roll and Score editors. The reason for this discrepancy lies in the established system for the notation of a polyphonic instrument. A polyphonic instrument notated on a single staff, such as a guitar, needs to have rhythmically different melodic lines displayed in the same staff. These voices, in turn, must be able to display length, stem direction, and rests independent of each other.
- In the Score Editor’s local menu bar, choose Layout > Staff Styles.
The Staff Style window opens, displaying the contents of the default Treble staff style.
- Expand the window by dragging the lower-right corner to view all of the parameters.
The data displayed in the Treble staff style represents a single-voice staff with various display attributes.
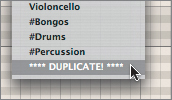
- Click the arrow button immediately to the right of the name box, and select ****DUPLICATE!**** from the menu.
A new staff style is created with the attributes of the Treble staff style. Let’s rename it.
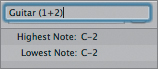
- In the name field, double-click the staff style name and enter Guitar (1+2), then press Return.
Notice that the new staff style contains a single row of attributes (preceded by the number 1) that represent a single staff. A staff style can have multiple staves with independent settings, each containing as many voices as you need.
In guitar notation, multiple voices are displayed on a single treble staff. Each voice is differentiated by the direction of the stems, ties, and tuplets. Let’s continue customizing the staff style to reflect these display parameters by first inserting an additional voice.
- Click the narrow column to the left of and just below the staff number.
Note
Clicking this column enables you to set insertion points for adding new staves and voices. You can also select voices and staves for deletion by clicking within this column, immediately to the left of the number.
The small arrow moves below the staff number, indicating where new staves and voices will be inserted.
- In the Staff Style window’s local menu bar, choose New > Insert Voice.
A new voice is created below the previous staff voice, indicated by the absence of a number at the far left of the line.
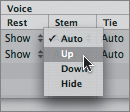
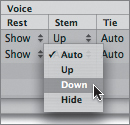
In guitar notation, when more than one voice is displayed at the same time, the stems, ties, and tuplets of the top voice always point upward. You can reflect this in the staff style by modifying the Voice attributes for the top voice.
- In the top voice, click the Stem parameter menu and choose Up.
- Do the same for the Tie and Tuplet parameter menus.
- In the bottom voice, click the Stem, Tie, and Tuplet menus one at a time and choose Down.
By default, each voice in a staff style can display rests. This can create multiple rests in a staff, which are appropriate for divided (divisi) parts but not for a solo part.
- Click the Rest parameter menu for the bottom voice and choose Hide.
This will hide the rests for the bottom voice.
Tip
Rests can be inserted manually by dragging them into the score from the Part box. These are graphic indicators only and have no effect on the playback of the MIDI region.
The last thing to consider is how to assign individual notes in the region to each voice. By default, a staff style will use a split note to do this. Pitches that fall above the split note are assigned to voice one, and pitches that fall below the split note are assigned to voice two. This split note can be changed in the Assign parameters in the Staff Style window.
However, this technique usually won’t work for guitar notation because voices are assigned primarily to represent melody (or bass lines) and the accompaniment, and they can consist of any range of pitches. Instead, voices can be assigned in a staff style using the individual notes’ MIDI channel numbers.
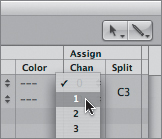
- In the Assign columns (far right), click the Chan(nel) menu for the top voice and choose 1.
- Click the Chan(nel) menu for the bottom voice and choose 2.
With these settings, all notes using MIDI channel 1 will be assigned to the top voice, and all notes using MIDI channel 2 will be assigned to the bottom voice.
Now that you have created the polyphonic Guitar staff style, it’s time to apply it to the displayed region.
- Close the Staff Style window.
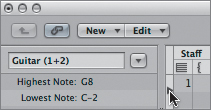
- In the Display Parameter box, click the Style menu and choose Guitar (1+2).
The notation changes slightly, displaying the notes with all stems pointing up. When notes are inserted manually, the same default MIDI channel is assigned to all notes (in this case, channel 1). When you applied the staff style, all the notes in the region were assigned to the top voice.
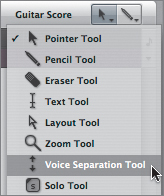
You don’t have to manually change the MIDI channel for each note that you want to assign to the bottom voice. Instead, you can quickly assign notes to adjacent voices by using the Voice Separation tool. This tool works by allowing you to draw a line between voices that need to be separated. Notes below the line are bumped to the adjacent voice below their current assignment, while notes above the line will be bumped up a voice.
- Choose the Voice Separation tool.
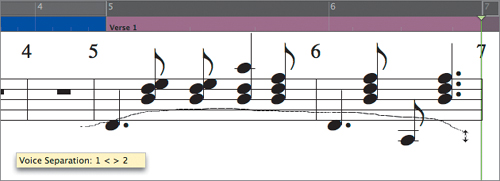
- Using the Voice Separation tool, draw between the bass notes and the chords in one continuous line.
The bass notes are assigned to the bottom voice and are now displayed correctly.

Working with Text
Text serves various purposes in musical notation, including supplying performance indications and displaying chord notation. Text can be added by using objects from the Part box, or by using the Text tool.
Entering Text into the Score
Let’s create a basic performance indication for the guitar part using an object from the Part box. The easiest way to input text directly into the Score Editor is with the Text tool.
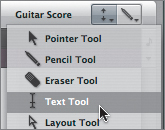
- Choose the Text tool.
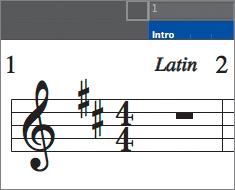
- Around the first measure, click the area above the staff.
A text insertion point is created.
- Type Latin and press Return.
Inserted text can be formatted in any font or size in the Font window.
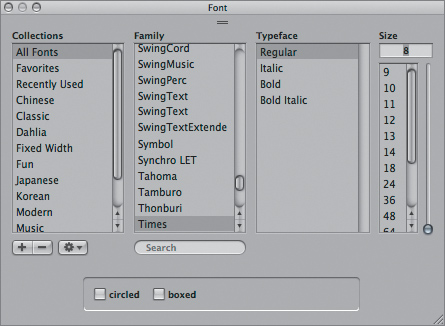
- In the Score Editor’s local menu bar, choose Text > Fonts.
The Font window opens.
- In the Size column on the far right, click 12.
The selected text increases in size.
- Close the Font window.
Tip
If you need to adjust the position of any inserted text, you can drag it from one location to another using the Pointer tool. However, when exact positions are required (as they often are), use the Event Parameter box. When text is selected, you will find parameters there to adjust both the vertical and horizontal positions by single pixels, and to align the text in relation to the page borders.
Creating Chord Symbols
In the Score Editor, chord symbols are a specialized form of text object and carry their own display attributes. Chord symbols can also be created by dragging symbols from the Part box.
Let’s create some chord symbols in the Guitar score to indicate the accompaniment chords for the guitar solo. Instead of using the Score Editor/Piano Roll Editor screenset, you’ll work with the Score Editor in the Arrange window. So far you’ve been accessing the editors within the Arrange area by clicking the tabs at the bottom of the window. You can speed up workflow considerably by using the various toggle key commands available, which both open and close an editor within the Arrange area with a single keystroke.
- Press the number 1 to open Screenset 1.
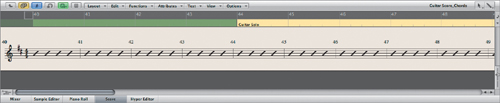
- In the Guitar Score track, select the last region (Guitar Score_Chords).
- Press the N key (Toggle Score Editor) to open the Score Editor within the Arrange area.
The Guitar Score_Chords region is displayed in the Score Editor.
Note
The Guitar Score_Chords region doesn’t contain any MIDI events or added notational symbols. The chord slashes you see displayed are actually part of the Lead Sheet staff style. You can display chord slashes for any staff style instead of rests by choosing them in the Staff Style window’s Rest parameter menu.
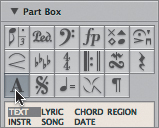
- In the Part box group menu, choose the text group to view its contents.
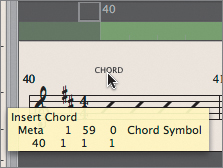
- Drag the CHORD object to just above the staff at 40 1 1 1.
A text insertion point is created at the location.
- Type D (uppercase) and press Return.
A D major chord symbol is entered at 40 1 1 1.
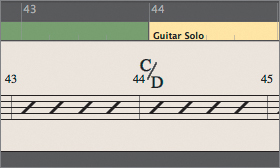
- Drag the CHORD object from the group to just above the staff at 44 1 1 1.
- Type C (uppercase) and press Return to enter another chord symbol.
This time, you are going to modify the chord by opening the Chord Symbol dialog.
- Double-click the chord symbol you just created.
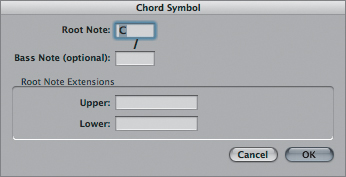
The Chord Symbol dialog opens.
This dialog allows you to add extensions and chord inversions.
- Click the Bass Note field, and type D.
- Click OK.
The chord is displayed as a C major chord with a D in the bass.
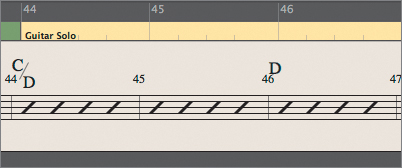
- Using the same technique, create a D major chord symbol at 46 1 1 1.

Using Text Styles
Just as you can format notes using staff styles, so you can create text styles to format text elements in the Score Editor. Each text style contains attributes, like font and size, that can be applied to specific types of text objects. You will use the Text Style window to modify the attributes of the chord text objects in the current score.
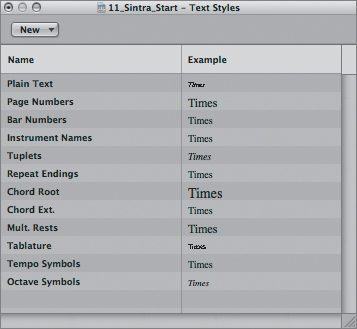
- In the Score Editor’s local menu bar, choose Text > Text Styles.
The Text Style window opens.
- Position the Text Style window so that you can see the chords you recently created.
- In the Chord Root row, click the Font column.
The Font window opens.
- In the Family column of the Font window, choose Arial.
The font changes for all chords. This is because they are assigned to the Chord Root text style by default.
- In the Typeface column, click Bold.
All chords are displayed in bold type.
- Close the Font window.
- Close the Text Style window.
Tip
Text styles are useful for creating specialized text formats commonly used in musical notation, such as rehearsal markings. A new text style is created by choosing New > New Text Style, then selecting its attributes using the technique described previously. The Font window also includes checkboxes for circling or boxing the text (useful for rehearsal markings). After setting up your text style, you can assign it to any input text by choosing it in the Style menu in the Event Parameter box.

Transcribing a Performance
Logic’s notation engine is designed to preserve the subtleties of an actual performance while organizing the data into cleanly notated scores. With a little finessing, you can create accurate parts and scores based on existing MIDI tracks without sacrificing any of the original “feel” of the sequenced material.
Logic accomplishes this demanding task by using a separate notation display system that allows you to adjust the look of the notation without changing the original MIDI region data.
In this exercise you’ll prepare MIDI regions in the Arrange area to aid in the transcription process, and adjust parameters in the Score Editor to correctly notate the parts without modifying the performance data.
Preparing MIDI Regions for Notation
During sequencing, it is commonplace to have tracks made up of noncontiguous regions (that is, regions that have space between them). However, the Score Editor needs regions to display notation and will display nothing (not even a staff) if no region is present.
For the purpose of notation, it is therefore advisable to fill up MIDI tracks with regions by inserting blank regions, or by merging multiple regions into a single composite region. This has no effect on the playback of a part but allows the Score Editor to create staves and fill them with rests.
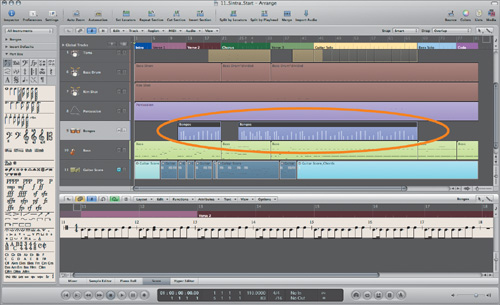
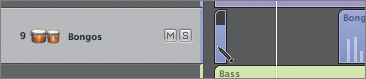
- In the Arrange area, scroll up and select the Bongos track (track 9).
The Bongos track consists of two separate regions.
As you can see in the Score Editor, the display starts at measure 11, which corresponds to the start of the first region in the track.
- Close the Score Editor by using the Toggle Score Editor key command (N).
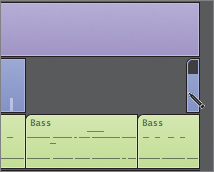
- In the Arrange area, choose the Pencil tool, and click the beginning of the Bongos track (at 1 1 1 1) to create a blank region.
- Create another blank region at 81 1 1 1 in the Bongos track.
- In the track list, click the Bongos track to select all of its regions, including the new ones.
- In the Arrange area’s local menu bar, choose Region > Merge > Regions.
One contiguous region is formed for the Bongos track.
- Press the N key to view the merged Bongos region in the Score Editor.
- Scroll through the Score Editor to view the part. Rests are now displayed for areas with no activity.
Viewing the Data Accurately
The settings in the Display Parameter box (with the exception of Style) form the basis for the rhythmic interpretation and display of MIDI data. These settings apply only to the score display and do not change the playback of the MIDI regions in any way.
Let’s look at how these parameters affect the notation of a selected region.
- Click the Solo button in the Bongos track to solo the track.
- Press the “Go to Position” key command (/) to locate to 11 1 1 1.
- Play the song, listening to the bongos part while watching the notation.
- When you’re familiar with the material, stop the song.
- Make sure that the Score Editor has key focus by clicking the top part of the area or by pressing the Tab key.
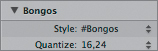
- In the upper-left corner, open the Display Parameter box (disclosure triangle next to Bongos), if it’s not already opened.
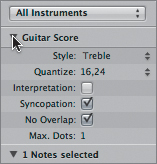
You can use the Quantize setting (located below the Style parameter) to apply visual quantization to the notes, dictating the shortest value that can be displayed in the selected MIDI region.
- Click the Quantize menu and choose 8.
The notation changes to display eighth notes as the shortest value.
- Play the song again, listening to the bongos part while watching the notation.
Notice that what you are hearing is not rhythmically the same as what is displayed. This illustrates the independence of display quantization from the actual MIDI performance data.
- Use the “Go to Position” key command (/) to locate to 11 1 1 1.
- Click the Quantize menu and choose 16,24.
This default setting works well for the part. It permits sixteenth notes as well as sixteenth-note triplets (indicated by 24) to appear as the shortest note lengths in the Score Editor.
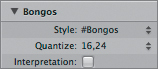
Let’s move on to the Interpretation parameter, which is specifically used to create an easy-to-read score from real-time MIDI recordings. When notes are performed, they generally aren’t held for the full length of a given note, but are shortened depending on the articulation and the time needed to move to another note on the instrument. With Interpretation turned on, Logic fills in those performance gaps between notes and makes a guess as to the appropriate notation for each note.
- Deselect the Interpretation checkbox in the Display Parameter box.
The notes are now displayed as isolated sixteenth notes with rests.
This might be more technically accurate (displaying the actual length of the notes as they are played), but the notation is much harder to read! Considering that the part is a percussive one, it makes sense to have Interpretation turned on (the default setting).
- Select the Interpretation checkbox to turn Interpretation on.
Tip
Interpretation should be turned off when using graphic or step input, because you want the full value of the selected notes to be displayed.
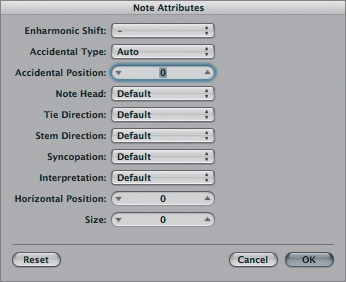
Each note in Logic can have unique display attributes, independent of the region settings in the Display Parameter box. These are set in the Note Attributes dialog.
- Double-click the first note of measure 11.
The Note Attributes dialog opens.
Here you can make adjustments to individual notes via various menus, including one for Interpretation.
- Click Cancel to close the Note Attributes dialog.
- Press the N key to close the Score Editor.
- Click the Solo button on the Bongos track to turn off soloing.
Working with Drum Notation
Logic has a unique and powerful way of notating drum parts using mapped instruments. Traditionally, mapped instruments are created in Logic to represent a drum machine or drum channel in a multi-timbral synthesizer, but they also enable you to assign specific notes to voice groups in the Staff Style window and thereby create drum notation.
In this exercise, you will create a mapped instrument to generate a score from the drum tracks used in the song.
Consolidating the Tracks
To create a single drum staff, you first need to consolidate the multiple drum part tracks into a single contiguous region.
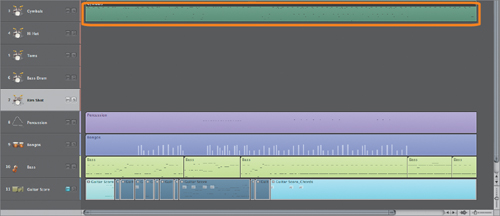
- Shift-click tracks 3 through 7 (Cymbals, Hi Hat, Toms, Bass Drum, and Rim Shot), selecting the regions in each track.
- In the Arrange area’s local menu bar, choose Region > Loops > Convert to Real Copies.
- In the Arrange area’s local menu bar, choose Region > Merge > Regions.
The drum tracks combine into a single region on track 3.
- In the Arrange area’s local menu bar, choose Track > Delete Unused.
The tracks left empty by the merge are deleted.
- Select track 3 (now displays Cymbals as the name).
Creating a Mapped Instrument
Now that everything is consolidated into a single region, you can create the mapped instrument object in the Environment.
- Choose Window > Environment.
The Environment window opens, displaying the Instruments layer, which has nothing in it yet.
- In the Environment window’s local menu bar, choose New > Mapped Instrument.
A mapped instrument object is created in the Environment layer, and the Mapped Instrument window appears.
The Mapped Instrument window is used to edit individual notes in a mapped instrument, and it automatically opens when creating a new mapped instrument object.
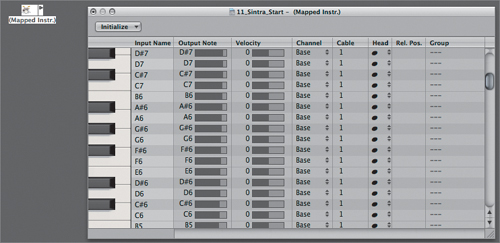
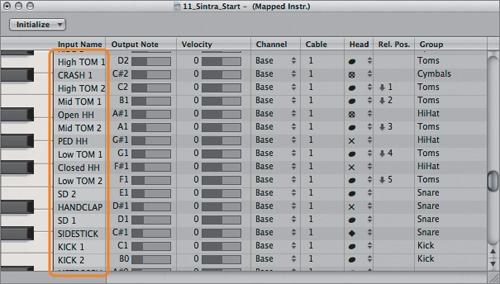
- In the Mapped Instrument window, scroll down until you can see the drum names displayed in the Input Name column (so that B0 is at the bottom of the list).
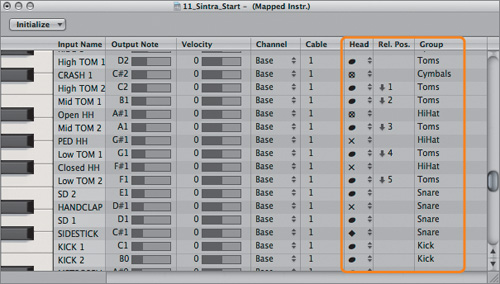
- Look at the three columns to the right in the Mapped Instrument window: Head, Rel. Pos. (for Relative Position), and Group.
The information in these columns has a direct impact on the drum notation. In these columns you assign note heads and adjust the relative position of the clef for each note. In addition, each note can be assigned to drum groups, which carry common attributes that are interpreted by the staff style in the Score Editor.
Note
The default settings in the Mapped Instrument window correspond to the standardized General MIDI (GM) Drum Kit note assignments. This makes it a snap to create drum notation from an EXS24 mkII sampler instrument that also reflects the General MIDI note assignments. If you aren’t using a GM-mapped drum sampler instrument to output the part, then adjustments can be made in the Output Note column to trigger the appropriate sound.
- Close the Mapped Instrument window.
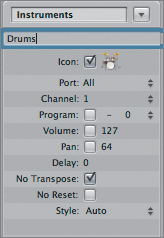
- In the Object Parameter box (for Mapped Instr.), click the object’s name, enter Drums, and press Return.
The mapped instrument object’s name changes to Drums.
If the track in the Arrange area is to display the drum notation, you need to assign it to the mapped instrument you created. To ensure that it still outputs to the EXS24 mkII plug-in inserted on the software instrument channel, you need to cable the objects together in the Environment.
- Option-click the cable output from the Drums object, and choose Audio > Software instrument > Inst 1 (the software instrument with the EXS24 mkII sampled drum kit).
Note
Option-clicking a cable output allows you to connect objects in different layers of the Environment.
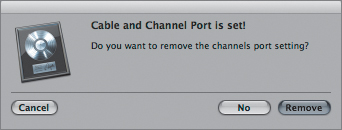
An alert message appears, asking if you want to remove the port setting for the object.
- Click Remove.
Note
By removing the port and channel settings for the object, you are setting the Drums object to output only to the software instrument object.
A cable appears, connecting the objects between the layers of the Environment.
You’re now ready to assign the new mapped instrument to the consolidated drums track (Cymbals) in the Arrange area. Instead of Control-clicking the track in the track list and choosing an object from the shortcut menu, you can quickly assign the selected track to any object in the Environment by using the MIDI Thru tool.
- Choose the MIDI Thru tool.
- Move the Environment window to the right, so you can see the Arrange window’s Inspector and track list.
- In the Environment window, click the Drums object while observing the Inspector within the Arrange area (Cymbals).
- Close the Environment window.
In the Arrange area, the selected drums track (track 3) is now assigned to the Drums mapped instrument. (You can verify the assignment by looking at the Arrange channel strip, which now displays a MIDI fader.)
Now all that’s left for you to do is assign the staff style in the Score Editor.
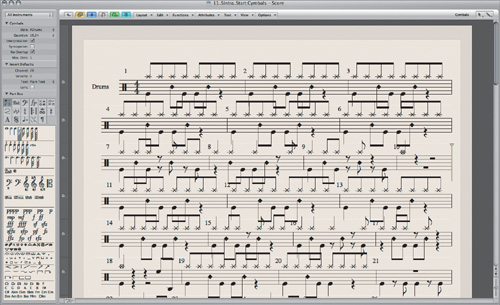
- Press the N key to open the Score Editor.
The Score Editor displays the contents of the drums track but uses the default Bass staff style. In order for the settings in the Mapped Instrument window to be translated into notation, it is necessary to assign a mapped staff style to the region. Mapped staff styles are designated in the staff style list by a # symbol preceding the name.
- Within the Display Parameter box, click the Style menu and choose #Drums.
The region is now displayed in correct notation.
Display the #Drums staff style to see how it affects the settings.
- In the Score Editor’s local menu bar, choose Layout > Staff Styles.
The #Drums staff style is displayed in the Staff Style window.
As you can see, this is a polyphonic staff style of sorts, consisting of multiple voices that are assigned to drum groups instead of a split point or MIDI channel. These drum groups correspond to the Group column entries in the Mapped Instrument window.
- Close the Staff Style window.


Creating Scores and Parts
Logic’s Score Editor allows you to use score sets to control which instruments will be displayed (and printed) in a score. A score set can include as many (or as few) of the existing track instruments as you want, and instruments can be arranged independently of their order in the Arrange area. In a score set you can also assign instrument names and determine if the group shares bar lines, brackets, or braces.
Multiple user-defined score sets can be created to display everything from a full score to individual parts. In this exercise, you will use score sets to lay out the full score as well as quickly generate individual instrument parts.
Creating a Score Set
- Click Stop to return the project to 1 1 1 1.
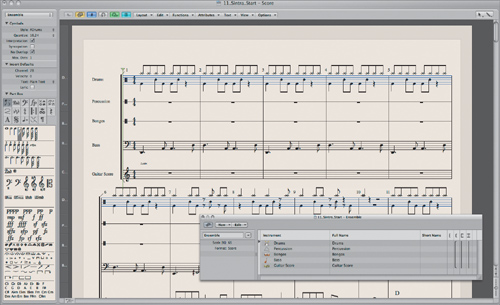
- Open Screenset 4.
The screenset contains a full-screen Score Editor in page view.
Note
Page view can be displayed in any Score Editor window: choose View > Page View from the Score Editor’s local menu bar, or click the turquoise Page View button next to the menu bar.
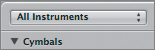
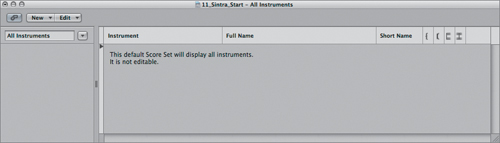
Prior to the creation of any score sets, Logic displays selected instruments using a default score set named All Instruments, which appears at the top of the Inspector.
However, you aren’t seeing all the instruments at the moment, because you recently selected the Drums region. To display all the instruments, you need to move up a level (reflecting the Arrange area).
- Click the Hierarchy button, located in the upper-left corner of the window.
All Arrange area instruments are displayed in the Score Editor.
Although the default All Instruments score set works for the basic display of the instruments, you can refine the score display by creating your own score set.
- In the Score Editor’s local menu bar, choose Layout > Score Sets.
The Score Set window opens.
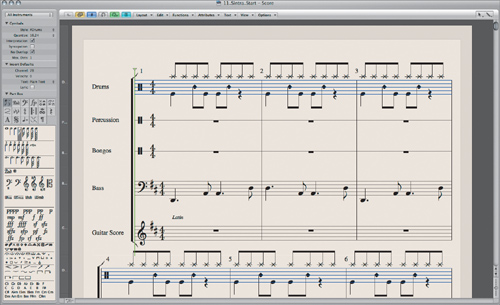
- In the Score Set window’s local menu bar, choose New > New Complete Set.
A new score set, made up of all the instruments used in the Arrange area, is created.
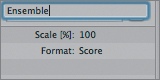
- Double-click the score set name, and enter Ensemble in the text field. Press Return.
The instrument names that appear in the score relate directly to the contents of the Full Name column. By default, these contents include the names of the objects within the Environment that are assigned to the tracks (channels, mapped instruments, and so on). You can, however, enter whatever you like in the Full Name and Short Name columns.
A score set also allows you to scale the size of the displayed staves, enabling you to fit more systems on a page. This is especially useful when creating full conductor scores.
- Double-click the number next to the Scale parameter (below the score set name) and enter 65, then press Return.
To apply the score set you created, you need to assign it in the Inspector.
- At the very top of the Inspector area, click the Score Set menu and choose Ensemble.
The score displays at a smaller scale and shows the instrument names you assigned in the score set.
The full score can now be printed.

Creating Parts for Printing
It is desirable to create individual score sets for each instrumental part in the score. This allows the most control over naming and other display attributes, and it enables you to print parts by choosing from the Score Set menu.
In this exercise, you will create an individual, printer-ready score set for the guitar part. You will create a new empty score set, then add the Guitar Score instrument to the set.
- In the Score Set window, select New > New Empty Set.
An empty score set is created.
- Choose New > Add Instrument Entry.
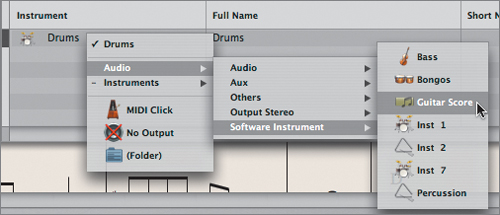
A single instrument entry is added to the score set. By default, the first instrument in the track list is added, which in this case is the Drums instrument. To add the guitar part, you must change the instrument in the Instrument column.
- In the Instrument column, click and hold down the Drums menu, and choose Audio > Software Instrument > Guitar Score.
The score set now displays the Guitar Score instrument in the Instrument column.
To complete the part, it is a simple matter to rename the default instrument as Guitar in the Score Set window.
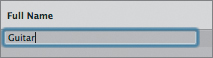
- Click the Full Name field, and enter Guitar. Press Return.
The score now displays Guitar at the beginning of the first staff.
Instrumental parts can reflect different layout preferences. To designate a score set as a part, you need to change the Format parameter, which is located below the Scale parameter.
- Click the setting next to the Format parameter (which currently displays Score). Choose Part from the menu. The Format setting changes to Part.
- Double-click the score set name in the top-left corner, and enter Guitar in the text field. Press Return.
- Close the Score Set window.
- In the Inspector, click the Score Set menu and choose Guitar.
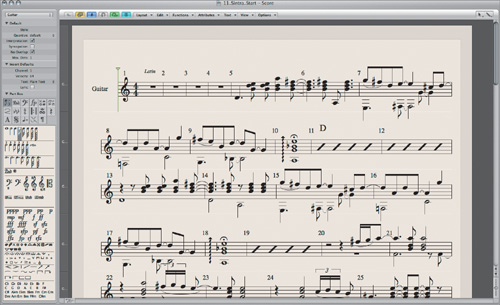
The Score Editor displays the guitar part.
Now that you’ve designated the Guitar score set as a part, you can change its layout preferences without affecting the Ensemble score set you created earlier. The layout preferences for both scores and parts are located in the Global Score project settings.
- In the Score Editor’s local menu bar, choose Layout > Global Format.
The Project Settings window opens, displaying the Global tab.
This window includes separate layout settings for scores and parts, designated by the two columns titled (appropriately enough) Score and Part.
The guitar part that you have been formatting needs a bit more space between the staves because the notation is getting crowded. You can create more space between the staves by adjusting the Line Distance setting in the Part column.
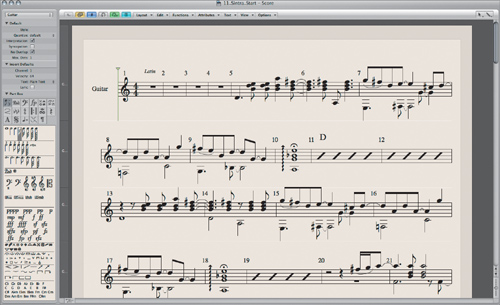
- In the Part column, click the Line Distance field and enter .25 (with a decimal point), and press Return.
- Close the Project Settings window.
The staves for the guitar part are more spread out now, making them easier to read.
Let’s finish by comparing the two score sets you have created. The differences can be seen most easily if you view the pages in their entirety. By zooming out in the Score Editor, you can see entire pages side by side.
- Press Control–Up Arrow repeatedly to vertically zoom out until you see two pages.
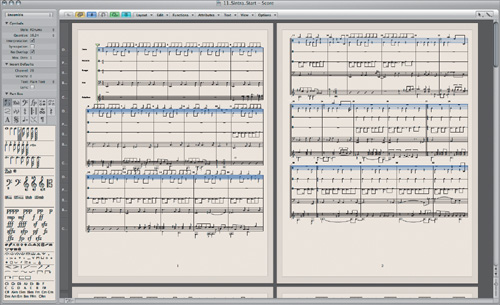
- From the Score Set menu, choose Ensemble.
The Score Editor displays the full score.
The two score sets display independent scale and line distance settings.
- Try printing the scores of both the Guitar and Ensemble score sets by selecting them in the Inspector and choosing File > Print.


Lesson Review
1. In what ways can you enter notation in the Score Editor?
2. Where do you edit note length?
3. What do you use to assign display attributes to notation?
4. How do you assign voices within a score style?
5. What do you use to assign voices in a part in the Score Editor?
7. Do you need to edit MIDI regions to accurately display notation?
8. Does the Quantization parameter in the Score Editor change both notation and playback?
9. How do you create drum notation?
10. What do you use to display and print only selected parts?
11. Can you retain independent formatting for both parts and scores?
Answers
1. Notation can be entered in the Score Editor using graphic input, step input, and real-time transcription.
2. Note length is edited in the Event Parameter box.
3. Staff styles are used to assign display attributes to notation.
4. Voices are assigned using a MIDI split note or an individual MIDI channel.
5. The Voice Separation tool can be used to quickly assign voices in a polyphonic staff style using MIDI channel assignment.
6. Text styles assign display attributes to text elements in the Score Editor.
7. Yes. MIDI regions must often be edited to display notation accurately.
8. No. Quantization in the Score Editor changes the notation display but does not affect the performance data.
9. Drum parts can be notated by assigning a mapped instrument and a mapped staff style to a track.
10. Score sets are used to display and print individual parts up to full scores.
11. Yes. You can assign separate format settings for parts and scores in the Global Score project settings.