
Lesson 6. Advanced Audio Editing
The flexibility of editing digital audio is one of the distinct advantages of working with nonlinear hard-disk recording systems. The user can precisely fix mistakes, adjust timing, rearrange section material, and combine elements in every conceivable way. What was once incredibly difficult or impossible to do with analog tape is now almost routine if you have the right set of tools and skills.
Modern production is both blessed with and plagued by this flexibility. On the one hand, it allows sophisticated edits to be performed with great accuracy. On the other, falling into obsessiveness is all too easy, and you can worry a track to a lifeless lump of 1s and 0s.
That said, good editing techniques can take your material to another level, turning a raw performance into a polished piece of music. Logic offers many ways to work with digital audio, whether fixing a performance mistake or a recording problem that would ruin an otherwise excellent take, or creating new parts out of an amalgam of tracks.
In this lesson, you will explore techniques for editing digital audio, enabling you to rework raw material with speed and flexibility.
Using Edits to Create Parts
One of the advantages offered by digital editing is the ease with which new parts are created from existing material through copying and pasting. In order to achieve a convincing result, however, it is of equal importance to use judicious edits to assemble the new part as well as create seamless transitions between the constituent building blocks.
- Choose File > Open.
- In the file selector box, choose Music > Logic 8_BTB_Files > Lessons and open 06_Sintra_Start.logic.
Note
This is the same project that you used in the previous lesson, but at a different stage of production. You will be using this project file in the following exercises.
Look at the length of the Rhythm Guitar.3 region on track 1. It ends about halfway through the Bass Solo section. This is because the original recorded part from the tracking session did not contain any material for the Bass Solo or Coda sections, which were added later in production. Punching in or adding other recorded material is not an option at this point because the tracking session has long since passed. Instead, let’s look at ways to extend the existing material using editing techniques.
- Use the key command for moving to the next marker (Control–Command–Right Arrow) or previous marker (Control–Command–Left Arrow) to go to the beginning of the Bass Solo section (and to set the locators).
- Use the “Zoom to fit Locators” key command (Shift-Control-Z) to zoom in to the Bass Solo section (we assigned this in the last lesson).
The window adapts to encompass the Bass Solo section.
- In the Transport bar, click the Cycle button.
A cycle area is created around the Bass Solo section.
- In the track 1 header, click the Solo button.
The Bar ruler is shaded in yellow, indicating that Solo mode is turned on.
Note
Mute and solo states can be independent for tracks and channel strips, depending on a setting in your preferences (Preferences > Audio > General > Track Mute/Solo). In order for you to see the Bar ruler displaying yellow (Solo mode engaged), you need to have CPU-saving (Slow Response) selected within the Track Mute/Solo menu.
- Play the project, listening to the Rhythm Guitar track.
- When you are familiar with the material, click the Stop button.
In this exercise, you will copy and paste the arpeggiated chords at the beginning of the Bass Solo to extend the track through the Coda section. The waveform is rather small in this quiet section, so to make an accurate edit, it is necessary to zoom in on the waveform.
- Use the Waveform Zoom tool located in the lower-right corner of the Arrange area to magnify the waveform to its maximum resolution.
The waveform is magnified.
- Using the Scissors tool, click the Rhythm Guitar.3 region at measure 69 (you can use the help tags to position the tool accurately).
The region divides at measure 69.
- Switch back to the Pointer tool.
- Copy the last region in the track (Rhythm Guitar.5) by Option-dragging it so that it begins at measure 72.
Note
Depending on your setup, a dialog may appear asking if you want to copy the automation data within the region. This alert preference can be found in Preferences > Automation. For this exercise, it won’t matter which option you choose (Don’t Copy or Copy).
The region is copied, creating a new region, Rhythm Guitar.6, which overlaps the previous region at measure 72.
- Copy the Rhythm Guitar.6 region by Option-dragging it to the right so that it begins at measure 75.
The region is copied, creating a new region, Rhythm Guitar.7, at measure 75.
- Using the same technique, create a copy of the Rhythm Guitar.7 region to begin at measure 78.
The region is copied, creating a new region, Rhythm Guitar.8, at measure 78.
Note
You can use the Zoom Horizontal Out key command (Control–Left Arrow) to see the entire extended part.
Take a moment to observe something important. Look closely at the regions you just moved and copied. You’ll notice dotted lines located close to measures 73 and 76. These lines represent the ends of the previous regions that are lying underneath each copied region.
When two regions overlap, the region with the latest start time takes precedence during playback.
- Using the Pointer tool, select the four copied regions (Rhythm Guitar.5, .6, .7, and .8) by drawing a rectangle selection around them.
You might have noticed that the region lengths seem to shift visually before you release the mouse button. Although the project will play back appropriately, with each region sounding at the right location, it can get visually confusing. You can easily fix this by eliminating the overlaps.
- From the Arrange area’s local menu bar, choose Regions > Remove Overlaps.
Each underlying region is trimmed at the point of overlap.


Using Fades to Smooth Out Transitions
When combining regions, you will often hear a short click at the seam of each edit. This is created by an interruption in the audio waveform at a nonzero point (a point where signal is present). In effect, each region’s audio waveform is clipped just shy of the ending or beginning of a sound.
This can be fixed by inserting a crossfade, a technique that automatically performs a quick fade-out and fade-in at the edit point so that the audio interruption won’t occur, thereby eliminating the click. Let’s take a look at some of the ways in which you can employ fades to smooth transitions.
- With the four regions (Rhythm Guitar.5, .6, .7, and .8) still selected, press the Set Locators by Regions/Events key command, Control-= (equal sign) (or Control-’ (apostrophe) on a laptop).
The cycle area adapts to the newly created passage.
- Click the Play button to hear the passage with the copied regions.
Listen for short clicks between the edited regions.
- Stop playback.
- While holding the Shift key, click the Rhythm Guitar.8 region, deselecting it.
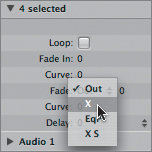
Look at the Region Parameter box, located immediately to the left of track 1. Notice that the box displays “3 selected,” indicating that any adjustments made to the region parameters will affect all four selected regions. You will be working with one of these parameters.
- In the Region Parameter box, click the Fade Out parameter, and choose X from the pop-up menu.
This enables a crossfade option.
Nothing has changed yet within the regions. This is because you haven’t determined a length for the fade.
- Double-click the number 0 to the right of the Fade parameter, and enter 10 in the value field.
The edit seams now display a crossfade (represented by a semitransparent white shape) at each edit point, lasting 10 milliseconds (ms).
- Play the project, stopping after you’ve listened to the passage with the crossfades.
The passage plays with smooth audio transitions between the regions.
Now that you’ve created smooth transitions between the edited regions, you can finish the passage by adding a short fade out to the last region.
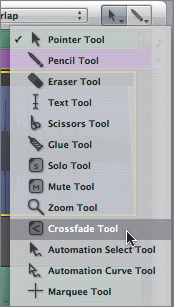
- In the Arrange tools, choose Crossfade Tool.
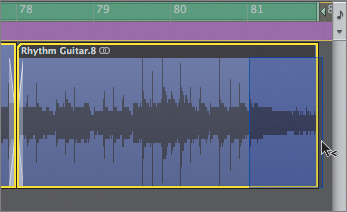
- Drag directly over the Rhythm Guitar.8 region, starting at measure 81 and ending slightly after the region end.
A fade-out is created from measure 81 to the end of the region.
- Play the project, stopping after you’ve listened to the passage with the fade-out at the end.

Using Existing Material to Fix Problems
Often, an otherwise perfectly good take might have a small defect such as an instrumental error, an extraneous noise, or even a malfunction in the recording process. By using carefully placed edits, you can substitute a passage of identical material for the problem segment.
- Using the Go to Next/Previous Marker commands, go to the Verse 1 section.
The cycle area now encompasses the Verse 1 section.
The waveform magnification isn’t needed here because the amplitude is at a sufficient level for you to easily see the waveform.
Let’s continue by returning the waveform to its normal display state.
- Click the Waveform Zoom button to return the waveform to its original size.
- Play the Verse 1 passage.
Verse 1 plays with an audible warble around the fourth beat of bar 7.
The perceived warble was caused by a glitch in the recording process, most likely from the audio interface. All is not lost, however, as the verse is repeated two times with the same musical material.
By finding an identical passage, you can replace the bad section with a copy from a good take. A perfect choice is the equivalent point within Verse 2, starting around the fourth beat of measure 15.
Let’s zoom in to this area to make a precise edit.
- Using the Zoom tool, draw a rectangle selection around measures 15 to 17.
Note
Depending on the size of your display, you might need to scroll to the right to perform this selection.
Now you can make the edit. You could do this by cutting and copying, as you did to the tail end of the track; but this requires multiple steps, including cutting around the desired material, copying to the new location, and eliminating the overlaps. Instead, try one of Logic’s handiest editing tools: the Marquee tool.
The Marquee tool allows you to select material for editing within regions without having to cut them up. It can work across multiple regions at once or in a single region, depending on the task required.
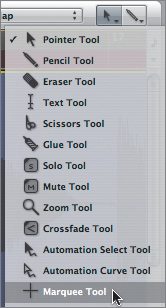
- In the Arrange tools, choose Marquee Tool.
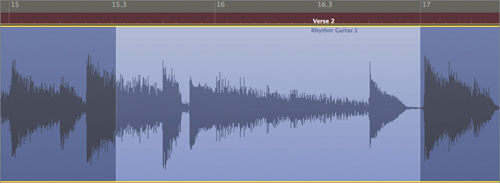
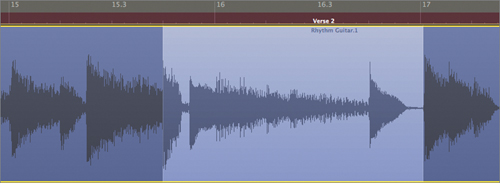
- With the Marquee tool, drag directly over the Rhythm Guitar.1 region, from around 15 3 1 1 to 17 1 1 1.
The selected passage is highlighted within the region.
- Click the Play button.
The project starts playing from the marquee selection, stopping when it reaches the end.
Note
The project will always play from the marquee selection when the normal Play command is used, regardless of cycle area or the current playhead position. This feature is handy for quickly locating and auditioning material within regions.
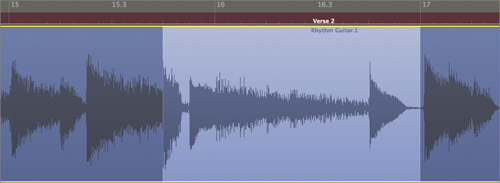
The material to be used for this edit starts at the transient located near 15 4 1 1 and ends right before the transient located just after 17 1 1 1. Your marquee selection was not that precise, but don’t worry: Logic allows you to lengthen or shorten a marquee selection by tabbing to nearby transients.
- Press Shift–Right Arrow to move the left marquee border to the transient at 15 4 1 1.
- Press the Right Arrow key (without holding down Shift) to move the right marquee border to the transient located just past 17 1 1 1.
The marquee selection expands to precisely encompass the area you want to edit.
- Using the Zoom tool, click anywhere in the Arrange area, making sure not to drag.
The window returns to the previous zoom level with the marquee selection still highlighted.
Now that you have selected the material to be copied, you can place it at the desired position. If you were to copy the selection as you did previously (by Option-dragging), the regions would overlap. Instead, you can create a splice without an overlap by using an alternative drag mode. Drag modes are available only in the Arrange area, and they act as preferences for moving regions.
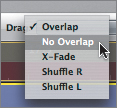
- In the upper-right corner of the Arrange area, click the Drag pop-up menu, and choose No Overlap.
As the name suggests, No Overlap is used in situations when you don’t want to create overlapped regions. In this mode, placing a selected region over another trims the underlying region and eliminates overlaps.
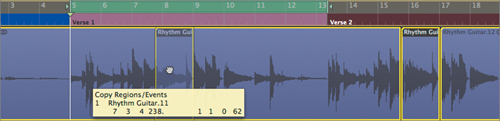
- Using the Pointer tool, Option-drag the marquee selection to the left, placing it at 7 3 4 238 (use the help tag to help you locate the position).
Note
When you’re dragging regions and events, Logic automatically snaps to a relative position (same bar/beat/division/tick relationship) based on the start point of the selected region or event (in this case, 7 3 4 238). This is usually desirable, as it allows you to align objects with the source material’s bars and beats. Snapping to relative positions can be turned off by choosing Snap > Snap to Absolute Value, which will snap the selection to the ruler’s bars, beats, division values, and so on, without reference to the source material.
The highlighted passage is copied to the new location, creating a new region at the target position.
- Using the Pointer tool, click anywhere in the Arrange area to eliminate the marquee selection.
- Click the Play button.
The edit works well but has an audible click at the first edit point.
- With the Pointer tool, Shift-click the copied region and the adjacent region immediately to its left.
- In the Region Parameter box, set a crossfade of 10 ms, as you did previously.
Crossfades of 10 ms are created at both edit points.
- Click the Play button to hear the material with the crossfades.
- Click the track’s Solo button to turn off soloing.
- Press the 1 key to recall Screenset 1, resetting your zoom levels to the original state.
Tip
Although selecting across multiple tracks is possible with the Marquee tool, it quickly becomes tedious when you’re making frequent edits to multitrack recordings such as drums. Instead, try using the marquee stripe, which creates a marquee selection across all the tracks designated by an area within the ruler. You can turn on this feature in the Bar ruler display menu by choosing Marquee Stripe. An additional lane appears just above the ruler, and you can drag to select an area similar to a cycle area.
Comping Tracks
Comping is the art of compiling a complete track from several raw performances. By using judicious editing techniques, you can assemble a cohesive musical track from the best parts of multiple takes.
In this exercise, you will create composite tracks from various materials and from multiple passes of the same part, drawing on a variety of strategies and techniques.
Understanding Comping Strategies
The process of comping a track demands a certain degree of consistency in the track components. You could assemble a comp from material on separate tracks that is routed to different channel strips, but there is a definite advantage to using the same track and channel strip when creating, editing, and mixing the source material. Using the same channel strip provides identical volume levels, pan positions, bus sends, and inserts, which will help level the playing field when you compare similar material.
The simplest and most efficient way to achieve consistency is to record a take folder on a single track (as described in Lesson 2, “Creating and Managing Takes”). In addition to keeping track material organized, a take folder also provides essential tools for quickly editing and creating a comp.
If a situation arises in which you need to put contributing material on tracks assigned to separate channel strips (such as when individual takes need to be processed differently to better match one another), you will be unable to utilize the comp editing features outlined in this exercise. If this is the case, however, it is still important to have the contributing tracks output to the same pair of channels on your audio interface. That way, you can make sure that your monitoring levels are consistent.
As in all editing procedures, an important aspect of the comping process is deciding how to approach the material that you will use to build a composite track. You should consider some general strategies that can make the process easier and produce a more satisfying musical outcome:
• If you have tracked many alternative takes, consider combing through them before you create the comp and isolating the three or four best choices to contribute to the part.
• When listening to the passes, judge the amount of editing that would be required to whip them into shape. A natural musical recording with acceptable flaws usually yields better results than a highly doctored track.
• Consider how well the material sits with the complete arrangement and with the other contributing tracks. If a part contains dramatic changes in feel or timbre, it will most certainly be harder to create a cohesive part, much less a cohesive composition.
Assembling a Composite Track
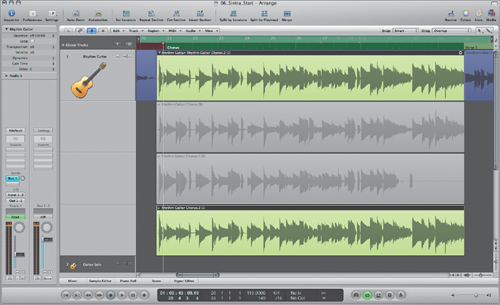
In this exercise, you will assemble a composite rhythm guitar track from several takes, isolating and compiling the good bits. In particular, you will be working with the chorus section, which has three takes in the take folder. All parts consist of the same musical material recorded in different passes during the tracking session.
Viewing Tracks for Comping
To accurately edit and assemble the comp from the take folder, it is important to first zoom in and set the cycle area. This allows you to focus on the area you will be working with. Notice that the Rhythm Guitar take folder slightly overlaps the Chorus section (the pickup, or anacrusis, to bar 21 is also included in the take).
When editing, it is also useful to start playback just before—and to end it just after—the material to be edited, checking the transitions to and from the adjacent sections. For these reasons, it will not be sufficient to use a marker as your target for zooming and setting locators for the cycle area. Instead, first set your locators manually, then use the cycle area as the zoom and playback target.
- Drag in the Bar ruler to create a cycle area from measure 20 to measure 35.
- Use the “Zoom to fit Locators” command (Control-Shift-Z) to zoom in on the cycle area. Now that you’ve centered in on the part of the Bar ruler you will be working with, take a look at the take folder contents.
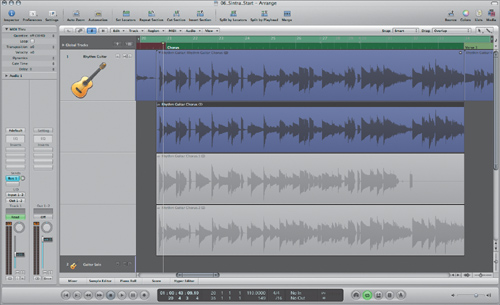
- At the upper-left corner of the take folder, click the disclosure triangle.
The take folder expands to show all three takes within the Arrange area.
This is a perfect zoom setting in which to assemble the comp, so it is worth your while to save it as a screenset in case your view inadvertently changes.
- From the Screenset menu, choose Duplicate.
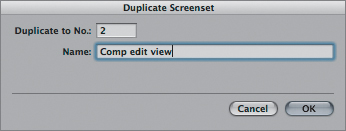
A dialog appears asking for a number and a name for the new screenset.
- In the Name field, enter Comp edit view.
- Click OK.
Now you can press the 2 key (or from the Screenset menu, choose “2 Comp edit view”) to recall these zoom settings.
Comparing Performances
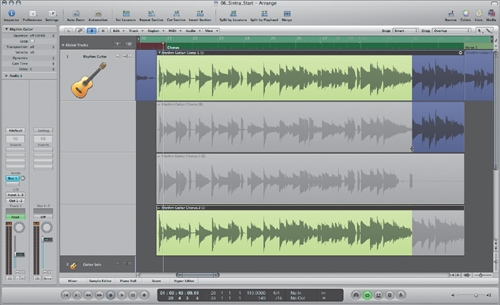
Now that you’ve isolated your work area, you should listen to each take, separating the wheat from the chaff. As you can see, the first take, Rhythm Guitar Chorus, is highlighted in the take folder and will sound when played back.
Note
Clicking a take within the take folder displays the waveform (color included) in the top track of the take folder, making it active for playback. You did this in Lesson 2.
- Click Play to listen to the first rhythm guitar take (purple) in the context of the project.
Though not egregious, the performance suffers from subtle deficiencies in the dynamics and timing, which were more skillfully realized in later passes. The ending of the Chorus section, from measures 32 to 34, works well, however, and should be retained, as it provides a smooth transition to the following verse.
- Click the second take, Rhythm Guitar Chorus.1.
- Click Play to listen to the second rhythm guitar take (green) in the context of the project.
The material is strong for the third phrase of the Chorus, beginning at the end of measure 24 and going until about measure 27. However, there is a flub near the end of the region resulting from a premature ending of the recording process.
- Click the third take, Rhythm Guitar Chorus.2.
- Click Play to listen to the third rhythm guitar take (yellow) in the context of the project.
This take contains a good performance of the beginning and latter parts of the Chorus, with a weaker middle section.
All in all, there is ripe material to choose from if you use phrases, or parts of phrases, from each take to construct a new track.
Isolating Wanted Material
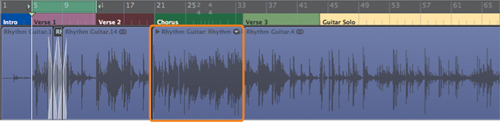
Selecting desirable material to form the comp can be accomplished in a variety of ways, and the process can quickly become confusing if you don’t follow a basic strategy. For this reason, it is advisable to start by selecting a take that will form the majority of the comp material, providing a framework in which to place additional material. In this instance, the beginning and some of the middle sections of the third take (Rhythm Guitar.2) are keepers and will form the majority of the comp.
- Select the third take, Rhythm Guitar Chorus.2.
The take folder highlights the Rhythm Guitar Chorus.2 take (in yellow).
The next steps are to insert pieces of material from the other takes, one at a time. The ending of the first take sounds satisfactory, so you can do that next.
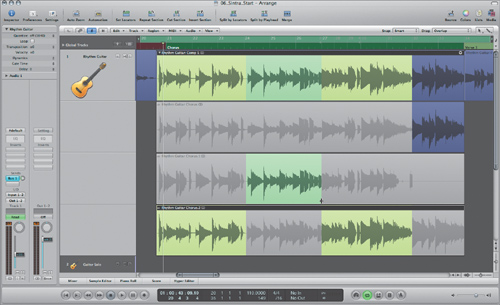
- Drag the right-hand border of the first take (Rhythm Guitar Chorus) to the left, stopping just before the large transient at measure 32 (the beginning of the next note).
The ending of the third take is dimmed, and the top take track now displays a purple area from measures 32 to 34, representing the first take.
- In the second take, drag from just before the transient after measure 24, to just before the transient starting on measure 27.
The top take track now depicts the selected areas (waveforms and colors) from each take.
Tip
You can always change the left and right borders of the selected areas by dragging them after they are initially selected. In addition, a selection can be moved forward and backward on the Bar ruler by dragging from the middle of it.
The Chorus is now divided into four distinct phrases.
- Click the Play button to listen to the comp.
Creating Alternative Comps
Logic allows you to create multiple comps, storing each for later comparison. These alternative comps are accessed from the Take Folder menu.
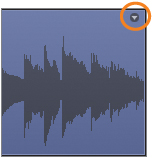
- At the upper right of the take folder, click the Take Folder menu’s arrow.
The Take Folder menu appears. As you can see, your completed comp is listed in the menu as Comp 1: Comp 1. Before you make an alternative comp, name the completed comp to avoid confusion.
- In the Take Folder menu, choose Rename Comp.
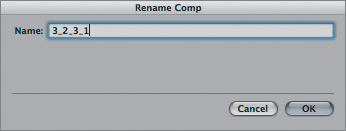
The Rename Comp window appears.
- In the Name field, enter 3_2_3_1 to indicate the order of the takes used in the comp.
- Click OK.
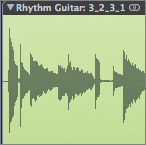
The take folder now lists the new name, Rhythm Guitar: 3_2_3_1, at the top.
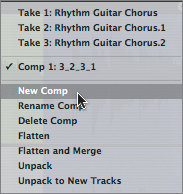
- Open the Take Folder menu by clicking the arrow.
Notice that a “new comp” option is listed in the menu.
- From the Take Folder menu, choose New Comp.
Now that you’ve named the comp and created a slot for the new comp, it is safe to create any additional alternative comps desired.
- With the techniques you learned earlier in the lesson, try assembling and naming your own comp using material from the take folder.
The Take Folder menu provides an easy way to compare alternative comps.
- Toggle between the two comps created in this lesson by choosing them in the Take Folder menu.
- Play the project, comparing each comp created in the lesson with the other.
Flattening the Comp
Now that the comp and an alternative have been completed, the take folder may be closed without a second thought. However, any region-level processing (Region Parameter box settings, Time and Pitch Machine manipulations, and so on) done on the Take Folder will treat the entire region contents as one. When you need to individually manipulate the separate take areas that make up the comp, it is necessary to convert the comp to individual regions. This process is referred to as flattening.
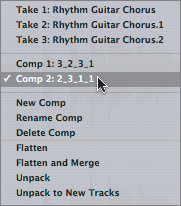
- Open the Take Folder menu by clicking the arrow.
- Choose Comp 1: 3_2_3_1 to make the original comp active.
- In the Take Folder menu, choose Flatten.
The selected take areas that made up the comp are converted to individual regions, in the order they were created and with the default crossfades applied (as defined in the General tab of the Audio preferences).
Note
The Take Folder menu also includes a “Flatten and Merge” command that converts the take areas of a comp to a single contiguous region by using digital mix-down (a process similar to using the Glue tool or the Merge Regions command on adjacent audio regions). It is not unlike the flatten function in digital graphics applications that merges all visual layers into one.
- Click the Play button to hear the comp track in the context of the arrangement.
Tip
If you are working on a project in which a take folder was not made, or composite material is located on multiple tracks, all is not lost. You can still pack a new take folder by clicking the associated regions and, from the Arrange area’s local menu bar, choosing Region > Folder > Pack Take Folder.

Fixing Problems Using the Sample Editor
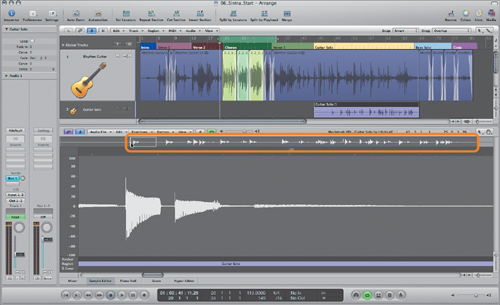
Up to now, the exercises have exclusively used the Arrange area for editing. Starting with Logic Pro 8, the Arrange area allows both sample-accurate viewing and waveform editing, just like the Sample Editor. Why, then, do you still need the Sample Editor? The Sample Editor also provides unique editing and file-based processing features (such as the Time and Pitch Machine used in Lesson 3, “Matching Tempo and Pitch”) that are indispensable for some tasks.
If you played the entire project during this lesson, you probably noticed the sharp click in the guitar solo. In an otherwise acceptable take, an audible click is evident slightly after measure 61. Using the Sample Editor, you can zoom in and remove the offending spike (most likely caused by a digital clock error during the recording session) by “drawing” it out.
Using the Sample Editor’s Waveform Overview
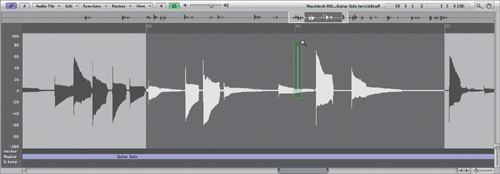
At the top of the Sample Editor is a view of the entire audio region’s waveform. The waveform overview acts as a map, always showing the full audio file attributed to the currently selected audio region, regardless of the zoom resolution. Any editing selection or current playback position is mirrored there and in the detailed waveform display. You can also use the overview to navigate the audio file for editing purposes.
- Press 1 to open Screenset 1.
- On track 2, double-click the Guitar Solo region.
The Sample Editor opens, displaying the Guitar Solo region.
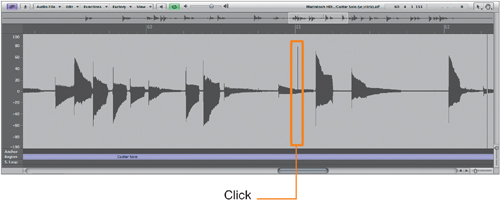
- Click anywhere in the waveform overview. (Try an area where some signal is present.)
The detailed waveform display updates to show the selected point in the overview, represented by a white rectangle.
The relationship between the waveform overview and the waveform display is interactive, as adjustments made in either area will be represented in both.
- Press Control–Right Arrow (the Zoom Horizontal In key command) once to slightly enlarge the currently visible selection.
Notice that the dotted rectangle in the overview has shrunk, accurately reflecting the area in the waveform display.
Locating Problem Areas in the Sample Editor
Now that you’ve been introduced to how the Sample Editor’s waveform overview works, let’s use it to locate the problematic click.
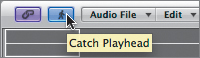
- If it is not turned on already, click the Catch button located at the upper left of the Sample Editor.
- At the top of the Sample Editor, click the Play button to listen to the take.
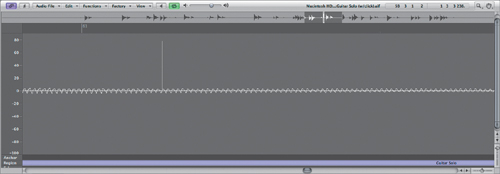
- Click the Play button again to stop playback when you hear the digital click right after measure 61.
You can see the click quite clearly as a sharp vertical spike, interrupting the normal audio waveform.
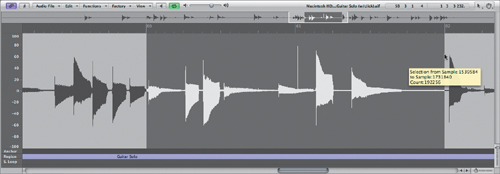
- In the waveform display, drag to select an area beginning approximately at measure 60 and ending approximately at measure 62.
- Click the Loop button next to the Play button to turn it on, if necessary.
Continuously repeating the selected area allows you to concentrate on the click.
Now you can zoom in on things a bit.
- In the waveform display, use the Zoom tool to draw a selection rectangle around the click.
The click’s waveform is magnified.
Although the magnification is at a good level, you need to get in even closer to draw out the click.
- In the waveform display, use the Zoom tool again to draw a selection around the click.
The view is magnified, displaying the click as a sloped rectangle sticking straight up from the surrounding waveform.
This zoom level will work well for the editing operation. At this magnification, the entire window represents about 130 samples (approximately 3 ms)!

Drawing Out Clicks with the Pencil Tool
Now that the click can be seen clearly, you can use the Sample Editor’s Pencil tool to draw out the waveform, smoothing over the click as if it never existed.
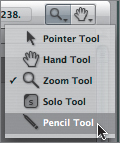
- Choose the Pencil tool.
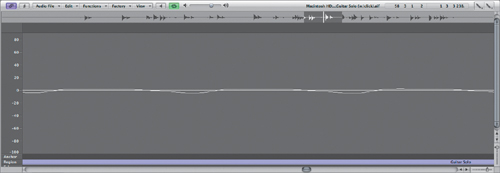
- Now, draw a line connecting the bottom points of the click rectangle. In effect, you’re redrawing the waveform as if it had never been interrupted by the click.
The click is eliminated, replaced by a smooth waveform.
- Using the Zoom tool, double-click the background of the waveform display to return to the original zoom level.
- Click the Play button to hear your edit.
The passage plays back without any audible click.
- Click the Sample Editor button to close the Sample Editor.
Tip
Instead of using the built-in Sample Editor, you can also set Logic Pro to open audio regions or files within an external sample editor like Soundtrack Pro. To do this, first specify the application you wish to use by choosing Logic Pro > Preferences > Audio > Sample Editor and clicking the Set button under the External Sample Editor heading. Once this path is defined, simply click the audio region or file you wish to edit and choose Options > Audio > Open in [name of sample editor], or use the corresponding key command.

Lesson Review
1. Which editing technique can be used to extend or repair parts?
2. How can Logic’s dragging behavior be changed in the Arrange area?
3. What technique is used to smooth out transitions between regions?
4. What makes up a composite (comp) track?
5. What is the most efficient way to isolate material to create a comp?
6. Do you have to manually apply crossfades between the selected areas in the take folder to form a seamless edit?
7. What is the Sample Editor used for?
8. How do you eliminate clicks and digital spikes in an audio file?
Answers
1. Parts can be extended or repaired by cutting and pasting similar material.
2. Logic’s dragging behavior can be changed to suit the editing need by selecting from the Drag menu.
3. Crossfades are used to smooth out seams between regions and can be placed automatically or manually.
4. A composite track is made up of material taken from contributing takes.
5. Isolating material for a composite track is done quickly by selecting areas in the take folder.
6. Comp tracks made from the take folder use automatic crossfades to seamlessly combine material into a cohesive whole.
7. The Sample Editor allows extremely fine edits and adjustments to an audio region, irrespective of the project’s tempo and key.
8. Digital clicks and spikes can be eliminated in the Sample Editor with the Pencil tool.