
Weaving the Web with Android
Your journey through Android’s capabilities has already taken you through many of the widgets and UI elements that form your basic toolkit for building applications. It has also introduced you to device capabilities that will bring features and functionality to your applications. There is, however, an 800-pound gorilla in the Android application development room, and that is the Internet.
Whether you want to bring HTML-based interfaces to your application, use services and capabilities on the Internet, or just work to download files and data to your application from a web server, Android has you covered. In this chapter, I explore three key building blocks for incorporating Internet-based data and features into your Android applications: the WebView widget for displaying web pages, the AndroidHttpClient and HttpURLConnection for richer manipulation of web services, and the DownloadManager for working with data in bulk.
Working with the WebView Widget
You can think of the WebView widget as being like most other UI components in Android—it provides a particular kind of UI experience for relevant data and functionality. With the appropriate layout in place, you can then drive a web-browser-like display to show the content of a page you specify. I say “web-browser-like” because under the hood, Android is using the WebKit plumbing that forms the core of the Chrome browser to provide the parsing and rendering capabilities needed to show web content. Interestingly, Chrome for Android itself uses a separate parsing and rendering engine, just to keep things a little complicated.
There are some limitations and additional points for you to consider when using a WebView widget, so let’s explore an example I can use as the basis for covering these.
Creating a Simple Application with a WebView
You can place a WebView in a layout much as you would any other component, either by itself or as one of a number of widgets in your activity. Listing 16-1 shows a straightforward layout where the WebView is the only widget, and it takes pretty much all of the available screen space.
No surprises here, although at this point it is worth flagging the first limitation of a WebView. If you look at the android:layout_height attribute, you can see I have chosen match_parent. This is the normal recommendation for WebView widgets. You can choose wrap_content, but there are known issues with both the WebView and its parent being set to wrap_content that result in incorrect sizing and scaling—and that basically result in a poor UI.
With a working layout defined, some Java logic is required to inflate the layout and do something useful with the WebView. The WebViewExample sample application in the ch16/WebViewExample folder uses the Java shown in Listing 16-2.
Such a small amount of code is capable of a great deal, depending on what the target URL provided in the .loadUrl() call returns. The myWV object is an instance of the android.webkit.WebView class, and that is worthy of comment. The Internet and Android’s WebKit plumbing are considered first class citizens (apologies for the “class” joke), such that WebKit has its own highest-level package in Android.
In other respects, the onCreate() method is quite simple, defining the myWV object for later use, inflating the layout—including the WebView defined—and retrieving the ID of the WebView for the instantiation call. That puts the code at the point where .loadUrl() can be called.
Normally .loadUrl() is called using the incarnation that takes a simple string parameter. There is a variant of .loadUrl() that takes both the desired URL and a second parameter as a String collection of additional HTTP headers to use.
Simple and Not-So-Simple WebView Security
At this point the WebViewExample application is almost ready to run. What remains is for us to add the necessary permissions to the manifest to allow access to the Internet. Providing the permission is as simple as adding the <uses-permission> option for the android.permission.INTERNET option in our AndroidManifest.xml file, as shown in Listing 16-3.
Without the android.permission.INTERNET permission in place, your application throws a range of unpredictable errors depending on the version of Android on which you run it and the API levels specified in the manifest file. Modern versions of Android, including Marshmallow 6.0 and Lollipop 5.0, show the error depicted in Figure 16-1.
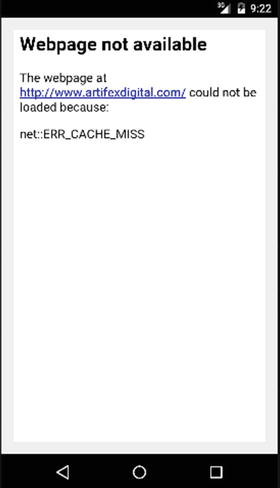
Figure 16-1. Errors showing in later versions of Android when the INTERNET permission is missing
You will probably confuse most lay users with a message like net:ERR_CACHE_MISS. Even somewhat web-savvy users might be mistaken and think the problem is with caching or something unrelated to permissions. You are also unlikely to actually ship an application with this problem, since hopefully you test your applications before you ship them and when you do, you notice the web page you are requesting is definitely not shown.
With the correct permissions in place in your manifest file, the WebViewExample application should behave as expected and actually load the page. Figure 16-2 shows the successful loading and rendering of the target URL.

Figure 16-2. Successfully loading a URL with WebView
Android’s security regime with WebView does not end with the android.permission.INTERNET setting. If you look at both Figures 16-1 and 16-2, you should notice that the WebView might have used the WebKit browser underpinnings to render output, but some other notable parts of typical web browsers are missing.
For instance, there is no address bar shown in the WebViewExample application. This is the default with WebView widgets; it prevents the WebView from being rerouted to other URLs unless you explicitly override this behavior. You will also notice there are no scroll bars. This is not a security measure, but rather a pragmatic interface choice on devices with no pointer. Instead, users of your application can scroll by touch-and-drag with their finger.
By default, Android also prohibits JavaScript execution in a WebView. You can change this restriction by invoking the method getSettings().setJavaScriptEnabled(true) on the WebView object.
GOOGLE, ANDROID, AND WEBVIEW SECURITY FLAWS
The history of security issues with WebView goes back some time, with a number of instances mentioned widely online. Google’s current practice is to patch WebView bugs promptly, which is in line with its overall security practice. Unfortunately, the combination of working through many handset manufacturers who do not use Google’s patching priorities and historic issues with poor upgrade paths means that older versions of Android have unpatched WebView bugs. You can help yourself protect your code and your users in a variety of ways, but it is worth keeping in mind Google’s official stance on WebView for older pre-Android 4.4 devices:
“If the affected version [of WebView] is before 4.4, we generally do not develop the patches ourselves, but welcome patches with the report for consideration. Other than notifying OEMs, we will not be able to take action on any report that is affecting versions before 4.4 that are not accompanied with a patch.”
How’s that for commitment to the long tail of Android versions? Android Lollipop 5.0 and Marshmallow 6.0 benefit from a rearchitecting of WebView by Google; in fact, Google is now releasing WebView as a stand-alone application so that, in the future, it can be updated separately from the Android version of the device.
Building HTML Layouts with WebView
An alternative to simply pointing your WebView to a URL is to provide the HTML that can be rendered within the WebView widget yourself and load it so it can be used with the loadData() method. Although you may see this as duplicating capabilities, it opens up a range of possibilities. You can, for instance, use HTML fragments to draw UI elements that stock Android widgets do not cover. You can also use it to display data fetched from a file, a database, or somewhere else online that is too big or otherwise cumbersome to bundle at application install time. And, of course, you can go so far as to design the entire layout of your application in HTML. There are pros and cons to this approach, which are argued about extensively in many fine books and websites. I’ll spare you a long diatribe on this point and assume you can judge for yourself if HTML is a useful interface design approach.
The loadData() method has several overloaded forms. The simplest version takes three parameters, all of which are string values.
- The HTML content, which is parsed and rendered to display in the WebView.
- A MIME type for the content, which is almost always text/HTML.
- The encoding used for the HTML content. UTF-8 is a safe option in almost all cases.
It is easy to experiment with HTML-based layouts assuming you have some knowledge of HTML. I have adapted the original WebViewExample application to replace the loadUrl() call with a loadData() call, which you can find in the ch16/WebViewExample2 folder. The layout for WebViewExample2 is exactly the same as it was for WebViewExample. The Java code differs, as shown in bold in Listing 16-4.
Here you can see the HTML payload provided to the loadData() method. Although the example HTML is simple, you can use almost all of the HTML5 elements with only a few minor exceptions. These include some quirks and limitations for <canvas> and the HTML5 video viewport extensions. (The Android developer website has more details on the particular supported behavior.) For easier reading, I have also written the HTML payload directly into the Java method call. In reality, it is far better to create string resources for your HTML in your strings.xml file and refer to them by ID.
When you run the WebViewExample2 application, you should see output similar to that shown in Figure 16-3.
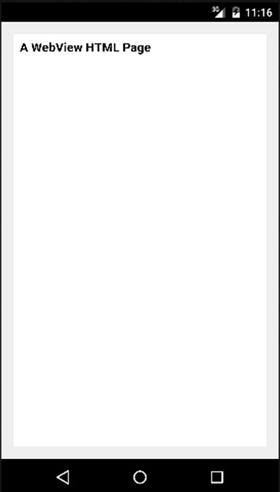
Figure 16-3. HTML rendered in a WebView using loadData( )
As with the earlier WebViewExample application, there is no address bar and no scroll bars. As mentioned earlier in the chapter, a user can scroll using swipe gestures on the screen. As a developer, you also have a range of programmatic controls over scrolling and web page behavior, via methods on the WebView object such as these:
- goBack(), which is analogous to hitting the back button in a browser, sends the user back to the previous page visited in the WebView.
- goForward() moves forward one page in the history of pages visited in the WebView, assuming at least one page forward has been visited.
- canGoBack() returns a boolean indicating if the WebView has any history, and therefore whether goBack() would do anything.
- canGoForward(), like canGoBack(), returns a boolean indicating if there’s a “future history” to which the WebView can progress.
- reload() reloads the content of the WebView from the source (HTML or URL).
- clearCache() removes all cached items from the WebView’s inventory of form entries, images, and so on.
- clearHistory() clears the history of URLs visited within the WebView object.
Many more methods are available for WebView; an exhaustive list is at http://developer.android.com/reference/android/webkit/WebView.html.
UI-less Internet Interaction with Android
Displaying web content in a WebView widget is a common way of integrating various Internet-based sources into Android applications. However, there are many cases in which an application’s interaction with a website or other Internet resource is all about consuming data, or accessing web-exposed APIs, such as SOAP web services or RESTful JSON API end points. In these cases, functionality and interaction are all possible without any UI to speak of, although the results of these actions probably get communicated to the user in some way. For instance, a music playlist might be updated, new features of a game might be exposed, or the results of an online purchase might be displayed.
Whatever the need, Android provides a multitude of techniques so you can interact with the Internet without a UI. The three principle approaches are via the Apache HttpClient interface, the AndroidHttpClient object, and the HttpURLConnection object.
Why Multiple Approaches to Web Interaction?
As is the case when they discuss any technology that is entering its fourth or fifth decade (depending on how you count), many people have differing opinions on the “best” way to incorporate Internet capabilities into software and libraries developers use. Each package, library, or class Android supports has its benefits and drawbacks, and you will not find a consensus on which is “best” to use. The following sections discuss the three most popular approaches at a high level.
The Apache HttpClient Approach
The venerable approach to Internet connectivity in Android is the Apache HttpClient. As the name suggests, this was sourced from an Apache-sponsored project and featured in the earliest Android devices. As far back as Android 2.2 Froyo, Google began signaling that this interface’s days were numbered when it introduced the parallel AndroidHttpClient object. Most of the capabilities you would expect are present with HttpClient-derived objects and the related HttpRequest and HttpResponse implementations, which allows you to conduct common Internet-enabled tasks.
These are the main issues with using Apache HttpClient:
- No default handing of SSL; the interface instead relies on you as the developer to do the hard work of certificate management.
- Single-threaded by default, with significant overhead to work in a multithreaded Android application.
- Marked as deprecated from Android API level 22 on (and will be removed from the Android SDK at some imminent point).
You can still use Apache HttpClient as your Internet connectivity approach today, and it is a good option if you are targeting the many older Android 2.2 Froyo and 2.3 Gingerbread devices on the market. But be aware that its days are numbered, and other approaches target Android devices of all vintages.
The AndroidHttpClient Approach
With the release of Android 2.2, Google introduced the AndroidHttpClient as its preferred approach to HTTP-and-friends interaction. Bundled as part of the android.net.http package, it is an optimized implementation of DefaultHttpClient that tries to help you, the developer, make good design choices. The following are among the many things it does for you:
- Integrated SSL handling with Android certificate management capabilities, which means you do not need to handcraft the certificate handling seen in Apache HttpClient.
- Better threading capabilities and the “benefit” of enforced performance controls; it provides these by insisting that all activity happens off the main UI thread. We will explore this more later in the chapter.
- Control over various HTTP connection and header attributes, such as the user agent string.
- Various utility methods to handle more elaborate HTTP payloads (GZIP, for example), date manipulation, and more.
One of the drawbacks for AndroidHttpClient is the loss of default cookie handling. Instead of seamlessly caching cookies for the life of the object, as a developer, you need to use a HttpContext object to persist cookies. The other principal thing to consider is whether only targeting devices running Android 2.2 or later suits you. As of this writing, this decision would encompass around 70 percent of the Android devices in circulation; but if you are aiming for all 100 percent, there are other options.
The HttpURLConnection Approach
If I told you there was a “venerable” approach to Internet integration in your application that was also as future-proof as Android itself, would you be interested? I hope the answer is “yes,” because that is what we explore next. The Internet predates Android by decades, and Java has provided a variety of approaches to working with Internet-based resources for many years longer than Android has existed. The HttpURLConnection package has been a mainstay of Java for a while, and because of Android’s Java underpinnings, it is also available as a viable option to help you develop Internet-powered applications.
HttpURLConnection has advantages and disadvantages, just as HttpClient and AndroidHttpClient have. For instance, Android enforces all network activity on non-main-UI thread code. But its universality in being available for all versions of Android, and, of course, wherever else Java is used, make it powerful and attractive. A huge number of examples of using HttpClient and AndroidHttpClient are online and in other books, including the Android Developer website. To help you expand to cover the fullest possible range of approaches to Internet interaction, I’ll now explore an example with HttpURLConnection so you can judge for yourself when you are comparing using this to those other examples.
Building a JSON-based Application with HttpURLConnection
The advent of JavaScript Object Notation, or JSON, has somewhat revolutionized many forms of application development. Many databases now support it natively, many developers use it to describe objects, and many APIs—particularly REST-based APIs on the Internet—use it as the data format for sending information to and fro. You could use JSON from APIs like this in any number of ways, but how would you fetch and send JSON to these distant REST APIs? A tour through the HttpUrlConnectionExample application should shine a light on the mechanics.
Layout or No Layout?
As mentioned earlier in the chapter, although you will want some form of UI for the user, such as a WebView, you don’t necessarily want to show UI components exposing the plumbing of how a web connection goes about its work (regardless of library or package in use). The layout for our HttpUrlConnectionExample application is very straightforward, and you can see it in Figure 16-4.
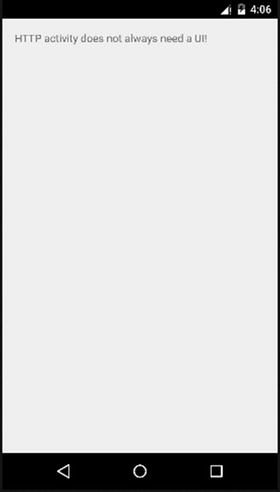
Figure 16-4. The UI provided as a courtesy for the HttpUrlConnectionExample application
I will spare you the layout XML file—as you can imagine, it is quite sparse. Check the ch16/HttpUrlConnectionExample folder if you are curious. The real activity in the application happens soon after launch, when all the promise of the HttpURLConnection approach is harnessed.
More Than Just a Series of Tubes
The plumbing for our application demonstrates the essential pieces of the HttpURLConnection technique. Listing 16-5 covers the Java logic for the example.
That might seem like a lot of code for what I promised was a simple example, but in reality, it is easy to digest. The action happens across three distinct parts of the code.
The onCreate() method has very little content. It inflates a layout that is not strictly needed but that is helpful in this example as a container for showing some of the trace information about what happens in other parts of the code. The last line of code in onCreate() is the secret sauce that drives the rest of the fetching and display of a URL and its content. Here, I create a new InternetOperation object, which is a subclass of the AsyncTask<> base class Android provides for invoking additional threads.
Jumping to the InternetOperation implementation itself, I have chosen the overloaded form of AsyncTask<> that takes a String collection for the doInBackground() phase and also uses a string for onPostExecute(). We pass the URL provided in the first String to the fetchUrl() method—which I cover shortly—and pass back the returned payload in the results member of InternetOperation (inherited from the parent class). The onPostExecute() method takes the result and creates a toast to display that onscreen. Obviously this is a little contrived, since in real life, you would likely want to parse the resulting payload from the URL, interrogate the HTTP return code (200 for OK, 404 for not found, and so on), and decide whether to render the response as a web page, a transaction result, or as some other action.
The fetchUrl() method does the bulk of the work preparing for the URL retrieval; it performs the actual work of contacting the URL and streaming and processing its content into a String object to return to the caller. The conceptual order of the code is as follows:
- Define a new URL object and assign the user-provided URL String to it.
- Define a new HttpURLConnection object, named myConn, for the URL object.
- Set the desired paramaters and attributes that the connection should have and use. This is done with various calls to myConn’s methods.
- myConn.setRequestProperty() can set a wide range of HTTP-related values, and in the case shown, it adds a blank User-Agent string for identifying the client application. Obviously you can use any User-Agent string you like to mimic well-known browsers, crawlers, and so on.
- myConn.setReqeustMethod() sets the HTTP verb to GET. This implies that various other settings are included in the header of the HTTP call when it is made, rather than the payload being used as it is in the POST method. This is a much larger topic in its own right; you’ll find plenty of additional information online.
- myConn.setDoInput() is set to true, which flags to the server that the response body will be consumed and used. There are times when you wish to set this to false to indicate that only the header of the response is important and that performance can be improved by discarding the response body.
- With the HttpURLConnection properties set as desired, invoke .connect() to actually connect to the URL and see what its server does in response.
- The response is gathered via a BufferedReader and InputStream for ultimately returning as a string of the web page content or as a server response.
Many, many more options and methods are available to HttpURLConnection objects, and Oracle, as the current “owner” of Java, provides an extensive set of documentation on them at http://docs.oracle.com/javase/<insert your java version here>/docs/api/java/net/URLConnection.html.
Running HttpUrlConnectionExample and Its Results
With the logic explained, and the world’s sparsest UI in place, running the code is as easy as launching it in your chosen AVD. For this example, I have included a URL for publicly available weather data from the Open Weathermap project.
http://api.openweathermap.org/data/2.5/weather?q=London,uk
If you check this URL in any browser, you should see a resulting JSON object returned as the “web page.” The content should look something like Listing 16-6 (depending on the day you look for the weather). Note that I have compressed the normally white-space-heavy JSON layout to save space.
Let us see if the HttpUrlConnectionExample returns the same information via the logic I described. Figure 16-5 shows the toast generated with the returned results from a successful run of the application.
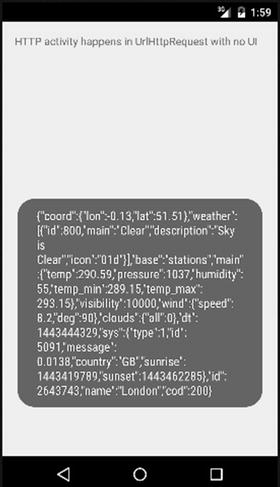
Figure 16-5. The JSON response showing in HttpUrlConnectionExample
Success! Obviously showing a user raw JSON is not the best application experience, so you would probably parse the JSON to extract temperatures, wind, sunrise and sunset, and so forth, to create a more pleasant experience.
Troubleshooting Issues with Internet Connections
If you have done any other form of development with Internet-based resources, web services, or pretty much anything online, you realize that there are a myriad of different ways in which things can go wrong. As a general strategy, definitely employ a liberal dose of exception handling across any use of HttpURLRequest and the data or payload you gather as you use it.
Rather than have the HttpUrlRequestExample application blow out to dozens of pages of mainly try-catch blocks, I have deliberately kept it simple so you can understand the mechanics, but in any real-world application, I would look to address these common types of exceptions and code for appropriate behavior and mitigation.
For many years, browsers have been trying to make users lives easier and easier. Whether it is friendly interpretation of 400-series and 500-series HTTP error codes, or the not-so-friendly hijacking of NXDOMAIN responses to show advertisements when a URL is not found, the general thrust has been to get the users to their destination (or any destination) rather than just leave them hanging.
One of the most pervasive forms of assistance is the browser assuming which protocol the user meant to use when they omitted that from the URL they entered. For instance, if the user types www.apress.com into the browser, it assumes the user meant to use HTTP, it adds the missing http:// preamble to the string, and it implicitly directs the request to the correctly formed http://www.apress.com URL instead. Great for the user, and for Apress!
That habit and its assumed behavior can cause you grief as a developer, however, because packages like java.net.URL and java.net.HttpURLConnection mean HTTP when they say HTTP. In practice, this means that although helper methods and the like exist to “fill in the gaps,” if a URL isn’t entered correctly, by default if you just attempt to use the String api.openweathermap.org you will get errors thrown akin to those in Listing 16-7.
The key error is shown in bold on the second line of the LogCat snippet. By not specifying the protocol (http://) in the URL string, we technically attempted to use a malformed URL. The upshot is that you either need to add the protocols explicitly or dynamically via helper methods (your own, or the java.net.* ones), or help your users specify which protocol they want, so you avoid the issue up front. Catching MalformedURLException errors should also be part of your normal code patterns when you’re working with Internet connections.
Misbehaving on the Main Thread
Earlier in the chapter, when discussing the various libraries and packages that are available to you for working with the Internet, I mentioned that any use of AndroidHttpClient must use a background thread for any network connection. This same stricture is true for HttpURLConnection—any network activity must happen off the main UI thread.
In the HttpUrlConnectionExample application, you can easily see how we use an AsyncTask<> implementation to make our fetchUrl() call on a dedicated thread. As your code gets more and more complicated and your applications add many activities, private classes, and more, it can become tricky to know for sure that you have spawned a separate thread for all attempts to invoke .connect() and its parallels in other classes.
I mentioned that network connections on the main UI thread are a performance no-no. They are bad for the users and bad for their impression of Android. In fact, Google was so concerned that they didn’t just forcefully recommend that network activity happen elsewhere—they changed Android to detect any attempt to do this and throw errors at the unlucky developers. Listing 16-8 shows the partial error stack you will see if you accidentally (or purposefully) try to invoke any form of network connection on the main thread. The formatting is wrapped to fit the page.
The second to last line, shown in bold, holds the key. We run straight into the NetworkOnMainThreadException with any attempt to use any kind of network connection (from any package or library) on the main thread. This means no sneaky Internet calls in onCreate() or any other callback without them being wrapped in AsyncTask<> or similar thread-management libraries.
Mastering Downloads with DownloadManager
As well as providing the many different foundational packages and libraries for network and Internet connectivity, Android also gives you access to a number of Internet-aware components to deal with common, higher-order concepts like maps, downloads, and more. To complete the current chapter, let’s explore the built-in DownloadManager facility for dealing with large and complex downloads.
Introducing the DownloadManager System Service
In old versions of Android, up to version 2.3, if you wanted to download any significant file or volume of data from an online source, you had to code your own tools and classes and do all the work yourself; it was a little like building a glorified example of the preceding HttpURLConnectionExample application. That got really painful for developers who werestruggling to cope with ever-expanding file types, network issues, and more, however. There had to be a better way; Android delivered this with the introduction of DownloadManager in version 2.3, and improvements have been made to it ever since.
The DownloadManager system service give you access to a lot of features that take the complexity out of managing large downloads, including the following:
- Network connectivity differentiation gives you options to allow, throttle, postpone, or end downloads depending on your network connection type (LTE, 4G, 3G, etc.), wifi signal strength, and so on.
- Cost-sensitivity controls allow you to avoid downloads if data roaming is in use and if there is a risk of excessive cost to the application’s user.
- Device keep-alive ensures that the device doesn’t disable radios or enter sleep mode.
- Download resumption for interrupted downloads.
- Connectivity-mode handoff, when the device transitions from cellular, to wifi, and so on.
The service taking on these tasks for you frees you to simply deal with the request in general and the resulting file.
Selecting Permissions for DownloadManager Use
The entire point of downloading something from the Internet is to take it from a server somewhere and place it locally on some storage for later use. At a minimum, this implies the following two permissions are needed to successfully work with DownloadManager.
- android.permission.INTERNET for accessing the Internet, just as with the other examples in this chapter
- android.permission.WRITE_EXTERNAL_STORAGE, which is the typical permission you need to write to your device’s user-accessible storage or SD card
I cover the WRITE_EXTERNAL_STORAGE permission in detail in Chapter 17 and the topic of managing and using files. For now, make sure you have the necessary entries in your AndroidManifest.XML file, as shown in Listing 16-9.
The DownloadManager also supports several other permissions, notably android.permission.DOWNLOAD_WITHOUT_NOTIFICATION. This permission allows an application to avoid posting notifications about downloads, which otherwise are always shown. This clearly has security implications for silent downloads, thus the protection offered by this additional permission.
A Simple Downloader Example
The manifest shown earlier in Listing 16-9 is for the example application, DownloadManagerExample, which you can find in the ch16/DownloadManagerExample folder of the sample code. Any good downloader needs a UI, and Listing 16-10 shows the layout for a simple two-button display to start and view downloads.
My two-button example layouts should start to become familiar after a while. Here we have a Start Download button and a View Downloads button, which are pretty self explanatory. The secret sauce is in the Java implementation. The layout renders the UI shown in Figure 16-6.
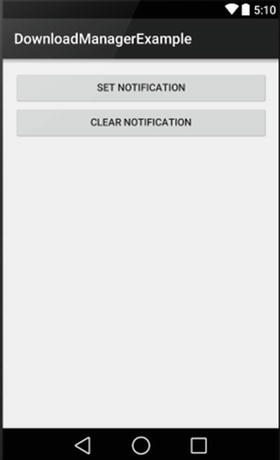
Figure 16-6. The DownloadManagerExample application UI
Coding DownloadManager Behavior
To give a user the ability to download is great, but you can also provide additional features that let them know when the download is in progress, when it is done, and even ways to work with downloads when they are complete. Our code covers some of these extended features and sets you up to expand even further.
Listing 16-10 is the complete code for the DownloadManagerExample application, with some areas already ripe for you to expand. I am also including techniques from earlier chapters to show, in particular, the use of broadcast intents and receivers to handle communication flow and some aspects of behavior.
Let’s break this down into sections to ensure you understand what each area covers. The activity setup and onCreate() method put in place some useful constants and inflate our basic layout. The myUri value is set to the same mp3 track we played with in Chapter 14 on Audio, and a DownloadManager object is created and then used to bind to the system service using the getSystemService(DOWNLOAD_SERVICE) call.
The activity is also flagged as a receiver with a filter for ACTION_DOWNLOAD_COMPLETE broadcast intents, which happens to be the intent fired when a download completes (you could have guessed that from the name). We could have configured this in the manifest instead, but it helps to see alternatives in practice. The onDownloaded method implements the logic for the BroadcastReceiver, which I cover shortly.
With the activity live, we have an onClick() method to implement a little logic around which button has been clicked. The Start Download button triggers the startDownload() method, and I’ve placed a little stub of if/then logic here if you wish to experiment with multiple simultaneous downloads and what happens when the user clicks Start Download more than once. For now, the logic in startDownload() prevents this, but you are free to change it.
The startDownload() method is where the action happens. Any download performed through DownloadManager relies on the notion of queuing items to be downloaded and having the system service work through its queue asynchronously. Your enqueed download might start instantaneously, but it might not, depending on what other activity is happening, what other downloads are in progress, and so on. If you revisit the enqueue() method, you will note that it takes a DownloadManager.Request object that looks and acts like a builder-style object—because that is exactly what it is.
downloadTarget = myDLManager.enqueue(new DownloadManager.Request(myUri)
                .setAllowedNetworkTypes
                    (DownloadManager.Request.NETWORK_MOBILE |
                     DownloadManager.Request.NETWORK_WIFI )
                .setTitle("Amazing Tunes")
                .setDescription("Rhapsody in Blue")
                .setDestinationInExternalPublicDir(
                        Environment.DIRECTORY_DOWNLOADS,
                        "rhapsody.mp4"));
Here we are using a combination of .setAllowedNetworkTypes() to specify that mobile and wifi are acceptable connectivity levels from which to initiate the download. For very large downloads, consider what network charges a user might need to pay, and allow them some control over whether NETWORK_MOBILE is included. There is also a .setAllowOverRoaming() Boolean to control dreaded roaming charges. The .setTitle() and .setDescription() calls add some useful text to the download when you are viewing its progress and the completed file, which you can see on the following pages in the screenshots of the example in action. These can be any strings you like. Lastly, we use .setDestinationInExternalPublicDir() to choose one of the system-provided locations for the file. We cover this in significantly more detail in Chapter 17 when we cover files and file systems for Android. For now, you can proceed knowing that your download will be called rhapsody.mp4 and will be placed in the common downloads folder used by all applications.
The startDownload() method is rounded out with some UI tricks to prevent multiple simultaneous downloads. I have done this only to keep the example simple to understand at first use—there is no Android limitation at play here. Using findViewById(), we find the reference for the Start Download button, change its text to “Downloading...,” and disable the button itself. Starting a download, therefore, changes the look of the UI, as shown in Figure 16-7.
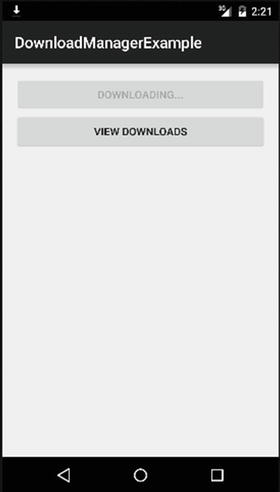
Figure 16-7. A download in progress. Note also the system-generated arrow in notification bar
These UI steps are reversed in the onDownloaded() broadcast receiver implementation. Assuming a download completes normally, our UI returns to the original form shown in Figure 16-6. Of course, that assumption is a little risky, and we will talk more about that in a moment. Android itself adds the animated downloading arrow to the notification bar at the top of the screen. At any point during a download, your user can swipe down to see the notification drawer (which we cover in-depth in Chapter 23) to see the progress of their downloads. This is depicted in Figure 16-8, where you can see the title and description text we used in the enqueue() method and Request object.
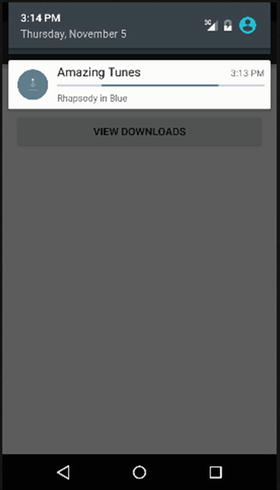
Figure 16-8. Download in progress shown in the notification drawer
We have implemented an onDestroy() override, which ensures our broadcast receiver is unregistered. This prevents stray receivers from consuming resources and causing problems, and it also means that your activity will not be triggered if it is not already running when some other application decides to perform a download with DownloadManager. Note that we do nothing with the DownloadManager object itself. We don’t dispose or destroy or unassign the myDLManager object, because we don’t have to. Android is designed to garbage collect objects referencing any system service, so we can simply leave the housekeeping to the system.
Last up is the viewDownloads() method. It is deceptively simple, attempting to start an activity that responds to the broadcast intent filter of DownloadManager.ACTION_VIEW_DOWNLOADS.
startActivity(new Intent(DownloadManager.ACTION_VIEW_DOWNLOADS));
Absent any other application that has already registered a receiver that can handle this intent, you are likely to trigger the system-provided Downloads management activity, as show in Figure 16-9.
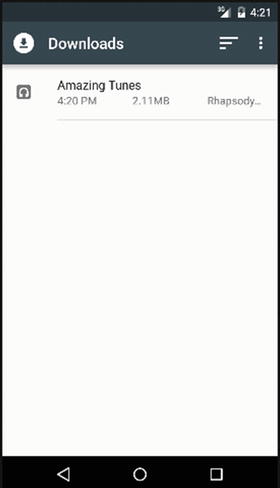
Figure 16-9. Our successful download in the general Downloads activity
In the spirit of liberally using plenty of activities, this Downloads activity can also fire off an intent for a playback activity just by touching the download. Figure 16-10 shows and example of this using one of the built-in playback activities. You can, of course, tweak your audio examples from Chapter 14, register a receiver, and see if you can trigger your own playback code.
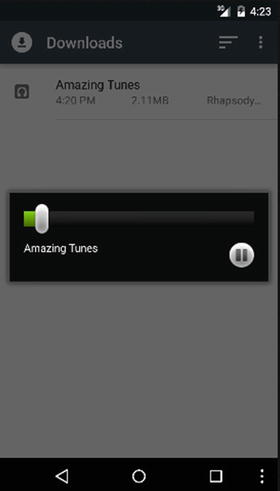
Figure 16-10. Playing back the downloaded mp3
When everything works normally, the user of your application gets all the benefit of smooth downloads, and you get the benefit of writing comparatively little code and letting the DownloadManager service do all the hard work. Of course, things do not always work smoothly, and I cover dealing with those circumstances next.
Dealing with Download Problems
The download manager offers a range of methods and data to help you keep tabs on the progress and status of your downloads, as well as see resulting information about what went right, and what might have gone wrong. Your DownloadManager object includes a .query() method that takes a Query object. By providing the reference to the relevant download, you will be returned a Cursor object that can be “walked through” to gather all kinds of information.
Cursor myDLCursor = myDLManager.query(new DownloadManager
                                       .Query()
                                       .setFilterById(downloadTarget));
Data available from the cursor includes the following:
- COLUMN_BYTES_DOWNLOADED_SO_FAR: The number of bytes already downloaded for the file
- COLUMN_LAST_MODIFIED_TIMESTAMP: The last modified time of the file
- COLUMN_LOCAL_URI: The local Uri reference for the local file
- COLUMN_STATUS: The status value for the download (more on this shortly)
- COLUMN_REASON: Any additional reason information for the COLUMN_STATUS
Even though a successfully completed download fires the DownloadManager.ACTION_DOWNLOAD_COMPLETE intent, it is still prudent to check the COLUMN_STATUS of your download to ensure its value is STATUS_SUCCESSFUL.
Here are other possible values for COLUMN_STATUS:
- STATUS_FAILED: Where the download failed for some reason, and will not be retried automatically.
- STATUS_PAUSED: A download is waiting to retry, or for the user to resume it.
- STATUS_PENDING: When your download is successfully queued via enqueue() but has not yet started.
- STATUS_RUNNING: The download is in progress.
Some of the Query object columns are only populated in some COLUMN_STATUS states. For example, COLUMN_BYTES_DOWNLOADED_SO_FAR does not have any data while the download is in STATUS_PENDING state, and COLUMN_REASON is only populated in STATUS_FAILED states, hopefully with useful diagnostic information.
Remember to keep the user’s perspective in mind when things go wrong; be careful not to let coding for the perfect situation cause further issues. The DownloadManagerExample application leaves the Start Download button disabled in some failure modes, so you can practice your skills expanding the code to cover STATUS_FAILED states and return the button to enabled. Figure 16-11 shows a failed download in the Downloads activity. Note the differing text inserted from STATUS_REASON automatically by Android (our code did not do this).
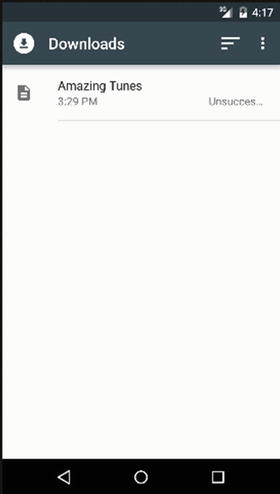
Figure 16-11. A failed download