
2.2. Creating Your First InfoPath Form
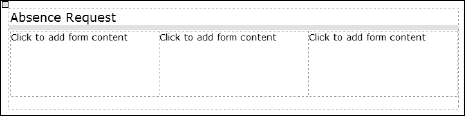
In the prior sections in this chapter you were introduced to the various task panes and the tasks contained within each pane. Now it is time to get to work and perform some of those tasks. In the next sections, you will create a new form, adding a few tables and controls by dragging and dropping them from the various areas on the Layout and Controls task panes. To create this form, the top section of the Absence Request form will be replicated, shown in Figure 2-7.
Figure 2.7. Figure 2-7

2.2.1.
2.2.1.1. Try It Out: Creating a New InfoPath Form
Open InfoPath by choosing All Programs
 Microsoft Office
 Microsoft InfoPath 2003 from the Start menu. The Fill Out a Form dialog box is opened.
Click on the Design a Form task. You will then see the Design a Form task pane with a blank design layout. The Design a Form task pane can be seen in Figure 2-8.
Figure 2.8. Figure 2-8

Click on the New Blank Form task. The designer now displays a blank form, with the Design task panes open.
2.2.1.2. How It Works
When a form is created using the InfoPath editor, you visually see what you are putting on the form, such as tables and controls. Under the covers InfoPath is creating a number of XML documents. To see the actual documents, you can choose File![]() Extract Form Files. InfoPath then displays a dialog box asking where you want to put the files. After you browse for the folder and click OK, InfoPath stores the files described in the following table:
Extract Form Files. InfoPath then displays a dialog box asking where you want to put the files. After you browse for the folder and click OK, InfoPath stores the files described in the following table:
Don't use the File![]() Extract unless you are very comfortable with XML. Even then, there is a good chance that you could break a form if you tweak it under the covers incorrectly. Be careful!
Extract unless you are very comfortable with XML. Even then, there is a good chance that you could break a form if you tweak it under the covers incorrectly. Be careful!
2.2.2. Exploring the Ways of Designing a New Form
Taking a closer look at the list of tasks under the heading Design a new form in Figure 2-8, you can see that there are a number of ways to accomplish creating a new form, depending on your needs. While you will be using the various ways throughout the rest of the book, here are the ways listed with descriptions of their purpose:
New from XML Document or Schema: XML Documents are files that contain data and describe that data in a specific format. When you get an XML document from a source, InfoPath will read it and use it as a data source, so you can add the data fields to your new form. More on using XML documents can be found in Chapter 5, "Utilizing XML and Web Service Data Sources."
New from Data Connection: Frequently the data you want to work with already exists in a database of some kind, such as Access or SQL Server. This option enables you to connect to the databases just mentioned, as well as to Web services.
Web services, also called XML Web services, work as a shell around a database, limiting views and access to the data and giving access to those databases over the Internet or intranet. Where InfoPath can only connect directly to Access or SQL Server, you can use a Web service to work with other types of databases such as Oracle. You will read about databases in general in Chapter 3, "Understanding Data," and Web services are discussed in Chapter 15, "Creating and Working with Web Services."
New Blank Form: The option you currently are using, this form creates a blank form that has no data connected whatsoever. You can create an XML schema or connect to data once you have started a form using this method of creating a new form.
Customize a Sample: This is a great option when you know that one of the samples included in InfoPath is very close to the form you want to create. When you choose this option, a new template is created based on one of the samples.
NOTE
Remember also that there are additonal templates at Office Online. If you want to look at these templates, click the Customize a Sample task, and then click on the button labeled Form Templates at Office Online in the Custom a Sample dialog box.
Import a Form: If somebody you know has created a form that is what you need or even a similar one, you can import that form with this option and modify it as needed.
Now that you know the various ways that you can create forms, you're going to continue with creating your first form, which you started using the New Blank Form task. It is time to add some new tables, so let's get busy.
2.2.3. Working with Tables
As mentioned previously, tables play a big role when designing InfoPath forms. Controls are placed within tables as are other tables to organize the layout of the form. For convenience, there are a number of different table layouts that you can drag and drop onto the designer layout area. To create the heading portion of the form displayed in Figure 2-8, two table layouts are used: Table with Title and Three-Column Table.
2.2.4.1. Adding a Table
Adding a table to your form is fairly straightforward. When you want to add a table, you place the cursor in the area you want the table to appear, and then choose from the list of table layouts in the Insert layout tables tasks.
To insert a table into another table, place the cursor in the cell of the table where you want the second table to appear. Next, under the Insert layout tables tasks, click the table with the number of columns you want to use, or click Custom Table . . . to specify the number of columns and rows you want in the new table yourself.
2.2.4.2. Try It Out: Adding the Tables
Continuing with the form you created in the last Try It Out, click on the Layout design task. The Layout task pane is displayed.
With the cursor located at the top of the blank form, click the Table with Title task in the Layout task pane. The table is then displayed in the top of the layout area of the form designer, as shown in Figure 2-9.
NOTE
Note that Figure 2-9 has the title (Design) Template2 at the top of the form. This may differ from yours, depending on if this is your first form or if you have been experimenting and creating your own forms.
Click in the area labeled Click to add a title, and type in Absence Request.
Place the cursor in the area of the table labeled Click to add form content.
Click Three-Column Table in the Insert layout tables tasks. You now see three columns displaying. Click to add form content, shown in Figure 2-10.
2.2.4.3. How It Works
That's all there is to it. As you add the tables, they show up in the location where you place the cursor. You can then size the columns and rows as you see fit. The nice thing is that you can embed as many tables as you need to. However, don't add unnecessary tables. This will just clutter your forms.
Figure 2.9. Figure 2-9

Figure 2.10. Figure 2-10
2.2.4.4. Resizing Table Columns and Rows
Before adding controls to your form, it is a good idea to resize the table, columns, and rows to the sizes you ultimately want them to be. While you can resize all three with controls in them, that just makes it a bit more cumbersome. To resize the columns and rows, as well as the borders of tables, you will move the cursor over the frame you want to resize, and the cursor will change into crosshairs with arrows pointing up and down.
Press and hold the left mouse button, and then drag the cursor in the direction you want to resize. When the particular edge is where it is supposed to be, release the left mouse button. This works the same way that resizing objects such as Word tables or Excel cells works in other Office applications.
2.2.4.5. Try It Out: Resizing Elements
Place the cursor over each of the inside column edges, pressing the mouse button when the cursor changes.
Drag the edge in the direction in which you need it to go. Then release the mouse button.
Repeat Steps 1 and 2 for the bottom edge of the 3-column table. You can see what this step will look like in Figure 2-11.
Figure 2.11. Figure 2-11

The table will now be resized to the desired dimensions.
NOTE
The text "Click to add form content" in the individual cells of the table will disappear as soon as you place (click) the cursor inside the individual cell. So, if your screen doesn't have this text, you probably accidentally clicked in the cell or cells. Also, don't panic if you have clicked in the cell, removing the text, and afterwards chose Edit ![]() Undo with no effect. Once you have clicked in the cells, the text will not return regardless of what you do. It will not affect your final form, because the text is not displayed in any case.
Undo with no effect. Once you have clicked in the cells, the text will not return regardless of what you do. It will not affect your final form, because the text is not displayed in any case.
2.2.4.6. Setting Fonts and Adding Text to the Form
With many applications, such as Access, when you want to add text to your forms, you do so by adding controls called labels. With InfoPath you just type the text where you want it, first setting the font and size of the text from the Format toolbar, located at the top of the form, as displayed Figure 2-12.
Figure 2.12. Figure 2-12
Once you have set the font, font size, and any other attributes such as underline, color, and so on that you want to use, type the text to be displayed. This is how you add the label information about the controls you are adding to the form.
2.2.4.7. Try It Out: Setting Font Information and Adding Text
Click on the font you want to use—in this case Verdana font, size 8.
Type Request Date:
Press the Tab key twice to jump over to the third column.
Once again set the font to Verdana and size to 8.

Seeing how to add text to the form is a big step in creating forms. With literal text you can create not only labels for individual controls, but also section headings and form instructions. However, forms are not much good with just a bunch of literal text on them; you need to have a way to accept data as well as display text. To accept data you need to add controls.
2.2.4.8. Adding Controls to the Form
Adding controls really isn't any different from adding tables. Once you have placed the cursor in the cell where you want the control to be inserted, choose the control you want from the list in the Controls lists. You can also drag and drop the control into the location you want it to be on the form. Just click on the control, and holding down the left mouse button, drag the control where you want it and release the button. The control is displayed in the location where you placed it.
While a number of the controls will be displayed and be set up as needed just by dropping them onto a form, some controls will need to be adjusted by setting either their width, height, or other necessary properties. Which properties need to be set will depend on the control.
You can also resize controls using the same steps you used to resize table columns and rows. Place the cursor on the edge of the control, and when you see the double arrow cursor, hold down the left mouse button and drag the cursor (and edge of the control) in the direction you want to resize. Note that one difference is the look of the cursor. The control resize cursor is simply two double arrows, versus two double arrows with a bar in between them, which is used with table resizing.
NOTE
If you are resizing a table to be smaller than the control or controls contained within, you need to resize the control (or controls) first. Otherwise, the control will be larger than the table cell that contains it, and the controls won't act correctly.
To move a control, or a table for that matter, move the cursor over the top left corner of the table or control, and when you get the four arrows, hold down the left mouse button and drag the object where you want it.
2.2.4.9. Try It Out: Adding Controls
Place the cursor in the cell of the table where you want to add the control. In this case it will be the first column of the 3-column table you added, under the text reading "Request Date:".
Click on the Controls task list.
Click on the Date Picker.
Using the same steps outlined for resizing table elements, resize the Date Picker control you just added to the form.
Repeat steps 1 through 4 and add a Textbox control under the test "Request Time:". When completed the form looks as displayed here in Figure 2-14.
Figure 2.14. Figure 2-14

NOTE
When laying out controls this way, the data is not going to be added into a database because you are not binding the controls. Data binding of controls will be discussed in Chapter 4, "Creating an InfoPath Form from an Existing Data Source." An XML document is being created, although specific field names are not being used.
2.2.4.10. Setting a Color Scheme
The form is looking good as far as replacing the Absence Request form heading. One last thing remains: to change the color scheme to match the colors on the original form. Changing colors is actually easier than it sounds. While you can set the background color for a view, and the individual colors for text and controls, it is a lot easier to set all the necessary colors using a color scheme.
2.2.4.11. Try It Out: Set the Color Scheme
With the cursor anywhere in the form, choose Format
 Color Schemes. You then see the color scheme chart shown in Figure 2-15.

There you have it. The form will now match the Absence Request form.