
11.3. Looking at Event Programming
Regardless of which language you decide to use, scripting or managed code, you need to understand how event programming works. Most applications created for the Windows platform use event programming to enable developers to capture events that occur and create routines to perform tasks based on those events.
11.3.1. What Is an Event?
In Windows, events occur when a user clicks a button, data is entered in a field, or a key is pressed. Windows applications also have their own set of events that can be programmed against, so that developers can control their applications. The object model of an application will include the available events in a development environment such as InfoPath. Object models will be discussed in the next couple of chapters, but for now take a look at the available events created for your use in InfoPath forms.
11.3.2. InfoPath Events
As with other development environments, InfoPath has some built-in events that can be utilized to perform tasks when triggered. The following table outlines those events.
| Event Name | Description of When Event Occurs |
|---|---|
| OnAfterChange | After you have changed the XML document that is bound to a form. |
| OnAfterImport | After data has been import or merged into a form. |
| OnBeforeChange | Before changes are made to the XML document bound to the form. |
| OnClick | When a command button is clicked on a form. |
| OnContextChange | When moving from one element on a form to another. An example is moving from one field to another. |
| OnLoad | When a form is first loaded. |
| OnMergeRequest | When a merge request is made on a form either made using the UI or programmatically. |
| OnSaveRequest | When a save request is made on a form using either the UI or programmatically. |
| OnSign | When data is signed digitally. |
| OnSubmitRequest | When a submit request is made on a form using either the UI or programmatically. |
| OnSwitchView | When switching between views on a form. |
| OnValidate | When validating data on a form. |
| OnVersionUpgrade | When a form is upgraded from one version to a later one at runtime. |
The more common events are listed the Tools![]() Programming menu, as shown in Figure 11-5.
Programming menu, as shown in Figure 11-5.
Figure 11.5. Figure 11-5

After you have created events, you can edit the code by selecting one of the events listed, or by selecting the last choice, Microsoft Script Editor.
11.3.2.1. Try It Out: Creating Your First Scripted Event
To create your first scripted event you will create a new blank form:
Open InfoPath.
Choose Design a Form.
Click New Blank Form.
Choose On Load Event from the Tools
 Programming menu. The Microsoft Script Editor opens with the OnLoad event defined against the XDocument object. This object will be discussed in greater detail in the next section.
Type the following line in between the curly brackets of the OnLoad event:
XDocument.UI.Alert("Instructions could be given here for the form.");
The code will then look as it does in Figure 11-6.
Figure 11.6. Figure 11-6

Click Yes to save the script.js file.
Click the Preview Form button. The message box displayed in Figure 11-7 appears.
Figure 11.7. Figure 11-7

There you have it: Your first InfoPath script event. Now take a look at the steps to create the same thing using Visual Studio .NET.
11.3.2.2. Try It Out: Creating Your First Managed Code Event
If you have installed Visual Studio .NET 2003 and the InfoPath 2003 Toolkit for Visual Studio .NET, you can create an InfoPath form with code behind it:
Choose Microsoft Visual Studio .NET 2003 from the Windows Start menu.
Click the New Project link. The New Project dialog box will open.
Click the Microsoft Office InfoPath Projects node in the Project Types tree. You will then see the two choices of Visual Basic Projects and Visual C# Projects.
Click the Visual C# Projects node.
Specify the location of the project where you would like to have it stored, as shown in Figure 11-8.
Click OK. The Microsoft Office Project Wizard will open, shown in Figure 11-9. The default choice of the type of InfoPath form is to create a new InfoPath template.
Click Finish. A new blank InfoPath form will be created, with Visual Studio .NET displaying the InfoPath project in the Solutions Explorer.
Choose On Load Event... from the Tools
 Programming menu. You will then be taken to the Visual Studio .NET editor, and the new event code will be displayed, as shown here:
// The following function handler is created by Microsoft Office InfoPath. Do not
// modify the type or number of arguments.
[InfoPathEventHandler(EventType=InfoPathEventType.OnLoad)]
public void OnLoad(DocReturnEvent e)
{
    // Write your code here.

}
Figure 11.8. Figure 11-8

Figure 11.9. Figure 11-9

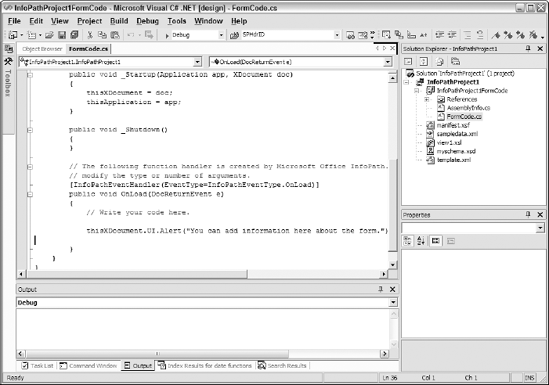
Add the following line of code in place of the line that reads // Write your code here.
thisXDocument.UI.Alert("You can add information here about the form.");
The code will look as it does in Figure 11-10.
Figure 11.10. Figure 11-10
Choose Debug
 Start to test the form. The form will open in preview mode, with the specified dialog box displayed, as shown in Figure 11-11.
Figure 11.11. Figure 11-11
