
There are a few different ways in which we can add details to the mesh for things such as skin pores or even the bumpy elements of the rock-like plates on the model's skin. When creating these details, we could use Alpha combined with the Standard brush, with drag set as the draw option. But I think we should explore the possibilities of the NoiseMaker for this.
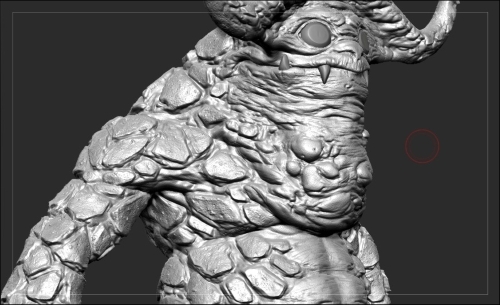
The model with details added
Let's start by opening NoiseMaker, which can be found in the Surface rollout of the Tool menu. On opening the rollout, we get a small selection of options.

The Surface menu
The NoiseMaker comes with a few examples that are included with Zbrush. However, we will explore making our own pattern with the powerful noise plug toolset.
Click on Edit and a pop-up window will appear; it includes a window that displays our model. This shows us how the model will look with the details applied. Right now, we can see the default details but we can open up the options further to create what we are looking for.
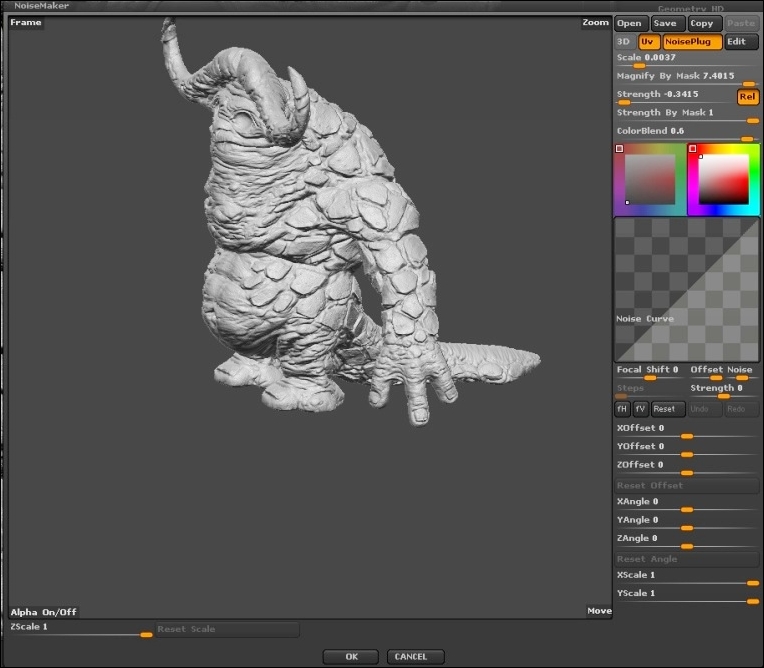
The NoiseMaker menu
We now have the options that will allow us to create our own specific details based on what we are looking for. The options here allow us to be as creative and make some unique details. I recommend experimenting with each of the different surface types to get familiar with the different ones available.
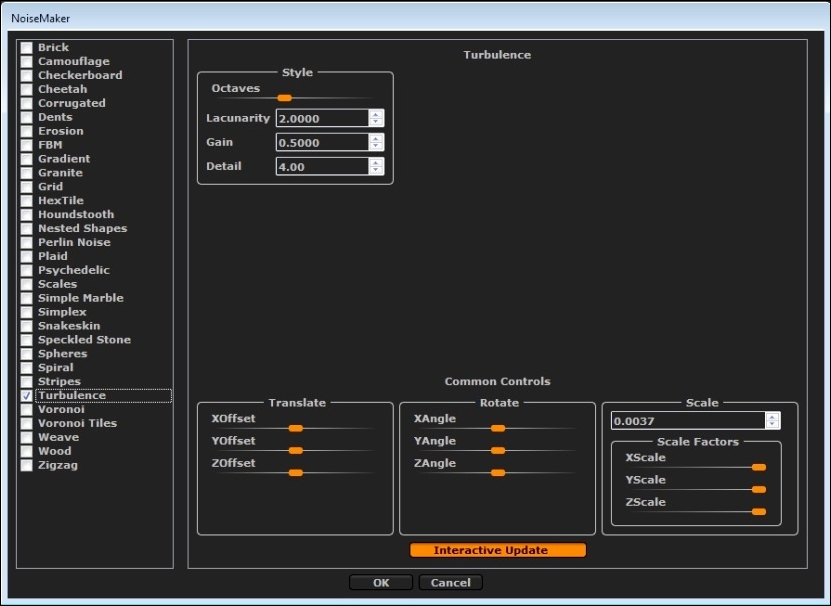
The Edit menu in NoiseMaker
Once we have found the one that fits our needs, we can click on OK and move back to the previous window. Don't worry if it's not exactly what is required, as we can still play around with the settings in the main option window.
Using these options, we can adjust the size, strength, and many other elements of the details. Again, I recommend experimenting with the options to see what each of them does.
Once we find what we are looking for, we can click on OK and return to the main workspace. However, before we apply this to the model, we need to consider a few things. Make sure that the density of the mesh is high enough to support the frequency of the details; if the mesh is too low, the details will get lost and blurred out.
We also need to consider where we would like the details to be applied. Right now, the details will be applied to the whole of the model. If we utilize the masking features, we can selectively choose where the details are applied.
Now that we have masked out the areas we wish for the details not to be applied, it is recommended that we create a layer to allow us to keep the details as nondestructive as possible.
This will also allow us to build up the details on separate layers and adjust them accordingly to reach the desired effect we are looking for. By making sure that we use layers, we enable ourselves to play with the details and avoid committing to what we have already set in place.
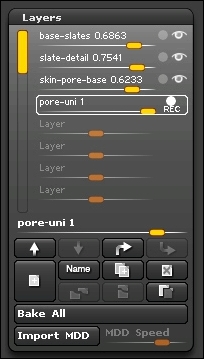
Keeping details on layers
Once the desired areas are masked and the layer is set up, the final step is to commit the details to the mesh. This is done by clicking on Accept so that the details are projected into the surface.