
CRYENGINE comes with a Photoshop plugin that we can use to export the textures for use in the engine. This plugin will define the compression of the texture to the desired size for the engine to read, without the need to change the size of our original psd. The exporter is simple to use and was installed when we completed Chapter 6, The Modeling Workflow for Game Characters and Tools.
To export the textures, we need to follow the following process:
- Have the diffuse texture layers selected and alphas placed into the alpha channel.
- Then, select Save as from the File menu and select the file type as Crytiff. This will then open up the exporter window.
There are a few options in the window, but the main two that we need to make sure we adjust are the size of the texture, to meet what the requirements are, and also making sure the dropdown is set to the right type of texture we are looking to export.
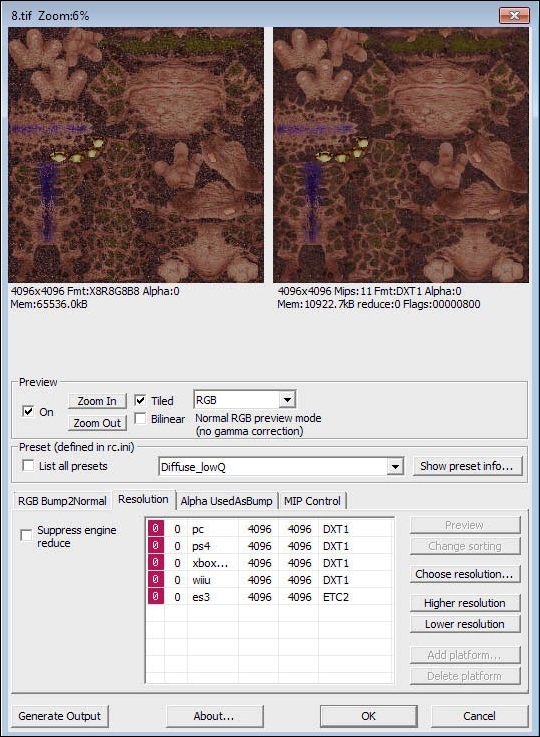
For each texture export, we will need to do this and make sure we have selected the right one from the dropdown. When exporting, it is worth experimenting with the size of the various textures. For instance, lowering the size of the specular map to half of the diffuse or normal map will not affect the textures, but it will reduce the amount of texture memory required for the character.
When exporting the maps, we use a set of standard naming conventions. Here's a list of examples: