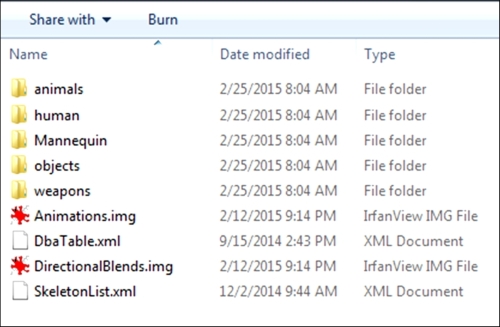
Before we go ahead and export our animations from Maya, we need to create our animations' folder structure. Assuming you already extracted the contents of the Animations.pak folder in the GameSDK folder, you should have the Animations folder with the following folders inside:
Create a new folder named Boris. This will be the folder where we export all of our character's animations to. Now, we have everything in place to export our animations from Maya in the following steps:
- In the
Borisfolder inObjects, open theboris_walkCycle01Maya file. You should see a 35-frame walk cycle. Make sure that your playback range starts at frame 1 and ends at frame 35. - In the Crytek shelf, click on the Export icon to open the Crytek Export window.
- In the Anim Export section, click on the Anim Manager button to open the Cry Animation Manager window.
- In the Cry Animation Manager window, click on New to add our walk cycle to the Animation Manager. Now, you should see the Add Anim Range window with multiple fields.
- In the Name field, type
boris_walkCycle01. This will be the name of our exported animation file. - Click on the Use Range From Time Slider button at the top of the window to fill in the Start Frame and End Frame fields.
- Select our root_bn joint in the deformation skeleton and then click on the Select button next to the Root field to add the Root bone.
- In the Path field, browse to the
Borisfolder we created inAnimations. This is the path where we will export the animation to. Here is a screenshot of the complete fields in the Add Anim Range window: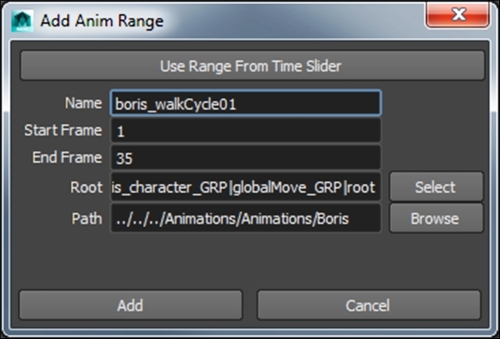
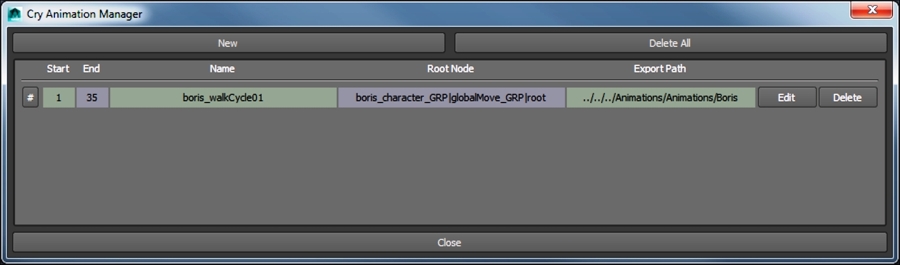
- After filling the information about our walk cycle, click on the Add button at the bottom of the window to go to back to the Cry Animation Manager window. You should see our boris_walkCycle01 animation added in there:
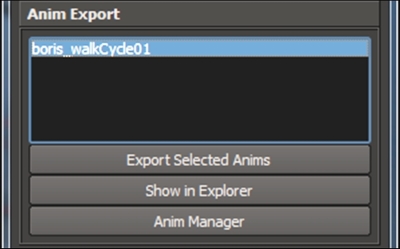
- Finally, select boris_walkCycle01 in the Anim Export panel and click on Export Selected Anims to export the animation. After exporting the animation, you can click on Show in Explorer to open our
Borisanimation folder. You should see theboris_walkCycle01.i_cafanimation file there. The namei_cafis short for Intermediate Character Animation File. This file holds the character's bone animation in an uncompressed format. There are a few other steps we need to follow in the upcoming order to be able to see our animations in the engine.
In order to map our exported animation to our character we will need to create a Character Parameters file (chrparams). The chrparams XML file is where we can define the animation set our character will use in the engine. There are also other definitions you can add to the chrparams file of your character, such as the level of detail (LOD), Look and Aim IK definitions, and more. For a full list of all the available definitions you can add to the chrparams file, please refer to the CRYENGINE documentation at http://docs.cryengine.com/pages/viewpage.action?pageId=1310814.
There are a couple of rules we need to follow when creating the chrparams file. First, the file needs to be saved where the CHR of the character is located. Second, the name of the file needs to match the name of the character CHR. In our case, that would be boris_skel.chrparams. Since we can't export chrparams files from the engine, we will create the file manually. Using any text editor, add these few lines of code:
<?xml version="1.0"?>
<Params>
 <AnimationList>
   <Animation name="#Filepath" path="animationsBoris"/>
   <Animation name="*" path="**.caf"/>
 </AnimationList>
</Params>
The #Filepath command points the engine to the folder where the animations of this character are exported to. In Animation name, you can assign any game name to your animation file. Using the asterisk symbol (*) to represent the animation name will allow you to use your animation file names in the game. Otherwise, you would have to add every animation in the animation folder or its subfolders and give each one of them a unique name. If we are going to use this method for our walk cycle, then the code would look like this:
<Animation name="walkCycle01" path="boris_walkCycle01.caf"/>
Here we assigned an in-game name walkCycle01 to the boris_walkCycle01.caf file. Although in our case it is not a big deal to add our animation and give it an in-game name in the engine, you can imagine how much time you can save using the wildcard mapping if you have lots of animation files for your character. Adding line by line each animation you have can lead to an unnecessarily long and messy chrparams file.
Setting the path parameter to **.caf will include all the animations in the animationsanimationsBoris folder and also its subfolders if you decided to have any. Finally save the file as boris_skel.chrparams in our Boris folder in Objects. As mentioned before the chrparams file needs to be saved in the same location as the character's CHR file.
As you have probably noticed, we are loading CAF files in our chrparams file, which are simply the compressed i_caf files. Our final step to be able to load the boris_walkCycle01 animation in the engine is to compress it using the Animation Import pane. In Sandbox, go to View | Open View Pane | Animation Import. On the right-hand side of the Animation Import window, you will see a list of CHR skeletons in-game and on the top-left side you can see our boris_walkCycle01.i_caf file.
The skeletons section is simply a representation of the SkeletonList.xml file that you can find in the Animations folder. We will need to add our boris_skel.chr skeleton to the SkeletonList file as well so we can compress our character's animations. You can add CHR skeletons to the file manually, but we will use the Animation Import window instead. Make sure the SkeletonList.xml file is writable. At the bottom of the Skeletons section, in the Animation Import pane, click on the Add button. Browse to our boris_skel.chr file in the Boris folder in Objects and select it.
Now, you should see our skeleton added to the list, as shown in the following screenshot:
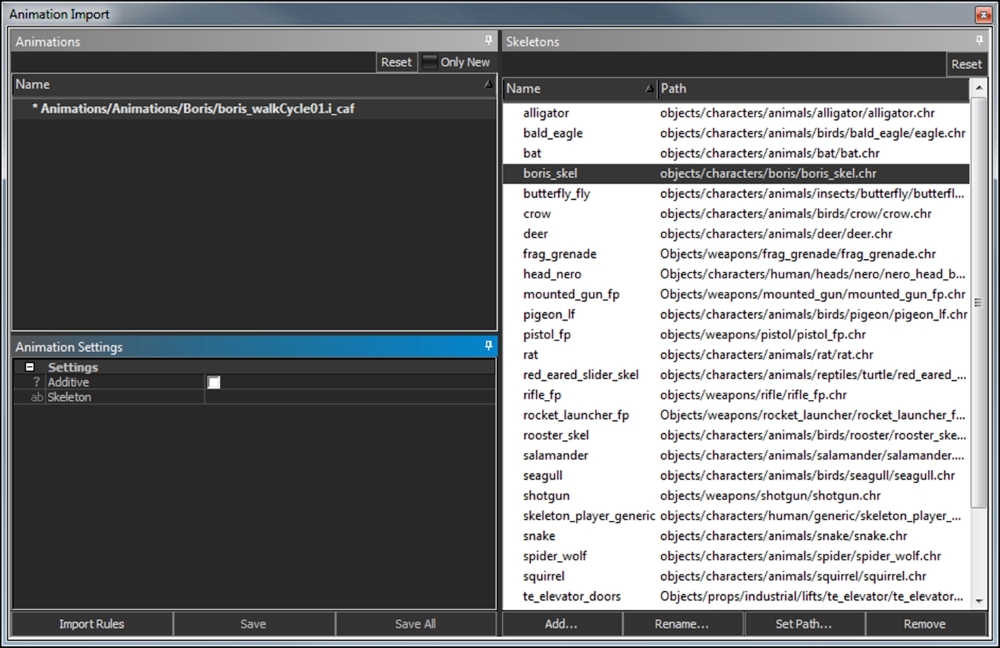
Select our animation in the Animations section on the right and double-click on boris_skel entry in the skeletons list. You should see our skeleton added to the Skeleton field in the Animation Settings panel, as shown in the following screenshot.
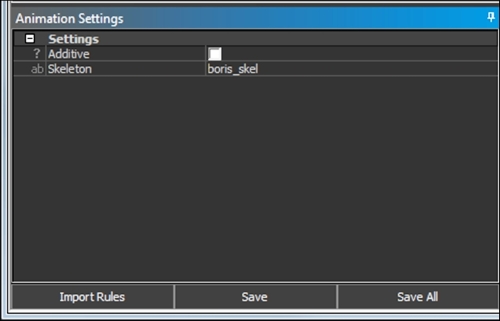
Now, click on the Save button at the bottom of the panel to save our settings and we should be done compressing our animation. If everything goes correctly, you should see these lines in the console:
Task Completed: Compression of 'Animations/Animations/Boris/boris_walkCycle01.caf'
Task Completed: Reload CHRPARAMS
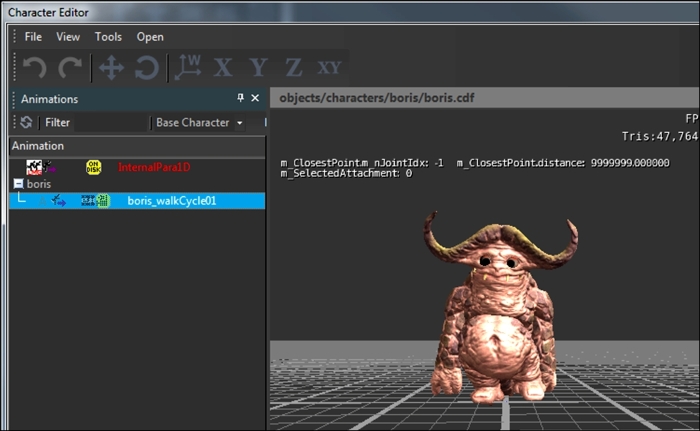
In our Boris animation folder, you should now see the boris_walkCycle01.caf file and the boris_walkCycle01.animsettings file. The animation settings file is created for each animation and holds its compression settings that we saved in the Animation Import pane. To see the animation, open the Character Editor and load our boris.cdf file from the Boris folder in Objects. In the Animation panel on the right-hand side of the Character Editor window, you should see our boris animation folder and our boris_walkCycle01.caf file inside, as shown in the following screenshot: