
Chapter 7. Adding Business Logic
Now let’s take a look at the business logic. A long time ago, applications were designed with all of their code in a single file as a long list of statements or commands. As applications became more complex, early software engineers looked for ways to improve software quality and organize code in a more manageable way. This gave rise to object-oriented programing. As applications became even larger, even with object-oriented programming, application developers needed a way to increase the flexibility and reusability of their application. This gave rise to n-tier applications. By breaking up an application into tiers or layers, developers only need to modify or add code to a specific layer, rather than rewrite the entire application. In general, you will find at least a presentation tier, a business logic tier, a data access tier, and a data tier. LightSwitch applications follow this tiered architecture, having a user interface layer, a business layer, and a data layer. The decision about where to put code is taken care of by LightSwitch.
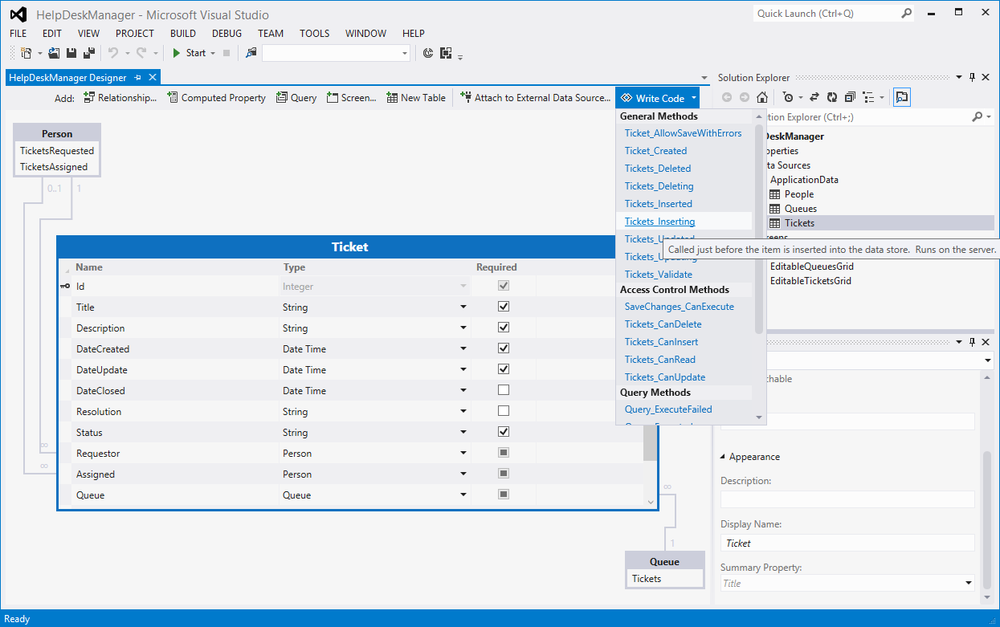
Each of the entities that we created in our data model can be displayed on multiple screens. Therefore, make sure that your business logic is stored in services rather than in screens. In basic n-tier architecture-speak, the business logic belongs in the business logic layer, not in the user interface. To accomplish this, let’s go back to the entity designer for Ticket and explore the Write Code drop-down again.
In Figure 7-1, you can see the events that LightSwitch provides in order to write code on a data entity. For each of the major events LightSwitch provides (such as insert, update, and delete), you’ll notice that for each of the CRUD operations there is an “ing” and an “ed” event. The Inserting event fires before the data has entered the table and the Inserted event fires when that insert event is completed.
To manage the DateCreated, we’ll add some code to the Tickets_Inserting event. Once again, we only need
to create a single line of code. The event is fired with the Ticket entity
as a parameter so just assign DateTime.Now to the entity.DateCreated property as follows.
public partial class ApplicationDataService
{

partial void Tickets_Inserting(Ticket entity)
{

entity.DateCreated = DateTime.Now;

adjustStatusForAssignment(entity);

}

partial void Tickets_Updating(Ticket entity)
{

    entity.DateUpdated = DateTime.Now;

    //If the status is closed, and it wasn't closed before, set
    the date closed to Now
    if (entity.Status == "Closed" &&
    entity.Details.Properties.Status.OriginalValue != "Closed")
    {
          entity.DateClosed = DateTime.Now;
    }

    //If the status is cancelled, and it wasn't cancelled before, set
    the date closed to Now
    if (entity.Status == "Cancelled" &&
    entity.Details.Properties.Status.OriginalValue != "Cancelled")
    {
          entity.DateClosed = DateTime.Now;
    }

    adjustStatusForAssignment(entity);
}

/// <summary>
/// Checks to see if someone was assigned that has a status of New and
    changes that status to Assigned
/// </summary>
/// <param name="entity">the ticket entity that is being modified</param>
private void adjustStatusForAssignment(Ticket entity)
{
    if (entity.Status == "New" && entity.Assigned != null)
    {
    entity.Status = "Assigned";
    }
}

}
We close and save our partial class that we just wrote and repeat the
process for Tickets_Updating. Notice that
this time, you see the method you just wrote for inserting because this
event is also handled in the same partial class.
Change Tracking in LightSwitch
LightSwitch entities have the ability to track unsaved changes to
their data and allow us to inject business logic before persisting our
data. Let’s take a deeper look at the Tickets_Updating event shown above. There’s a
bit more code than in the Inserting event we discussed first, but we’re
not writing plumbing; we’re writing business logic. We are checking to see
if the Status property has been changed
to Closed or Cancelled and setting the Date Closed to DateTime.Now if either of those conditions is
detected. This code shows off something pretty important to us as business
application developers. Anytime I need to compare the current value of a
property to the original value of a property, I can do that through the
entity details collection. This is quite useful any time you need to
maintain a history or archive table recording changes that your users have
made. It’s always a best practice to drop a comment inline to make this
easier for future maintainers of your code.
Factoring Out Repeated Logic
The code block above highlights another important consideration when you are writing code. We had a requirement to adjust the status field to Assigned if there was a name assigned to work our ticket. In this application, this assignment can take place during two different events: either when the ticket is initially created or via an update later on
It’s easy for first-time developers to copy and paste the same code into the Inserting and Updating events in scenarios like this. When you have logic that needs to be performed multiple times, remember to factor that into another method and call it from both locations. In our examples, we created a new private method that accepts the Ticket entity as a parameter and updates the status if the entity meets our conditions. Any time you find yourself having the same code in multiple places, find a way to refactor it so that you store the logic in one place and call it universally. This will make a huge difference in the quality of your software, decrease your bug count, and improve maintainability.
We’ve implemented quite a bit of logic so let’s run it and see where we are. The first thing you’ll see is that when you click the Plus icon on the toolbar, you still get the out-of-the-box Add New Modal Window. You may then notice that at the bottom of the screen, a Group button appears (Figure 7-2). If you click that button, you’ll see our new custom modal window, but you’ll quickly notice that there isn’t any data to edit. So we have a few more actions to code:
Change the Plus button to launch our custom modal window
Hide the Group button at the bottom
Add a new record for us to edit when we launch our modal window
Let’s stop debugging here and head back to Visual Studio to implement the changes. Because we are talking about changes to our screen layout and interaction, we’ll head back to the screen designer for our Editable Tickets Grid.
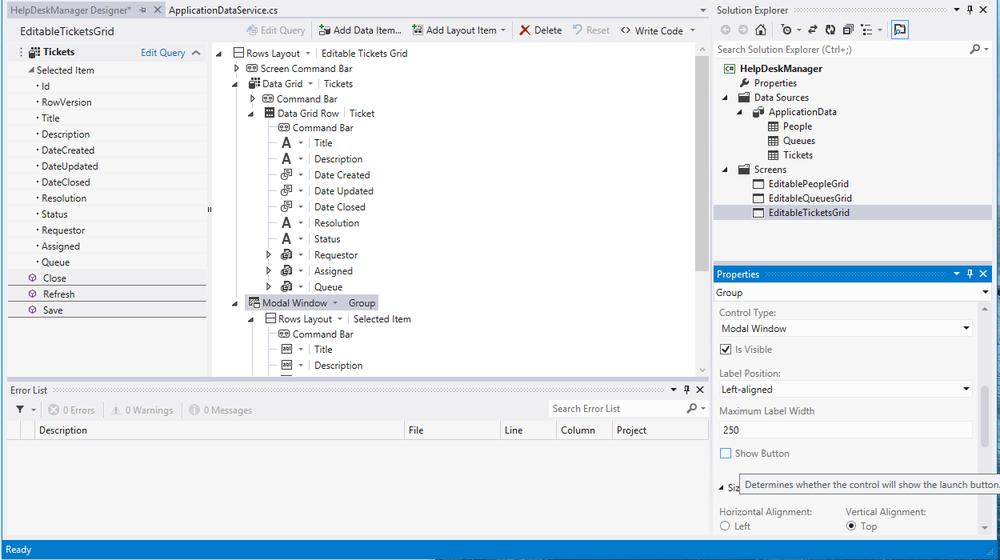
The first thing we can do is rename our modal window to something a bit easier to follow, such as NewTicketModal. Just click on Modal Window at the bottom of the control hierarchy and change the name in the Properties window. We can even give it a separate Display Name, such as New Ticket.
Customizing the Add and Edit Buttons
To create a positive, consistent user experience, we want to override the out-of-the-box button to launch our modal window rather then add a new button at the bottom of the screen. With the Group control selected, scroll down in the Properties window and uncheck the Show Button checkbox. This removes the button from the bottom of the screen and makes it our responsibility to handle the showing of our modal window with code.
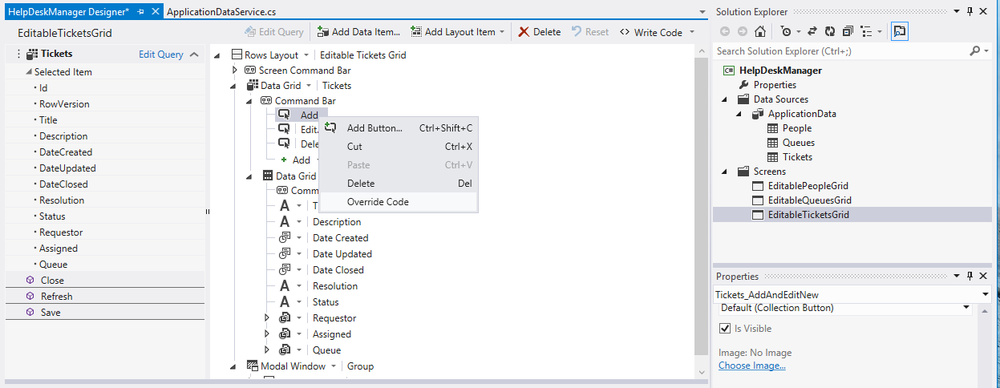
Let’s do that. Start by inspecting the control hierarchy on the screen designer. Looking at the Tickets Data Grid, we see a Command Bar with buttons for Add, Edit, and Delete (Figure 7-3).
Right-click on the Add button and choose Override Code. This will allow us to replace the default functionality of the Add or Plus button on the Tickets Data Grid with our own functionality.
To do this, we’re going to use an object called the DataWorkspace. The DataWorkspace object is the top-level object for all data access in LightSwitch. The DataWorkspace object contains a property for every data source in our project.
In our case, we didn’t attach to an external data source so we have only the ApplicationData property. If we attach to a SharePoint list as a data source and name it SpKnowledgeBase, then LightSwitch generates a property named SpKnowledgeBaseData. Then, when you type DataWorkspace in the Code Editor, the SpKnowledgeBaseData property is available in a drop-down list in addition to ApplicationData.
When we override the code for the Add button, LightSwitch generates
the stub for gridAddAndEditNew_Execute,
allowing us to implement code to add a ticket and show the editor in a
modal window. Let’s walk through the code:
Add a new entity to the Tickets collection and get a reference to it with a variable we named
t, which is of type Ticket.Set the selected item on our screen’s ticket collection to be this new ticket we just created.
Open our custom modal window, which will display the selected ticket.
partial void gridAddAndEditNew_Execute()
{
//Create a new ticket in our appliication data
Ticket t = DataWorkspace.ApplicationData.Tickets.AddNew();
//Set the currently selected item in our screen's ticket collection
to this new item
Tickets.SelectedItem = t;
//Open the modal window we created on the screen named NewTicketModal
this.OpenModalWindow("NewTicketModal");
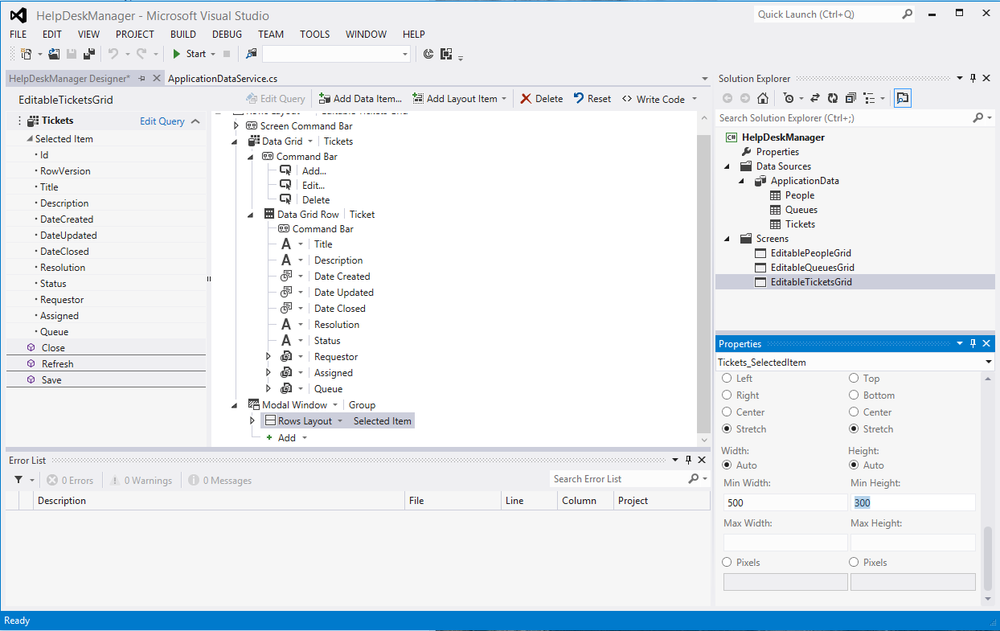
}There’s one last change before we start debugging again. Let’s adjust the size of our modal windows. To do this, we’ll expand out the Modal Window and examine the properties of our Rows Layout. Use the Properties window to set the minimum width to 500 pixels and the minimum height to 300 pixels(Figure 7-5). These settings are easy to tweak later based on your content, but this should get you started.
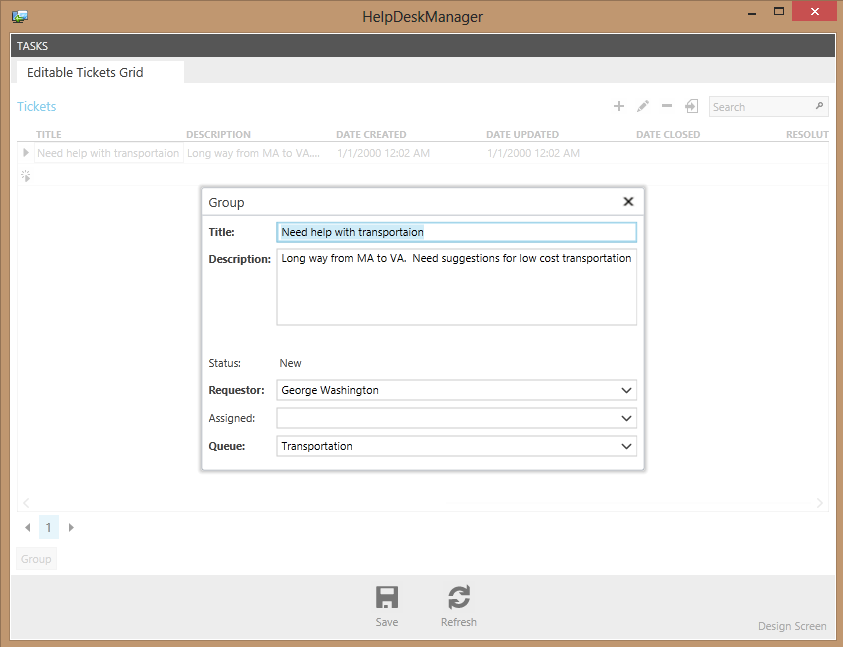
We are ready to check out our application, so let’s go ahead and start debugging. Now when we click the plus sign to add a new ticket, our custom modal window is spawned (Figure 7-6).
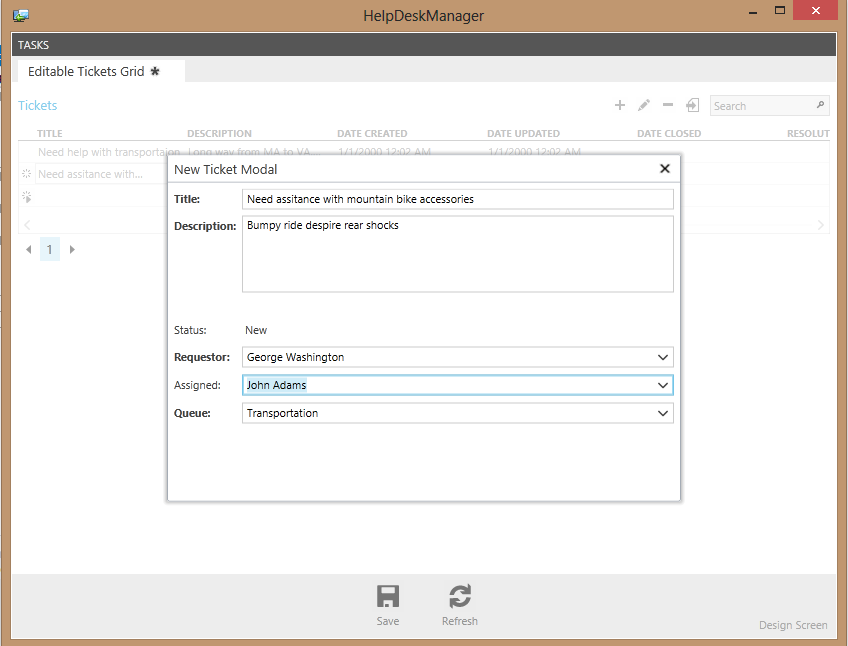
After entering some data for a new ticket, we close the modal window and click the Save button on the Screen Command Bar. Notice that the Status is set to New and Date Created is correctly set by our code.
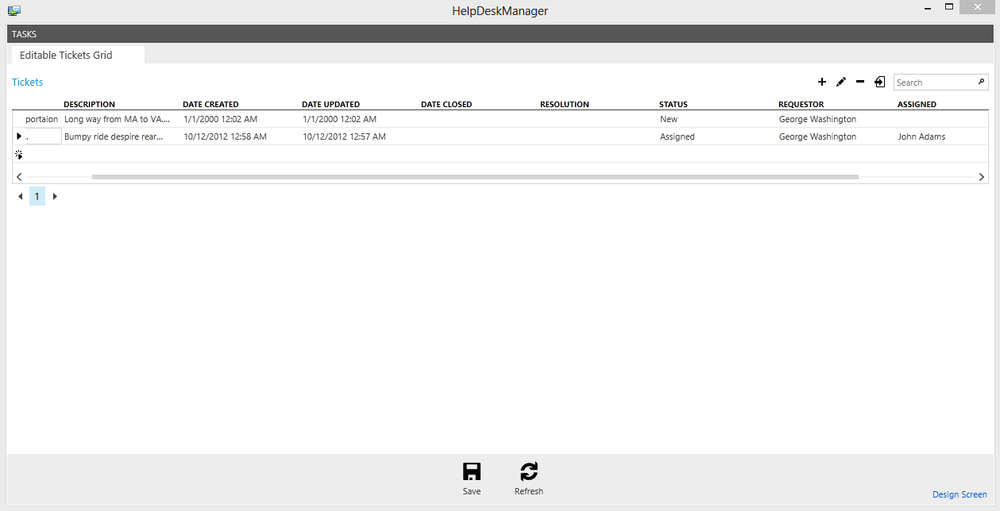
For our next test, we’ll create a new ticket and assign it directly
from the New Ticket modal window. When we set an Assigned person and save,
our private method, adjustStatusForAssignment, will fire from the
entity’s Updated event. Our code will adjust the Status from New to
Assigned because our Assigned property will no longer be NULL.
Let’s give it a try. We close the Modal Window and hit Save on the Screen Command Bar. As expected, the Status changes to Assigned because we’ve assigned the ticket to John Adams. As seen in Figure 7-7, our events fired correctly and updated the status of our latest help desk ticket.
To test our closure logic, we’ll want to edit our first ticket and change the status to Cancelled. When we click the Edit button on the DataGrid, we see the original auto-generated modal window as our editor. We’ll want to come back and address this in a similar fashion by creating a custom editor, but let’s just use it for now to test our logic. We change the status to cancelled, close the modal window, and click the Save button. As expected, we see that DateClosed was set successfully to the current date.
So far, we’ve been able to create a data model, create relationships, build screens, and even add custom business logic to our web services. Good work!
Designing Running Screens
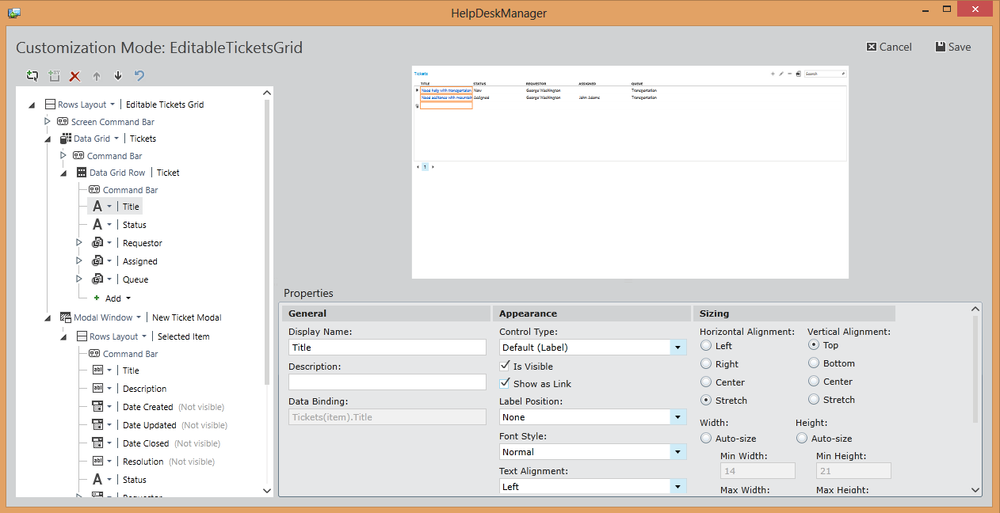
Another great feature of this model-driven development experience is the ability to customize our user interface when the application is running. To do this, hit the Design Screen button (Figure 7-8) on the running application’s toolbar.
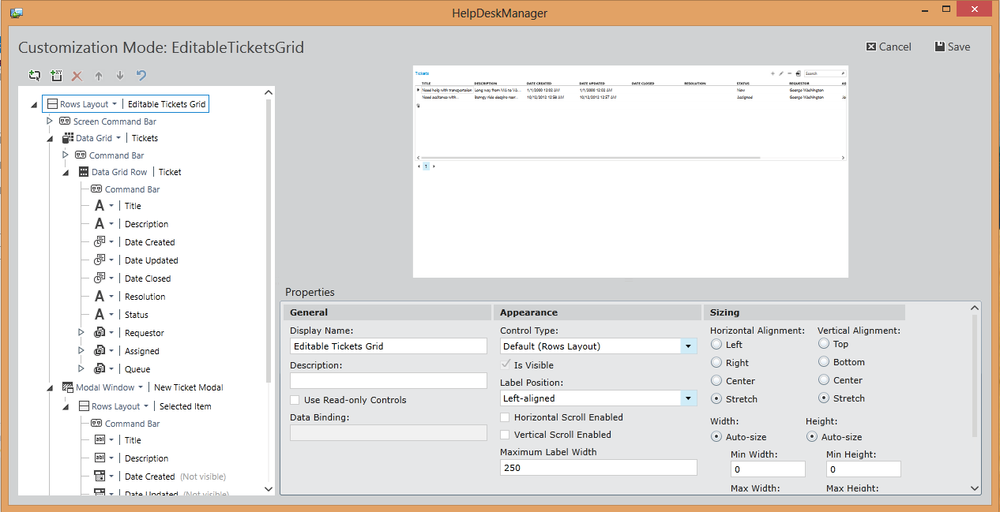
Using this customization model, we’ll clean up our grid a bit by deleting some columns that we don’t need to see when browsing our data. Description, DateCreated, DateClosed, and Resolution are all great information to capture, but they are not really needed when browsing through our help desk tickets. We can remove unwanted display items by selecting them and clicking the red X on the toolbar. To finish our form, select DateUpdated and hit the down arrow or drag it all the way to the bottom of the screen. Then hit Save in the upper right corner of the screen to see your changes in real time.
The screen looks much cleaner after hitting save. We’ll go back to design one more time and click on Title in the control hierarchy on the left. In the Properties window on the bottom right, select Show as Link (Figure 7-9). Now when a user clicks on the title of a Ticket, a new screen will open showing the editable details of that screen.
Click Save and let’s try it out. What you’ll find is a new auto-generated details page for editing our Ticket entity. While it’s a great start, we want to customize it a bit and we’ll want to replace our edit modal window with a link to this new screen in the next section.
Creating a Custom Details Page
After we stop debugging, back in Solution Explorer, right-click on Screens and choose Add Screen. This time, we’ll create a details screen and choose Ticket for our Screen Data. A checkbox labeled Use as Default Details Screen will cause this details screen to load whenever details for that entity are accessed. When we click the link from our application to look at Ticket details, this new screen will automatically launch.
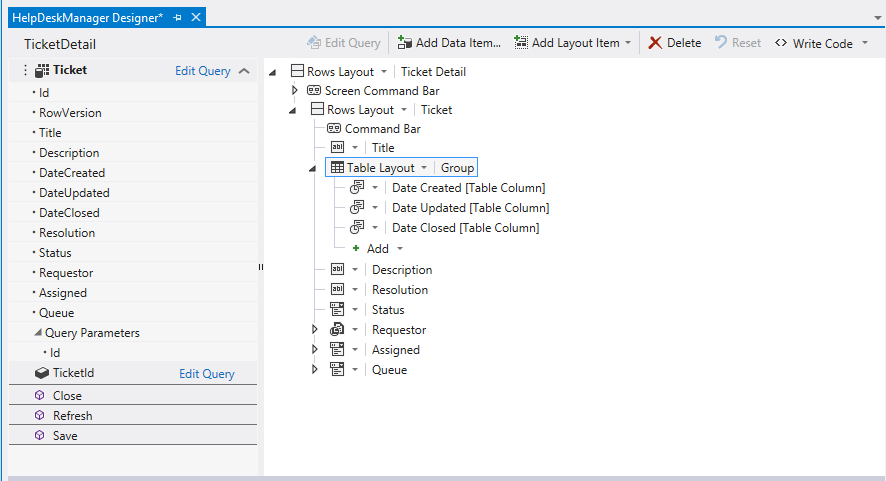
After clicking OK to create the screen, we find ourselves back in the screen designer, which by now should be becoming a bit more familiar.
Set Description and Resolution to be five lines high
Change Date Created, Date Updated, and Date Closed to Date Time Viewers
Move Description down to appear just above Resolution
Change Requestor into a Summary property; this makes it read-only
That should cover the basics, but we’ll make it just a bit nicer. Go ahead and add a new Group to the bottom of the screen. We’ll make this a table group and drag it up in the hierarchy so that it appears just below Title. Then we can drop the three date fields into this table group and they will all be laid out horizontally in a nice table for us. When we’re done, the control hierarchy should look like Figure 7-10.
When we’re done designing the screen changes for our Ticket details, let’s go back to our EditableTicketsGrid screen and rewire that Edit button to launch our new screen. Go to the Tickets data grid and expand the command bar. Then, right-click on Edit and choose Override Code again. Again, it’s a simple single-line statement taking advantage of all the plumbing that LightSwitch writes for us.
partial void gridEditSelected_Execute()
{
    //show the details of the selected ticket
    Application.ShowTicketDetail(Tickets.SelectedItem.Id);
}
We use the Application.ShowTicketDetail method
that was generated because we are on a grid associated with Tickets. All
we need to do is pass in the ID of the Ticket we’d like to edit. This is
as simple as accessing the SelectedItem from the tickets collection we
have on our screen. Couldn’t be easier!
When you’re done, go ahead and try it out. One thing you’ll be noticing about now if you’ve done SharePoint development in the past is that LightSwitch makes for a much better iterative development experience. Not only do you not need to do development on a server, but each time you make a change, you can quickly hit the Play button to launch the debugger and see your changes immediately.
Let’s walk through the app together starting with our Tickets grid (Figure 7-11).
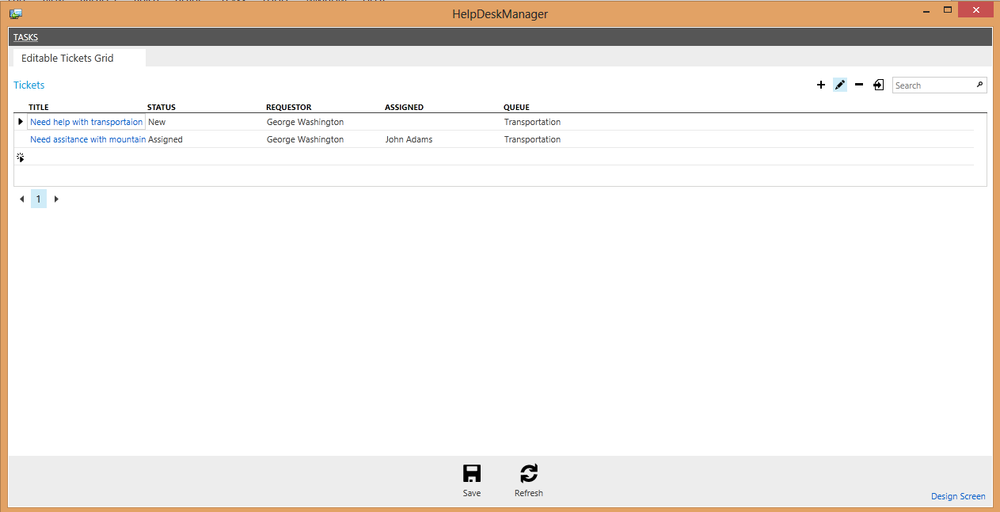
Click the title of the ticket you’d like to see or click the pencil icon to edit the currently selected row (Figure 7-12). Try it both ways.
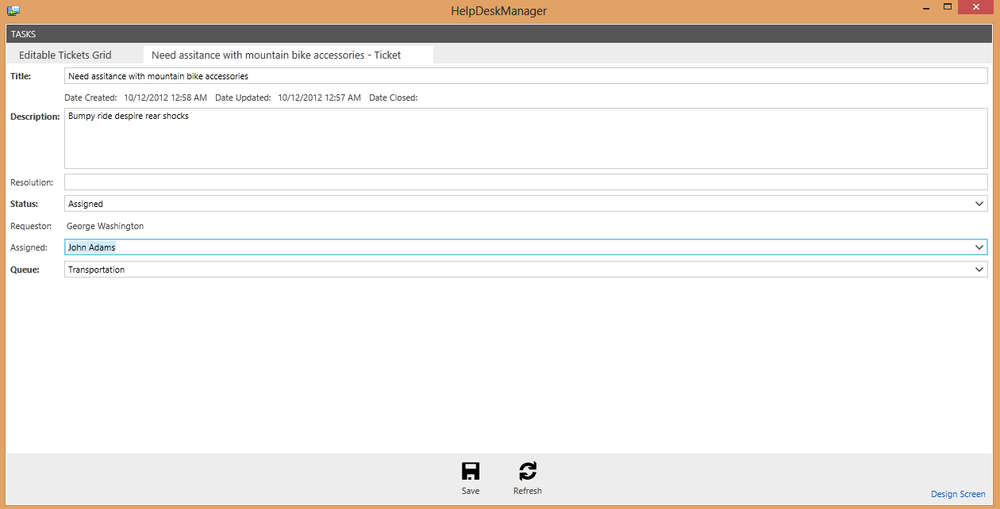
It’s a pretty slick system. Whichever way you choose, you go to your custom details page where you can edit the fields that you want to be editable and get a custom display of the fields that you want to be read-only.
The only thing we’re missing is a way to make the resolution a required field if we set the status to Closed or Cancelled. It makes a lot of sense to capture this resolution field so we know how the ticket was handled in the past and maybe even build this into a searchable knowledge base. It’s time to write some more code to capture our logic, but this time we’re doing it in the Custom Validation property of the Resolution on our Ticket data entity.
Custom Validation
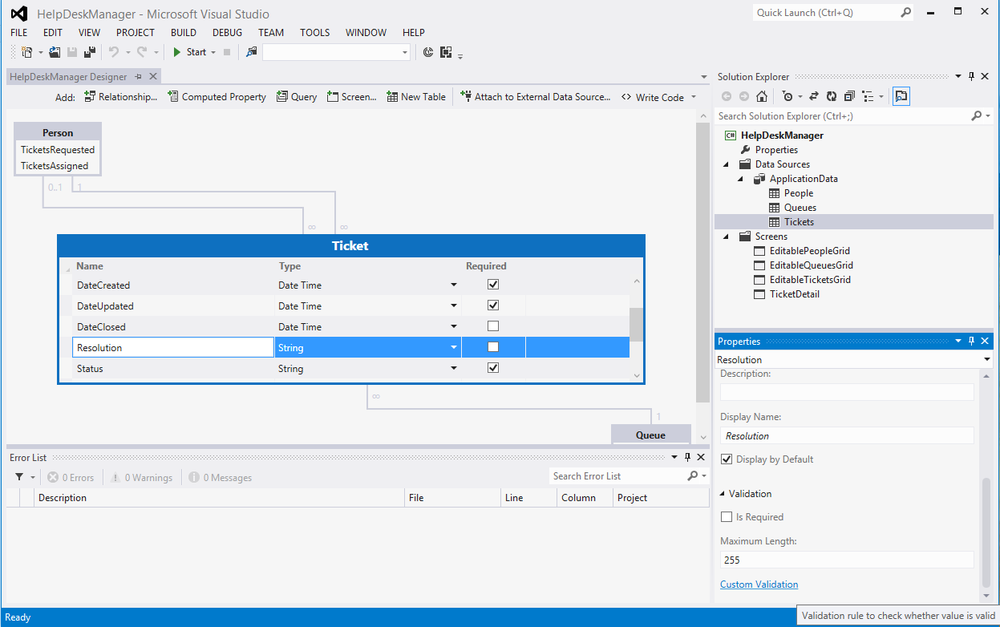
Let’s stop debugging and head back to Visual Studio. Back in the entity designer for Tickets, click on the Resolution property (see Figure 7-13). In the Properties window on the right, scroll down and click Custom Validation.
We’ll walk through the code together on this. You can see that LightSwitch generated a method that is called with an EntityValidationResultsBuilder as a parameter. We’ll use that object to communicate back to LightSwitch any errors that we encounter during our custom validation.
We write our custom logic to check for Null, Blank, or WhiteSpace if the status of the Ticket is Closed or Cancelled. Then we add the property error to the EntityValidationResultsBuilder using the second overload is provided. This lets us specify a custom error message, but also provide a reference to the control that failed validation.
partial void Resolution_Validate(EntityValidationResultsBuilder results)
{

if ((Status == "Closed" || Status == "Cancelled") &&
String.IsNullOrWhiteSpace(Resolution))
{

results.AddPropertyError("Provide a Resolution
 when Status is " + Status,
Details.Properties.Resolution);

}

}
You can see that we provide this reference using the entity properties collection again. This is the same object we used when we were comparing current values to our previous values during a save operation.
When we run this code, LightSwitch automatically highlights the control that failed validation as well as provides our custom error message in context and at the top of the screen (Figure 7-14). All we had to do was write the logic to validate our data and LightSwitch managed all the plumbing.
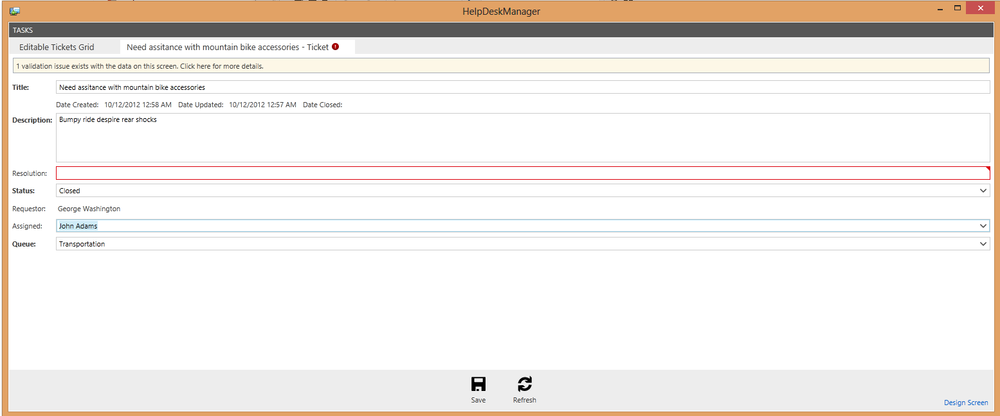
The other thing that’s worth pointing out here was that we wrote our validation logic in the model and it was projected into our services layer and then projected again into our user interface. Anyone calling those services is forced to pass the validation rules; and our user interface has robust, responsive checks of our validation rules before we call those services to save our data.
In a traditional web or SharePoint application, we’d need to write this logic twice; once in our business layer in C# and again in client-side JavaScript to provide the real-time feedback. Not only would that be more work, but it’s also a larger surface area with the potential for more bugs in your code as you’re implementing the same logic in two different languages in different tiers of your application. With LightSwitch, the plumbing is left to Visual Studio, thus improving the quality of our software.
Summary
In this chapter, we’ve learned about adding business logic to the entity model and to screens. Always remember to put as much logic as possible into your model as it is automatically reusable across screens with no additional effort. We learned how to enhance our entity model and leverage the events that fire as our data is inserting, updating, or deleting, and how to add custom validation. We also learned how to add custom buttons and dialogs to our screen. Used together, these tools can handle almost any data type development scenario you will face. In the next chapter, we will talk about adding security and access control to our application using the infrastructure provided by Visual Studio LightSwitch.