13. Advanced Editing
Now that you’ve mastered the basics of editing in Pro Tools, it’s time to learn a few advanced editing features. The features covered in this chapter are easy to learn. With a bit of practice, they’ll help you produce even smoother and more pristine-sounding audio.
We’ll begin with Region Groups, a new feature in Pro Tools 7, which lets you create collections of regions and handle them as one file. Next, we’ll look at fades and crossfades. You’ll learn when to use them and how to create them in Pro Tools. We’ll also look at the Batch Fade feature, which lets you apply multiple fades or crossfades across several regions simultaneously.
Next, we’ll explore repairing audio waveforms. We’ll show you how to quickly locate problematic glitches in your audio waveforms, and how to easily reshape the waveform with the Pencil tool to eradicate the unwanted noise.
Lastly, we’ll explore silence—that is, Pro Tools’ Strip Silence feature, which removes portions of audio files that fall below a user-defined volume threshold. We’ll sign off with the Insert Silence feature, which lets you add silence to a selected audio region.
Region Groups
A region group is a collection of regions, brought together and handled as a single region group file (.rgrp file format). You can use a region group just like you would a regular region: You can place region groups in tracks, edit them, view and manage them in the Regions list, and export and import them between Pro Tools sessions. (Region group file names are given the .rgrp extension upon export).
Region groups are useful for managing large numbers of similar small regions. For example, complex vocal arrangements, such as three part harmonies, are well suited for using region groups (multiple takes, redos, touch ups, edits composites can cause an explosion in the Regions list population). Creating a region group for each harmony part (or section of a harmony part) will help you keep your arrangements clean and organized. You can also nest region groups within region groups, which lets you organize your subsets of regions with region groups.
Creating region groups
To create a region group, you must first select the regions you want in the group. Region group selections can start and end anywhere in a track, including within a region, on a region boundary, or in empty space. Selections placed within region boundaries will separate the region at the selection boundaries. Blank space included in the selection will become part of the region group.
To create a region group
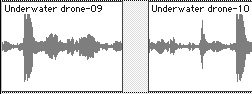
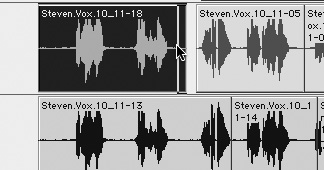
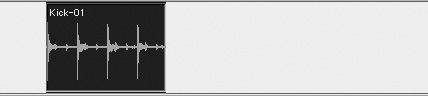
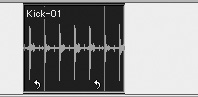
1. Select one or more regions in a track playlist (Figure 13.1).
Figure 13.1. Select one or more regions to place in a region group.
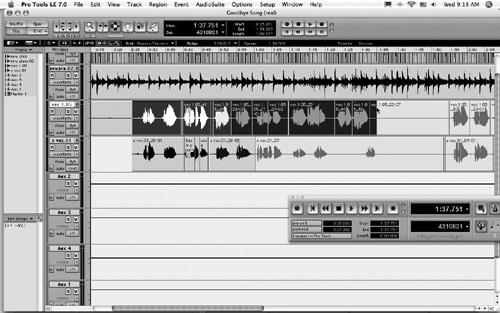
A single region group appears in the track playlist and in the Regions list (Figure 13.2). The region group icon is displayed in the lower left corner of the region group in the track (Figure 13.3).
Figure 13.2. A single region group appears in the track playlist and in the Regions list.

Figure 13.3. The region group icon is displayed in the lower left corner of the region group.
To ungroup a region group
1. Select a region group to ungroup (Figure 13.4).
Figure 13.4. Select a region group to ungroup.
2. Choose Region > Ungroup
The first level of region groups is ungrouped (nested region groups are maintained).
or
Choose Region > Ungroup All (Figure 13.5).
Figure 13.5. To ungroup a region group and all nested region groups it contains, choose Region > Ungroup All.
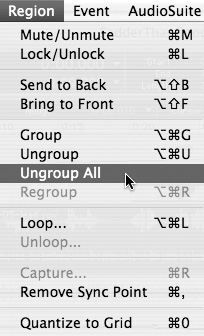
All region groups, including nested region groups, are ungrouped.
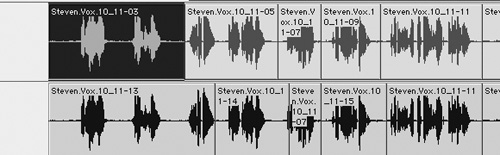
1. Select any region from the ungrouped region group (Figure 13.6).
Figure 13.6. To regroup a region group, first select any ungrouped region.
2. Choose Region > Regroup (Figure 13.7).
Figure 13.7. Choose Region > Regroup.
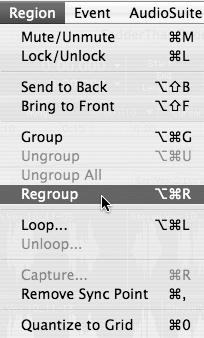
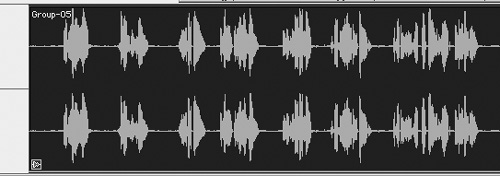
Region groups (ungrouped with the Ungroup All command) are restored tracks (Figure 13.8).
Figure 13.8. A restored region group. The Region > Regroup command restores region groups ungrouped with the Ungroup All command.
Editing Region Groups
Region groups are edited using the same standard editing commands used to edit regular regions: Cut, Copy, Paste, Clear, Trim, Lock, Mute, Name, Duplicate, Repeat, Spot, and so on.
When you apply an edit command to a region group it also applies to the regions it contains, with a few noteworthy exceptions: The Trim command, for example, applies to the boundaries of the region group only.
To trim individual regions within a region group
1. Choose Region > Ungroup All.
The region group is ungrouped. Individual regions appear in tracks.
2. Trim individual regions as desired (Figure 13.9).
Figure 13.9. You can trim individual ungrouped regions.
3. Choose Region > Regroup.
The region group is restored with trim edits to individual regions saved.
In addition, certain edit commands create new regions over region groups, as follows:
• Trimming a region group with the TCE Trim tool applies to region group boundaries only (Figure 13.10) and creates a new region over the region group (Figure 13.11).
Figure 13.10. The TCE Trim tool lets you trim region group boundaries.
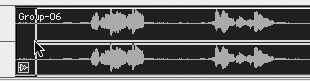
Figure 13.11. Trimming a region group with the TCE Trim tool creates a new region over the region group.
• AudioSuite processing of a grouped region creates a new region over the region group.
• Consolidating a selection including a grouped region creates a new audio file and region over the region group.
• Recording into a region group creates a new audio file and region over the region group.
• Pencil tool waveform redraw creates a new region over the region group.
• With Tab to Transients enabled, the Tab key moves the location cursor to transients and region boundaries within a region group; with Tab to Transients disabled, the Tab key moves the location cursor to region group boundaries and the sync point, if present, only.
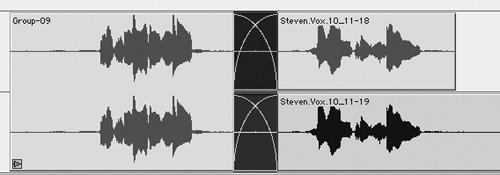
• Fade and crossfades can be created between two audio region groups and between an audio region group and a regular audio region (Figure 13.12). Ungrouping a region group removes any group level fades or crossfades. Fades and crossfades are restored by the Regroup command.
Figure 13.12. A crossfade between a region group and individual regions.
Looping Regions
New in Pro Tools 7, the Region Loop command lets you create loops of selected audio and MIDI regions and region groups (Figure 13.13).
Figure 13.13. A region loop.

Creating region loops
Creating region loops is an excellent way to quickly generate full-song rhythm sections (drum or percussion parts) or to extend a sound effect or a one-of-a-kind riff for fading in and out as desired throughout a song.
To loop a region
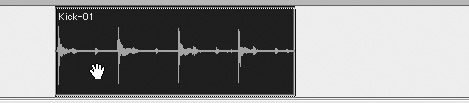
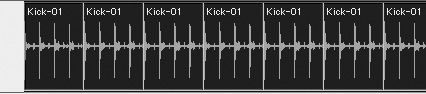
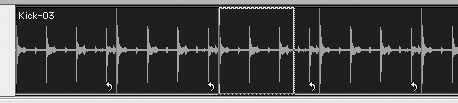
1. Select an audio or MIDI region, or region group (Figure 13.14).
Figure 13.14. Select the audio (or MIDI) region you want to loop.
2. Choose Region > Loop.
The Region Looping dialog box appears (Figure 13.15).
Figure 13.15. The Region Looping dialog box.

3. In the Region Looping dialog box, do one of the following:
• Select the Number of Loops option and enter the number of times to loop the region.
• Select the Loop Length option and enter the duration according to the Main Time Scale. If the length is not an exact multiple of the source loop’s duration, the last loop will be truncated.
• Select the Loop Until End of Session or Next Region option. The looped region will repeat until the end of the session or until the next region on the track. If necessary, the last loop will be truncated to fit.
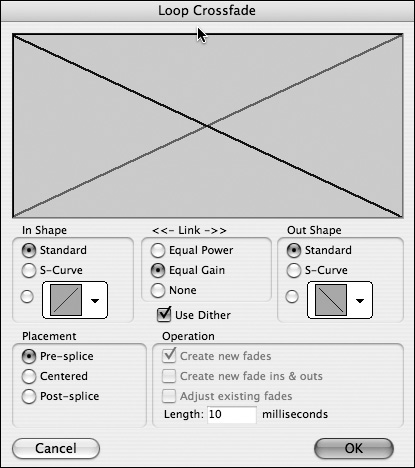
4. To create a crossfade at the loop point, choose Enable Crossfade. Select Settings. Configure the crossfade as desired (Figure 13.16). Click OK.
Figure 13.16. Creating crossfades between loops helps to smooth transitions between individual loop iterations.
5. In the Region Looping dialog, click OK.
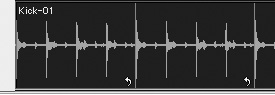
The loop appears on the track (as specified in the Region Looping dialog box) with each region of the loop displaying the loop icon (Figure 13.17).
Figure 13.17. The region loop appears in the track playlist. Each loop iteration displays the loop icon.
To unloop looped regions
1. Select the looped region.
2. Choose Region > Unloop.
The Unloop Regions dialog box opens (Figure 13.18).
Figure 13.18. The Unloop Regions dialog box.
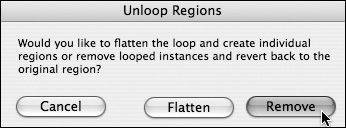
3. In the Unloop Regions dialog box, select one of the following:
• Remove: This option unloops and removes all loop iterations except the source loop iteration (Figure 13.19).
Figure 13.19. Click Remove in the Unloop Regions dialog box to remove all loop iterations except the originally selected source region.
or
• Flatten: This option unloops the region loop and creates individual regions from loop iterations (Figure 13.20).
Figure 13.20. Click Flatten in the Unloop Regions dialog box to unloop the region loop and create individual regions.
To unloop region loops and ungroup region groups
1. Select a looped region that contains one or more region groups.
2. Choose Region > Ungroup All.
The selected loop is unlooped and region groups are ungrouped (individual regions reappear).
Editing Looped Regions
You can apply edits to an entire region loop (edits apply to all regions in a loop), or you can edit the individual regions within a region loop. Clicking on the region loop with the Grabber tool, Smart Tool, or Selector tool selects the entire region loop; clicking the icon of an individual region in a loop selects that region only.
When you move a region loop, all regions in that loop are moved along with the source loop. However, individual regions in a region loop cannot be moved separately from the region loop.
To select a looped region
• Using the Grabber tool or Smart tool, click the looped region (Figure 13.21).
Figure 13.21. Select a loop by clicking on it with the Grabber tool.
or
• Using the Selector tool, double-click the looped region.
The entire region loop is selected, including the source region and all its loop iterations.
To select an individual source region or loop iteration
• Using the Grabber tool or Smart tool, click the loop icon of a source region or the desired individual loop iteration (Figure 13.22).
Figure 13.22. Select an individual loop iteration by clicking its loop icon.
![]()
or
• Using the Selector tool, double-click the loop icon of a source region or the desired individual loop iteration.
The individual source region or individual loop iteration is selected.
Trimming looped regions
Looped regions can be trimmed using the Standard Trim tool, Trim Region commands, or the Loop Trim tool. The Standard Trim tool lets you trim the boundaries of entire region loops. Trim Region commands let you trim an entire region loop down to a selected area or from the start or end point of a region loop to the edit insertion point.
The Loop Trim tool lets you quickly alter the source loop selection by trimming individual loop iterations. All iterations in the region loop are then updated automatically to match the individual trimmed region. The number of loops in the region loop either increases or decreases to fill the space of the entire region loop. The Loop Trim tool appears when you move the Standard Trim tool over the loop icon of any loop iteration in the region loop.
To trim region loop boundaries
1. Choose the Standard Trim tool.
2. Trim the start or end of the region loop.
Region loop boundaries move to reveal additional loop iterations or to conceal existing loop iterations (Figure 13.23).
Figure 13.23. Use the Standard Trim tool to trim region loop boundaries.

To trim a region loop to a selection
1. Choose the Selector tool.
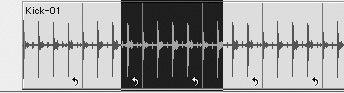
2. Make the desired edit selection within the region loop (Figure 13.24).
Figure 13.24. Make an edit selection of the area you want to keep within a region loop.
3. Choose Edit > Trim Region > To Selection (Figure 13.25).
Figure 13.25. To trim a region loop to a selected area, choose Edit > Trim Region > To Selection.

The region loop is trimmed on both sides of the edit selection (Figure 13.26).
Figure 13.26. The region loop is trimmed on both sides of the edit selection.
To trim a region loop using the Loop Trim tool
1. Choose the Standard Trim tool.
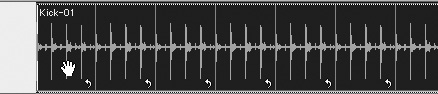
2. Move the Standard Trim cursor over an individual region’s loop icon (Figure 13.27).
Figure 13.27. Drag the Standard Trim tool over the loop icon of any individual iteration in the loop.
![]()
3. Trim the boundaries of the individual region as desired (Figure 13.28).
Figure 13.28. Trim the individual region of the loop as desired.
All loops in the region loop are updated automatically to match the new boundaries (of the individual region trimmed with the Loop Trim tool) (Figure 13.29).
Figure 13.29. All loops in the region loop are updated to match the trim performed on the individual loop iteration.

• To trim region loops in one loop iteration increments, press Control (Macintosh) or Start (Windows) while trimming with the Standard Trim tool.
• With Tab to Transients enabled, the Tab key moves the location cursor to transients and region boundaries in a looped region; with Tab to Transients disabled, the Tab key moves the location cursor to start and end boundaries of the entire region.
• The TCE Trim tool unloops and consolidates the entire region loop. A new region appears over the region loop and in the Regions list.
• Looping audio regions does not loop automation. To copy and apply a selected segment of automation to a region loop, choose Edit > Copy Special to copy the automation to the clipboard. Then choose Edit > Paste Special > Repeat to Fill Selection.
For more information on Trim tools in Pro Tools 7, see Chapter 12: Working with Regions or see The Pro Tools Reference Guide. For more information on Looping Regions, see The Pro Tools Reference Guide.
Creating Fades and Crossfades
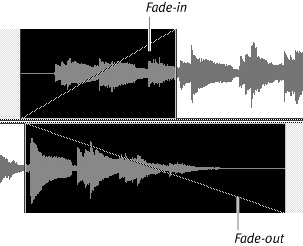
Pro Tools lets you add fades and crossfades to audio regions. A fade is a volume curve that controls the rate of increase (fade-in) or decrease (fade-out) of a region’s volume. Fade-ins are placed at the start of regions; fade-outs are placed at the end (Figure 13.30). You can add fades and crossfades to regular audio regions, region groups, and looped regions.
Figure 13.30. A standard fade-in and fade-out.
Fades let you smooth the entrance and exit of audio during a mix. You can use fades on final mixes (such as a fade-out at the end of a song). Or, you can use fades to blend individual elements into a mix. For example, you may want to embellish a song chorus with a sample or instrumental part. Fades can help you smoothly incorporate these sounds.
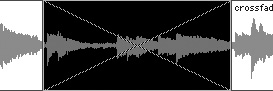
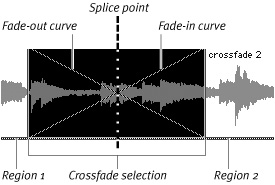
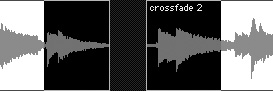
A crossfade is an overlapping fade-out and fade-in placed between two adjoining audio regions (Figure 13.31). Crossfades let you smooth transitions between separate audio regions on a track. You can use crossfades to reduce noise (such as clicks and pops) or to reduce distracting changes in sound character that can occur between regions during playback.
Figure 13.31. A crossfade is an overlapping fade-out and fade-in placed between two adjoining audio regions.
You can assign different volume curves to the fade-out and fade-in portion of a crossfade. The type of volume curve you assign determines the crossfade’s character. Crossfade types include:
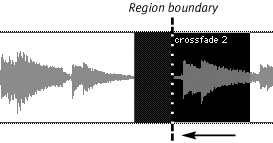
Centered: Centered crossfades extend across both sides of the splice point—the location where two cross-faded regions join (Figure 13.32). In a centered crossfade, the first region must contain audio material beyond its end point, and the second region must contain audio material before its start point.
Figure 13.32. A centered crossfade.
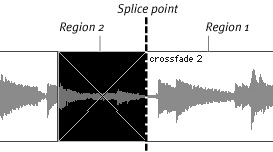
Pre-Crossfade: Pre-crossfades are created before the splice point (Figure 13.33). This maintains the volume at the very beginning of the second region, which is useful if you want to preserve a strong attack at the beginning of the region.
Figure 13.33. A pre-crossfade. The selection range extends just up to the beginning of Region 2.
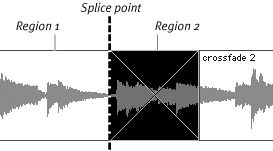
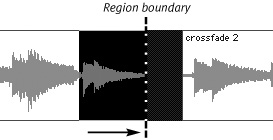
Post-Crossfade: Post-crossfades are created after the splice point (Figure 13.34). They’re useful if you want to maintain the volume of the first region until its end.
Figure 13.34. A post-crossfade. The selection range begins just after the end of Region 1.
About the Fades dialog box
The Fades dialog box (Figure 13.35) lets you select, view, audition, and edit fade volume curves. It includes the following buttons:
Audition: This button lets you preview a fade or crossfade.
Figure 13.35. The Fades dialog box.
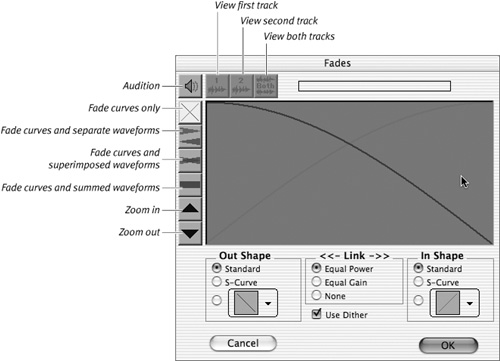
View First Track: If a fade includes multiple tracks, this button lets you view the first pair of adjacent tracks.
View Second Track: If a fade includes multiple tracks, this button lets you view the second pair of adjacent tracks.
View Both Tracks: This button displays the waveforms of the first two adjacent tracks in a multitrack fade.
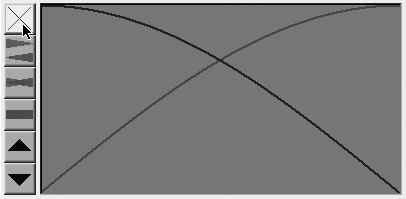
Fade Curves Only: This button displays the fade curves without showing the audio waveforms (Figure 13.36).
Figure 13.36. The Fade Curves Only button in the Fades dialog box displays the fade curves without showing the audio waveforms.
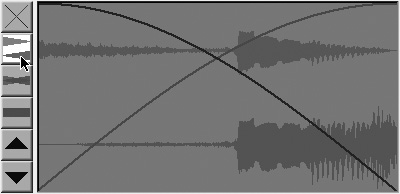
Fade Curves and Separate Waveforms: This button displays fade curves along with separate views of the fade-in and fade-out waveforms (Figure 13.37).
Figure 13.37. The Fade Curves and Separate Waveforms button displays fade curves and separate views of the fade-in and fade-out waveforms.
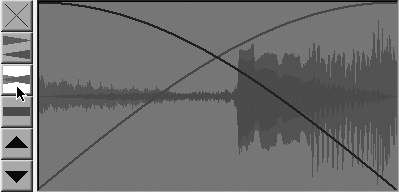
Fade Curves and Superimposed Waveforms: This button displays fade curves along with superimposed views of the fade-in and fade-out waveforms (Figure 13.38).
Figure 13.38. The Fade Curves and Superimposed Waveforms button displays the fade curves along with superimposed views of the fade-in and fade-out waveforms.
Fade Curves and Summed Waveform: This button displays the fade curves along with a single waveform representing the summation of the cross-faded audio.
Zoom In: This button zooms in on the audio waveform.
Zoom Out: This button zooms out on the audio waveform.
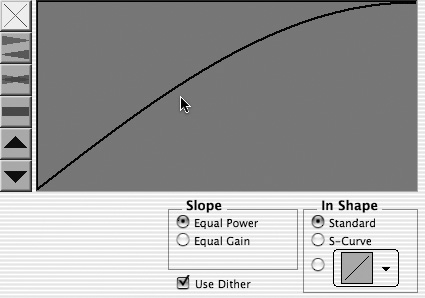
The Fades dialog box provides the following fade-in and fade-out curve shapes:
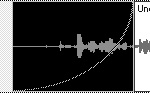
Standard: This is an all-purpose fade curve. You can adjust its shape by dragging it (Figure 13.39).
Figure 13.39. The Standard fade curve.
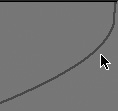
S-Curve: The S-shaped fade curve inverts at the start and end to make fade-ins faster and fade-outs slower (Figure 13.40). You can adjust its shape by dragging it.
Figure 13.40. The S-shaped fade curve. Drag on the curve to adjust its shape.

Preset Curves: The Preset Curves pop-up menu (Figure 13.41) lets you choose from seven curves. You can adjust preset curves by dragging their end points (Figure 13.42).
Figure 13.41. The Preset Curves pop-up menu.

Figure 13.42. You can adjust preset curves used as crossfades by dragging their end points.
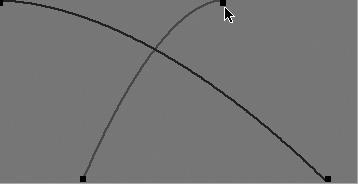
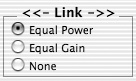
Linking curves can help smooth the transition between fade-ins and fade-outs of a crossfade. When fades are linked, adjusting one fade curve automatically adjusts the other. The Fades dialog box offers the following options for linking fade-in and fade-out curves (Figure 13.43):
Equal Power: The Equal Power option is useful when cross-fading between audio regions that are out of phase or differ in sound character. It can also help prevent volume drop-outs that can occur with an Equal Gain crossfade. Option-click (Macintosh) or Alt-click (Windows) on the fade curve to reset it to its default shape.
Figure 13.43. You can link fade-in and fade-out parameters in the Fades dialog box.
Equal Gain: The Equal Gain option is useful when cross-fading between audio regions that are in phase or have similar or identical sound character (such as a drum loop). It can also help prevent the clipping that can occur when using an Equal Power crossfade. Option-click (Macintosh) or Alt-click (Windows) on the fade curve to reset it to its default shape.
None: This option disables linking between the fade-out and fade-in curves. This lets you adjust the curves separately and create custom crossfade shapes. To adjust the fade-in curve, press Option (Macintosh) or Alt (Windows) while dragging the curve. To adjust the fade-out curve, press Command (Macintosh) or Control (Windows) while dragging the curve.
The Fades dialog box also provides a Use Dither option (Figure 13.44), which lets you add dither to fades. Dither is a form of randomly generated noise that helps smooth out fade-ins or fade-outs from silence. Dither can also help smooth crossfades between low-level audio regions.
Figure 13.44. Select the Use Dither check box in the Fades dialog box to add dither to a fade.
![]()
For more information on fades, see the Pro Tools Reference Guide.
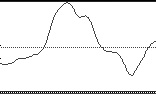
1. With the Selector, select the beginning of the region you want to fade in. The selection must extend to the exact beginning of the region or a blank area prior to the region in the track (Figure 13.45).
Figure 13.45. A fade-in selection. The selection must extend to the exact beginning of the region or a blank area prior to the region in the track.
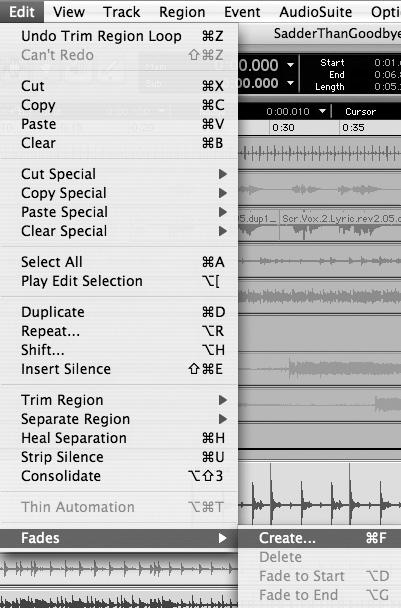
2. Choose Edit > Fades > Create (Figure 13.46).
Figure 13.46. To create a fade-in or fade-out, choose Edit > Fades > Create.
The Fades dialog box appears.
3. Choose an In Shape.
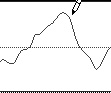
4. Click the Audition button to play the fade. If desired, adjust the curve by dragging it in the Fades dialog box (Figure 13.47).
Figure 13.47. You can adjust a fade curve by dragging it.
5. Select a Link option.
6. Click OK.
Pro Tools calculates the fade-in and writes it to disk. The chosen fade curve appears in the region (Figure 13.48).
Figure 13.48. Pro Tools calculates the selected fade curve, and it appears in the region.
1. Select the end of the region you want to fade out. The selection must extend to the exact end of the region or a blank area after the region in the track.
2. Choose Edit > Fades > Create.
The Fades dialog box appears.
3. Choose an Out Shape.
4. Click the Audition button to play the fade. If desired, adjust the curve by dragging it in the Fades dialog box.
5. Select a Link option.
6. Click OK.
Pro Tools calculates the fade-out and writes it to disk (Figure 13.49). The chosen fade curve appears in the region.
Figure 13.49. Fade files are stored in the Fade Files folder inside the Session folder.

To create a crossfade between two regions
1. With the Selector, drag from where you want the crossfade to begin (in the first region) to where you want it to end (in the second region) (Figure 13.50).
Figure 13.50. A crossfade selection between two regions.
2. Choose Edit > Fades > Create.
3. Use the view buttons to adjust the view of the crossfade.
4. Choose an Out Shape and an In Shape.
5. Select a Link option.
6. Audition the crossfade.
7. Click OK.
Pro Tools calculates the crossfade and writes it to disk. The crossfade appears between the two selected regions.
To create a pre- or post-crossfade
1. Click with the Selector in the track you want to cross-fade.
2. Press Tab to move forward to the next region boundary.
or
Press Option-Tab (Macintosh) or Control-Tab (Windows) to move back to the previous region boundary.
3. Shift-drag or press Shift-Tab to extend a selection forward to the next region boundary (Figure 13.51).
Figure 13.51. Shift-drag or press Shift-Tab to extend a selection forward to the next region boundary.
or
Press Option-Shift-Tab (Macintosh) or Control-Shift-Tab (Windows) to extend the selection back to the previous region boundary (Figure 13.52).
Figure 13.52. Press Option-Shift-Tab (Macintosh) or Control-Shift-Tab (Windows) to extend the selection back to the previous region boundary.
4. Choose Edit > Fades > Create.
5. Choose an In Shape and Out Shape for the crossfade.
6. Audition the crossfade.
Adjust the fade-in and fade-out curves, if desired, by dragging them in the Fades dialog box.
7. Click OK.
A pre- or post-crossfade appears between the selected regions.
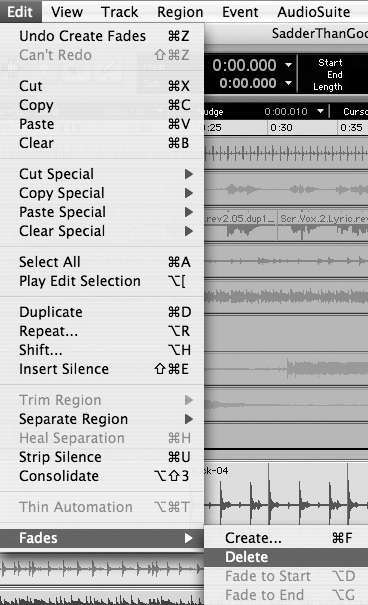
1. Select the area of the track containing the crossfade you want to delete.
2. Choose Edit > Fades > Delete (Figure 13.53).
Figure 13.53. To remove a crossfade, choose Edit > Fades > Delete.
or
1. Select the crossfade with the Grabber or Selector.
2. Press Delete (Macintosh) or Backspace (Windows).
The crossfade is removed and the regions are returned to their previous state.
To trim a crossfade
1. Select the crossfade with the Grabber or Selector.
2. Drag the Trim tool at the start or end of the crossfade to lengthen or shorten it (Figure 13.54).
Figure 13.54. To trim a crossfade, drag the Trimmer at the start or end of a crossfade.

The crossfade is recalculated and a new crossfade appears.
• When making selections for crossfades that occur on the border of two regions, use the Tab key to move the cursor to the exact beginning or end of a region.
• Disabling the Use Dither function when editing fades and crossfades can help speed previews and fade recalculations.
Creating Fades and Crossfades in Batches
Pro Tools lets you create multiple fades and crossfades simultaneously. Creating fades and crossfades in batches lets you quickly smooth transitions between multiple regions.
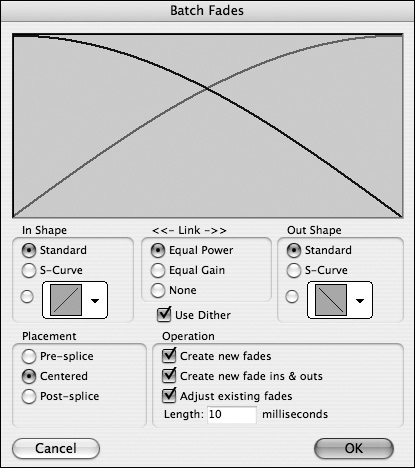
To create batch fades you must first make a selection across multiple regions, and then choose the Create Fades command. This launches the Batch Fades dialog box (Figure 13.55), which provides options for creating multiple fades and crossfades.
Figure 13.55. The Batch Fades dialog box.
To create crossfades between multiple regions at once
1. Drag with the Selector from the first region you want to cross-fade to the last region you want to cross-fade (Figure 13.56).
Figure 13.56. A multiple region selection.
2. Choose Edit > Fades > Create.
The Batch Fades dialog box appears.
3. Select a Batch Operation.
4. Select a crossfade type (pre-splice, centered, or post-splice).
5. Enter a crossfade length in milliseconds.
6. Click OK.
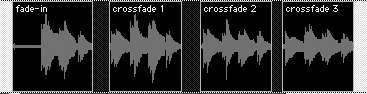
Fades and crossfades appear in the selected regions (Figure 13.57).
Figure 13.57. Multiple crossfades created with the Batch Fades dialog box.

• To smooth region transitions for an entire audio track, select Create New Fades and Create New Fade-Ins and -Outs from the Operation area of the Batch Fades dialog box. This creates a fade-in at the start of the first selected region, crossfades between subsequent regions, and a fade-out at the end of the last region.
Repairing Waveforms with the Pencil Tool
Pro Tools lets you make destructive edits to waveform data using the Edit window’s Pencil tool. This is useful for repairing pops, clicks, or other sharp volume spikes in a waveform. The Pencil’s waveform repair feature only functions when the waveform is zoomed-in to the sample level.
To edit an audio waveform with the Pencil tool
1. Use the Zoomer or Horizontal Zoom buttons to zoom in to the sample level where the waveform appears as a thin line (Figure 13.58).
Figure 13.58. The Waveform view zoomed in to the sample level.
2. Using the Pencil tool, drag over the area of the waveform you want to reshape (Figure 13.59).
Figure 13.59. To repair a waveform, drag the Pencil tool over the area of the waveform you want to reshape.
• Limit your edits to small problem areas, and be careful not to overedit. Too much reshaping can alter the sound or add noise.
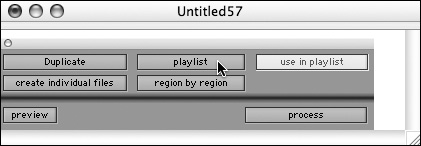
• Repairing waveforms with the Pencil tool is destructive: It permanently alters the underlying audio file. Always back up an audio region before repairing it. To do this, select the region you want to repair, and then choose AudioSuite > Duplicate. In the Duplicate plug-in window, select Playlist and Use In Playlist (Figure 13.60), and click the Process button. The AudioSuite plug-in creates a duplicate audio file. The duplicate replaces the region on the track and the suffix .DUPL is added to the region name.
Figure 13.60. The Duplicate AudioSuite plug-in lets you quickly back up a region’s underlying audio file.
• When working with the Pencil tool, use Zoom Preset buttons or memory locations to quickly recall a sample-level zoom setting. For information on zoom presets and memory locations, see Chapter 10: Editing Basics.
Stripping Silence from Regions
The Strip Silence command removes portions of audio regions that fall below a user-defined volume threshold. This process divides audio regions into separate regions.
Stripping silence is useful for quickly breaking larger audio regions into smaller, more manageable regions. For example, stripping silence from a sound effect makes it easier to locate it to a specific point. It’s also useful for condensing regions in preparation for compacting audio. For information on compacting audio, see Chapter 8: File Management Basics.
About the Strip Silence window
The four sliders in the Strip Silence window (Figure 13.61) let you determine how Pro Tools defines silence in audio regions.
Figure 13.61. The Strip Silence window.

Strip Threshold: This slider determines the volume threshold below which audio is considered silence (-48 dB to 0).
Minimum Strip Duration: This slider sets a minimum time period (0 to 1,000 ms) below which audio is considered silence.
Region Start Pad: This slider sets a time value that is added to the start of new regions. Use this to preserve audio that falls below the volume threshold.
Region End Pad: This slider sets a time value that is added to the end of new regions.
The Strip Silence window includes a Rename button, which, when clicked, opens the Rename Selected Regions dialog box (Figure 13.62). Here, you can set the following parameters for automatically naming regions created with the Strip Silence command:
Name: The Name field lets you enter a base name for all regions created with Strip Silence.
Figure 13.62. The Rename Selected Regions dialog box.

Starting Number: The Starting Number field lets you enter a start number for sequential auto numbering.
Number of Places: The Number of Places field lets you enter the number of numeric places (zeros) that will precede the auto-numbers.
Suffix: The Suffix field lets you append text to the end of the name (after the auto-numbering).
To strip silence from an audio selection
1. Select one or more regions (Shift-click to select multiple tracks).
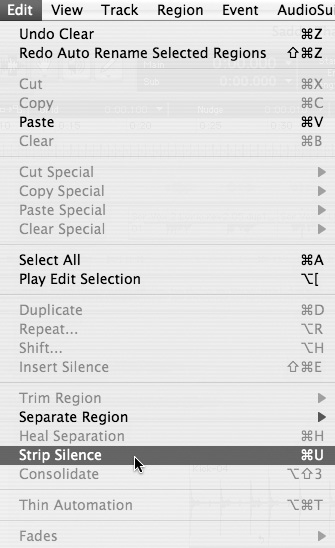
2. Choose Edit > Strip Silence (Figure 13.63).
Figure 13.63. To show the Strip Silence window, choose Edit > Strip Silence.
3. Click the Rename button to establish a naming scheme for regions created with Strip Silence.
4. Adjust the Strip Threshold and Minimum Strip Duration sliders until rectangles appear, which indicate areas of audio above the threshold (Figure 13.64).
Figure 13.64. Adjust the sliders for Strip Threshold and Minimum Strip Duration until the strip rectangles appear in the selection.
5. Adjust the Region Start Pad and Region End Pad sliders to fine-tune the Strip Silence region selections.
6. Click the Strip button.
The selection is removed from the track (Figure 13.65). New regions are created and appear in the Audio Regions list.
Figure 13.65. Strip Silence removes the selected audio from the track and creates new regions in the Audio Regions list.
Inserting Silence
The Insert Silence command lets you add silence to an audio region selection. The command is affected by the current Edit mode as follows:
Slip mode: In Slip mode, if a selected track is displaying audio data, the selected range is cleared of the audio data, as well as all underlying automation data on all selected tracks.
If a selected track is displaying automation data (such as volume, mute, or pan), then silence is inserted into the automation type visible on each track. Press Control (Macintosh) or Start (Windows) while choosing the Insert Silence command to insert silence on all automation playlists for all selected tracks.
Shuffle mode: If a selected track is displaying audio data in Shuffle mode, silence is inserted into the selected range and existing audio regions are shuffled. If a selected track is displaying automation data, only the visible automation type is cleared, and a blank gap appears. Regions are not shuffled.
Grid mode: In Grid mode, inserting silence clears all audio and automation data within a selected range.
To insert silence into a track
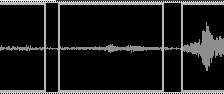
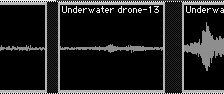
1. Select the portion of a region in which you want to insert silence (Figure 13.66).
Figure 13.66. Select the segment of the region in which you want to insert silence.
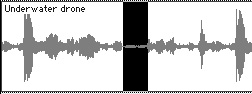
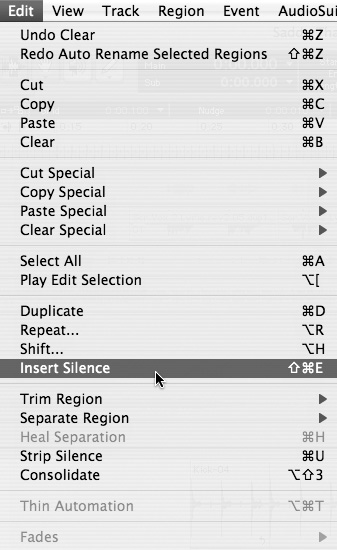
2. Choose Edit > Insert Silence (Figure 13.67).
Figure 13.67. To insert silence, choose Edit > Insert Silence.
Silence is inserted into the selected audio range. In Slip mode, all audio data and automation data is cleared from the selected range (Figure 13.68). In Shuffle mode, silence is inserted in the selected range, and existing audio regions are shuffled.
Figure 13.68. In Slip mode, inserting silence clears all audio data and automation data from the selected range.