
Controlled Bleaching with Discharge Paste
A quick and easy way to create designs on fabric By Ed Lewis
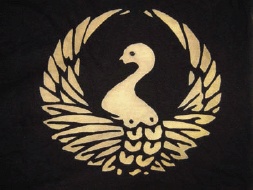
Figure A: A finished bleaching job
This is more of an introduction to discharge paste than a full-blown Instructable. Yes, the name is terrible and the stuff is white and gooey which makes it even worse. But it’s pretty damn cool stuff, so you just accept it and move on towards greatness.
Where bleach is incredibly thin and can destroy natural fibers if you’re not careful, discharge paste is the opposite. It’s gooey, so it doesn’t spill easily and it can be used with silkscreens. It’s also nice to natural fibers, which is very good as well. It removes most fiber reactives, direct dyes, and acid dyes, and typically leaves a light golden color when it’s done.
Everything you need to know about this chemical agent is printed right on the label. To use it, you just apply it to a fabric, let it dry, then iron it on the lowest steam setting for a few minutes to activate it. To make sure it works on a new fabric, test it by putting a small spot in a hidden area of your target material (assuming you’re using a shirt, for instance) and see how well it works before spreading it everywhere.
Discharge Paste is available in the U.S. from Dharma Trading Co. www.dharmatrading.com/html/eng/1574-AA.shtml.
1. Apply to the fabric of your life
Put down a stencil or a silkscreen or forgo all premade plans and apply the paste directly to your fabric. If you want to let the goo seep in a little deeper, you can thin it out with some water. You can just go for it or keep on testing on more areas of the fabric.
Used shirts are cheap to play with, but for consistency and thin shirts, go to the underwear aisle and get the dyed T-shirts. They’re usually less than $5 each for decent ones and they tend to be thinner than Beefy Ts that make me sweat like I still live in Southern California.
2. Make magic with your iron
At first, there’s not much to see on the shirt. Even when you wait until the paste dries, there’s still not much there. This all changes dramatically when you put the iron to the fabric. The color quickly disappears, and POW, there’s your design!
One more thing: be sure to work in a well-ventilated area. This stuff stinks, and when your fabric is done, it too will stink until you wash it. So don’t run out to a bar to show off your new threads right away ’cause you’ll destroy your shirt’s first impression with a resounding “P-U!”
Now clean up your mess and start planning your next project.
3. BONUS! Before and after… again
Another example of how the paste looks dried on black cotton before and after it’s been ironed (Figures H-J).
Ed Lewis lives in Oakland, CA, with his wife Maria and Biscuit, the stunt cat. Being outside, cooking, making wine, and building funny objects are current favorite activities.
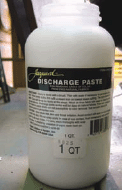
Figure B: A 1 qt. bottle of Discharge Paste from Dharma Trading
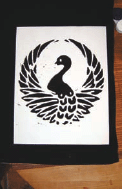
Figure C: Using a stencil
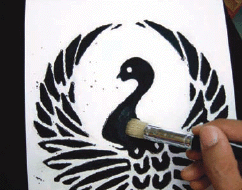
Figure D: Applying the Discharge Paste
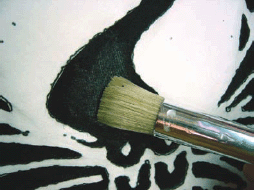
Figure E: Make sure to achieve full and even coverage
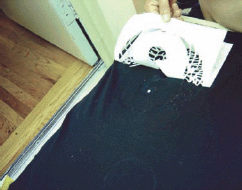
Figure F: You won’t see much of your handiwork until after you iron it
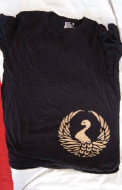
Figure G: Nice job!
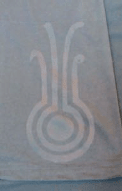
Figure H: After application, before ironing
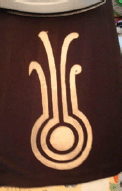
Figure I: After ironing
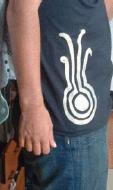
Figure J: Ready to roll