
My take on an old photographer’s trick By Alexander Reben

Figure A: The String Tripod, attached to a camera
The string tripod is an old photographers trick—here is my design. It’s also sometimes referred to as a string bipod, string monopod, chain tripod, bipod, etc….
This device is used to stabilize a camera in order to get clearer pictures at a slow shutter speed. With more and more digital cameras coming out with vibration reduction (VR) or image stabilization (IS) systems, the string tripod has a new life.
Note: You can read more about vibration reduction here (http://tinyurl.com/5tmtdv).
Since image stabilization systems work best with rotational vibration, translational vibration can still create blurry pictures. By restraining the up-down left-right and back-front axis, you can lessen this vibration. Since with this design you still have rotational freedom, you can pan and follow something such as a bird or sports player. You can also recompose your shot with little trouble. Of course this technique also works well with non image stabilization systems.
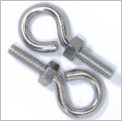
Figure B: Eye bolts and nuts
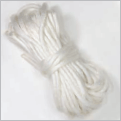
Figure C: Braided cord
Advantages:
![]() Cheap
Cheap
![]() Easy to make
Easy to make
![]() No special tools needed (or really any at all)
No special tools needed (or really any at all)
![]() Hard to break
Hard to break
![]() Small
Small
![]() You can use this where tripods are disallowed (such as museums)
You can use this where tripods are disallowed (such as museums)
![]() If the “tripod” gets dirty you can throw it in the wash
If the “tripod” gets dirty you can throw it in the wash
![]() If you misplace it, you can make another
If you misplace it, you can make another
![]() Rotational movement still available for panning and recomposition
Rotational movement still available for panning and recomposition
Disadvantages:
![]() Does not hold as steady as a real tripod
Does not hold as steady as a real tripod
![]() You can get some strange looks while using it
You can get some strange looks while using it
1. Parts
The parts you will need are as follows:
![]() A 1/4” x 20tpi stainless steel eye hook or eyebolt, 2" long or shorter
A 1/4” x 20tpi stainless steel eye hook or eyebolt, 2" long or shorter
![]() A 1/4” x 20tpi nut (may come with the eye hook)
A 1/4” x 20tpi nut (may come with the eye hook)
![]() 40' braided nylon and/or poly cord (parachute cord is recommended)
40' braided nylon and/or poly cord (parachute cord is recommended)
![]() Optional: a carabiner
Optional: a carabiner
All of these can be found at your local hardware store and should be had for about $5 total.
2. Prepare the cord
Cut your cord to about three times your height (more is better as you can cut off excess later). Make sure you melt the ends with a match or lighter to keep them from unraveling. Next create an overhand loop knot at one end as shown in Figure E. Pull the knot tight.
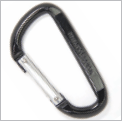
Figure D: Carabiner

Figure E: An overhand loop knot
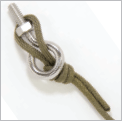
Figure F: Making the ring hitch
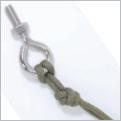
Figure G: Pulling it snug
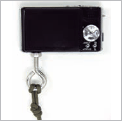
Figure H: Attaching the tripoe to the camera

Figure I: Using it as a monopod
3. Connect cord to hook
Put the loop you just created through the ring on the hook. Then place the loop on the cord behind the threaded portion on the hook (Figure F). Pull tight and the cord will form a ring hitch.
It should look like Figure G.
4. You’re done!
You’re done with the construction. Now comes installation and use.
5. Camera installation
Now you’re ready to install this on your camera. Simply screw in the hook into the tripod mount at the bottom of your camera. When the hook becomes snug, tighten down the nut to meet with the camera body. You do not need to screw this down with much torque, since it is only there to keep the hook from backing out. Figure H shows the tripod connected to a camera. You can cut the hook to exact length if you want.
Note: If your camera has plastic threads, be careful to not cross thread the hook. You should never have to force it in.
6. Using as a monopod
To use as a monopod, take your camera and put it just below eye level. Next take the cord dangling from the bottom and loop it under your shoe. Take the remaining cord and hold it tight in your hand while gripping the camera. Now pull up on the cord to camera eye level and take a picture. The cord should be taut. An advantage to this is that it prevents a rotation axis because you are holding the cord in your hand away from the attachment point. Figure I shows how it’s done.
This is my preferred method when I need to move around a lot or need to set up quickly. If you have the hook already attached to the camera it will take less than a second to get into position.
You can also tie a large loop at the end where your foot would be using a overhand loop and put your foot through it. You would not have to hold the end in this configuration.
Note: For each of these methods it is important that you do not put excess force on your camera. As every camera is designed different, you need to determine the amount of force your camera can take. With that said, I have been using this method for years with many different cameras with no problems.
7. Using as a bipod
To use as a bipod, take a wide stance and loop cord under both feet. Bring the hook and end of cord to about where they would be when attached to the camera. Once you know this distance, secure the end of the cord into the hook as shown in Figures J and K.
You have now created a triangle in the cord. Attach the hook to the camera and pull up tight. If you miscalculated the distance, simply loosen your grip and pull the end of the cord tighter through the hook. Figure L shows how to use it.
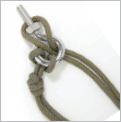
Figure J: Attaching the other end of the loop for bipod use
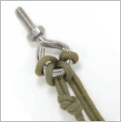
Figure K: Pulling it snug

Figure L: Using it as a bipod

Figure M: Using it as a tripod

Figure N: Attaching the carabiner

Figure O: Pulling it snug
This method is good if you have a little more time on your hands or need a more stable shot.
If you are in a crunch, you can also just skip the last step and hold the end of the cord like when using as a monopod.
8. Using as a tripod
To use as a tripod, follow the steps to use as a bipod. Then take the leftover end of the string and attach it to something (see Figure M). Optionally you can install a carabiner or other device at the end of the string as shown in Figures N and O. When using this method, it is imperative that you keep all parts of the string taut.
This method takes the most time to setup and requires something in the environment to attach to. Also, front to back movement is not as bad as left to right or up and down. Personally, I hardly use this method but it is always an option.
Figure P: Tests—1/2-second exposure, 200mm at 10 feet

Figure P1: No string tripod; no image stabilization
Figure P2: No string tripod; image stabilization on
Figure P3: String tripod used; image stabilization on
9. Tips & tricks
Shutter Speed:
Using the right shutter speed is essential, you should always use the maximum speed possible.
The rule of thumb for absolute minimum shutter speeds for a handheld camera is 1/focal length. For example, a 135mm lens with a 1.5x crop factor (on a SLR) makes it 202.5mm. So with a handheld you should expect somewhat clear pictures starting at 1/200 or 200 shutter speed. It also matters how far away the subject is: the farther away, the faster the shutter speed needed. The third factor is how far the tip of your lens is from the camera, the further it is—the more it will amplify the vibration.
The string tripod requires a bit of practice and getting used to. I did not notice much of a difference at first, but after a while it really helped. After some practice, it should improve the minimum shutter speed to 1/2 or 1/3 that of handheld. With VR or IS and the string tripod, you should get 1/4 or 1/6 that of a handheld.
So, if you are first starting out I would not go any slower than 1/100 with a string tripod at that focal length. As you can see in Figure P, after practice and with VR I can get clear pictures at 1/2 sec shutter speed at 300mm equivalent at 10 feet.
With all of this said, it is extremely hard to generalize these numbers and each person is different. There are limitations on this design and those limitations will be different with each person. If you have not determined these limitations for you, leave the camera on P or Auto—this should optimize the shutter speed. Keep experimenting and don’t give up, it will be worth it.
Technique:
To take steady pictures in general, use the following steps.
![]() Get a good footing
Get a good footing
![]() Compose your shot
Compose your shot
![]() Keep your elbows tucked in
Keep your elbows tucked in
![]() Take a breath and hold it in
Take a breath and hold it in
![]() Slowly depress the shutter
Slowly depress the shutter
![]() Keep the camera at your eye for a few seconds after the picture is taken
Keep the camera at your eye for a few seconds after the picture is taken
10. Conclusion
For $5 and a little work, you too can have a tripod in your pocket. Figure P showed some tests done (taken with a D200 and 18-200mm VRII).
Here are three pictures taken at 135MM (202MM equiv) at 1/15 sec:
![]() Figure Q is handheld, no string tripod or VR
Figure Q is handheld, no string tripod or VR
![]() Figure R is with string tripod, no VR
Figure R is with string tripod, no VR
![]() Figure S is with string tripod and VR
Figure S is with string tripod and VR
Each of these is directly from the camera with no alterations. Figure T was taken in real life with the string tripod. Tripods were not allowed in this aquarium.
Alexander Reben enjoys photography, simple elegant design, and building robots. He has worked on robots for photography at NASA and is currently a graduate student in The Media Lab at MIT.
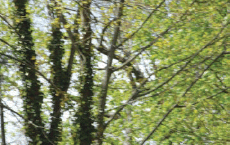
Figure Q: No string tripod, no vibration reduction
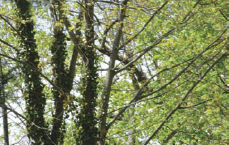
Figure R: String tripod, no vibration reduction

Figure S: String tripod, with vibration reduction

Figure T: Aquarium photo