
Make this everlasting bouquet for your Valentine By Travis Hydzik

Figure A: A lovely bouquet for your sweetie
Give a unique twist to the traditional giving of roses on Valentine’s Day. Handmade origami roses are everlasting and inexpensive to make.
1. Inspiration
Looking for a unique way to convey my love, the idea of paper roses popped into my head. A quick Google search and it turned out it wasn’t such an obscure idea.
The first result returned Bloom4ever (www.bloom4ever.com), a company that specializes in handmade roses, and they were even nice enough to include a “How to fold origami roses” (www.bloom4ever.com/HowToFold.html) guide. The site lists bouquets of a dozen roses for $80.
2. Equipment and materials
Only the most basic craft stationery is required:
![]() Scissors
Scissors
![]() Ruler
Ruler
![]() Craft glue
Craft glue
![]() Pens/pencils
Pens/pencils
The most important material is the paper. Unable to find any origami paper, I had to settle for colored A4 paper, and this turned out for the better. I used 80gsm A4 paper. I purchased 100 sheets of red and green for $6.50 AUS. You may be able to borrow some colored paper from your school or work. One sheet of colored paper is required for each rose and one sheet for each stem and set of leaves. You should experiment with different paper sizes and thicknesses to find what best works for yourself.
Other materials include:
![]() Clear transparent wrap (cellophane) to wrap the bouquet
Clear transparent wrap (cellophane) to wrap the bouquet
![]() 1mm diameter wire—to make the rose stems; nice to have but not a requirement
1mm diameter wire—to make the rose stems; nice to have but not a requirement
![]() Ribbon to tie the bouquet of roses
Ribbon to tie the bouquet of roses
3. Folding the rose
This rose was designed by origami theorist Toshikazu Kawasaki.
Start with a sheet of A4 paper, and cut the paper into a square. I used a 17cm square, as I found 21cm width (or A4) was too large, and 13cm (recommended by Bloom4ever) was too difficult to fold.
I will not go through each folding step as there are numerous resources already available:
![]() How to fold origami roses, at Bloom4ever (www.bloom4ever.com/HowToFold.html). Very good instructions, except for step 25.
How to fold origami roses, at Bloom4ever (www.bloom4ever.com/HowToFold.html). Very good instructions, except for step 25.
![]() Rose, at pajarita.org (www.pajarita.org/aep/internacionales/intern1-3.pdf)
Rose, at pajarita.org (www.pajarita.org/aep/internacionales/intern1-3.pdf)
![]() How to Fold a Paper Rose, at wikiHow (www.wikihow.com/Fold-a-Paper-Rose)
How to Fold a Paper Rose, at wikiHow (www.wikihow.com/Fold-a-Paper-Rose)
I used the Bloom4ever instructions for the most part. Even though step 25 is broken into steps, I could not work out how to perform the “twist” maneuver.
This YouTube video (www.youtube.com/watch?v=BZnhMl85dq4) saved my life; big credit to the producer.

Figure B: Everlasting paper roses
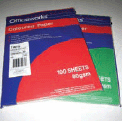
Figure C: Red and green A4 paper
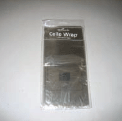
Figure D: Clear cellophane wrap
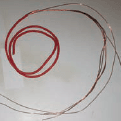
Figure E: Copper wire for stems

Figure F: Roses from paper squares measuring 21 cm, 17 cm, and 13 cm

Figure G: Rose heads
Figure H: Folding diagram—match the triangles; diagonal folding line; join the set of lines in the lower corner
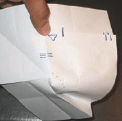
Figure I: It should look like this when folding; note the scrunched up part in the center

Figure J: Start to wrap a stem

Figure K: Glue this last bit to hold the paper in place

Figure L: Bend the end of the wire into this shape to fit into the rose

Figure M: Group of stems ready for their roses
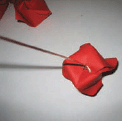
Figure N: Twist the rose head onto the bent end of the wire

Figure O: Stemmed roses. On to the leaves …

Figure P: Draw the leaves on the green paper. Note the stipules; these will be glued onto the stems.

Figure Q: Cut lots of leaves
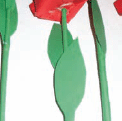
Figure R: Gluing leaves onto the stems

Figure S: Curve the leaves a bit after the glue has dried
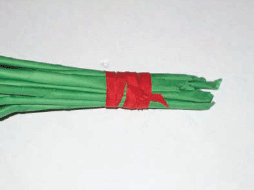
Figure T: Tie the bunch of flowers together with a ribbon

Figure U: A beautiful bouquet, ready to be wrapped in cellophane
4. Stems
I found some 1.86mm copper wire lying around that could be used for the stems. The advantage of copper wire over a paper-only stem is that the copper can be bent allowing for better arrangement of the individual roses in the bouquet.
The copper wire was first straightened by pulling on the wire with one end in a vise. Once straightened, the wire was cut into 30cm lengths. Each wire was then rolled with green paper and the end glued. It is possible to make stems without the wire by only rolling paper.
I needed a simple method of attaching the stems to the rose heads. Each wire end was bent into a shape that allowed the rose heads to simply be twisted onto the wire. Glue was then applied.
I also think it would look nice to make the rose heads from silver metallic paper, with copper or silver stems.
5. Leaves
After Googling “rose leaf” for ideas, basic leaf shapes were cut out of green paper. Each leaf had a little stipule allowing it to be glued to the main stem. There were two leaves per stem, glued in an alternate pattern.
Once the glue dried, the leaves were slightly bent through the center axis and shaped to give a more pleasing look.
6. Making the bouquet
A dozen roses were bunched and arranged together to form a bouquet. The stems were securely tied together with red ribbon. I used clear transparent cellophane to wrap the bouquet and fastened it with more ribbon. I made a simple card to accompany the flowers.
Travis Hydzik says, “These roses were to result of wanting to make something special for my girlfriend on Valentine’s Day.”