
Duct tape is not just for repairing ducts/cars/books/broken bones; it’s also for making roses By Josiah Bradbury
This Instructable will teach you how to make duct tape roses; they’re great for Valentine’s Day and lots of other events, like fundraisers. The original idea came from the Duct Tape Club (www.ducktapeclub.com), but after making these roses for a year or so, I’ve developed my own style.
1. Get your stuff together
You will need:
![]() Duct tape in several colors; I use Duck brand Duct Tape
Duct tape in several colors; I use Duck brand Duct Tape
![]() Floral wire, found almost in any floral department
Floral wire, found almost in any floral department
It takes about 10 minutes to make each rose.
2. Rip tape
Start by ripping a 2" x 2" strip of tape. It doesn’t have to be exact; in fact, varying the size of the petals makes the rose seem more real.
3. Making the petals
Fold the top right corner over on itself making sure you leave some adhesive on the left side. Fold the top left corner over on itself making a triangle with some adhesive left on the bottom (Figures D-E).
4. Start making the rose
Take your newly made petal and wrap it around the top of the wire stem (Figures F-G).
5. Building off the base
Repeat steps 2 and 3 to add petals to the rose. I have found that it works well to add them at an angle and then wrap them (Figures H-J).
6. Finish the petals
You can make smaller roses by using just a few petals or make a larger rose by adding more; it’s up to you. You should end up with something that looks like the rose in Figure K.
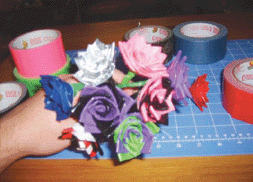
Figure A: An assortment of roses
7. Stem
Now you have a pretty good rose, but the wire stem is pokey and hurts when you get stabbed with it. Let’s make it a little safer.
Take your stem color and rip a strip that’s half the width of the roll and longer than your stem (Figure L). Start at the top by the rose and wrap tightly down the stem. If you have some leftover, keep it for the next step.
8. Finishing up
Take the tape you have left after wrapping the stem, or rip some more little squares of tape, and apply them to the underside of the rose (Figure O). This helps keep the rose on the stem.
And there you go! Go crazy; use any and all the colors you want.
Josiah Bradbury lives in Iron Mountain, MI, with his wife Amy and their cat Koneko. Geocaching, drawing, gaming, and duct tape arts are just a few of his interests, and Instructables is just one of his many outlets.
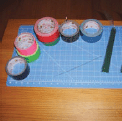
Figure B: Duct tape and floral wire
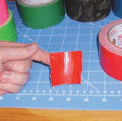
Figure C: Rip tape into squares
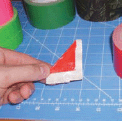
Figure D: Fold over, leaving some glued surface along both sides
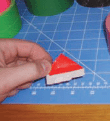
Figure E: Fold over the other side, leaving a strip of the glued surface at the bottom
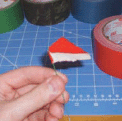
Figure F: Start wrapping the petal around the stem wire
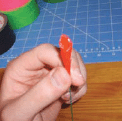
Figure G: This first petal should be tightly wrapped
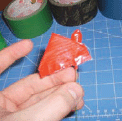
Figure H: Continue wrapping petals around the stem wire—note the angle
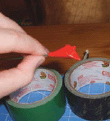
Figure I: Wrapping petals at an angle gives the flower a more realistic look
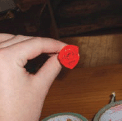
Figure J: Continue wrapping petals—your flower should start to look like this
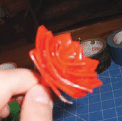
Figure K: A decent rose
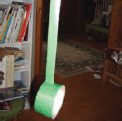
Figure L: Rip a long strip of tape for wrapping the stem
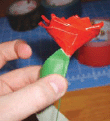
Figure M: Start next to the rose and wrap down the stem at an angle
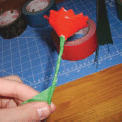
Figure N: Continue wrapping the stem tightly
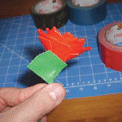
Figure O: Use small squares of tape to help attach the rose to the stem
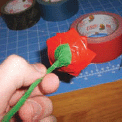
Figure P: The underside of the rose
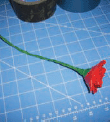
Figure Q: A finished rose