
BONUS CHAPTER 23
Expanding Max with Third-Party Plug-Ins
Using Turbo Squid Tentacles
Understanding plug-ins
Locating plug-ins
Installing, viewing, and managing plug-ins
Looking at plug-in examples
A plug-in is an external program that integrates seamlessly with the Max interface to provide additional functionality. Autodesk has adopted an architecture for Max that is open and enables all aspects of the program to be enhanced. Max ships with a Software Developer's Kit (SDK) that enables users to generate their own plug-ins. Many companies currently produce plug-ins, and other users create and distribute freeware and shareware plug-ins.
The purpose of this chapter isn't to cover all the available plug-ins or to teach you how to create plug-ins, but simply to show you how to install and access plug-ins. At the end of the chapter is a list of web links you can use to locate plug-ins for Max. The entire architecture of Max is built around plug-ins, and many of the core components of Max are implemented as them. Max ships with a robust SDK that includes all the information you need to create your own plug-ins.
A key feature that allowed Max to become and remain so popular is that users can download and install plug-ins that extend Max's power and functionality. Plug-ins allow Max to adapt to the needs of each user as well as keep up with new ideas.
One plug-in that is worth closer inspection ships with Max and is installed by default. The Turbo Squid Tentacles plug-in provides access to a website of content that you can buy, download, and use. This content includes models, textures, and even plug-ins.
Using Turbo Squid Tentacles
If you need a frog for the background of your scene and you don't have the time or the inclination to create one (maybe you're worried about getting warts), then another option is to buy a model that is already made.
Turbo Squid Tentacles is a separate installation that is accessed from the installation discs. Once installed, it shows up as a menu option to the right of all other menus. The menu options include Search Marketplace for browsing content online, Open My Files for retrieving any downloaded content that you've purchased, and Save to Tentacles for uploading content to the Turbo Squid marketplace.
When you choose the Search Marketplace menu command, a web browser opens with thumbnails showing the available content, as shown in Figure 1. The browser lets you sort by product, file format, and price. Most items are rated, and each item's price and creator are listed.
FIGURE 1 Turbo Squid Tentacles is an online marketplace of content available for purchase.

Note
The Turbo Squid marketplace can be browsed without registering, but if you plan to download or purchase any content, you need to create an account.
The product categories include 3D Models, Materials & Shaders, Texture Maps, Motion Capture, and Scripts. Many free items are available for downloading.
When you've selected and purchased an item, a download link appears and the file is downloaded to a local folder or saved in an online folder called My Files. You can access your online My Files folder using the Tentacles ![]() Open My Files command.
Open My Files command.
The Tentacles ![]() Save to Tentacles menu lets you upload your current scene to your My Files space, where you can make it available for others to download.
Save to Tentacles menu lets you upload your current scene to your My Files space, where you can make it available for others to download.
Working with Plug-Ins
After you've located a plug-in that you would like to add to your system, you need to install the plug-in. Most commercial plug-ins come with an executable setup program that automates this for you, but others need to be installed manually, which isn't difficult.
Note
Plug-ins typically don't work from one version of Max to another. If the plug-in is commercial, then the developers usually release an updated version of the plug-in for the new Max version.
As you begin to add plug-ins to Max, you may eventually want to see which plug-ins are installed and even disable certain plug-ins. Max includes tools to view installed plug-ins and to manage your current plug-ins.
Installing plug-ins
For commercial plug-ins that include an installation program, the installation process asks where the Max root directory is located. From this root directory, the plug-in program files are typically installed in the “plugins” directory, help files for the plug-ins are installed in the “help” directory, and example scenes are installed in the “scenes” directory.
Plug-in program files typically have a .dlc, .dlr, .dlo, .dlu, .dlv, or .dlm extension, depending on the type of plug-in. When Max loads, it searches the /plugins directory for these files and loads them along with the program files. You can manually install freeware plug-ins simply by copying the plug-in file into the plugins directory and restarting Max.
You can also place plug-ins in a different directory and load them from this directory. The Configure System Paths dialog box includes a panel titled 3rd Party Plug-Ins, where you can specify additional plug-in paths.
Cross-Reference
Find out more about the Configure System Paths dialog box in Chapter 4, “Changing Interface Units and Setting Preferences.”
Most commercial plug-ins require that the plug-in be authorized after installation. You must do this before you can use the plug-in, and you can usually do it via telephone, fax, or e-mail.
To remove a plug-in, use the uninstall feature that is part of the setup process, or delete the associated program files from the plugins directory.
Plug-ins can also create a help file that explains how to work with the plug-in. These help files are installed in the /help directory where Max is installed. To view these help files, open the Additional Help dialog box by choosing Help ![]() Additional Help.
Additional Help.
Viewing installed plug-ins
To see all the currently installed plug-ins, choose Application Button ![]() Properties
Properties ![]() Summary Info to open the Summary Info dialog box and click the Plug-In Info button. This opens the Plug-In Info dialog box that lists all installed plug-ins with their details, as shown in Figure 2. As you can see, many plug-ins created by Autodesk (or Discreet) are installed with just the default installation.
Summary Info to open the Summary Info dialog box and click the Plug-In Info button. This opens the Plug-In Info dialog box that lists all installed plug-ins with their details, as shown in Figure 2. As you can see, many plug-ins created by Autodesk (or Discreet) are installed with just the default installation.
Even if you haven't installed any plug-ins, this dialog box lists many plug-ins. These are core functions in Max that are implemented as plug-ins.
FIGURE 2 The Plug-In Info dialog box includes a list of all the currently loaded plug-ins, both internal and external.

You can manage which installed plug-ins are available using the Plug-in Manager dialog box, shown in Figure 3. Open this dialog box by choosing Customize ![]() Plug-in Manager.
Plug-in Manager.
FIGURE 3 Use the Plug-in Manager dialog box to disable plug-ins.

Each column in the Plug-in Manager dialog box includes information about the plug-ins. The columns include Tag, Name, Description, Status, Size, and Full Path. You can sort the list of plug-ins alphabetically by column if you click on the column name. An asterisk appears to the right of the column title that is used to sort.
Each unique directory that is specified within the Configure System Paths dialog box appears in the bottom pane of the Plug-in Manager. Use the check boxes to remove all plug-ins in that directory from the list.
Tip
If you install all your plug-ins into a custom directory, you can use the bottom pane to filter only the plug-ins you've installed.
In the list of plug-ins, you select a specific plug-in by clicking it. You can select multiple plug-ins in the list using the Ctrl and Shift keys. A right-click pop-up menu of options lets you control the selected plug-ins. You can also tag (or mark) certain plug-ins using the Tag Selected option in the right-click pop-up menu. For tagged plug-ins, a white check mark appears in the left column.
You can also choose to load or defer selected or checked plug-ins using the right-click pop-up menu. Plug-ins with a status of loaded are currently loaded in memory and available; these plug-ins are identified with a green circle in the Status column. The deferred plug-ins are waiting in the wings and load when needed; these plug-ins are identified with a yellow circle in the Status column. Plug-ins that are marked Unloaded (with a red circle) are not in memory.
Using the right-click pop-up menu, you can also select Load New Plug-in, which opens the Choose Plug-in File dialog box where you can select a plug-in file. The file is then accessed from this directory and loaded into the Plug-in Manager list.
Tutorial: Installing and using the AfterBurn plug-in demo
If you'd like to try out some plug-ins before purchasing them, check out the Partners and Samples section on the 3ds Max install disc or visit the developers’ websites to download a demo copy of the plug-in.
Caution
These demos are full-featured, but most of them are save-disabled, which prevents you from saving the file that includes the plug-in's features. Look at the readme file as the plug-in is installed to see what has been disabled.
To install a demo plug-in from the Max install disc, follow these steps:
- Insert the 3ds Max installation disc into your CD-ROM drive. When a menu of options appears, click the Partners and Samples link and then click the Autodesk Certified Animation Plug-Ins link.
A page of certified plug-in demos appears, including AfterBurn, Absolute Character Tools, DreamScape, and others.
- Click AfterBurn to select it, and click the Install button to launch the installation wizard. Follow the Installation Wizard's instructions, and press Next to complete each step. Click the Finish button when the installation is complete.
- You need to restart Max before the plug-ins features become available, so select Start
 Program Files Autodesk Autodesk 3ds Max 2012 3ds Max 2012to restart Max.
 - You can learn to use the AfterBurn plug-in using the help files that were installed; select Help Additional Help, and double-click the AfterBurn reference in the list that appears to open the Help files for the plug-in.
- After reviewing the help files, select Create Helpers Atmospherics Sphere Gizmo and drag in the Top viewport to create a gizmo.
- Most of the AfterBurn plug-in features are found in the Environment & Effects dialog box. Select Rendering Environment (keyboard shortcut, 8), and click the Add button in the Atmosphere rollout. In the Add Atmospheric Effect list, double-click on the AfterBurn Combustion Demo effect. This adds the AfterBurn Combustion effect along with the AfterBurn Renderer to the Effects list and makes several new rollouts appear.
- In AfterBurn Combustion Parameters rollout, click the Pick Gizmos button and select the Sphere Gizmo icon in the Top viewport.
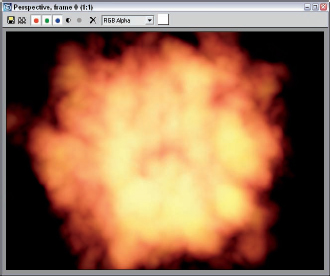
- Select Rendering Render (F10) to open the Render Scene dialog box. Make sure that the Atmospherics option is enabled, and render the Perspective viewport to see the resulting AfterBurn flame effect.
Figure 4 shows the resulting fireball created using the AfterBurn demo plug-in.
FIGURE 4 This simple fireball was created using the AfterBurn plug-in.
Locating Plug-Ins
Before you can take advantage of plug-ins, you need to locate, acquire, and install them. You can find plug-ins from a variety of sources: commercial, shareware, or freeware.
The first place to look for commercial plug-ins is Digimation. It is not only a plug-in developer, but it also resells many plug-ins for other companies. Another good site to check out is the list at Autodesk. Autodesk evaluates plug-ins as part of the Certified Plug-Ins program to ensure compatibility with Max.
In addition to the commercially developed plug-ins, many plug-ins are available as freeware or shareware. You can find many of these plug-ins and download them via the Web.
If you're looking for plug-ins, both commercial and shareware, you should visit these sites:
- Digimation: www.digimation.com/
- BoboLand: www.scriptspot.com/bobo/
- Max Plugins.De: www.maxplugins.de/
- Creative Crash: www.creativecrash.com/3dsmax
- Autodesk: http://usa.autodesk.com/adsk/servlet/index?id=5659455&siteID=123112
- Turbo Squid: www.turbosquid.com/
Caution
Plug-ins typically are not compatible between different versions of Max. For example, a plug-in written for version 2.5 does not work on versions 2009, 2010, or 2012, and vice versa. When downloading and purchasing plug-ins, be sure to get a version that matches your current version of Max.
Summary
By adding plug-ins, you can increase the functionality of Max far beyond its default setup. In this chapter, I covered the following topics:
- Using Turbo Squid Tentacles
- What plug-ins are and how they can extend Max
- How to install, view, and manage plug-ins
- Where to find plug-ins