
Lion’s web service is open source at its finest. Based on Apache, one of the most popular web engines of all time, the service can host the most complicated of web sites, while being so easy to use that you can start it up by clicking an ON button. The tricky part (and the reason this chapter isn’t just one paragraph) is getting the web service to configure wikis and blogs, to run multiple websites on one server, to get specific mods running, and of course, to do all of this securely.
Apache got its name from being “a patchy” product. Many of the aspects of the web that we interact with on a daily basis are made from these patches, known as mods (short for modules). Mods can be enabled or disabled as needed, with each not only providing additional functionality but also providing security concerns and potentially enabling features you may not want (or need).
In this chapter, we’ll look at setting up websites, configuring wikis and blogs, and other tasks common in Lion Server environments. We won’t dive too heavily into customizing the Apache configuration outside of the options exposed in the GUI, although there are countless things you can do using the Apache, PHP, and other configuration options, such as clustering, securing PHP, enabling options for Perl, and of course, setting up various Ruby on Rails options.
The first step to setting up any web server is to enable the service, which sets up the initial web portal. Before setting up the first website, first complete the items in the Next Steps drawer in Server (see Chapter 2 for more information on completing these steps). These will let you set up the network, users, and most importantly—if you’re interested in securely communicating with your server (which most people should be)—setting up SSL certificates.
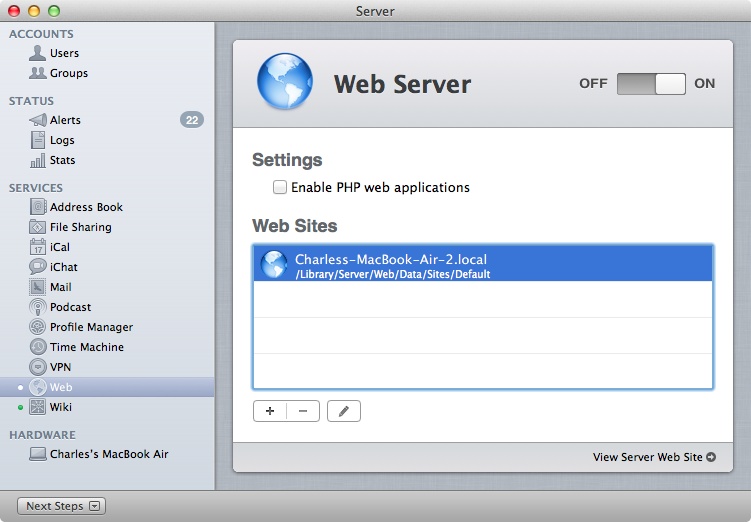
To create your first website (based on the built-in web portal), open the Server application and click on the Web service, listed under the SERVICES section of the Server sidebar. Here, check the “Enable PHP web applications” if using a PHP-based website. Click the ON button and when the server is finished writing the settings, a green button will appear beside the Web entry in the sidebar (Figure 5-1).
When the Web service starts, click on View Server Web Site. The default portal should then open, providing you access to Lion’s built-in web portal. Here, you can access podcasts, calendars, wikis, and other features, provided they have been enabled.
The built-in web portal is accessible using any address that can access the web server that does not otherwise have an address defined. This can be the IP address of the server, the name, or even 127.0.0.1, the loopback address that can be used to access any server from itself. We’ll dive further into defining additional websites in the next section. But if all you are using the built-in web server for is the Lion Server portal, then it should be easily accessible at this time.
From the Web service in the Server application, click on View Server Web Site to bring up the portal, or from another server, use the address (name or IP address) of the server to bring up the portal. If you are using a self-signed certificate then you will be prompted to accept the certificate the first time you open the site from another computer. Accept the certificate and the portal will load.
If the portal loads, you’ll then be greeted by the Welcome to Mac OS X Lion Server page. Here, links to Mail, Calendar, Change Password, and Profile Manager are included. Each of these links (with the exception of Change Password) requires corresponding services to be configured. The Change Password option is enabled by checking the “Allow users to change their password” box in the site definition screen in Server. The Mail, Calendar, and Profile Manager services are covered in Chapters 4, 6, and 8, respectively.
The web portal will change considerably if the wiki service is enabled. The wiki service is covered more fully in the Setting up a Wiki section later in this chapter. The default site uses the /Library/Server/Web/Data/Sites/Default directory on the server to store files that comprise the website. Once started, copy the files that comprise your website into this directory if you wish to replace the default web portal with your own site. If you do, the calendar and other options are still available, using the address of the site followed by the link for the service. For example, Profile Manager is accessible following the address of the site with /profilemanager, calendars are accessible using /webcal, and mail is accessible using /webmail.
For environments with only one site, if the site loads after copying it to the correct location, the task is often complete. The most important aspect of securing the site though, is locking down the permissions for the files that make up the site. Work with your web developer to make sure the least possible permissions are applied to these files.
Lion Server is capable of hosting a custom site or the default web portal. As you’ve seen so far, setting up a website is an easy task. Setting up additional sites is also a fairly straightforward process. When using multiple sites, Apache is pretty smart about how it directs traffic to each. If the address that is used matches a specific URL that is defined in the web service, traffic for that site will go to that location. Additionally, when setting up sites, it is possible to indicate IP addresses that sites listen on, allowing sites to only run on specific IP addresses or ports.
Double-clicking on this site brings up the following options:
- IP Address
The IP address that the site listens on (Any means the site is accessible from any IP address the server is configured to use).
- Port
By default, sites without SSL run on port 80 on all network interfaces, and sites with SSL run on port 443 on all network interfaces. Use the Port field to use custom ports (e.g., 8080).
- Store Site Files In
The directory that the files that comprise the website are stored in. These can be placed into the correct directory using file shares or copying using the Finder. Click on the drop-down menu and then select Other to browse to the directory files are stored in.
- Who Can Access
By default Anyone (all users, including unauthenticated guests) can access the contents of sites. Clicking on Anyone and then Customize… brings up the “Restrict access to the following folders to a chosen group” screen, where you can choose web directories and then define groups of users who can access the contents.
- Allow users to change their passwords
Enables the change password option in the built-in Lion web portal.
- View document root contents
A button that opens a Finder screen showing the contents of the root of each web directory.
Warning
If you customize ports to nonstandard ports,many corporate firewalls will block traffic coming to the sites.
Once all of the appropriate fields are filled in, click on Done to save the new site. Then, point the DNS for the domain whose website will be stored on the server to the server. Most DNS hosts have different means of repointing DNS. Usually the root record (e.g., krypted.com) and the www record (e.g., www.krypted.com) both need to point to a server’s IP address in order for all users to access the site properly.