
We are now ready to start a new project and deal with the Unity project directory.
When starting a new project in Unity, we are asked to set a name for it and add what we need. Follow us in the next recipe, which shows you how to perform this fundamental task.
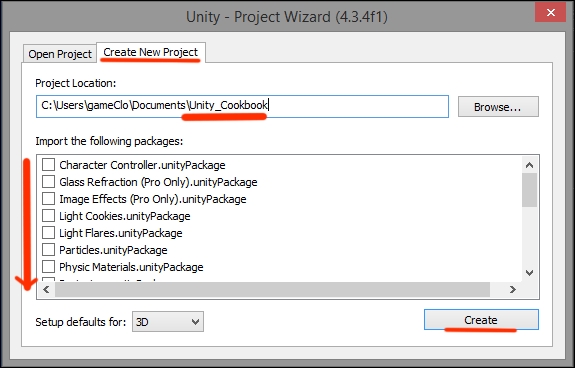
- Launch Unity. The Project Wizard window opens to start a new project.
- In the NewProject tab, select a destination directory and type a name for the project. Our choice is
Unity_Cookbook. - No need to flag any packages from the list. We will import packages as we need them through the development process. Simply hit Create. You can look at the following image for reference:
..................Content has been hidden....................
You can't read the all page of ebook, please click here login for view all page.