
With the mask ready and set up, we can move back to the Animator panel to add a second animation layer. Be ready to follow our instructions.
We follow on from where we left off . The avatar mask is ready to be used with the second animation layer.
- With the Animator editor open in Unity, click on the small + on the widget in the top-left corner of the window to add a new
layer, as shown in the following screenshot: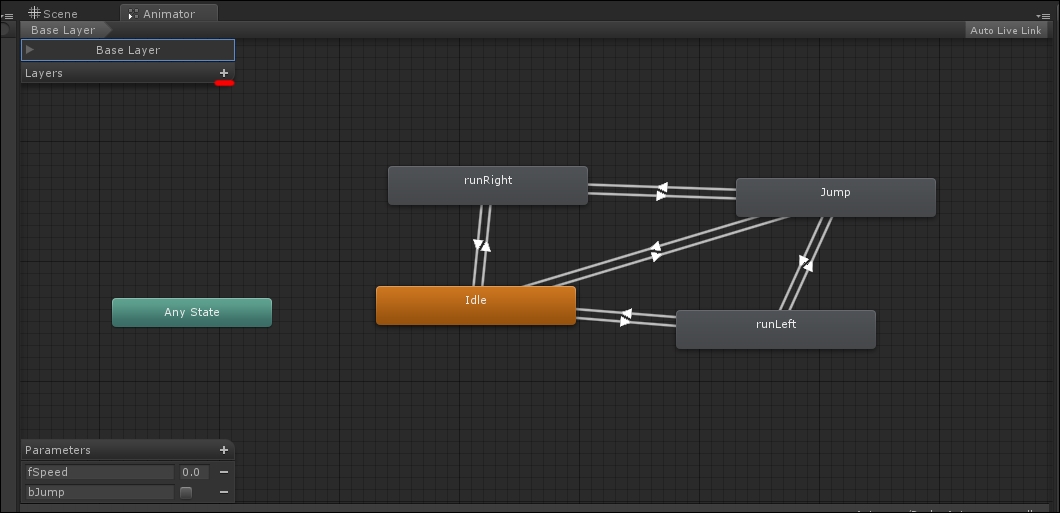
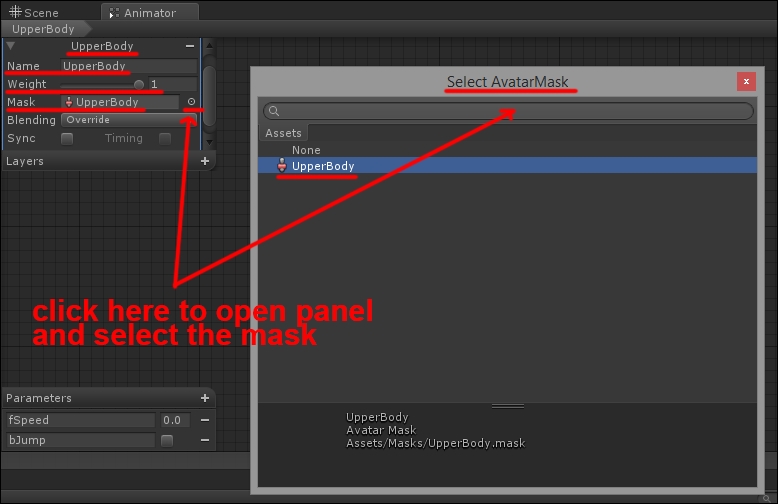
- Click on the Name field and name this layer
UpperBody, the same as the mask. - Set the Weight parameter to
1. This is sort of a default value; you may need to tweak it according to each of your actual animation clips. - Now click on the small button in the Mask field to select Mask from the panel, among the various options available in the project. Right now, you should see the UpperBody mask we created in the previous recipe. Please refer to the following screenshot for these last three steps:
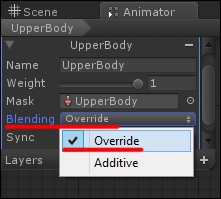
- The last setting we are defining here is the blending mode we want for this UpperBody layer to work. If you click on the Blending drop-down menu, you can select two options: Override and Additive. In this case, we want Override to be set, because, thinking about the reloading while running case, we actually want the arms to reload instead of running.
- Additive is fine, on the other hand, when you want the final animation to be the result of both clips mixed together. This is not what we want now. Please refer to the following screenshot:
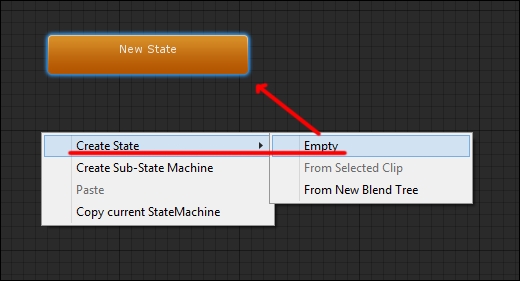
- Let's now focus our attention on the actual Animator panel. Right now, we don't have any state here, though we need two, at least: a default state, actually empty, and the reload animation clip (which we don't have for real!). Let's begin by adding an Empty state, as we did before. You can refer to the following screenshot and remember that this state must be colored orange, as it is the default state for this layer:
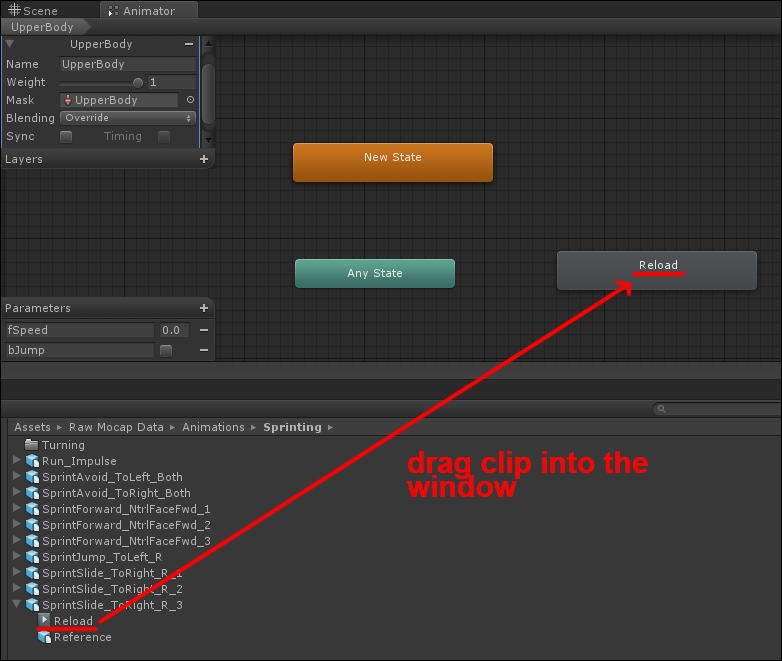
- Now, assuming you actually have a reload animation to use, drag it from the project panel into the Animator editor, as shown in the following screenshot:
- With the Reload clip added to the UpperBody animation layer, the next steps would be to create a new parameter, a
trigger, or abooleanparameter like we used before; make a transition between the default state of UpperBody and reload; and finally, add instructions to theAnimControllerscript to trigger the animation upon reloading the weapon. - Assuming you are going to use a
booleanparameter calledbReload, the line of code to be added would be:charAnimator.SetBool ("bReload", true); - We won't repeat the steps here to perform these operations, as they follow the same logic we described in the previous recipe. Try to do this on your own this time!
Mask blending and displacing animation clips on different layers is a technique that both allows you to create more complex animation trees for game characters while keeping the number of actual clips to be crafted at a minimum. In our case, we set a new layer to act only on the arms of the character and applied a reload animation clip to them, while the rest of the character's body keeps running, walking, or whatever.
As usual, we recommend you check out the manual for the more advanced settings, available at http://docs.unity3d.com/Manual/AnimationLayers.html.
Mecanim is one of the most relevant improvements to Unity in recent years. There is really very much you can achieve with it, especially if you plan to use humanoid characters for full 3D games.
An option we didn't discuss in this chapter is retargeting, which allows you to adapt a complete animation set to different characters with similar skeletal configurations. Retargeting is an efficient and economic way, for example, to offer your players the option to choose between male or female characters to play with. Instead of making a complete new animation set for the additional characters, you just retarget the set you have!
We suggest you refer to the Unity documentation to learn more about the animator component, its features, and its methods. The manual is available at http://docs.unity3d.com/Manual/AnimationSection.html.
We suggest this tutorial (http://www.digitaltutors.com/lesson/27480) about character animation.
It is hosted by Digital Tutors: it is excellent, clear and quickly puts you on the track, though it comes with a price!