
As we are nearing the end of this chapter, there is one topic we would like to discuss. Let's take a look at the following screenshot, courtesy of Gamasutra:
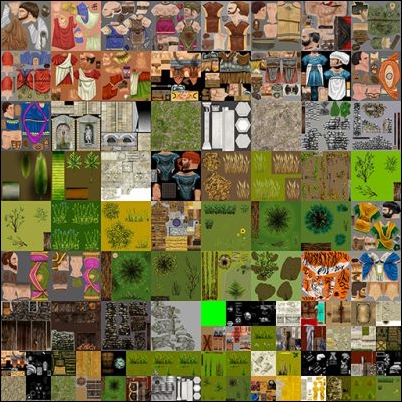
You may notice that it contains an arrangement of images and parts of images that are all nicely deployed to better fill the whole space available. This is technically called a texture atlas. A texture atlas is in fact a way to optimize memory management as you feed your project with 2D textures. Instead of having an image for any differently colored mesh or mesh part, an artist can align several chunks on a single texture, saving memory that would otherwise go wasted.
Actually, in 2D gaming, texture atlases are extremely useful for backgrounds. To improve the perspective illusion of 2D static backgrounds, it is a good practice to actually build them as is done in theaters, by putting several screens on stage at different depths (distance from the audience), each with its own piece of background.
Likewise, artists create pre-rendered backgrounds by putting several images on different planes (or quads, more likely) that they scatter around on the game stage. On each of those quads (quads, by the way, are very simple, single-faced 3D shapes, made of a rectangular plane divided into two triangles), artists put an image selected from a texture atlas, which contains all the images required to actually build up that background. Simple as that!
As it is an important subject for 2D games, in the next recipe, we show how to make a texture atlas from a group of images.
This recipe requires two steps. The first is to create a proper texture atlas using a 2D editor. Our choice is Photoshop, but you can do it with, I believe, any other editor.
The second step happens in Unity, where we configure the texture atlas in Inspector. So be ready to open your Unity project, too.
- Open your 2D editor of choice, ours is Photoshop.
- Create a new file. This will be our actual atlas, to be filled with other images. If you don't have other images, you can use the ones we have provided.
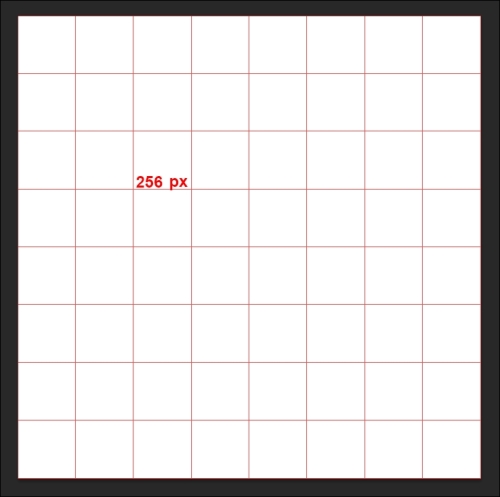
- Make the file large, set the file size to 2048 x 2048 pixels, so it is a large texture. A resolution of 72 points should be fine.
- Set your editor so it displays the reference grid and set the grid to 256 px. The following screenshot will clarify this:
- Now you are ready to start importing other images into this grid. In Photoshop, several images can be added as so-called levels to another image. We are pretty sure other software do this as well.
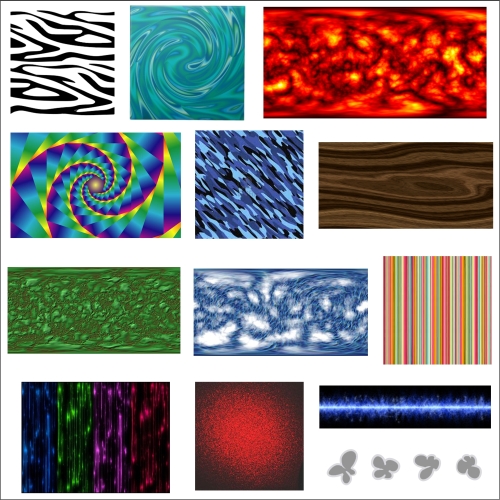
- As you import new images, take care when deploying them so each one has its own separate slice of image to occupy. You can use the grid to help you out with this. The following screenshot shows the result we got:
- Save the texture atlas. Since Unity needs the information about transparency to effectively import the atlas, remove any default background from the original image before saving it as a PNG file.
- Now switch to Unity. Open the project and create a new folder inside the
AssetsTexturesfolder and name itTexture Atlas. We insist on this so your projects are well organized, with different folders for different types of assets. - Double-click on the
Texture Atlasfolder to open it, then right-click inside the Project panel window and select Import New Asset, as we did before. - Select the atlas PSD or BMP file in your
destinationfolder and click on Import to add it to the Unity project. - Next, select Texture Atlas in the Project panel in Unity; we need to set a few properties in Inspector.
- Set Texture Type to Sprite, Sprite Mode to Multiple, Max Size to 2048 (the size of the original image we made), and Format to Truecolor. You can refer to the following screenshot:

- Click on Apply to save these settings.
- In Inspector, click on the Sprite Editor button to open the Sprite Editor window, as shown in the following screenshot:

- In this panel, click on the Slice button to open a panel. Check that the settings are the same as those displayed in the following screenshot, then click on Slice:
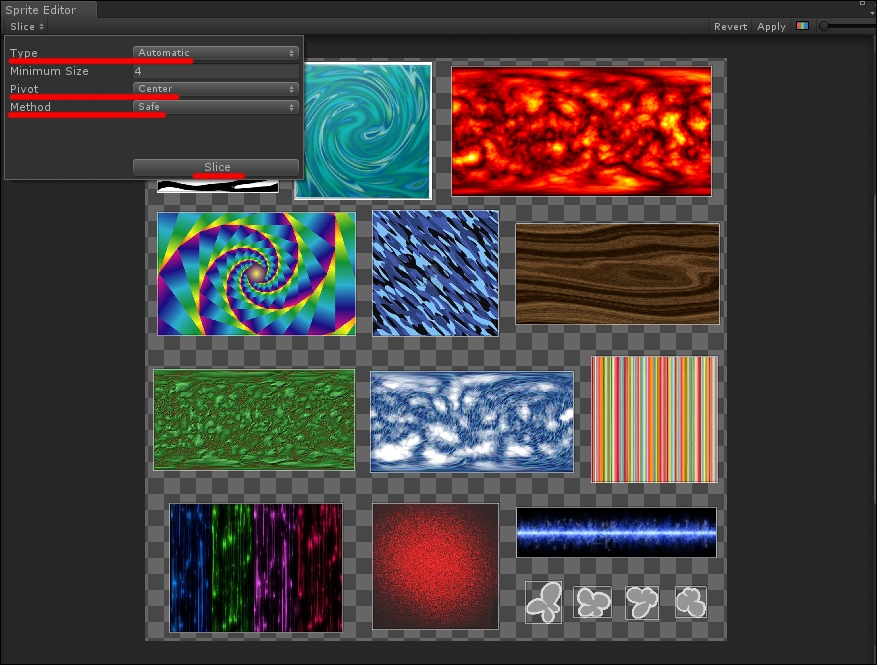
- If nothing bad happened, you should see a thin white line around each image in the atlas, meaning that Unity has correctly identified and isolated each chunk of the atlas.
Though it required several steps, building a texture atlas is quite simple and very useful. The principle is simple: create a large image and fill it with other images. As long as you use a transparent background and leave enough room between each image in the collection, Unity is good enough to slice it up automatically.
About the settings we defined, we set the image as a sprite made out of multiple chunks to allow automatic slicing. Setting the image to a non-compressed format is also required for automatic slicing.
There are more settings you can tweak for specific requirements, but we cannot explain all of them here, so we have provided a bunch of useful links about texture atlases and their management in Unity.
The first two are links from Unity manuals about texture settings and the Sprite Editor:
http://docs.unity3d.com/Manual/class-TextureImporter.html
http://docs.unity3d.com/Manual/SpriteEditor.html
The next link is a very interesting read about texture atlases from Gamasutra:
http://www.gamasutra.com/view/feature/2530/practical_texture_atlases.php
Last is the link to a PDF manual from nVidia corporation about texture optimization, for those of you who really want to dig into this topic:
http://http.download.nvidia.com/developer/NVTextureSuite/Atlas_Tools/Texture_Atlas_Whitepaper.pdf