
The first point to keep in mind when setting up a scene in Maya is that the standard unit in Maya is 1 cm, while the standard unit in Unity is 1 m So, whenever you export an FBX file from Maya into Unity, Unity scales it down to 0.01 percent of its original size.
Another very relevant point is that Maya and Unity are affected by strange kinds of idiosyncrasies that put them on opposing sides, with regard to what left or right and front or bottom mean. This is not something that only happens between Maya and Unity. Many 3D software disagree about the concepts of right and up. To get an idea, have a look at the following image, taken from Unity's forum:
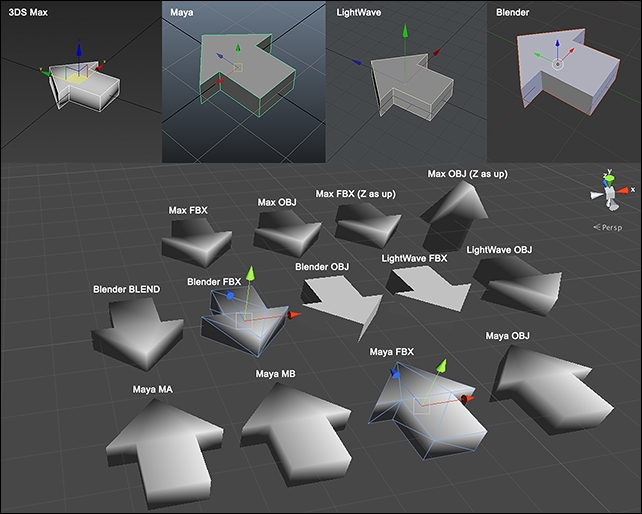
As you can see, the red arrow, representing the left-right axis in the 3D world, may point to the left or right on different software or file formats, and the green and blue axes may switch to alternatively point to the forward or upward directions.
With Maya and Unity, what happens is that the front in Maya is the back in Unity. So you model the front of a character in Maya, and when you import it into Unity, it shows its back.
How do we deal with this? There's more than one option available, and turning the camera by 180 degrees in Unity is not the only one. We will show you how to deal with this problem but, before this, we need to learn how to actually export an FBX file from Maya and add it to a Unity scene, which is what we will do in the first recipe of this chapter.
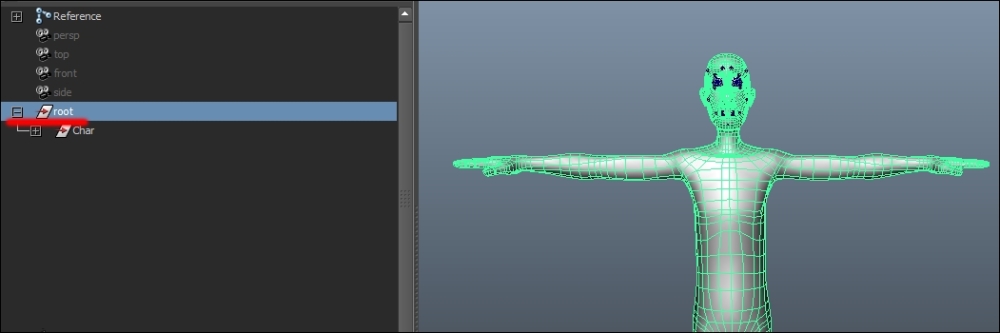
For this recipe, we need a Maya scene with a 3D model, any model with at least one material applied to it. A textured model is provided with the contents of this book.
In this recipe, we will show you how a model is exported from Maya using the default FBX exporter panel and how the FBX file will get imported in Unity.
- Open your model in Maya.
- Open the outliner panel, and from the hierarchy, select the root node of your model. Remember that it is good practice to name the root node with a meaningful name, such as root. It can turn out to be useful, for example, when managing the exporting process through scripts (as shown later).
- Now, in the top menu window, navigate to File | Export Selection. The Maya exporter panel will open, as shown in the following screenshot. Don't bother with the panel on the right-hand side with the actual settings; we will get back to it in a while.
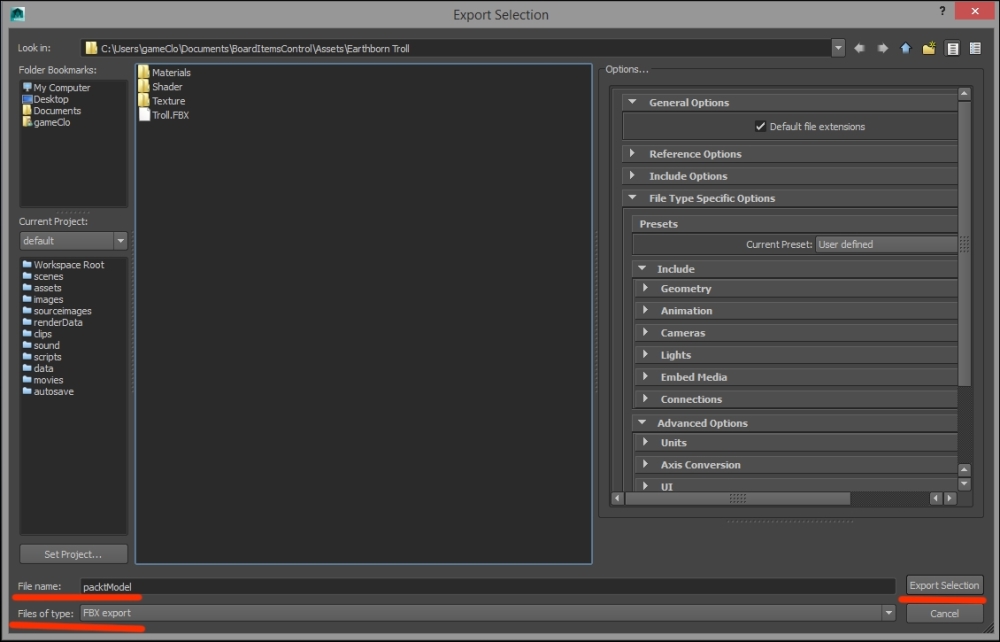
- Be sure that FBX export is selected from the drop-down menu at the bottom.
- Put a name you like in the File name field.
- Click on Export Selection to save the file in your
destinationfolder. - Now open Unity and, in the project panel, right-click and select Import New Asset…. from the menu:
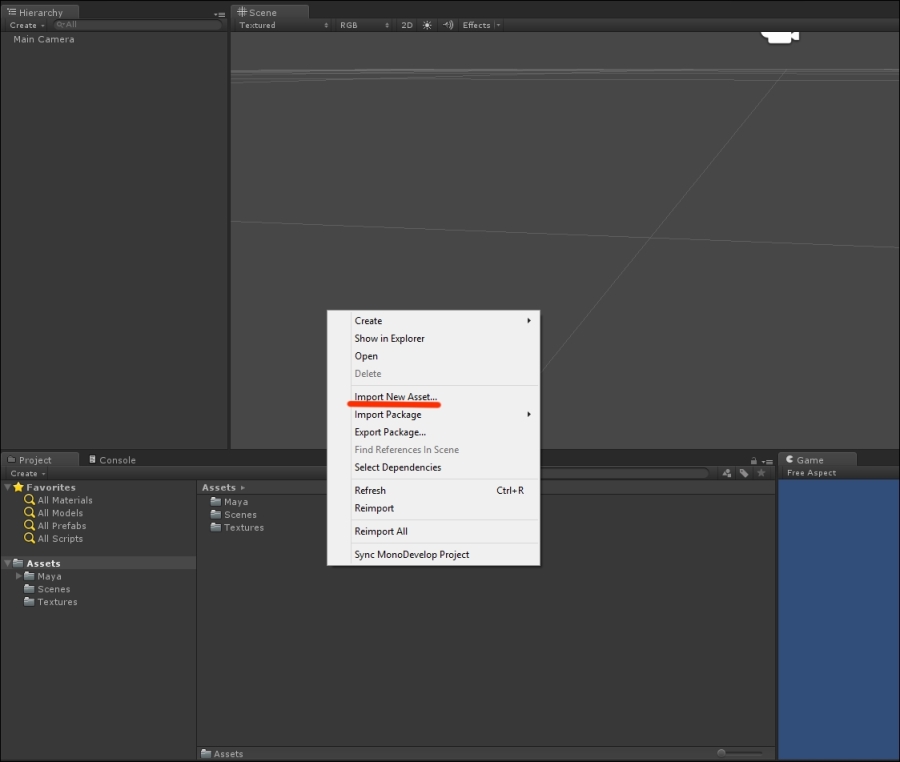
- Select your saved FBX file from the Explorer window that opens and click on Import.
- Alternatively, you could have directly exported the FBX file from Maya into the
Assets/Modelsdirectory of your Unity project. - Now select the FBX file from the project panel and drag it onto the scene. The following screenshot shows what happens in Unity:
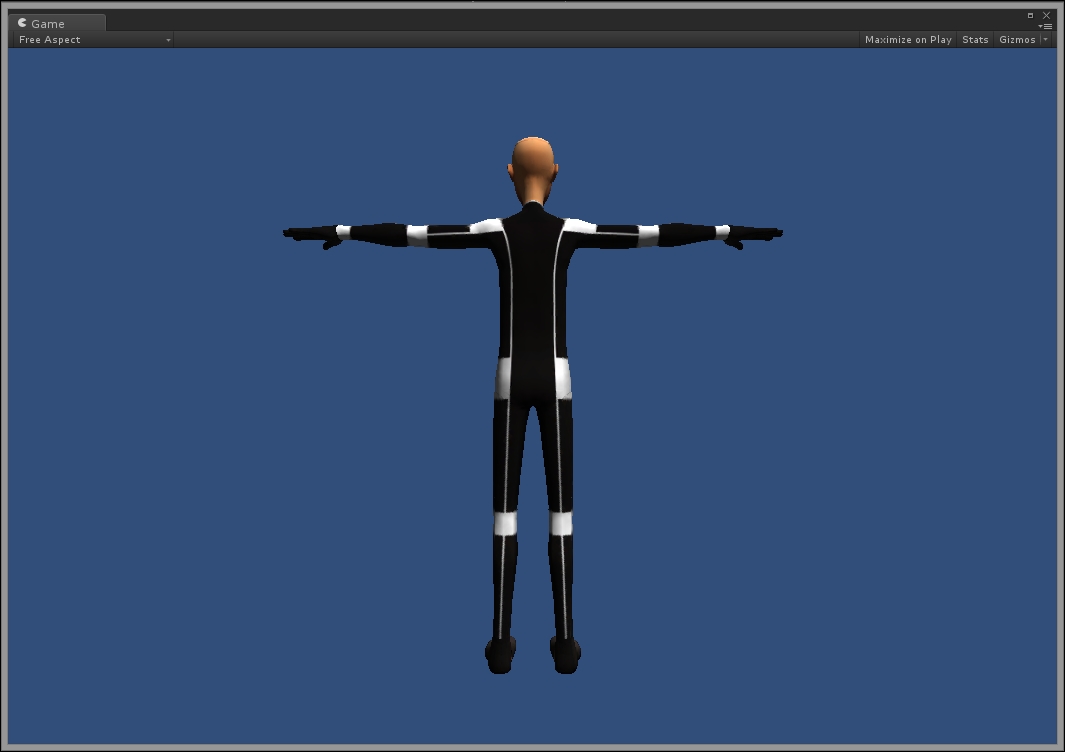
The operation of exporting FBX files from Maya is simple: select the actual root node in the hierarchy and click on the Export button. But, as you can see, unless we use some precautions, the result of importing an FBX file from Maya is that the model is flipped by 180 degrees on the the y axis in Unity. This happens because the blue arrow that represents the z axis in Maya points in the opposite direction in Unity. As a consequence, the model shows its back to Unity's camera.
As we write, there are rumors that this issue is going to be solved in forthcoming Unity versions. For now, we will provide custom solutions we have used ourselves.