
With the transition between Idle and Jump configured in the Animator window, we can script a piece of code to trigger it. With the following recipe, we show how simple it is to control animations through scripting with Unity.
As usual, we follow on from the last recipe. You just need to add a C# script in the Scripts folder of the project (as you learned in Chapter 2, Importing 3D Graphics) and name it Char_Animator.
- Access the
Scriptsfolder in your Project panel and double-click on the newly created script to open it in Monodevelop, the default Unity script editor. - Let's begin by creating an
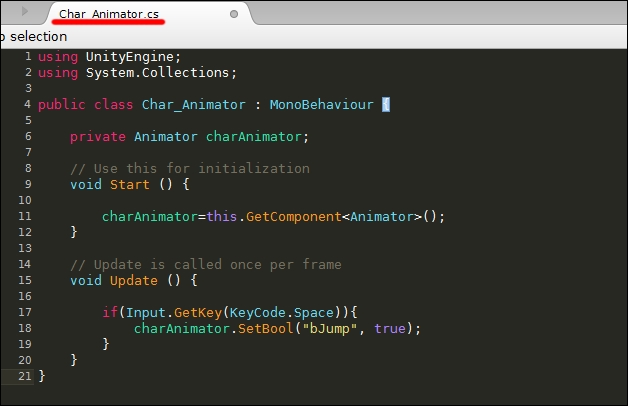
Animatortype variable to store the reference to the character animator and add the following line at the top of the script:private Animator charAnimator;
- Get inside the
Start()function; here we need to address thecharAnimatorvariable we created to the actual animator that we will attach to the character. We do that by adding the following line to the script:charAnimator=this.GetComponent<Animator>();
- Now we define an event to trigger the
Jumpclip. In theUpdate()function, add the following lines to intercept the pressing of the bar and settJump:if(Input.GetKey(KeyCode.Space)){ charAnimator.SetBool ("bJump", true); }Refer to the following screenshot to check whether your code is correct:
- Now, we need to add this script and the
Animatorcontroller to the character, but to do that, we first need to complete two steps:- The first is to instantiate the character itself into the game scene, which we haven't done yet. Select Character in the project panel and drag it into the hierarchy or directly into the game scene. You can see this in the following screenshot. Also, be sure that translations and rotations from Inspector are all set to
0; it is strongly recommended!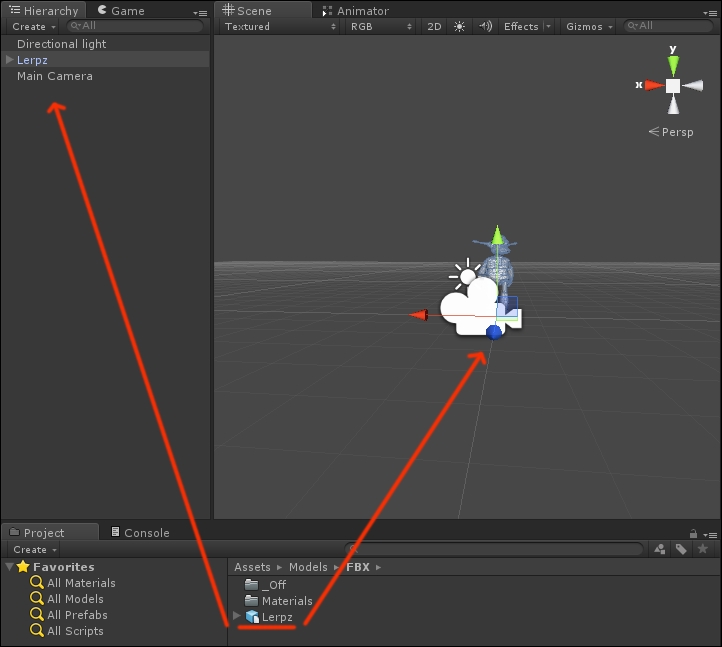
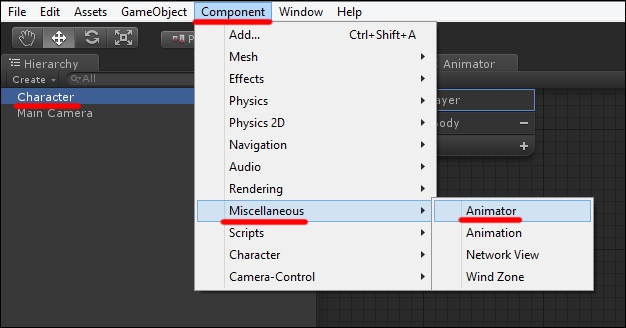
- The second step is to add the Animator component to the character in the scene. You can do that from the top menu or in Inspector (we go for the first solution). With Character selected in the scene, go to the menu and navigate to Component | Miscellaneous | Animator, as shown in the following screenshot:
- The first is to instantiate the character itself into the game scene, which we haven't done yet. Select Character in the project panel and drag it into the hierarchy or directly into the game scene. You can see this in the following screenshot. Also, be sure that translations and rotations from Inspector are all set to
- Now drag
Packt_Animatorfrom theAnimatorfolder in the project panel in theControllerfield of the Animator component into the Inspector window, which should displayNonein the Controller option field right now. Please refer to the following screenshot:
- Next, drag
Char_Animatorfrom theScriptsfolder onto the character in the scene. If you did things right, with the character selected, you should see both components displayed in the Inspector panel, as shown in the following screenshot: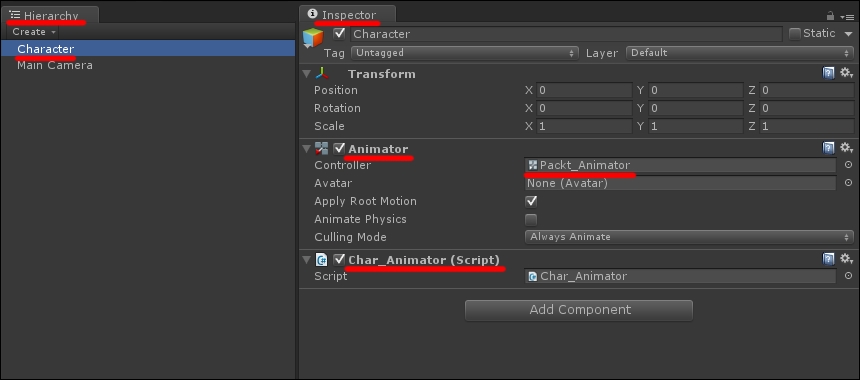
- Press the Play button to start your game scene in the editor. If you press the spacebar, the character jumps, playing the correct clip.
Once transitions are set up, code is required to trigger them so that the animation clips are played. The logic to follow is pretty straightforward; we cover it here.
The character needs an animator component to store an animator controller. The controller holds the clips, represented as states; the transitions between them; and a number of control parameters to manage the logic. The script contains the instructions that trigger the clips in the animator controller, thanks to the control parameters.
All this information may seem overwhelming at first, but with practice, you'll see it makes perfect sense and you'll get used to it!