
In this recipe, we will see how the individual sprites belonging to a character are prepared for keyframe animation.
We are going to create an entirely new character for this recipe, so start by creating a new scene in your Unity project.
Next, import the keyframe_anim PNG image we have provided with the contents of this book to the Sprites folder located in Assets. We've done this many times so far. The image contains the blocks to actually build up two characters, an orc and a knight. We will use the knight for this recipe, and once you have learned the process, you can make the orc or even mix the two characters to get something original!
- Select the PNG image you just imported. Then set Texture Type to Sprite and Sprite Mode to Multiple in the Inspector window, as shown in the following screenshot:
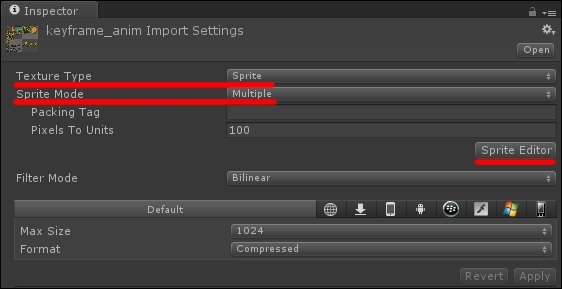
- Click on the Sprite Editor button to open Sprite Editor.
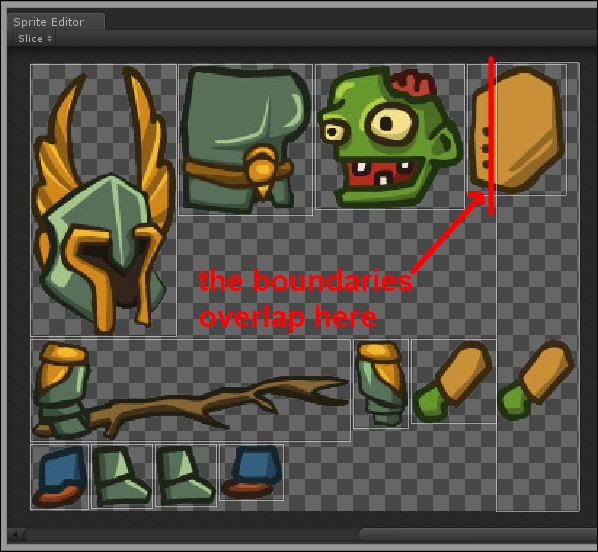
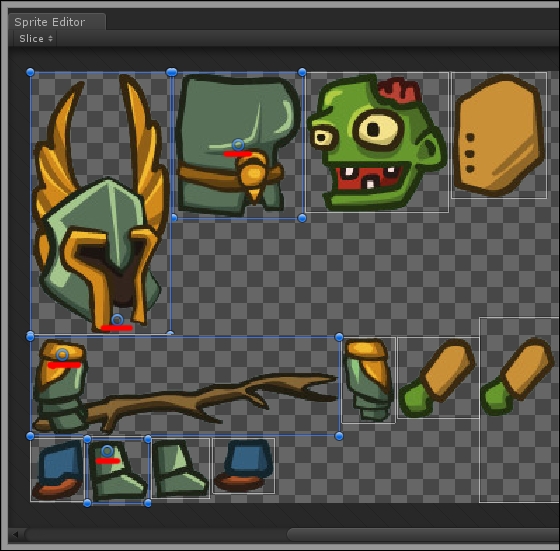
- Use the Slice menu, which is set to Automatic, to slice the image into its individual chunks, as we did before. If the automatic slicing method fails, you can edit the image manually by dragging the corners of each chunk. Refer to the following screenshot, showing a failed slice that we are going to fix manually:
- To fix Slice, select Sprite by clicking on it to display its slicing boundaries. Then drag one of its corners to resize the boundaries themselves, as shown in the following screenshot:
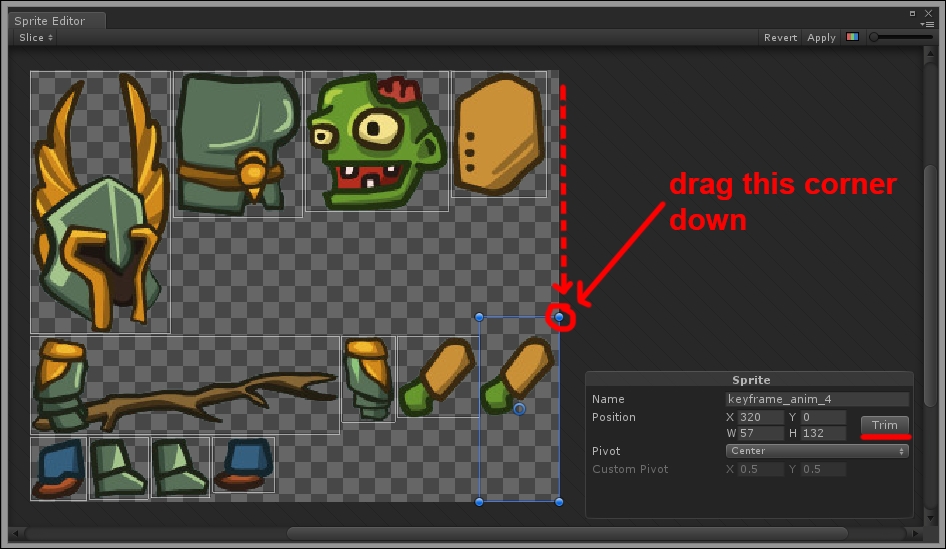
- When the sprite is selected, a small panel opens in the corner of the window. Hit the Trim button to have Unity finalize the resized boundary.
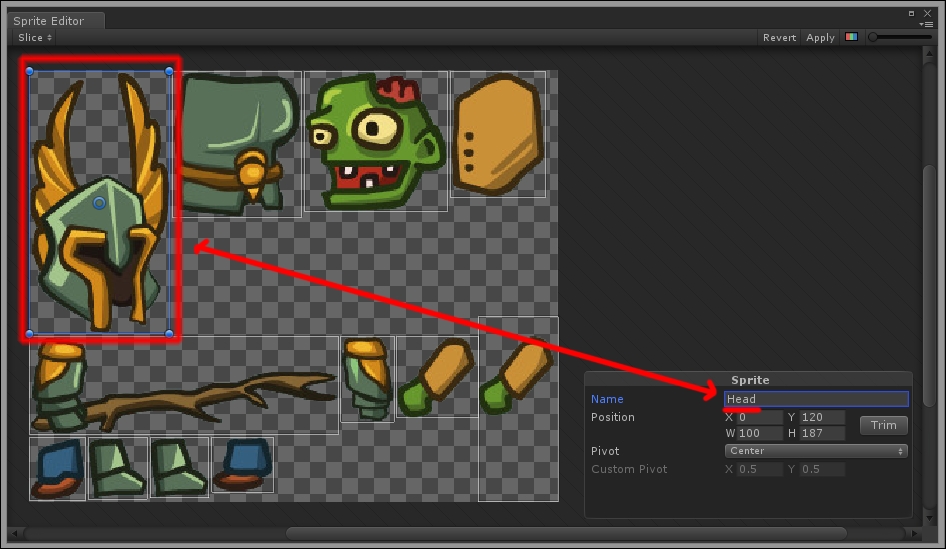
- In the same panel, it is possible to enter a name for each individual sprite chunk. Once you are done resizing the slicing boundaries, name each part of the knight we are going to use as follows: Head, Body, Arm_L, Arm_R, Foot_L, and Foot_R. Remember that the right arm is the arm with the stick. You shouldn't have problems assigning the other names.
- Another operation required is to correctly set the so-called pivot point of each sprite. The pivot point is the spot on the sprites that acts as reference point for any translation and rotation of the sprite. Depending on each individual part, it may be necessary to move the pivot point from the center to another position; for example, the pivot point of the head goes where the neck is supposed to be, the arm's pivot goes on the shoulder, and so on. This screenshot should help you understand what we mean:
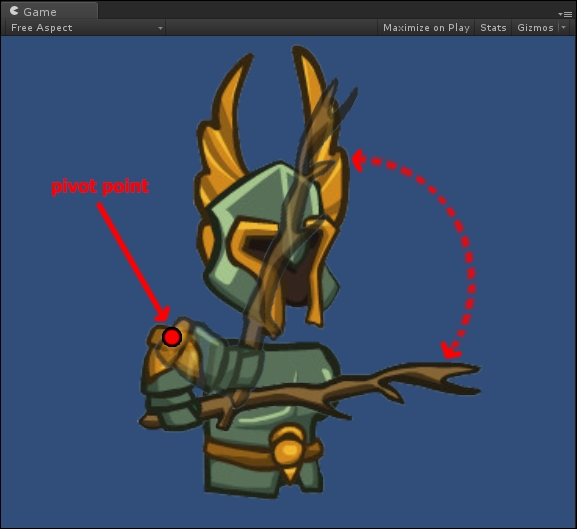
To move the pivot, simply select it and drag it where you want. The following screenshot shows what we did:
- Hit Apply in the top-right corner when you are done with editing the sprites. If you expand the hierarchy of keyframe_anim in the Project panel, you should see the parts we named, as shown in this screenshot:

In this recipe, we saw how to slice a spritesheet with the Sprite Editor. We also saw the operations required to resize the slicing boundaries, place the pivot points on the sprites, and name the individual chunks.
In the next recipe, we will learn how to parent these chunks to actually animate an assembled character.