
As we said, materials are the skin of a model and provide its distinctive look. In the following recipe, we will create two materials that show the difference between a diffuse and transparent material.
As we add an entirely new type of asset to our project in this recipe (didn't we tell you that we were going to create many?), we need to create a folder to store our materials. Open Unity and get ready to follow the instructions of the next recipe!
- From the Project panel, select the
Assetsfolder, then click anywhere and select Create | Folder, as shown in the following screenshot: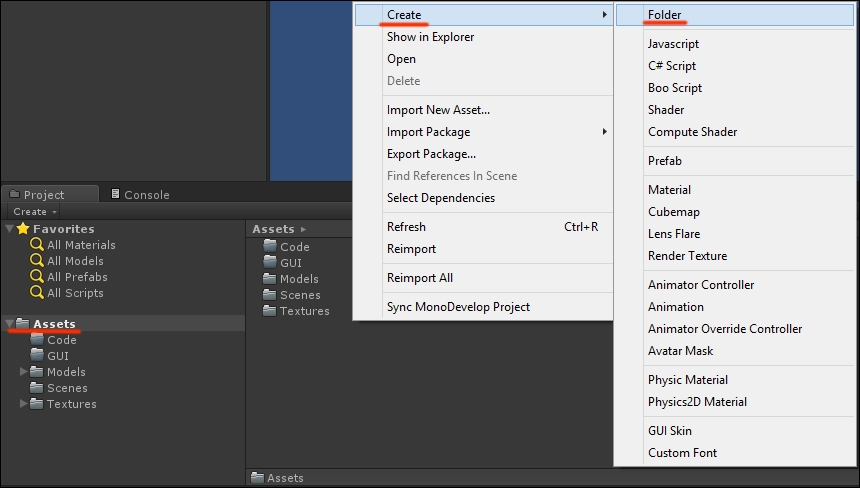
- Name the folder
Materials, then double-click to open it. - Right-click anywhere on the panel and select Create | Material, as shown in the following screenshot:
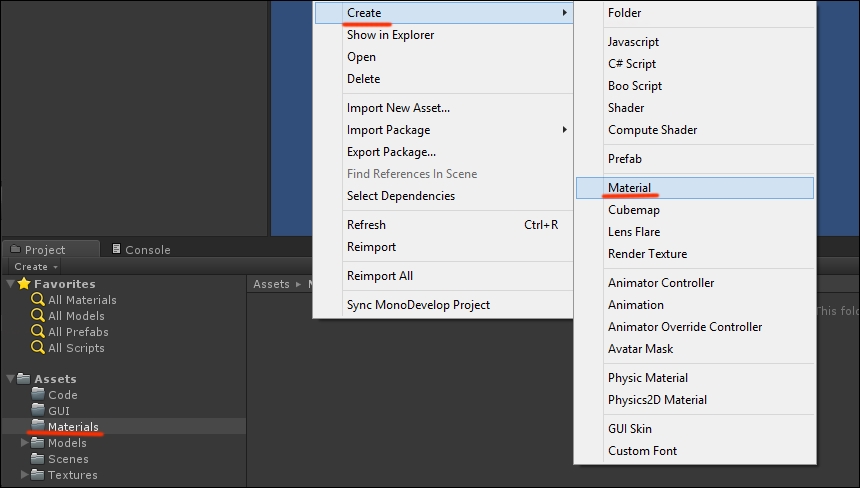
- Name the material as
filled, then repeat this operation to create another material and name itTransparent. At this point, you should have two gray materials in yourMaterialsfolder, one namedfilledand the other namedTransparent. - Select
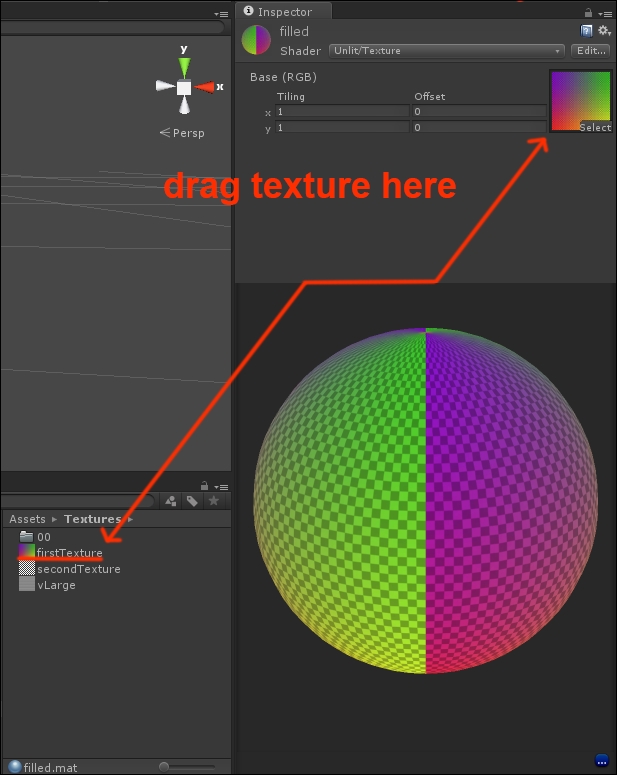
filled. In Inspector, check that Shader is set to Texture under Unlit. This way, our materials won't be affected by light and will simply shine.
- Click once on the
Texturesfolder in the Project panel. - With filled selected in the Inspector window, drag and drop firstTexture onto the empty Texture field, as shown in the following screenshot:
- Now select transparent and repeat the dragging operation with secondTexture.
- This time, check that the Shader field is set to Unlit/Cutout, as shown in the following screenshot:
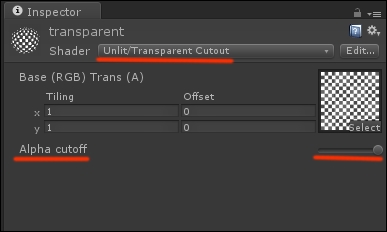
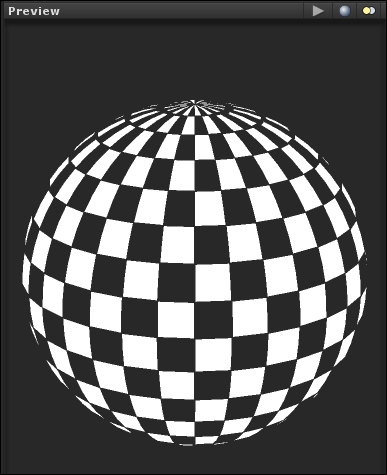
- You can act on the Alpha cutoff slider to adjust the transparency of the black squares on the checker texture, from null to total. The following screenshot shows how the material preview should look:
- Add two cubes to your scene. This can be done by navigating to GameObject | Create Other from the top menu, as shown in the following screenshot:

- Duplicate the cube or create another so that you end up with two cubes in the scene. We don't need to add a light to our scene, as we set out materials as Unlit, which means they are not actually affected by light at all.
- Now drag the material named filled onto one cube and transparent onto the other. The following screenshot shows the result you should get:
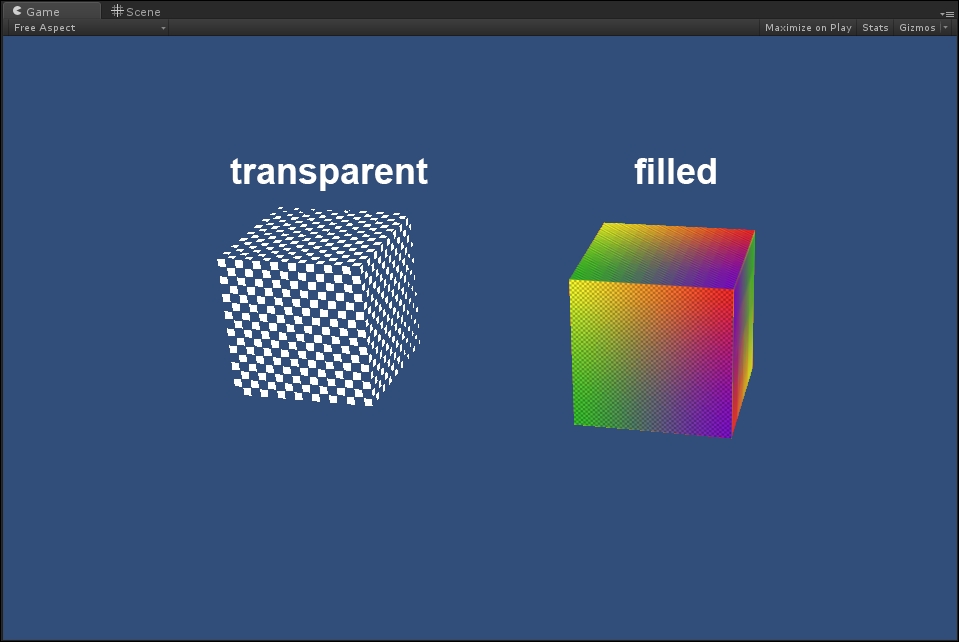
By getting the info about transparency from the grayscale of secondTexture and setting transparent as an Unlit/Transparent Cutout material, we caused the checkered cube to appear empty where the dark squares were.
Unity offers the possibility to define several other material types, allowing the use of normal and specular maps and many other effects to improve the look of your models. A detailed analysis of all such materials would go beyond the scope of this chapter about importing 2D assets, so we will stop here. We will delve more into materials in the later chapters.