
In this recipe, we show you how to add animation clips to the animator component of a game object (our game character). This being done, we will be able to set the transitions between the clips and create the logic for the animations to be correctly played.
First of all, we need a set of animation clips, imported in Unity and configured in Inspector. We explained these operations in Chapter 1, Importing 3D Models and Animations, so we suggest going back to it in case you haven't checked that part yet. As usual, we provide the Assets folder you need, in case you don't have your own to use.
Before we proceed, be sure you have these four animation clips imported into your Unity project as FBX files: Char@Idle, Char@Run, Char@Jump, and Char@Walk.
The first operation is to create a folder to store the Animator Controller.
- From the project panel, select the
Assetsfolder and create a new folder for the Animation Controller. Name this folderAnimators. - In the
Animatorsfolder, create a newAnimatorControlleroption by navigating to Create | Animator Controller, as shown in the following screenshot: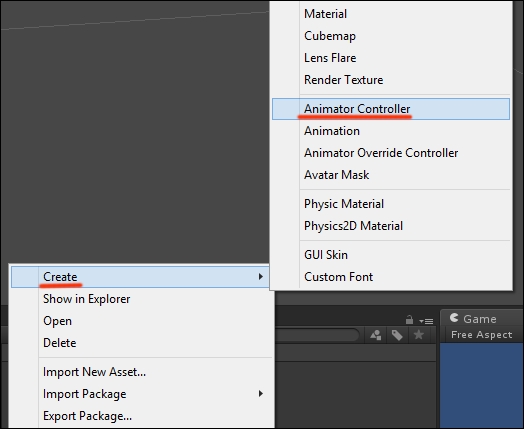
- Name the asset
Character_Animator, or any other name you like. - Double-click on
Character_Animatorto open the Animator panel in Unity. Refer to the following screenshot; you should have an empty grid with a single magenta box called Any State: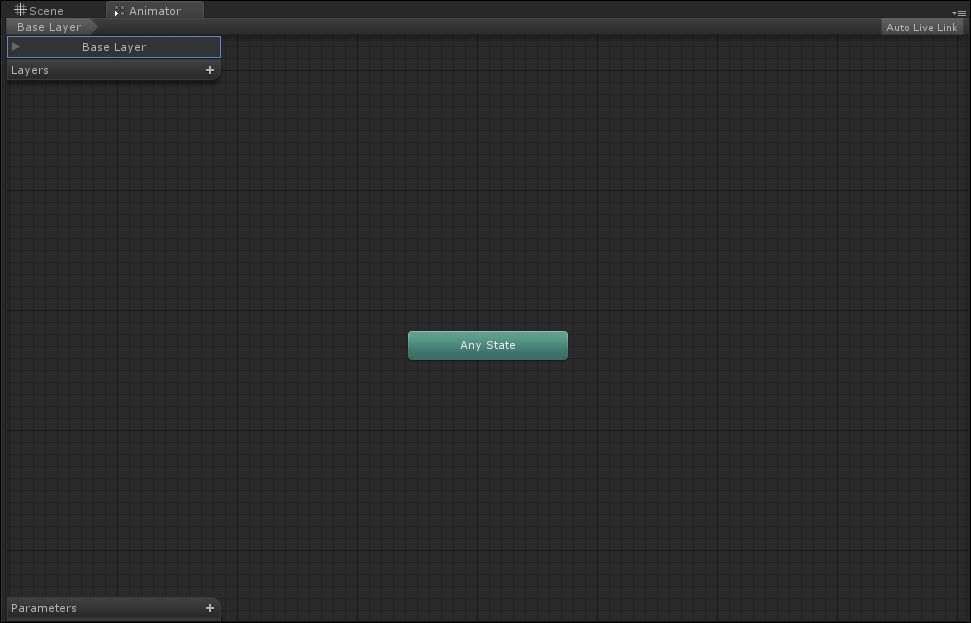
- Access the
Models/Animationsfolder and selectChar@Idle. Expand its hierarchy to access the actual animation clip namedIdle; animation clips are represented by small play icons. Refer to the following screenshot for more clarity:
- Now drag the clip into the Animator window. The clip should turn into a box inside the panel (colored in orange to represent that). Being the first clip imported into the Animator window, it is assumed to be the default animation for the character. That's exactly what we want!
- Repeat this operation with the clip named
Jump, taken from theChar@JumpFBX file. The following screenshot shows what should appear in the Animator window: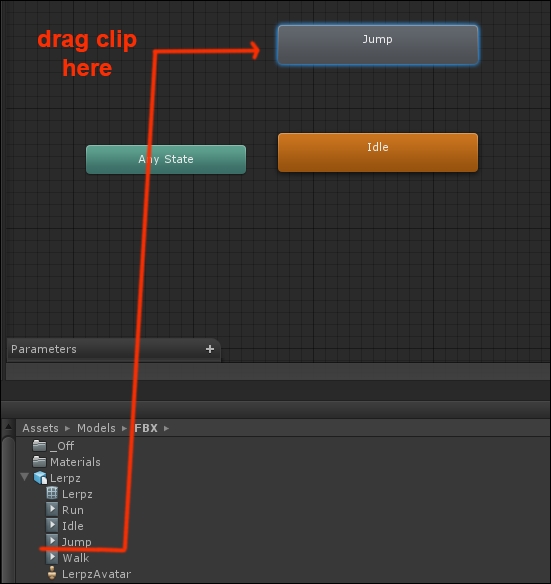
By dragging animation clips from the project panel into the Animator editor, Mecanim creates a logic state for each of them. As states, the clips are available to connect through transitions and the animation tree of the character can come to life.
With the Idle and Jump animations added to the Animator window, we can define the logic to control the conditions to switch between them.
In the following recipe, we create the transition to blend between these two animation clips.