
In the last recipe of this chapter, we'll learn how a video can be displayed in the game scene. It is a useful feature—very handy for computer graphics scenes or cut scenes or if you want to include a monitor displaying a video clip in your game scene.
You need two things for this recipe. Firstly, install QuickTime on your PC, if you don't have it already. Without QuickTime, Unity cannot import video clips properly. The QuickTime installer can be downloaded from http://www.apple.com/quicktime/download/.
Next, we need a video clip. If you don't have a clip to use, you can load the video clip we have provided with the content of this book.
- Exit and launch Unity again, after QuickTime is installed.
- Create a new folder in your project and name it
Videos. - Access the folder and right-click to import a new asset, as we did many times.
- Unity imports all major video file formats. In this case, we opted for an MPEG file. Select the file named video_01 (or any other video you want to use) and import it into the project.
- Leave the settings in the Inspector window alone for now. We don't need to edit them.
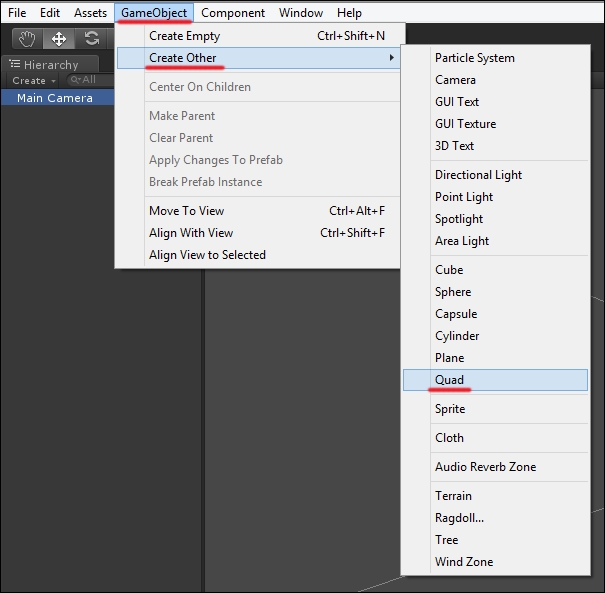
- Next, we need a game object to project the video on. Let's use Quad for this. Quads are single-faced, rectangular surfaces that are instantiated in the game scene like any other polygon available in the GameObject menu of Unity (cubes, spheres, and cylinders). Quads are made of just two triangles/faces, so they are very light game objects that provide a flat surface that proves useful when we need to display flat textures, plain text, or video clips in the game scene.
- Create Quad in the scene by navigating to GameObject | Create Other | Quad, as shown in the following screenshot:
- Name the Quad screen, place it in front of the camera, and size it as you please. Take into consideration the fact that the video we have provided is designed to be displayed in HD resolution.
- Now drag the movie clip from the Project panel onto Quad in the scene, as you would do with a material, as shown in this screenshot:

- Create a new C# script and name it VideoPlayer.
- Open the script in Monodevelop.
- Assuming we are fine with playing the video as the scene begins, we can play it by adding the following lines to the
Start()function of the script:void Start () { MovieTexture mt = (MovieTexture)renderer.material.mainTexture; mt.Play(); } - To complete the task, drag the script onto the Quad in the scene (named Screen).
Video clips are added to game objects in the scene as you would do with any other material. The difference is that, with video clips, the material is obtained from a video clip, instead of a texture.
That said, a very important aspect when dealing with videos is to correctly code them. On one side, you need quality, and on the other side, you need to keep the file as small as possible. Take into consideration the fact that importing long videos in Unity can take several minutes, and that whenever you change settings in the Inspector window, the clip is reimported and processed. This means you may find yourself waiting and waiting for the processing to be done, before being able to getting back to work!
With Unity, it is pretty easy to add videos and create the controls to pause, play, or stop the video. We recommend referring to the manual at http://docs.unity3d.com/Manual/class-MovieTexture.html to delve more into this matter.