
Now that the spritesheet with the animation cycle is correctly split up, we can use the multiple sprites to create a walking animation for our character.
In this recipe, we will use the spritesheet we set up in the previous recipe to create an animation cycle for a character sprite.
- Let's start with a clean game scene. Remove all game objects from the scene, except for Main Camera.
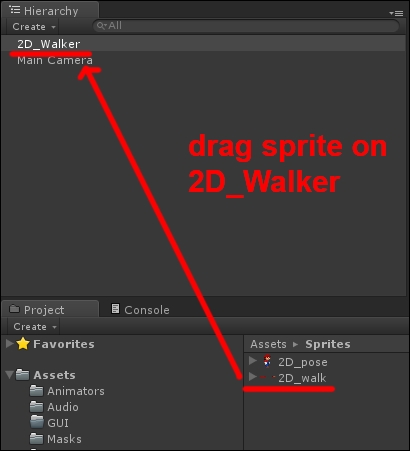
- Create a new game object in the scene and name it 2D_Walker.
- Drag the 2D_walk sprite from the Project panel onto 2D_Walker in the scene, as shown in the following screenshot:
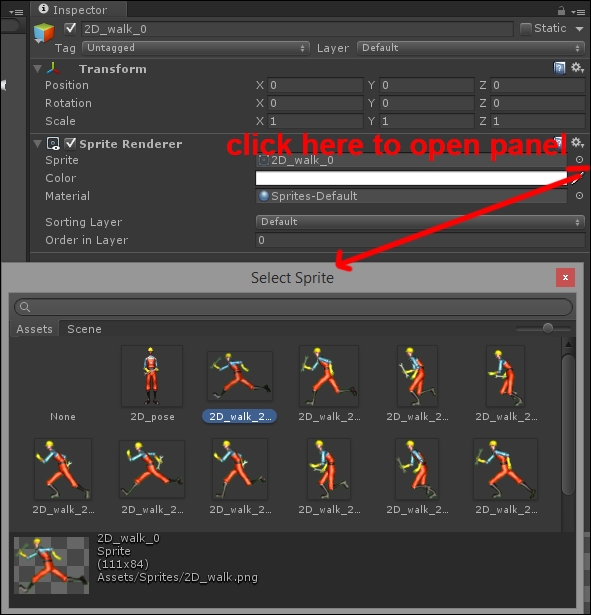
- The Sprite Renderer component has now been added to 2D_Walker. In the Sprite property, you should have a frame named 2D_walk_0. If you don't, you can click on the small button in the bottom-right corner of the Sprite Renderer panel in the Inspector window, and select the frame named 2D_walk_0 from the window that opens, as shown in this screenshot:
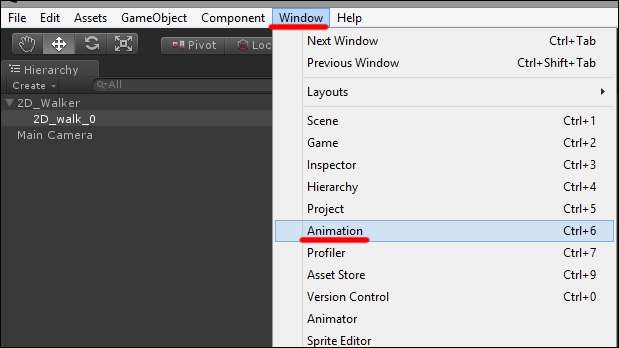
- The next step is to add an animation clip to the object to store the frames of the walking cycle. From top main menu of Unity, navigate to Window | Animation to open the Animation panel, as shown in the following screenshot:
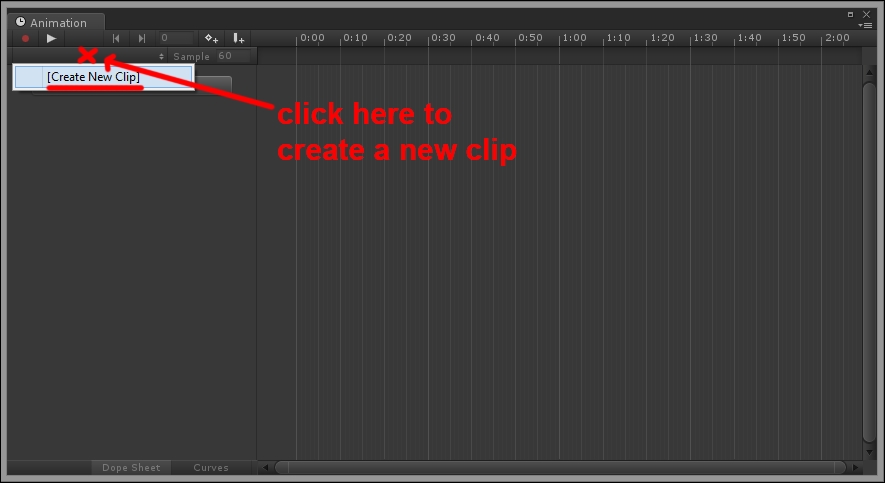
- Click on the small arrows in the left-top corner of the panel to add a new clip, as shown here:
- A window opens, where we need to set a destination folder to save the animation clip. Name the clip
walkand save it in the Anims folder inside Assets, which is in Sprites, as shown in the following screenshot: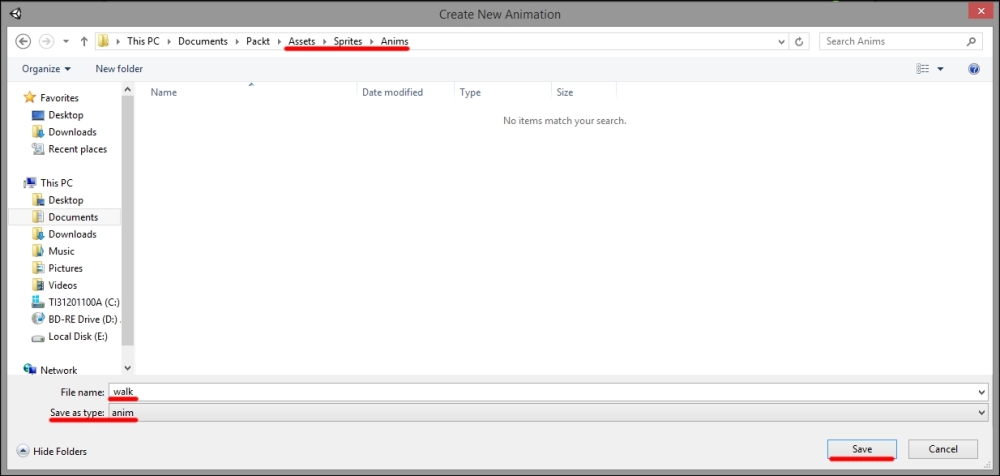
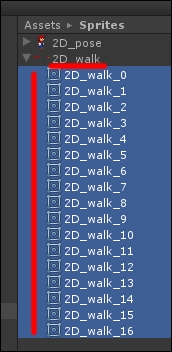
- Now expand the hierarchy of 2D_walk in the Project panel to display all its frames, and select them by pressing Shift and clicking, as shown in the following screenshot:
- Drag all the frames onto the Animation panel, as shown here:
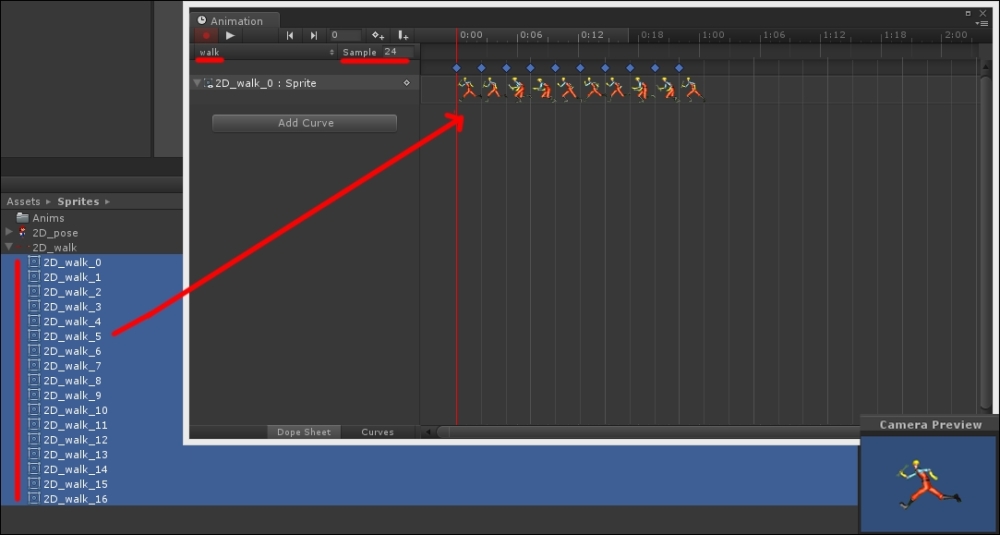
- Check whether the Sample parameter is set to 24 frames (instead of the default value of 60, because 60 frames per second would be too much for this walking cycle), as displayed in the previous screenshot.
- Click on the small red recording button in the Animation panel so that the clip gets saved. When you hit the play button to launch the game in Unity, you should see Mario walking in a looped cycle.
Once a spritesheet is split into several frames, Unity is automatically capable of displaying them within an animation clip in a given order and at a given frame rate. The clip is then attached to the Animation component of a game object so that the game object can perform the animation clip defined in the spritesheet.
Using spritesheets is not the only way to animate sprites. Actually, there are cases where keyframe animation may be preferred.
With keyframe animation, a clip is obtained as a sequence of keyframes on a timeline. In each keyframe, the character is set in a pose that is a step of the final animation we aim to create. Unity takes care of interpolating the movement of each individual animated part of the sprite between one keyframe and the next. Thus, when we play the animation clip on the timeline, the result we get is coherent, progressive animation.
This is the same concept of spritesheet animation after all; the difference is that no predrawn spritesheet is required with skeletal animation and the character can be directly animated. As such, animating sprites with keyframe animation is actually an optimization technique, as it reduces the amount of data required to store several spritesheets in the project. We suggest you visit the following links to go deeper into this matter:
In order to use skeletal animation, the character must be provided with so-called joints. This is the topic of our next recipe.