
Now, let's learn how to create a simple attack animation clip for our sprite character using keyframes instead of a spritesheet.
Keyframe animation is a complex topic, and we cannot fully address it in a single recipe. Nevertheless, we'll use this opportunity to cover the basic principles so that you can get a grasp of the procedure.
Again, we keep up from where we left. Have your project open and be ready to follow our instructions.
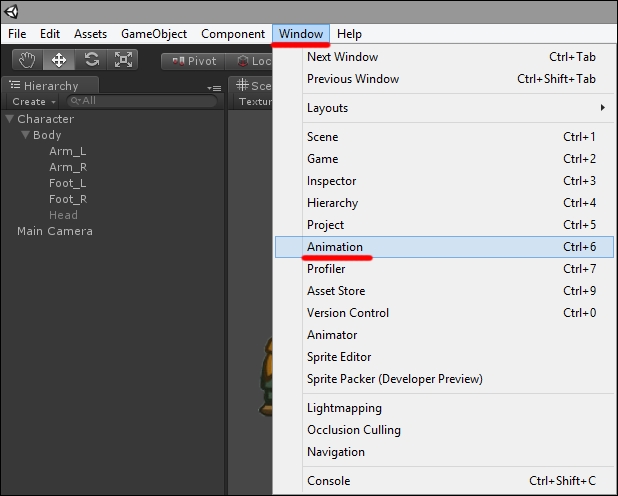
- Open the Animation panel by going to Window | Animation, as shown in the following screenshot:
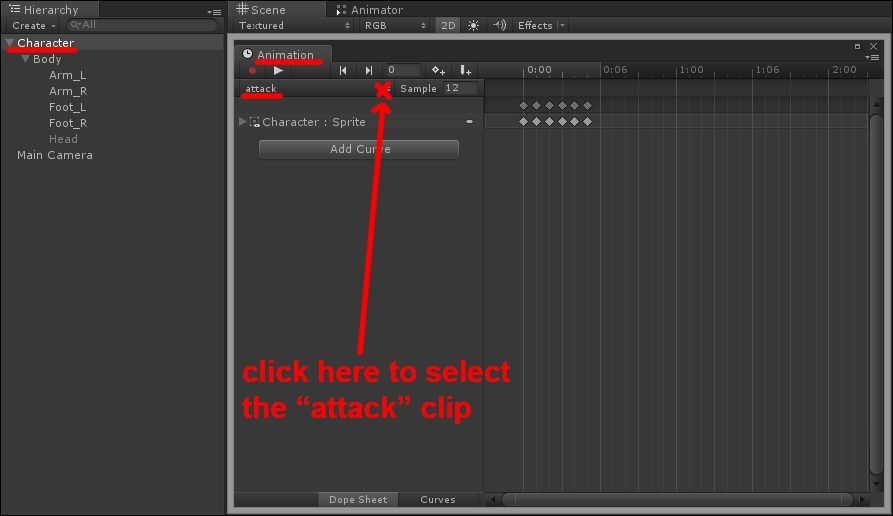
- Select Character in Scene. Then click on the drop-down menu in the Animation panel to set attack as the active clip, as shown in this screenshot:
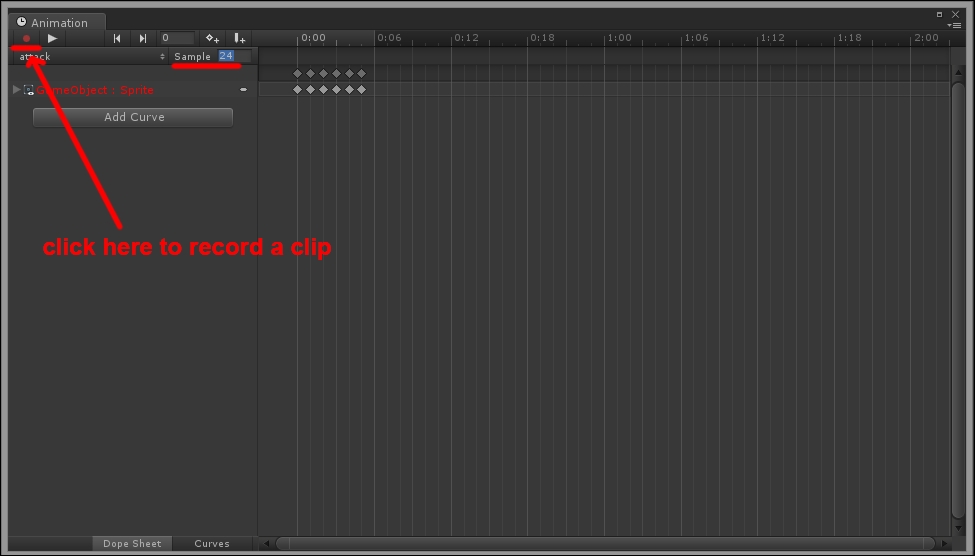
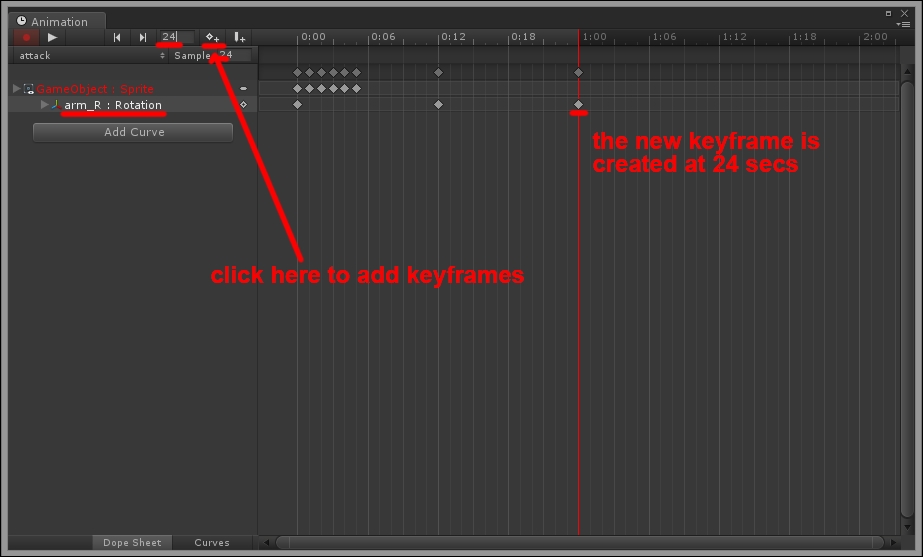
- Set a reasonable number of keyframes for the attack clip; 24 frames per seconds is a good starting point. Then hit the recording button to start recording the clip. You can refer to the following screenshot to ensure that you are doing it right:
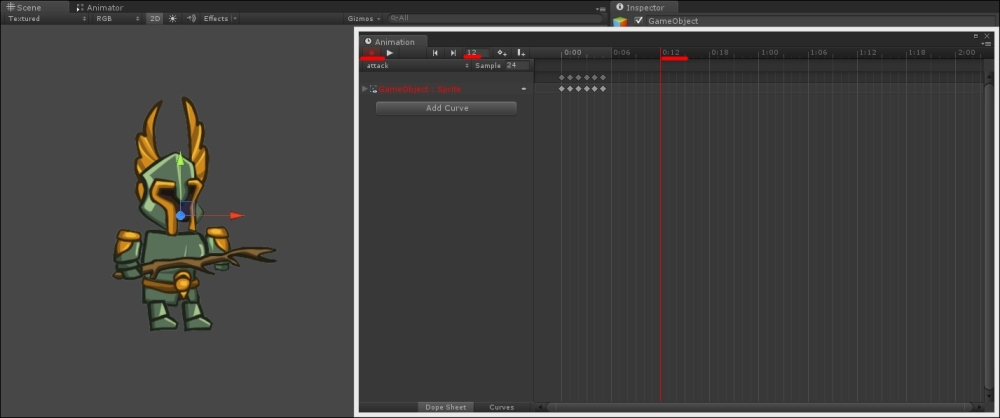
- With the record button pressed, move the timeline cursor to half the clip, that is, at 12 seconds, as shown in the following screenshot:
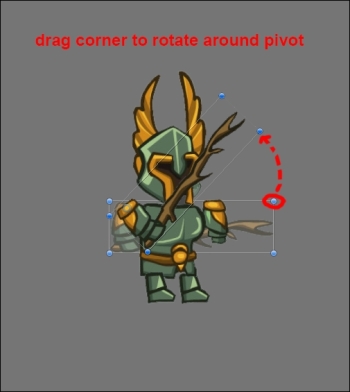
- Go to the Scene, select Arm_R (in Scene or from the Hierarchy window) and move the cursor close to the corner of the boundary (the blue dots). The cursor should change to a rotating icon. Grab the corner and rotate the arm around the pivot we set earlier. Here is a screenshot that shows the result you should get:
- By doing so, we created two keyframes for Arm_R: one frame in the position it was at 0 seconds of the clip, and another frame at 12 seconds, with the rotation we applied. To close this attacking loop, we need to set the final position keyframe, which is at the same position we started with.
Set the time line at frame 24 (by setting the value as we did before). Then click on the small button with a rhombus and a + icon to add a keyframe at second 24. Please refer to the following screenshot:
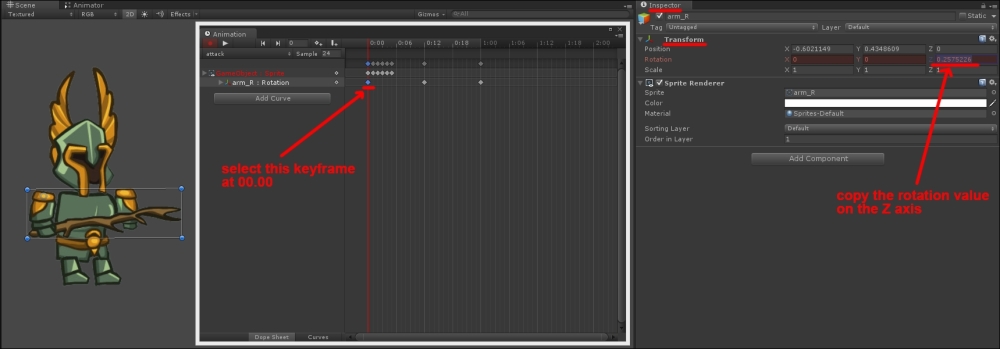
- Now, with Arm_R still selected in the scene, move to the Animation panel and select the frame at 0:00. Then go to the Transform component panel in the Inspector window and copy (right-click and select Copy) the Rotation value on the z axis, as shown in this screenshot:
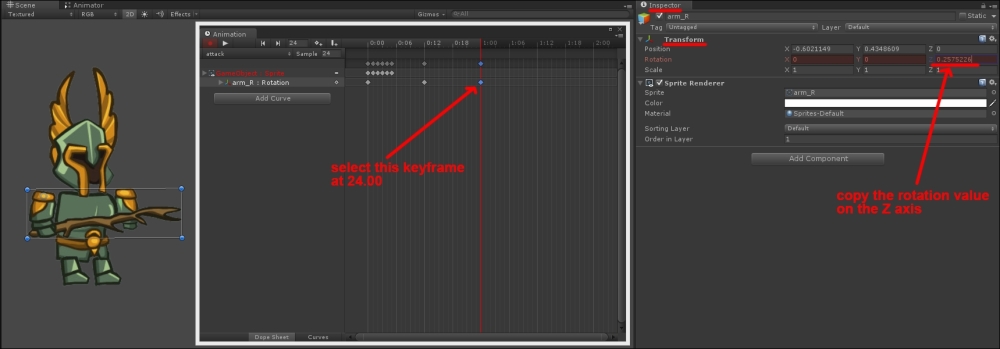
- The last step is to paste the Rotation value at 0:00 on the frame at 24:00. Select the frame and then paste (right-click and select Paste) the rotation value on the z axis. If you did this right, the arm should get back to its starting position. Please refer to the following screenshot:
- You can now test the result. Disable the record button and then try hitting play on the Animation panel. Hopefully, the knight will start swinging the stick it holds in its right-hand!
With respect to its general principles, keyframe animation is easy to understand, as it consists of setting keyframes and then moving single body parts in the position we want at that keyframe. Unity takes care of making the transitions between frames so that at the end of the animation process, we perceive a meaningful sequence instead of a collection of static frames.
The hard part comes with tweaking the animations to make them part of the characterization, which goes beyond the scope of this book.
The interface of the Animation panel may not look friendly at a first glance, so we recommend repeating this last group of recipes and creating an animated orc with the other sprites available in the sprite atlas we have provided.
We have just scratched the surface of animation and keyframe animation here, as several other options and tools are available; for example, transitions between frames can be adjusted using curves to slow movements down (or speed them up), and make animations nicer and more believable. Animation curves have recently gone legacy (so they are still supported but not recommended anymore), but the manual at http://docs.unity3d.com/Manual/animeditor-AnimationCurves.html still provides all the explanations you will require to make the most out of them.
For those of you who are interested in animation in general, we recommend the following links to begin with:
Dudes, animation is massive topic!
There is also this link that I love, at http://the12principles.tumblr.com/.
Last, but absolutely not least, is the king of animation manuals: The Animator's Survival Kit by former Disney's Richard Williams. It is available at popular online stores.