
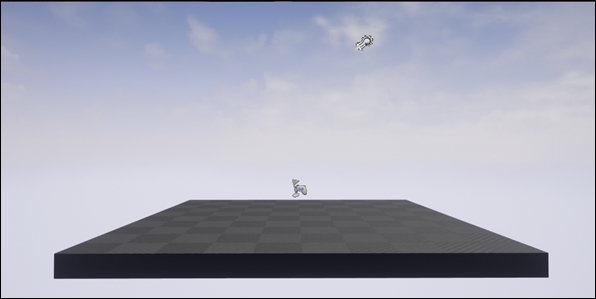
UE provides a very in-depth and multi-use editor. From this editor, developers are able to create amazing and high-detail levels, the combination of editor tools present in UE4 creates a developer environment where the most limiting factor is the imagination! For the scope of this chapter, we will be using a limited tool set of the editor to act as an introduction to building levels with UE4. Each of the game projects you will create during the course of this book will require a new approach to building levels. This chapter will teach you the fundamentals of level creation and manipulation while teaching you some tricks to make position world geometry a breeze. We are going to take the default level arrangement from this:
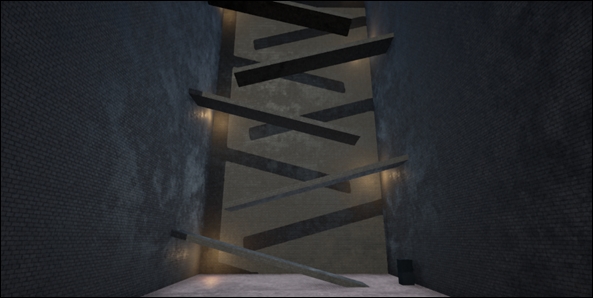
To a more realized gameplay level, like this:
For this process, we are going to be creating a new level. To do this navigate to File | New Level and select the option default. Save this level as Barrel_Hopper_Map.
It's time for us to learn about the various camera and viewport tricks that we can use when working with levels to make creating interesting world environments that is much easier.
There is nothing worse than spending hours placing objects in a 3D scene, only to find that once the camera has moved, everything is out of alignment! It is important to constantly check how the world geometry appears from multiple angles, as you are positioning your assets in a scene. This is particularly important when placing blocking volumes that prevent players from accessing areas of your map you do not wish them too.
In the top left-hand corner of any viewport are a series of view buttons. They look like this:
Clicking on the downward arrow opens up a drop-down menu that has a large selection of settings that you can apply to your viewport camera. Here, you can set things such as Field of View and Far View Plane, if you would like to have runtime statistics like Frames per Second displayed and many more camera-specific options. Most of these options will be explored over the course of the book.
One of the most important buttons on this bar is the one that currently says Perspective. It is this button that allows you to swap between camera perspective types, with the default being 3D perspective view. The other options for this button are the available orthographic views. What this means is that these view modes allow you to change how your world is viewed through the Editor window. If you select the Front option, it will change the camera from a perspective camera affected by FOV to an orthographic camera that looks in the opposite direction of the world's x-axis. This is very important to a level designer, as you are able to view the layout of your game world without a FOV bias from multiple angles.
The button titled Lit allows you to specify the rendering mode through which you would like to view your world. Do you want to see the level unaffected by postprocessing? Do you want to see your level unaffected by lights? All of these options are here. It is important to use these options to remove
visual clutter when dealing with levels that are heavily affected by post-processing and visual effects.
The final option allows you to specify which objects you would like to see in your viewport. If you want to view your entire world without any of your currently placed static meshes or BSP volumes, you can specify this here. It is also through this option that you can specify specific post-processing effects that you wish to view your world with.
On top of the basic camera controls there are a couple more advanced methods of camera manipulation. One of the control techniques covered in the tutorial that you saw when you opened Unreal for the first time was focusing. Pressing F will move the camera, so the currently selected object is front and center in the screen. There are some object-specific camera controls that expand this concept. You can press and hold ALT while pressing the left-mouse button to orbit the focused object; if you do the same thing while pressing the right-mouse button, you are able to dolly in and out from the object. You may also pan the camera up, right, left, and down by holding the middle mouse button.
Tip
For a complete list of in editor controls address https://docs.unrealengine.com/latest/INT/Engine/UI/LevelEditor/Viewports/ViewportControls/index.html.
At the moment, our newly created map has a Player Start, a Sky sphere, a light source, some atmospheric fog and a floor. We are going to change this level to match something similar to the preceding image. Through this process, we are going to learn some level construction tips, what BSP geometry is, and how we can use them, as well as how we can apply and modify materials. In the game Barrel Hopper, we will be getting the player to scale sloping ramps to reach the top of a level while trying to jump over barrels that are rolling down the ramps. We need to construct a level that accommodates these gameplay requirements.
The first thing we are going to do is roughly place our level geometry that we will later be replacing with static mesh actors; this is called blocking, and we are going to do this using Geometry Brushes. This process allows us to estimate the level geometry without having to create custom mesh assets in a third party tool such as Maya or 3DsMax. Fortunately, the Geometry Brush that we are going to use to block our level can be converted to static mesh actors, so we will be able to create our entire level using UE 4.
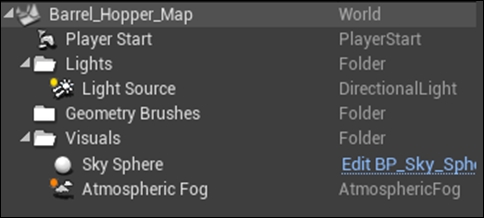
To ensure our World Outlier remains tidy and organized before we begin create a folder structure, we can group similar objects in our 3D world. Do this by clicking the small + folder button in the top right-hand corner of the World Outliner panel. Create three folders now, Lights, Geometry Brushes, and Visuals. Match the folder structure show here:
Whenever we create a new Geometry Brush ensure that it is categorized under the similarly named folder in the World Outlier. Now what we need to do is select the static mesh actor titled Floor and delete it. We are going to be creating all of our level geometry from scratch.
We are going to use Geometry Brushes to block our scene. These brushes are used by UE 4 to add geometry to a scene that has prebuilt behavior like collision, tessellation, and material tiling. They can be used by developers to effectively block a 3D scene then be converted to static mesh assets for later optimization of the 3D scene. The reasons this is beneficial to developers is the huge amount of time saving this process can afford the level designers. It also eliminates a major development hold up the level designer can continue to create without having to wait for assets from the 3D modelers.
From the Modes panel on the left-hand side of the Editor window, ensure that the place mode is active and navigate to the BSP section. Here, you can see a list of basic primitive types such as Box, Cone, Cylinder, and so on. From this list, click and drag the Box option into the 3D scene. Congratulations, you just created your first Geometry Brush! As you can see, it is currently called Box Brush in the world outlier. Change this now to Floor Brush.
Currently with the brush selected, you should see a Details Panel that contains a Transform section, a Brush Settings section, and an Actor section. If you see something different, but you can see that the brush object is obviously highlighted, it means that you have selected a single face on the brush. I will come back to this later. If this is the case, deselect the brush and then select the brush again by clicking on it once.
The section that we are most concerned with is the Brush Settings section. It is here that we can change the proportions of the brush.
It is important to use the Brush Settings section to modify the proportions of the brush as opposed to using the scale of the object through the transform properties. The reason being that when we change proportions using Brush Settings, the way a material will appear on the surface of the brush will be preserved. If we were to use the scaling tools, we would have to adjust the UV's of the brush. A UV is simply how we choose a specific pixel from a texture when it is mapped to a surface. When a surface is scaled, the UV's are stretched resulting in the texture stretching as well.
For now, we can ignore the other settings. The first thing we need to do is ensure our floor brush is centered in our world at the 3D co-ordinates of 0, 0, 0; we will call this origin. We then need to proportion our brush, so we can use it as the floor in our 3D world.
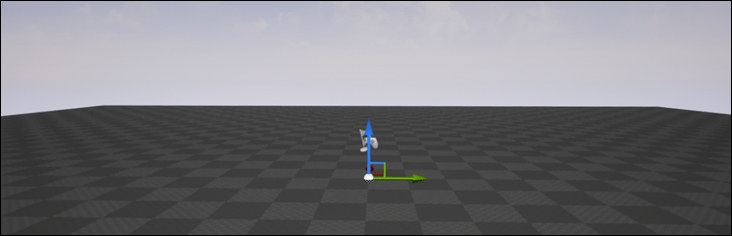
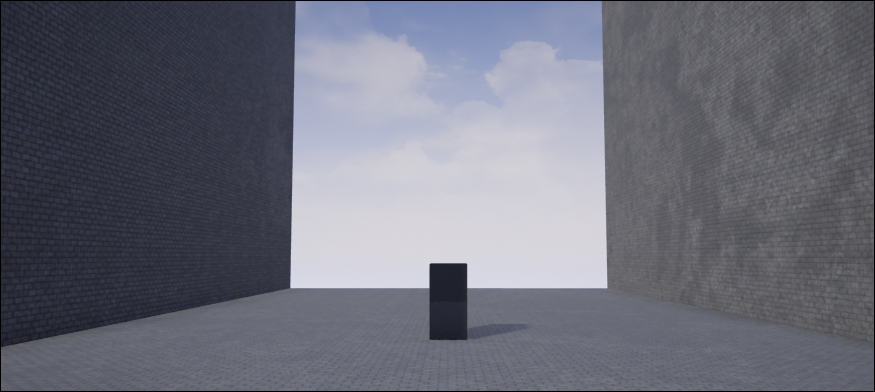
We can do this by changing the Brush Settings. Change the X value of the brush to 5000cm, the Y value to 5000cm, and the Z value to 25cm. Next, we need to position the brush. Change Transform Settings so that all numbers along the Location row are 0. This will shift our floor to origin. Now, because our brush is now 25 units in height, we should adjust the location of the brush so the top side of the brush is flush with the zero plane. To do this, simply change the Z value of the location row in the Transform Settings to -12.5cm. You should now be presented with something similar to this:
The next thing we should do is place a Brush in our scene that we can use to represent the size and scale of our character, so we have a persistent visual reference for when we construct our level. To do this drag another Box Brush into the scene. This time proportion the brush using the Brush setting to the following—X 100cm, Y 100cm, and Z 200cm. We are using these dimensions as that is roughly the bounds within which our character occupies. Now, we are going to make this box a static mesh actor and place it in the scene. This will create a mesh object that the character will be able to pass through and our camera will not collide with. To do this, select the brush and under the Brush Settings section click on the white drop-down arrow at the bottom of the section to expand the option list. You will be presented with these options:
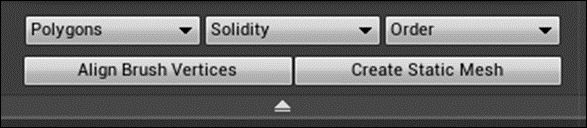
Press the Create Static Mesh option now and save the resultant mesh under the Barrel_Hopper folder. You will notice that our Brush has been replaced with a static mesh! We will use this mesh as an approximation volume when building the rest of the level. Now is a good time to update our folder hierarchy in our Content browser, as it currently contains a Mesh and a Level with no containing folder. Add two new folders to our content browser: Levels and Static_Meshes. Place the new mesh under the Static_Meshes folder and place our new Barrel_Hopper_Level in the Levels folder. Create a similar Static_Meshes folder in the world outlier and place the new mesh under this folder. From this point forward, I will leave organizing your content browser and world outlier up to you for the sake of brevity.
Now, we need to create the walls and the ramps the barrels are going to roll down. Let's start by creating the walls. Drag a new Box Brush into the world. This time proportion this Brush using the brush settings with 5000cm on the X, 25cm on the Y, and 5000cm on the Z. Then, you can place the brush using the location settings at: X 0cm, Y -1100cm, and Z 2500cm.
We can then duplicate this brush and use it for our other wall; but before we do that, we want to apply a material to our brush. Now, we need to select a face of the brush, do this by holding Ctrl and Shift then clicking on a face of the brush. This will present you with a new section list in the Details panel that has properties specific to single face of the brush.
We need to ensure that we select all faces of the brush before applying the material, so it is applied to all faces. Do this by clicking on the select dropdown under the Geometry section and then by clicking Select all adjacent faces. This will select all faces of the currently selected brush. With all of the faces selected, click the dropdown under the Surface Materials section and find and select M_Brick_Clay_Beveled. The entire brush should now appear to be made of beveled clay bricks!
To duplicate our wall brush we can do one of two things, we can copy paste the element via our world outlier or we can hold Alt while transforming the brush using the in-viewport transform widget. Do this now by holding Alt and translating the wall brush along the y-axis using the green arrow of the translation transform widget. You will notice that the original brush remains in place and you have instead dragged a duplicate of the brush off the original. Position this brush at X 0cm, Y 1100cm, and Z 2500cm using the Transform settings of the new brush now. While you are at it, you should also apply the M_Brick_Clay_Beveled material to the floor brush now as well!
With both of our walls in place, the light from our light source is being obstructed and our world is beginning to look quite dark. To remedy this, we need to place a Skylight in the scene. A Skylight is an object that captures the color of your world outside a distance threshold from the Skylight's position and applies that as a uniform light within the scene. As we have a skybox with a light blue ambient color, the Skylight will provide a light to the scene that matches this color. Click on and drag a Skylight into the scene from the Modes Panel in the Place Tab under the Lights section. You should now see something that looks like this:
We are starting to form the basic bounds of our level! You may have notice that we are starting to cut off large chunks of our brush geometry from the player; we will deal with this later. For now, we need to construct our ramps! This will require yet another Box Brush. Drag a new Box Brush into the scene. We want this brush to be roughly three-fourth of the length between our two walls, so there is a 550 cm space between the edge of the ramp and the wall. This will ensure that our barrels can fall through the gap, and our player can jump up to the next ramp. We also want our ramp to be sloped so that our barrels will roll down towards the climbing player. Let's use 15 degrees.
We can use some basic trigonometry to figure the length of our ramp. If the ramp is sloped at an angle of 15 degrees and our adjacent side length is 1650 (3/4 of 2,200). Then, the length of our ramp is roughly 1708 as 1650/cos(15) = 1708. We can increase this to 1800 so that we have some leeway for our player, and so the ramps are easier to place in our level.
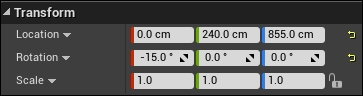
With our new length of ramp, we can angle and place this ramp. Using the transform settings, place our first ramp at: X 0, Y -240, and Z 200. Make sure that the rotation of the ramp is set to 15 in the Roll value (the first column). From here, all we need to do is duplicate the ramp, raise it by an amount, and inverse the Y position and the Roll angel. The separation for each ramp that I used is 655. I based this number off of the height if the character block out mesh we made earlier, which is 200 units and accounted for the total height of the ramp being 442 (also calculated using basic trig, this time 1650 * Tan(15)). This number was then rounded to 655.
Before duplicating the ramp brushes, ensure that you apply M_Brick_Clay_Beveled to all of the brush faces. Now, select the first ramp brush, duplicate it, and then transform the brush by 655 units on the z-axis. Now, you need to flip the rotation of the ramp and position it correctly along the y-axis. As our ramps will alternate symmetrically, you can simply inverse the Y value of the location transform and the Roll value of the Rotation Transform. Your second Ramps Transform matrix should look like this:
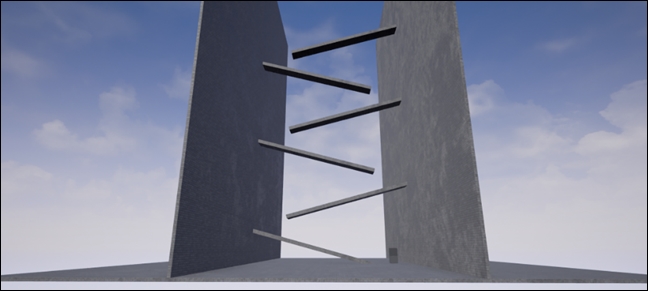
Repeat this process until you have six ramps and can see something similar to this:
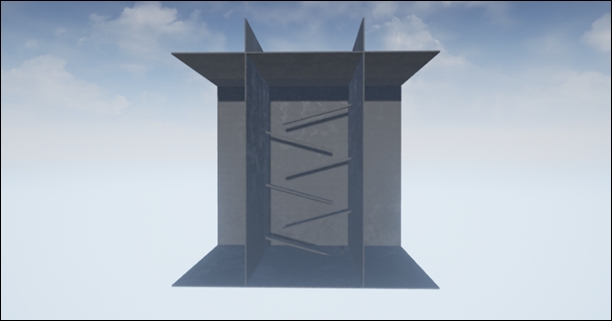
We are nearly done with blocking our level! All we need to do now is close off our play area with a roof and a back wall! This is very easily done as we can use a duplicate of our floor brush as the roof, and we can use a duplicate of one of the wall brushes as the back wall. Set the floor brush duplicates position to—X 0, Y 0, and Z 4360. Yaw the wall brush duplicate by 90 and set its position at—X 950, Y 0, and Z 2500. You should now have something that looks very similar to this:
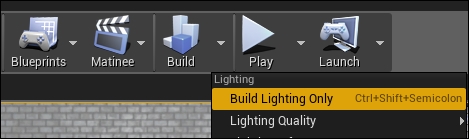
We are done on blocking your level! If you aren't happy with the way your level is lit, try adjusting the Light source directional light to your liking. If you find that all of the shadows in your level have the word preview repeated through them; it means you need to rebuild your lighting. To do so, click on the drop-down arrow in the Build icon under the Toolbar panel and select Build Lighting Only:
Now that we have blocked our level, we can add the other assets to our scene so we can start to form the gameplay of Barrel Hopper!