
Now it is time for us to create your very first plugin, with which we can provide our codebase with a power-up object. The plugin itself will be very simple, as the purpose of this exercise is to teach you how to include plugins within your own Unreal Engine project. The following section of this chapter will break down how to create a new C++ plugin from scratch with the help of the Unreal plugin wizard. Refer to the following screenshot:
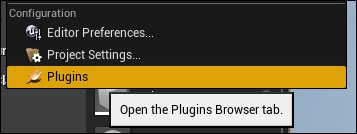
Begin by opening the Bounty Dash project. From the Level Editor, select the Edit selection from the dropdown menu at the top of the screen, from here select Plugins. This will open the plugin wizard. You will be presented with a list of already installed and available plugins. We are not concerned with these just yet. What we need to do is create a new plugin; we can do this by selecting the New plugin button in the bottom right-hand corner of the plugin wizard window:
Selecting this button will present you with a list of plugin template types. From this list, select Blank (it should be the first option). Be sure to specify the name of this plugin to be PowerUpPlugin. With the Blank category selected and the name specified, press the Create Plugin button. This will create a new blank plugin called PowerUpPlugin that contains minimal code and is a great starting point for our custom plugin.
Before we embark on our journey with plugins, it is important to bring up a new semantic that will help with understanding how plugins and Unreal Engine 4 work. Unreal Engine 4 is made up of a collection of various modules. A module is a grouping of code that is responsible for a specific set of functionality featured in Unreal Engine. It is important to understand that each module is responsible for a section of the Unreal Engine codebase. For example, the Core module is responsible for the core engine-programming environment, and the Engine module is responsible for defining actors and components, and implements the game framework.
Tip
If you want a complete list of all of the Engine modules, they can be found here:
https://docs.unrealengine.com/latest/INT/API/
You will probably find yourself referencing the online API documentation more and more as you dive deeper into C++ and Unreal Engine, as the API will inform you which module a given object is part of. For example, the AActor object is part of the Engine module, as can be seen at the bottom of this page:
https://docs.unrealengine.com/latest/INT/API/Runtime/Engine/GameFramework/AActor/index.html.
In the same sense, plugins are also made up of modules. Each module is responsible for a certain set of functionality within the plugin. Simple plugins will usually only contain one module, however, as a plugin's complexity increases, so does that of its module count. It is also important to note that plugin modules do not know about all of the Unreal Engine modules by default. You must specify which modules the plugin needs to know about to gain access to the objects contained within those modules. How this is done will be detailed in the following sections of this chapter.
Before we begin working with our new blank plugin, we will first look into the different code files that make up a plugin and how a plugin is saved within a project folder. Each plugin will be accompanied by the following files:
*.uplugin: This file type is used as a descriptor file for the plugin and informs the engine how the plugin should be interpreted and when it should be loaded. The*.upluginfile is where you specify most of the information about the plugin, such as name, version, type, engine version, and so on. It is also here where you will specify how many code modules will be present within the plugin and the settings for those modules.*.Build.cs: This file is used to inform the engine where to find the given source for this plugin and what modules of the engine this plugin will be concerned with. It is here where you will specify whether the plugin will need to access functionality from theCoreUObjectmodule or theRenderermodule, and so forth. Also, it should be noted that plugins can contain multiple modules and each plugin module will be accompanied by a*.Build.csfile.PCH.h: APCH.hfile is a precompiled header file. This file will be used to include files that are needed across a plugin module. If you specify in the.Build.csthat you need access to theCoreUObjectmodule, it is in thePCHfile that you will add the#include, which includes the desired code file from that module. So, if you wish to have your plugin include or inherit fromUObject, you will need to add#include "CoreUObject.h"to thePCH. It is also here you will include any of the module's private headers that will be needed in most of the module's other source files.Source: Every plugin will have source files associated with the plugin. These files will be used to both load the plugin and create the functionality the plugin will add to the engine/project.Content: Plugins may or may not include content. This content will be physical assets such as sounds files, image files, meshes, and so on. It is also here the icon used for the plugin can be specified.
Every plugin created will be located under the Plugins folder of the project directory. In our case, the PowerUpPlugin can be found under BountyDash/Plugins/PowerUpPlugin. Within this file, you will find the .uplugin file mentioned previously, along with a resources folder used to hold the content of the plugin, and a source folder. If you open the resources folder now, you will note that the wizard has automatically populated the plugin with an icon file icon128.png. You may replace this file with an image of the same name and dimensions if you wish. We will not be adding any further content to the PowerUpPlugin.
Now, open the aforementioned source folder and you will find that it contains another folder titled PowerUpPlugin. Why the duplicate folder name? This is because plugins, much like the engine, can be made up of multiple code modules with the default module named after the plugin itself. Within the scope of this chapter, our plugin will only contain one module; however, it is important to note the ability to add more modules if needed.
Now, address the Visual Studio project and you will find that the plugin directory has been added to the solution explorer, meaning we can edit all of the plugin files directly from Visual Studio! Open the PowerUpPlugin.uplugin file now.
With the .uplugin file open, you will be presented with a file format that looks very similar to JSON. In this file, we have a series of categories followed by a value. Each of these categories describes something about the plugin. There are more categories that can be specified than included by default in the PowerUpPlugin.uplugin file.
The most relevant are detailed as follows:
FileVersion: The version of the.uplugindescriptor format itself. This is used primarily for backwards compatibility. In our case, this version has been set to3as that is the most recent file format version for a.upluginfile. If we wish to create a plugin that utilizes an older.upluginformat, we can specify a different number here. However, this is not recommended.Version: This is the version number of the plugin itself. This is so you can keep track of which version of your plugin you are working with. This number is not generally shown to the end user and is more for the plugin creator's benefit.VersionName: This is simply the version of the plugin displayed in the editor UI. This is not used for any version checks and can be any format you wish. AMajor.minorformat is suggested. For example, plugin version 1.0, 1.1, 2.0, and so on.EngineVersion: Allows you to specify the minimum engine version that has to be used for this plugin to load. This is useful when accessing engine code modules that are only present in later versions of the engine, and the plugin may be distributed to users with an earlier version of the engine.FriendlyName: The name of the plugin that will be displayed in editor. This name will default to the.upluginfile name.Description: A paragraph of text that describes what the plugin is used for.Category: This is a special dot-seperated path string that lets you specify which category your plugin will feature within the editor UI. For example,BountyDash.PowerUpswill have the plugin feature underBountyDash|PowerUpswithin the plugin wizard.CreateBy: The individual or company name that created the plugin.URL: Each of the categories ending in URL can be used to specify hyperlinks for each of the categories.Modules: This is where you specify the code modules the plugin contains, and essential details about each module that will dictate how the module is loaded and when it can be accessed by developers. This will be covered in more detail in the next section.
Make sure the .uplugin file for the PowerUpPlugin appears as follows:
{
    "FileVersion": 3,
    "Version": 1,
    "VersionName": "1.0",
    "FriendlyName": "PowerUpPlugin",
    "Description": "",
    "Category": "Other",
    "CreatedBy": "",
    "CreatedByURL": "",
    "DocsURL": "",
    "MarketplaceURL": "",
    "SupportURL": "",
    "Modules": [
        {
            "Name": "PowerUpPlugin",
            "Type": "Runtime",
            "LoadingPhase": "Default"
        }
        ],
    "EnabledByDefault": true,
    "CanContainContent": false,
    "IsBetaVersion": false,
    "Installed": false
}
Translated in short. This plugin uses file version 3 of the .uplugin format. It is the first version of this plugin and will be referenced as PowerUpPlugin under the Other category within the Editor UI. It contains one code module that is named PowerUpPlugin and is of type developer that will use the default loading phase and is enabled by default. What this means will be described now.
Each code module is described with the following categories:
Name: The unique name of this plugin module that will be loaded with the plugin. The engine will use this name to locate similarly named binaries for this plugin at runtime. Each uniquely named module that has a source directory requires a matching.Build.csfile.Type: This category determines when the plugin will be loaded based on the application type the plugin will be used for. This is because you may wish to create a plugin that is only used within the editor (a plugin that assists with object placement perhaps). This plugin should not be loaded when building a shipping version of the product. The valid options for the type category areRuntime,RuntimeNoCommandlet,Developer,Editor,EditorNoCommandlet, andProgram. Runtime modules will be loaded in all cases, even in shipped games. Developer modules will only be loaded in development, runtime, or editor builds but never in shipping builds, and Editor modules will only be loaded when the editor is starting up.LoadingPhase: If specified, this category controls when the plugin is loaded at startup. This option is advanced and is not required by default.
The descriptor file can be used to exercise multiple loading options for the plugin itself. As we have only one module for our PowerUpPlugin, the .uplugin file will remain mostly unchanged from the provided default. However, we do need to modify the Module category slightly. As we are creating a plugin that we wish to reference within our game code at runtime in all builds of the application, we need to change the Type of the PowerUpPlugin module to Runtime. Leaving it as developer will cause issues when we build the project to a binary format.
It should be noted that plugins can serve many different purposes. As mentioned previously, they can be used to augment how you interact with the engine at an editor level, meaning that the plugin is completely detached from your game code. Plugins may also be used to include pre-made functionality you wish to include in your project code; this can be done to include things such as artificial intelligence packages or inventory systems. The latter, however, creates a static link between the plugin and the project code, as once a plugin of this type is included in the project code, your project cannot run without the plugin being installed or enabled. This may be undesirable and does limit the flexibility of a plugin somewhat. This is why we are able to specify the type for each code module included in a plugin.
The module category should appear as follows:
"Modules": [
        {
            "Name": "PowerUpPlugin",
            "Type": "Runtime",
            "LoadingPhase": "Default"
        }
    ],