Keeping records secure is one of the highest priority goals of any Records Management system. By definition, the Records Management system is designed to store documents that are vital to the operations of the organization. In this chapter, we will examine how security and access controls can be applied so that users are able to access only the functionality and content that is appropriate for their role.
In particular, we will describe in this chapter:
- How to create users and groups within Alfresco Share
- How to view the permissions of existing Records Management roles
- How to modify and create new Records Management roles
- How to set access rights for areas in the File Plan
Before a user is able to gain access to the records File Plan, they must have access to the Share Records Management site, and before getting access to the site, they must first become a user of the Share application. Let's look briefly at how Share users are created and how users are then able to subscribe to sites within Share.
The tool that allows us to create a new Share user is available from the Tools area within the Admin Console. To get to this page, as a user admin, we click on the Admin Console link that can be found at the top of every Share page. After that, we can then move into the Users tool that is available from the left-hand panel navigation area:
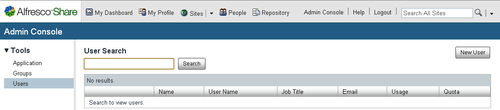
There is a Search field at the top of the page that lets us check to see if a user that we plan to add is already in the system. Users can be searched for by full or partial matches to either their first name or their last name.
Note
There are some limitations to User Search. A search by user name or e-mail address will fail, and there is a limit of displaying only 100 users at one time. It also isn't possible to get a complete list of all users from this screen. One unwieldy solution to find all users in the system is to use the search criteria "A | B | C | D | E | F | G | H | I | J | K | L | M | N | O | P | Q | R | S | T | U | V | W | X | Y | Z".
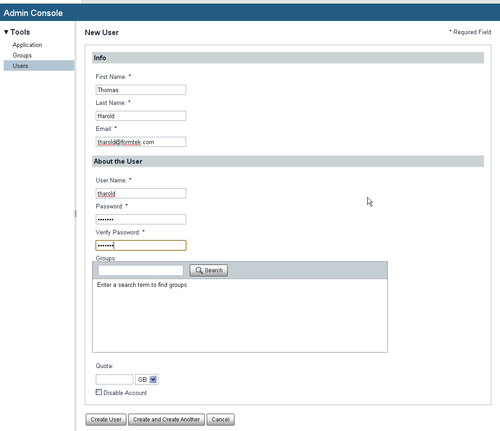
To add a new user, we click on the New User button. After doing that, we are presented with the screen for adding a new user.
At a minimum, we need to enter the following information for each new user that we create:
- First Name
- Last Name
- Email address
- User Name
- Password
Optionally, two other pieces of information can be entered when a new user is created:
- Groups that the user will belong to
- Maximum disk space Quota that the user may consume (leaving bank implies no restriction)
After entering the user information, we click on Create User to add the user to the system. If there are many users to be added at one time, the Create and Create Another button can save some time by keeping the Add User page open and clearing the fields after a user is entered so that a new user can be immediately entered after one is created:
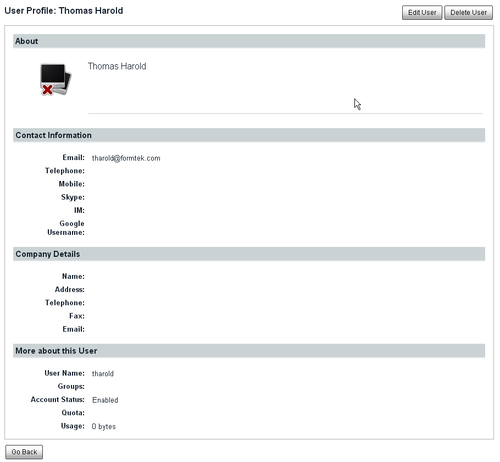
There is a lot more user information that can be tracked and managed than what was collected on the user creation form. This additional information can be entered and viewed on the Profile page for the user.
If we search for the new user that we just created, we can then click on the username in the user list row. We then see the Profile page for the user. While administrators are able to update the profile page for a user, users can also update their own profiles:
After a user has been created in the system, they will then be able to log in to Share. Newly created users will not yet be members of any sites within Share. To join a Share site, the user will either need to subscribe to or be invited to the site.
When the new user logs in to Share, they will immediately be sent to their homepage dashboard. The dashboard page can be customized by each user and the layout that they select will be remembered as a preference and available each time they visit their homepage.
Most of our discussion in this book about operations within the Records Management site so far has been from the perspective of the user admin. It is vital that the admin account remains secure. Admin either has the privilege to perform any operation in the system or is in the position to be able to acquire any privileges that are not already assigned.
The user admin basically holds all the keys to the system and is thus an important user account that needs to be secured. The default password for the user admin is admin. This is a well known and insecure password that should be changed, especially in a production system, at the very first opportunity.