
A dynamic action is a piece of code that can handle page events (onchange, onclick, and so on). It is actually the APEX implementation of JavaScript event handling. For example, you can show or hide an item or a region on a specific moment. And that moment can be, for example, when a user clicks an item with the mouse, or when a user enters some text in an item. These moments are called events. There are several events which we already described in the recipe "Controlling the display of regions and items with dynamic actions" in Chapter 1,
A dynamic action plug-in offers the same functionality but you can customize the appearance of the affected objects. In this recipe, we will show you how you can make a dynamic action plug-in which changes the color of a text item when a user enters some text in another text item.
No preparations are needed, except that you have an existing page with a region where you can put the items from this recipe on.
- In the application builder, go to Shared Components | Plug-ins.
- Click the Create button.
- In the name section, enter a name for the plug-in, for example setcolor.
- In the Internal name text field, enter a unique name, for example, com.packtpub.setcolor. In the type list box, select Dynamic action.
- In the category list box, select Miscellaneous (use this category to easily find the plug-in back in the categorized action listbox later on in the recipe).
- In the source section, enter the following code into the PL/SQL code text field:
function render_setcolor ( p_dynamic_action in apex_plugin.t_dynamic_action, p_plugin in apex_plugin.t_plugin ) return apex_plugin.t_dynamic_action_render_result is l_result apex_plugin.t_dynamic_action_render_result; begin l_result.javascript_function := 'function(pAction){this.affectedElements.css("color", this.action.attribute01);}'; l_result.attribute_01 := p_dynamic_action.attribute_01; return l_result; end render_setcolor; [render_setcolor.sql] - This piece of code starts with the declaration of the function with its parameters. The return value should be of type apex_plugin.t_dynamic_action_render_result. This return type contains the call to the built-in JavaScript function this.affectedElements.css(), which can change the style attributes of an object in the webpage, in this case a text item. The value of the color is set by the parameter p_dynamic_action.attribute_01.
- In the Callbacks section, enter render_setcolor into the render function name text field.
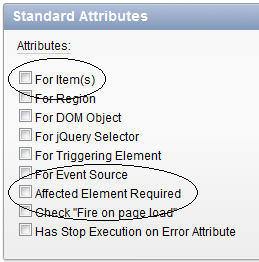
- In the Standard attributes section, check the For Item(s) and the Affected Element Required checkbox.
- Click the Create button.
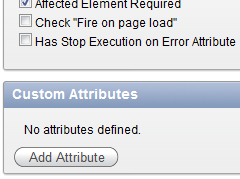
- In the Custom Attributes section, click the Add Attribute button.
- In the name section, enter color into the label text field.
- Click the Create button.
- Click the Apply changes button.
The plug-in is ready and now we will create two text items, one for triggering the event and one that is going to be the affected item.
- Go to an existing page where you want to put this.
- In the items section, click the Add icon.
- Select Text field.
- Enter a name for the text field, for example PX_EVENT (replace X by the page ID).
- Click Next three times.
- Click the Create item button to finish the create item wizard.
- Again in the items section, click the add icon.
- Select Text field.
- Enter a name for the text field, for example PX_TEXT (replace X by the page ID).
- Click Next two times.
- Click Create item.
The two items are ready now. The last thing we have to do is to create the dynamic action.
- In the dynamic actions section in the lower left corner, click the Add icon.
- Select Advanced.
- Enter a name for the dynamic action, for example set_color. Click Next.
- In the Items text field, enter the name of the event item, PX_EVENT (replace X by the page id).
- In the condition list box, select Equal to.
- In the value text area, enter SEMINAR. Click Next.
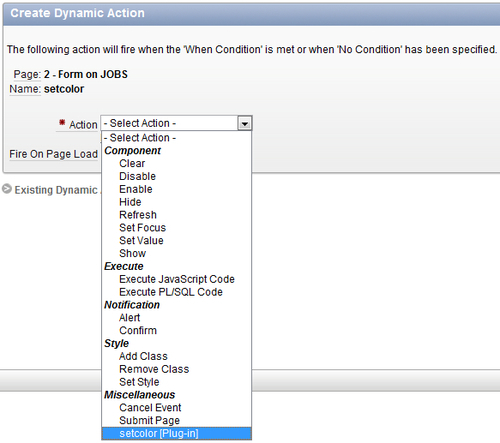
- In the action list box, select our newly created plug-in, setcolor[Plug-in].
- In the color text field, enter a color, for example, blue. Click Next.
- In the false action select box, again select the new plug-in, setcolor(Plug-in).
- In the color text field, enter another color, green. Click Next.
- In the selection type list box, select Item.
- Click on the item PX_TEXT (replace X by the page ID) and click on the single arrow in the middle of the shuttle. Click the Create button.
- You are ready now. Run the page and see what happens when you enter SEMINAR in the event text field.
This dynamic action plug-in works just as the normal dynamic actions except that there is a new action. Instead of show or hide, we now give the affected object a certain color, simply by changing the style of the object. We could have used some other style, for example font-weight instead of color. In that case, don't use the color names (blue and green) but bold and normal.