
The next step is to add the view menu, which is the drop-down menu shown by the triangle in the top-right of the original view. Adding this takes the same pattern as before, but the drop-down menu requires an additional tag to be shown as a view menu.
- Add a method
createViewMenuin theSampleViewclass. Add a call to thecreatePartControlmethod so that it is called when the view is created. - In the
createViewMenumethod, create an instance ofMMenuusingMMenuFactory.INSTANCE.createMenu(). - Add the
menuto thepartusingpart.getMenus().add(menu). - To configure the
menuas a view menu, add a tagViewMenuusingmenu.getTags().add("ViewMenu"). - As with toolbar items, a menu item can either be handled or direct. A direct menu item is associated directly with a handler implementation class. Create a direct menu item with
MMenuFactory.INSTANCE.createDirectMenuItem()and store it in a local fieldone. Set the tooltip and label appropriately, and use the same icon as the previous step. - Associate the menu item with the handler class, with the
setContributionURImethod as before. Either use a hard-coded string,"bundleclass://com.packtpub.e4.migration/com.packtpub.e4.migration.views.HandlerOne", or use thegetURImethod as shown in the previous hero section. - Add the menu item using
menu.getChildren().add(one). - The method should now look like:
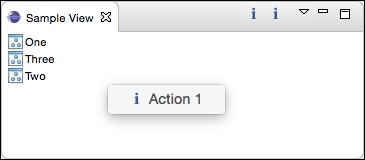
private void createViewMenu() { MMenu menu = MMenuFactory.INSTANCE.createMenu(); part.getMenus().add(menu); menu.getTags().add("ViewMenu"); List<MMenuElement> children = menu.getChildren(); MDirectMenuItem one = MMenuFactory.INSTANCE.createDirectMenuItem(); one.setLabel("Action 1"); one.setTooltip("Action 1 tooltip"); one.setIconURI("platform:/plugin/org.eclipse.ui/" + "icons/full/obj16/info_tsk.png"); one.setContributionURI(getURI(HandlerOne.class)); children.add(one); } - When the application is run, clicking on the triangular menu icon on the top right will present the action, which can then be selected:
- To replicate the original Eclipse 3.x view, a separator needs to be added. This is created with a call to
createMenuSeparatorfrom theMMenuFactory:children.add(MMenuFactory.INSTANCE.createMenuSeparator());
- Now add a direct menu item for
HandlerTwoas well, using the same pattern as mentioned before. - Clicking on the menu should now show both actions, as before.
Adding a view menu item is very similar to adding a toolbar menu item. Each element has a model object (which begins with M), so MMenu stands for M(odel) Menu. These are then added using standard collections and added to the part as before.
The tags are a way of appending additional information to the model. These are sometimes used to disambiguate between different types of elements; in this case, it allows the menu to be shown as a view menu when the ViewMenu tag is added (without this tag, the menu won't be shown in the UI).
A direct menu item works in the same way as a direct toolbar item; the contribution URI (stored as a bundleclass URI) dictates which class will be invoked when the item is chosen from the menu.
Separators provide a horizontal line and can be used to separate items in a menu. When added at the end of a menu, there is no visible effect; but if they are added between menu items, the separator is shown.