
Eclipse is a Java-based application; it needs Java installed. Eclipse is distributed as a compressed archive and doesn't require an explicit installation step.
- To obtain Java, go to http://java.com and follow the instructions to download and install Java.
- Running
java -versionshould give output like this:java version "1.8.0_92" Java(TM) SE Runtime Environment (build 1.8.0_92-b14) Java HotSpot(TM) 64-Bit Server VM (build 25.92-b14, mixed mode)
- Go to http://www.eclipse.org/downloads/ and select the Eclipse IDE for Eclipse Committers distribution.
- Download the one that matches the installed JDK. Running
java -versionshould report either of these:- If it's a 32-bit JDK:
Java HotSpot(TM) Client VM - If it's a 64-bit JDK:
Java HotSpot(TM) 64-Bit Server VM
- If it's a 32-bit JDK:
- To install Eclipse, download and extract the contents to a suitable location. Eclipse is shipped as an archive, and needs no administrator privileges to install. Do not run it from a networked drive as this will cause performance problems.
- Note that Eclipse needs to write to the folder where it is extracted, so it's normal that the contents are writable afterwards. Generally, installing in
/ApplicationsorC:Program Filesas an administrator account is not recommended. - Run Eclipse by double-clicking on the Eclipse icon, or by running
eclipse.exe(Windows),eclipse(Linux), orEclipse.app(macOS). - On startup, the splash screen will be shown:

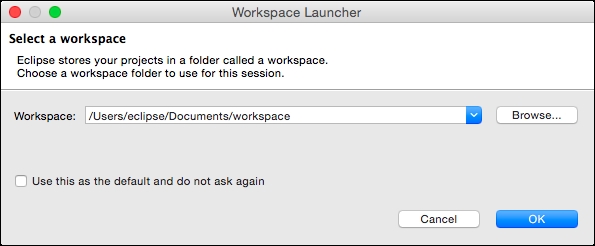
- Choose a workspace, which is the location in which projects are to be stored, and click on OK:
- Close the welcome screen by clicking on the cross in the tab next to the welcome text. The welcome screen can be reopened by navigating to Help | Welcome:

Eclipse needs Java to run, and so the first step involved in installing Eclipse is ensuring that an up-to-date Java installation is available. By default, Eclipse will find a copy of Java installed on the path or from one of the standard locations. It is also possible to specify a different Java by using the -vm command-line argument.
If the splash screen doesn't show, then the Eclipse version may be incompatible with the JDK (for example, a 64-bit JDK with a 32-bit Eclipse, or vice versa). Common error messages shown at the launcher may include Unable to find companion launcher or a cryptic message about being unable to find an SWT library.
On Windows, there is an additional eclipsec.exe launcher that allows log messages to be displayed on the console. This is sometimes useful if Eclipse fails to load and no other message is displayed. Other operating systems can use the eclipse command; and both support the -consolelog argument, which can display more diagnostic information about problems with launching Eclipse.
The Eclipse workspace is a directory used for two purposes: as the default project location, and to hold the .metadata directory containing Eclipse settings, preferences, and other runtime information. The Eclipse runtime log is stored in the .metadata/.log file.
The workspace chooser dialog has an option to set a default workspace. It can be changed within Eclipse by navigating to File | Switch Workspace. It can also be overridden by specifying a different workspace location with the -data command-line argument.
Finally, the welcome screen is useful for first-time users, but it is worth closing (rather than minimizing) once Eclipse has started.