
Commands and handlers are common to both Eclipse 3.x and the Eclipse 4 model. In Eclipse 3.x, they are represented as extension points in the plugin.xml file under org.eclipse.ui.commands. In Eclipse 4, they are stored in the E4 fragment file.
A command will be created to represent saying "hello world," and a handler will be created to display the message. These will then be used to add a menu item to execute the operation.
- Open the fragment for the project, or double-click on the
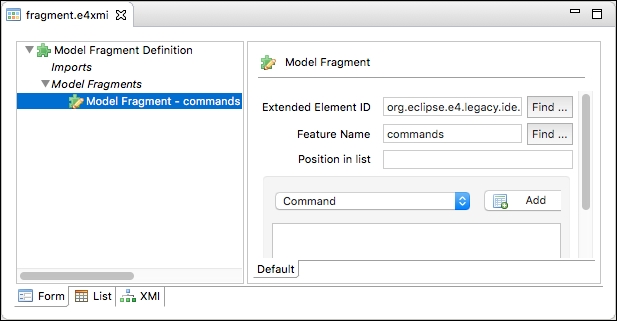
fragment.e4xmifile. - Select the Model Fragment Definition element and click on Add to create a new fragment. Fill in the fields as follows:
- Extended Element ID:
org.eclipse.e4.legacy.ide.application(this can be found under the Container-Type: Application from the search field) - Feature Name:
commands
- Extended Element ID:
- Select the newly created Model Fragment if it is not already selected.
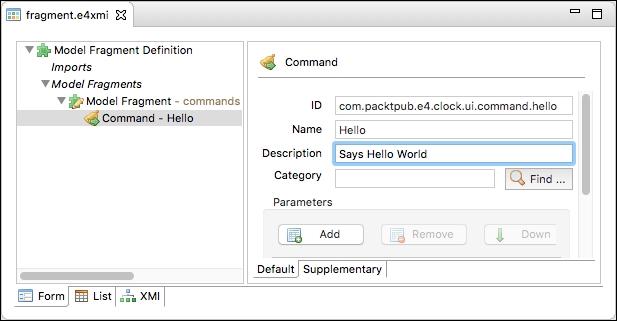
- Choose Command from the dropdown and click on Add. Fill in the fields as follows:
- ID:
com.packtpub.e4.clock.ui.command.hello - Name:
Hello - Description:
Says Hello World
- ID:
- This creates a command that is just an identifier and a name. To specify what it does, it must be connected to a handler, which is done by adding another model fragment. Right-click on the Model Fragments and add a Model Fragment child, using the Extended Element ID
org.eclipse.e4.legacy.ide.application, but this time with the Feature Namehandlers. - Choose Handler from the dropdown and click on Add. Fill in the fields as follows, using the Find... buttons next to the fields to find the elements:
- ID:
com.packtpub.e4.clock.ui.handler.HelloHandler - Command:
Hello – com.packtpub.e4.clock.ui.command.hello - Class URI:
bundleclass://com.packtpub.e4.clock.ui/com.packtub.e4.clock.ui.handlers.HleloHandler

- ID:
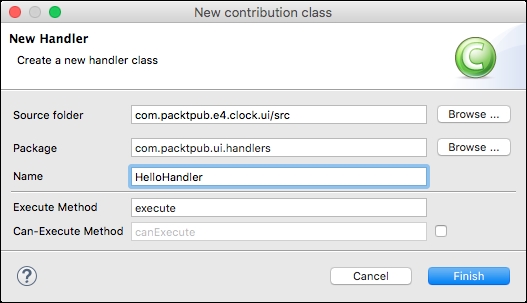
- To create a new class, click on Class URI and fill in the fields as follows:
- Source folder:
com.packtpub.e4.clock.ui/src - Package:
com.packtpub.e4.clock.ui.handlers - Name:
HelloHandler - Execute Method:
execute
- Source folder:
- The handler joins the processing of the command. In Eclipse 3.x, this was a class that implemented
IHandler(typicallyAbstractHandler); but in Eclipse 4, this interface is no longer necessary. Implement the classHelloHandleras follows:package com.packtpub.e4.clock.ui.handlers; import org.eclipse.e4.core.di.annotations.Execute; public class HelloHandler { public void execute() { MessageDialog.openInformation(null, "Hello", "World"); } } - The command's ID
com.packtpub.e4.clock.ui.command.hellois used to refer to it from menus or other locations. To place the contribution in an existing menu structure, it needs to be added as amenuContribution. Create a new Model Fragment using the Extended Element IDorg.eclipse.e4.legacy.ide.applicationand Feature Namehandlers. - Select the newly created Model Fragment, choose Menu Contribution from the dropdown, and click on Add. Ensure that the Parent-ID is set to help.
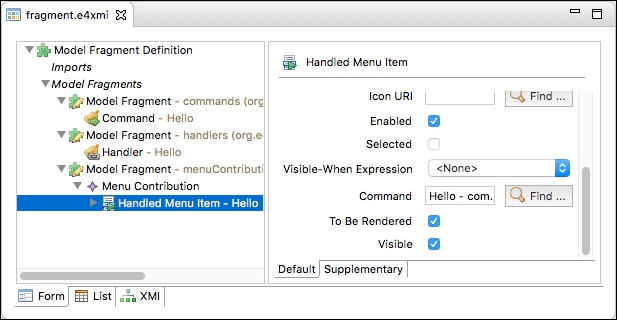
- Select the newly created Menu Contribution, select Handled Menu Item from the dropdown, and click on Add. Fill in the fields as follows:
- ID:
com.packtpub.e4.clock.ui.handledmenuitem.Hello - Label:
Hello - Command:
Hello – com.packtpub.e4.clock.ui.command.hello
- ID:
- Run the target Eclipse instance, and there will be a Hello menu item under the Help menu. When selected, it will pop up the Hello World message.

Eclipse 3.x introduced the concept of commands and handlers as a means of separating their interface from their implementation. This allows a generic command (such as Copy) to be overridden by specific views. Unlike the traditional command design pattern, which provides implementation as subclasses, the Command in Eclipse uses a retargetable handler to perform the actual execution. In Eclipse 4, the concepts of commands and handlers are used extensively to provide the components of the user interface. The key difference is in their definition; for Eclipse 3.x, this typically occurs in the plugin.xml, whereas in Eclipse 4, it is part of the application model.
In the example, a specific handler was defined for the command, which is valid in all contexts. The handler's class is the implementation; the command ID is the reference.
The menuContributions fragment entry allows menus to be added anywhere in the user interface. The parent defines where the menu item can be created. The syntax for the parent is as follows:
identifier: This can be a known short name (such asfile,window, orhelp), the global menu (org.eclipse.ui.main.menu), the global toolbar (org.eclipse.ui.main.toolbar), a view identifier (org.eclipse.ui.views.ContentOutline), or an ID explicitly defined in a popup menu'sregisterContextMenucall?after|before=key: This is a placement instruction to put this after or before other items; typicallyadditionsis used as an extensible location for others to contribute to
This allows plug-ins to contribute to other menus, regardless of where they are ultimately located.