
Eclipse 4 – the new Eclipse platform
The last major change to Eclipse was with the 3.0 release, when it migrated to OSGi. The Eclipse 4 model provides a significant departure from the Eclipse 3.x line, with the user interface being represented as a dynamic Eclipse Modeling Framework (EMF) model. In addition, both model and views can be represented as simple Plain Old Java Objects (POJOs) with services provided by dependency injection. There is also a separate rendering mechanism that allows an E4 application to be hosted by different UIs, although we'll look at the SWT renderer specifically. In this chapter, we'll take a look at the differences and how you can evolve Eclipse plug-ins forward.
In this chapter, we shall:
- Set up an Eclipse 4 instance for development
- Create an E4 application with parts
- Send and receive events
- Create commands, handlers, and menus
- Inject custom POJOs
Since Eclipse was first released in November 2001, its user interface has remained mostly static. Each window has a perspective, which contains zero or one editor area, and zero or more views. In early releases, every perspective had exactly one editor area, and it was not until the release of Eclipse RCP with Eclipse 3.0 in 2004 that it was possible to disable the editor, and have a custom application suitable for a non-IDE use. However, customizing the presentation of the perspective always proved difficult, such as changing the background color or arrangement of the windows or toolbars. The Eclipse 4 model provides a way to model an application at design time, and also interpret and modify it at runtime. An application has a top-level model, but may also have additional model fragments contributed by different bundles. Additionally, the separate rendering framework allows the UI to be represented with different frameworks such as JavaFX and HTML. In this book, the default SWT rendering framework will be used, since that closely matches the existing Eclipse 3.x UI.
The other significant change is that it is no longer necessary to create subclasses of specific classes to contribute to the Eclipse infrastructure. Instead, classes are created with dependency injection (similar to how Spring components are configured) and may consume platform-level services separately to the user interface. Instead of referring to global singletons through accessor methods, these are now available through injection. This allows components to be built as simple POJOs, which allows them to be tested headlessly and provides a looser binding to the services that they consume.
To work with Eclipse 4 application models, it is necessary to install the E4 tools to allow the application XML to be edited through an editor. These are not shipped with all the Eclipse packages, and must be installed separately.
- Add the following update site by going to the Preferences menu (from the Eclipse menu on macOS or the Window menu on other operating systems), followed by navigating to Install/Update | Available Software Sites, then clicking on Add..., and entering http://download.eclipse.org/e4/updates/0.17.
Note
Some of the E4 tools are available in the Eclipse Mars update site, but not all of them. There may be updates available or additional releases of the E4 tools site; check out http://download.eclipse.org/e4/updates/ and look at the directory contents to find a later release for later versions of Eclipse.
- Click on OK on the Add Site dialog and OK on the Preferences page to add it. Once added, navigate to the Help | Install New Software menu and then select the newly added site in the list. Select the following features:
- E4 CSS Spy
- Eclipse e4 Tools
- Eclipse 4 - Model Spy
These add the ability to create Eclipse 4 Applications and edit both
cssande4xmifiles, which are used to create and render the user interface in Eclipse 4: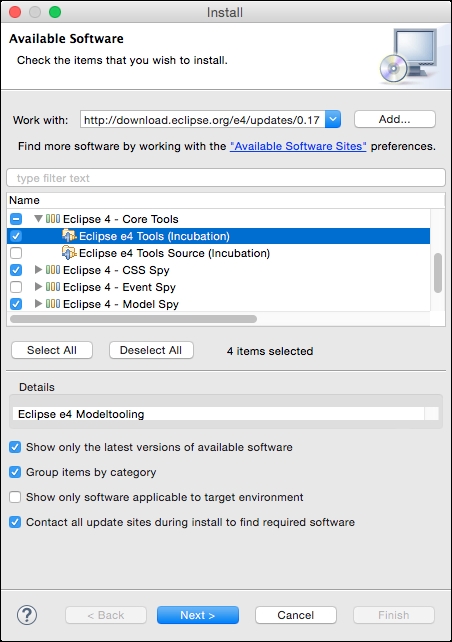
- Restart Eclipse after the install has completed.
- Go to the File | New | Project menu and verify that Eclipse 4 | Eclipse 4 Application Project is seen in the New Project wizard's choices.
Installing the Eclipse E4 tools and E4 CSS Spy provides a custom editor for e4xmi files as well as css files. In addition, the CSS Spy can be displayed by pressing Alt + Shift + F5, or with the Quick Access search bar.
To run the CSS spy in a launched application, add org.eclipse.e4.tools.css.spy to the required bundles in the launch configuration (don't add them to the product definition unless the product's end users need to be able to invoke the CSS spy).
There is also a live EMF editor that can be displayed by pressing Alt + Shift + F9. This is useful for exploring the Eclipse runtime, either in the IDE or in the launched application. To add the live EMF editor in a launched application, add org.eclipse.e4.tools.emf.liveeditor to the launch configuration.
Don't forget to click on Validate plug-ins and if necessary Add required plug-ins to ensure that the tools' dependencies are present in the launched product.