
Data stores connect GeoServer to your data. You can't use data that is not supported by GeoServer without a built-in connector or a plugin. Of course, the REST interface supports all operations on data stores. If you plan to automate GeoServer configurations, it is very important to understand how data stores can be created and edited.
The resource exposed is in the following form:
/workspaces/<ws>/datastores
Here, ws stands for the workspace on which the data store is linked.
- As usual, you can use the
GEToperation to retrieve information about which data stores are available in the configuration for a specific workspace. Let's retrieve information in Python:>>> myUrl = 'http://localhost:8080/geoserver/rest/workspaces/NaturalEarth/datastores' >>> headers = {'Accept': 'text/xml'} >>> resp = requests.get(myUrl,auth=('admin','geoserver'),headers=headers)
- Now do the same with cURL:
$ curl -u admin:geoserver -XGET -H 'Accept: text/xml' http://localhost:8080/geoserver/rest/workspaces/NaturalEarth/datastores -o naturalEarthDataStores.xml - Let's look at the file content:
<dataStores> <dataStore> <name>ShapeData</name> <atom:link xmlns:atom="http://www.w3.org/2005/Atom" rel="alternate" href="http://localhost:8080/geoserver/rest/workspaces/NaturalEarth/datastores/ShapeData.xml" type="application/xml"/> </dataStore> <dataStore> <name>GeneralizedCountries</name> <atom:link xmlns:atom="http://www.w3.org/2005/Atom" rel="alternate" href="http://localhost:8080/geoserver/rest/workspaces/NaturalEarth/datastores/GeneralizedCountries.xml" type="application/xml"/> </dataStore> <dataStore> <name>PostGISLocal</name> <atom:link xmlns:atom="http://www.w3.org/2005/Atom" rel="alternate" href="http://localhost:8080/geoserver/rest/workspaces/NaturalEarth/datastores/PostGISLocal.xml" type="application/xml"/> </dataStore> </dataStores> - There are three data stores. Now, retrieve information about the PostGIS data source using cURL:
$ curl -u admin:geoserver -XGET -H 'Accept: text/xml' http://localhost:8080/geoserver/rest/workspaces/NaturalEarth/datastores/PostGISLocal -o PostGISLocal.xml - Next, retrieve information using Python:
>>> myUrl = 'http://localhost:8080/geoserver/rest/workspaces/NaturalEarth/datastores/PostGISLocal'
>>> headers = {'Accept': 'text/xml'}
>>> resp = requests.get(myUrl,auth=('admin','geoserver'),headers=headers)
>>> file = open(PostGISLocal_py.xml','w')
>>> file.write(resp.text)
>>> file.close()
- Examine the content:
<dataStore> <name>PostGISLocal</name> <type>PostGIS</type> <enabled>true</enabled> <workspace> <name>NaturalEarth</name> <atom:link xmlns:atom="http://www.w3.org/2005/Atom" rel="alternate" href="http://localhost:8080/geoserver/rest/workspaces/NaturalEarth.xml" type="application/xml"/> </workspace> <connectionParameters> <entry key="Connection timeout">20</entry> <entry key="port">5432</entry> <entry key="passwd">crypt1:xbeWyWda+hqHCf456TK0Gg==</entry> <entry key="dbtype">postgis</entry> <entry key="host">localhost</entry> <entry key="validate connections">true</entry> <entry key="encode functions">false</entry> <entry key="max connections">10</entry> <entry key="database">gisdata</entry> <entry key="namespace">http://www.naturalearthdata.com/</entry> <entry key="schema">public</entry> <entry key="Loose bbox">true</entry> <entry key="Expose primary keys">false</entry> <entry key="Max open prepared statements">50</entry> <entry key="fetch size">1000</entry> <entry key="preparedStatements">false</entry> <entry key="Estimated extends">true</entry> <entry key="user">gisuser</entry> <entry key="min connections">1</entry> </connectionParameters> <__default>false</__default> <featureTypes> <atom:link xmlns:atom="http://www.w3.org/2005/Atom" rel="alternate" href="http://localhost:8080/geoserver/rest/workspaces/NaturalEarth/datastores/PostGISLocal/featuretypes.xml" type="application/xml"/> </featureTypes> </dataStore> - Prepare an XML file to create a new data store pointing to PostGIS in the new workspace created in the previous recipe:
<dataStore> <name>myPostGIS</name> <description>PostGIS local instance</description> <type>PostGIS</type> <enabled>true</enabled> <connectionParameters> <entry key="host">localhost</entry> <entry key="port">5432</entry> <entry key="database"> gisdata</entry> <entry key="schema">public</entry> <entry key="user">gisuser</entry> <entry key="passwd"> gisuser </entry> <entry key="dbtype">postgis</entry> <entry key="validate connections">true</entry> <entry key="Connection timeout">20</entry> <entry key="min connections">1</entry> <entry key="max connections">10</entry> <entry key="Loose bbox">true</entry> <entry key="fetch size">1000</entry> <entry key="Max open prepared statements">50</entry> <entry key="Estimated extends">true</entry> </connectionParameters> <__default>false</__default> </dataStore> - Now use a cURL call to create your new PostGIS source:
$ curl -u admin:geoserver -XPOST -d @postgis.xml -H 'Content-type: text/xml' -H 'Accept: text/xml' http://localhost:8080/geoserver/rest/workspaces/MyOrganization/datastores - Go to the web interface and you will find the new data store.

- You can do the same using Python:
>>> myUrl = 'http://localhost:8080/geoserver/rest/workspaces/MyOrganization/datastores'
>>> file = open('postgis.xml','r')
>>> payload = file.read()
>>> headers = {'Content-type': 'text/xml','Accept': 'text/xml'}
>>> resp = requests.post(myUrl, auth=('admin','geoserver'), data=payload, headers=headers)
>>> resp.status_code
201
The REST syntax is not different from that used in the previous recipe. What's changed is that the objects that you're using and data stores are more complicated objects than workspaces, so you found a lot of information in the XML file.
You have to remember that data stores are heterogeneous. The connection parameter tag may contain very different elements, depending on the data store type, for example, a shapefile data store won't have a user ID, password, TCP port, and similar properties that only make sense when connecting to a database.
Try to query the BlueMarble data store we created in Chapter 1, Working with Vectors:
$ curl -u admin:geoserver -XGET -H 'Accept: text/xml' http://localhost:8080/geoserver/rest/workspaces/NaturalEarth/coveragestores/BlueMarble -o BlueMarble.xml
Please note that in the URL, we send the request to coveragestores and not datastores; the latter is only for vector data. The raster data stored in the filesystem is included in the coveragestores collection.
Examining the result, you can note that there is a reference to the actual raster file and its location:
<coverageStore>
  <name>BlueMarble</name>
  <type>GeoTIFF</type>
  <enabled>true</enabled>
  <workspace>
    <name>NaturalEarth</name>
    <atom:link xmlns:atom="http://www.w3.org/2005/Atom" rel="alternate" href="http://localhost:8080/geoserver/rest/workspaces/NaturalEarth.xml" type="application/xml"/>
  </workspace>
  <__default>false</__default>
  <url>file:data/blueMarble/blueMarble.tiff</url>
  <coverages>
    <atom:link xmlns:atom="http://www.w3.org/2005/Atom" rel="alternate" href="http://localhost:8080/geoserver/rest/workspaces/NaturalEarth/coveragestores/BlueMarble/coverages.xml" type="application/xml"/>
  </coverages>
</coverageStore>In this recipe, you created a data store for a PostGIS database; of course, you can also create it for a simple shapefile. In this case, you can also deliver the data with a REST operation.
We will use the coastline shapefile from the Natural Earth site; locate it at http://www.naturalearthdata.com/downloads/110m-physical-vectors/, save the ZIP file on your filesystem, and then execute the following Python code:
>>> myUrl =  'http://localhost:8080/geoserver/rest/workspaces/NaturalEarth/datastores/Coastline/file.shp'
>>> file = open('ne_110m_coastline.zip','rb')
>>> payload = file.read()
>>> headers = {'Content-type': 'application/zip'}
>>> resp = requests.put(myUrl, auth=('admin','geoserver'), data=payload, headers=headers)
>>> resp.status_code
201
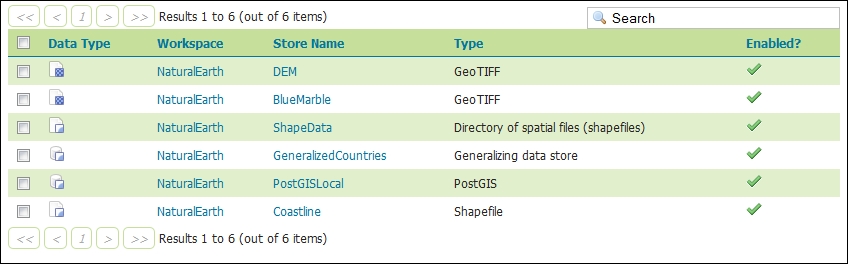
You loaded the file and sent it to GeoServer, creating a new data store for it. Now look at the web interface and list the data stores; there is a new one.
Of course, a new layer is listed.
