
You've been using WMS since the start of this book. You are an expert with GetMap requests, so it's perfectly clear to you that such a request can only produce a static map, that is, a representation of your data according to the styles and other parameters you submitted with the query.
Sometimes it may be useful to produce a dynamic map, something more similar to an animation. In fact, an animation is composed of an ordered sequence of pictures, so a map animation only requires you to produce an ordered sequence of maps.
A common use case is a map changing its extent to simulate a move over the data. In this recipe, you will learn how to produce a small animation, which shows a map moving toward the east.
- Start your GeoServer instance and go to the web interface.
- On the left panel, select the Layer option and then check that the following layers are listed among the available layers:
- NaturalEarth:populatedplaces
- NaturalEarth:GeneralizedCountries
- We created them in the Improving performance with pregeneralized features recipe, Chapter 1, Working with Vectors. In case you skipped it, you should at least load the data and publish them in GeoServer.
- Now open your browser and point it to the following URL:
http://localhost:8080/geoserver/wms/animate?layers=NaturalEarth:populatedplaces,NaturalEarth:GeneralizedCountries&width=600&aparam=bbox&avalues=-7,40,0,47,-6.5,40,0.5,47,-6,40,1,47,-5.5,40,1.5,47,-5,40,2,47,-4.5,40,2.5,47,-4,40,3,47,-3.5,40,3.5,47,-3,40,4,47,-2.5,40,4.5,47,-2,40,5,47,-1.5,40,5.5,47,-1,40,6,47 - Wait for GeoServer to elaborate on your request. A map will then appear in the browser showing a short animation, which will display a map shifting from Spain to France. The map should look like the following screenshot:
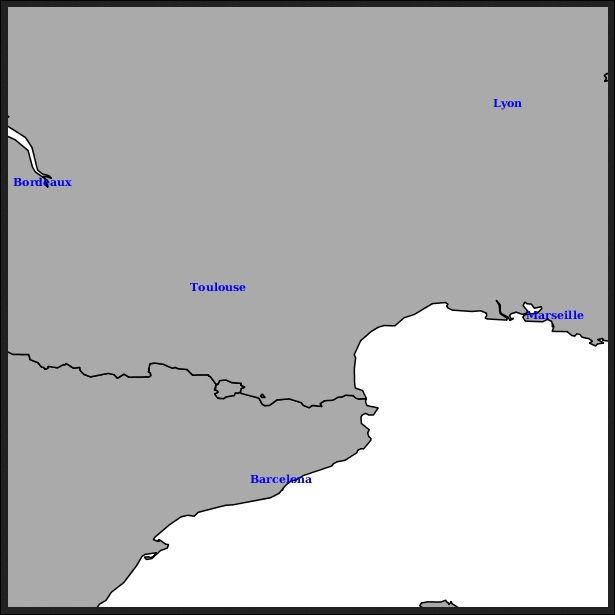
The small animation you requested GeoServer to create for you is stored inside an animated GIF. You can check it if you right-click on the picture and use the Save image function. If you check the GIF properties, you will see that it contains 13 pictures or frames.
Each frame is a static map with a different extent. You can produce it with 13 GetMap requests, and then use an external tool to merge all 13 pictures in an animation. GeoServer does it all for you. The small, but fundamental, difference in the request of an ordinary GetMap is in the path.
For a simple GetMap request, you could use the http://localhost:8080/geoserver/wms path. In this case, you shall use the http://localhost:8080/geoserver/wms/animate path. So your request is recognized as an animation request and extra parameters, such as the animator parameter, are allowed.
You need to forward some more information to instruct GeoServer on how to produce the animation. Basically, you have to set the aparam and avalue parameters:
aparam: This parameter specifies the name of the parameter that will change in the frames. In this recipe, we used thebboxparameter, so GeoServer will expect different bounding boxes for each frame.avalue: This parameter specifies the actual value that should be used for each frame. In this recipe, we listed a set of bounding boxes, each containing four numbers, for the top, bottom, left, and right.
The other parameters are the same you would use in a standard GetMap request. Please note that the animator parameter has default values for almost all GetMap parameters; the only one you need to explicitly set is layers to indicate what data should be represented in the map.
The previous requests, in fact, do not contain the format, as they defaults to image/gif;subtype=animated. In fact, with GeoServer 2.5.x release, the animated GIF is the only supported format for animation.
The GeoServer animator gives you options of speed and looping for your animation. To set them, you can use the following two custom parameters:
gif_loop_continuosly: This parameter controls whether the animation will run just once or loop continuously. The default value is false and, in fact, in this recipe, the animation just plays once. Try to run it again adding&gif_loop_continuosly=trueat the end of the URL.gif_frames_delay: This parameter specifies the frame delay in milliseconds. The default is 1,000 milliseconds, which is the value used in the previous request. Add&gif_frame_delay=500at the end of the URL and run it again.
We'll explore the preceding two parameters using data from the previous recipe. We'll create an animation showing the path of the vehicle. In fact, you just have to specify time as the animation parameter, as shown in the following request:
http://localhost:8080/geoserver/wms/animate?layers=NaturalEarth:vehicletrack&width=200&aparam=time&avalues=2014-05-26T11:00:00.0Z/2014-05-26T11:05:00.0Z,2014-05-26T11:05:00.0Z/2014-05-26T11:10:00.0Z,2014-05-26T11:10:00.0Z/2014-05-26T11:15:00.0Z,2014-05-26T11:15:00.0Z/2014-05-26T11:20:00.0Z,2014-05-26T11:20:00.0Z/2014-05-26T11:25:00.0Z,2014-05-26T11:25:00.0Z/2014-05-26T11:30:00.0Z,2014-05-26T11:30:00.0Z/2014-05-26T11:35:00.0Z,2014-05-26T11:35:00.0Z/2014-05-26T11:40:00.0Z,2014-05-26T11:40:00.0Z/2014-05-26T11:45:00.0Z,2014-05-26T11:45:00.0Z/2014-05-26T11:50:00.0Z,2014-05-26T11:50:00.0Z/2014-05-26T11:55:00.0Z,2014-05-26T11:55:00.0Z/2014-05-26T12:00:00.0Z,2014-05-26T12:00:00.0Z/2014-05-26T12:05:00.0Z,2014-05-26T12:05:00.0Z/2014-05-26T12:10:00.0Z,2014-05-26T12:10:00.0Z/2014-05-26T12:15:00.0Z,2014-05-26T12:15:00.0Z/2014-05-26T12:20:00.0Z,2014-05-26T12:20:00.0Z/2014-05-26T12:25:00.0Z,2014-05-26T12:25:00.0Z/2014-05-26T12:30:00.0Z&gif_loop_continuosly=true&gif_frame_delay=500
The avalues parameter contains a set of ranges, and each one spans over a five-minute interval; the resulting screenshot shows you the path of the vehicle in that period. You can also control some animator parameters globally.
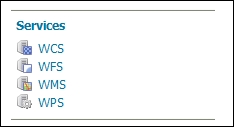
In the GeoServer web interface, locate the WMS setting in the left pane, as shown:
Scroll down until you reach the WMS-Animator Options section, as shown in the following screenshot:
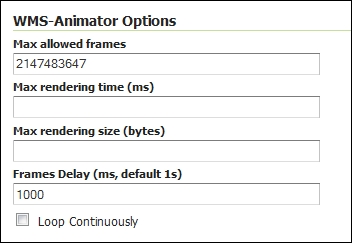
You'll find the two previous custom parameters, and from here, you can change the default behavior. For instance, you may want GeoServer to loop the animation continuously by default. The first option lets you set the maximum number of frames allowed in a single animation, which as you can see is a very high value by default. You may want to reduce it to avoid a huge load on your server triggered by some user. The other two values let you set the maximum time GeoServer should work on an animation before discarding it and also, the maximum animation size. Again, these values let you protect your server from dangerous requests.