Installing, maintaining, and administering a Kubernetes cluster manually could mean a huge investment of time for a company. In general, these tasks are one-off costs and therefore it would be best to not waste these resources. In Azure today, there is a feature called AKS, where K emphasizes that it is a managed Kubernetes service.
Right after containers became interesting for cloud services, Microsoft launched a first service called which was in general the same, but if you ordered it, Azure created a custom ACS environment (dedicated to your tenant) for templated deployments. With ACS, the choice was just available to the most popular orchestrators—Mesos, Swarm, and Kubernetes. With ACS, you have to pay for the master servers of the orchestrator.
For AKS, there is no charge for Kubernetes masters, you just have to pay for the nodes that are running the containers.
Before you start, you will have to fulfill the following prerequisites:
- An Azure account with an active subscription
- Azure CLI installed and configured
- Kubernetes command-line tool, kubectl, installed
- Make sure that the Azure subscription you use has these required resources—storage, compute, networking, and a container service:

- For the first step, you need to choose Kubernetes service and choose to create your AKS deployment for your tenant. The following parameters need to be defined:
- Resource group for the deployment
- Kubernetes cluster name
- Azure region
- Kubernetes version
- DNS prefix
- Then, hit the Authentication tab, as shown in the following screenshot:

- On the Authentication tab, you will need to define a service principal or choose and existing one, as AKS needs a service principal to run the deployment. In addition, you could enable the RBAC feature, which gives you the chance to define fine-grained permissions based on Azure AD accounts and groups.
- On the Networking tab, you can choose either to add the Kubernetes cluster into an existing VNET, or create a new one. In addition, the HTTP routing feature can be enabled or disabled:

- On the Monitoring tab, you have the option to enable container monitoring and link it to an existing Log Analytics workspace, or create a new one:

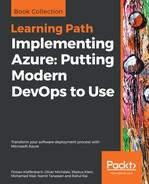
- As Azure tags are a major feature and requirement for Azure Governance, the following is the source from which to set your required tags:
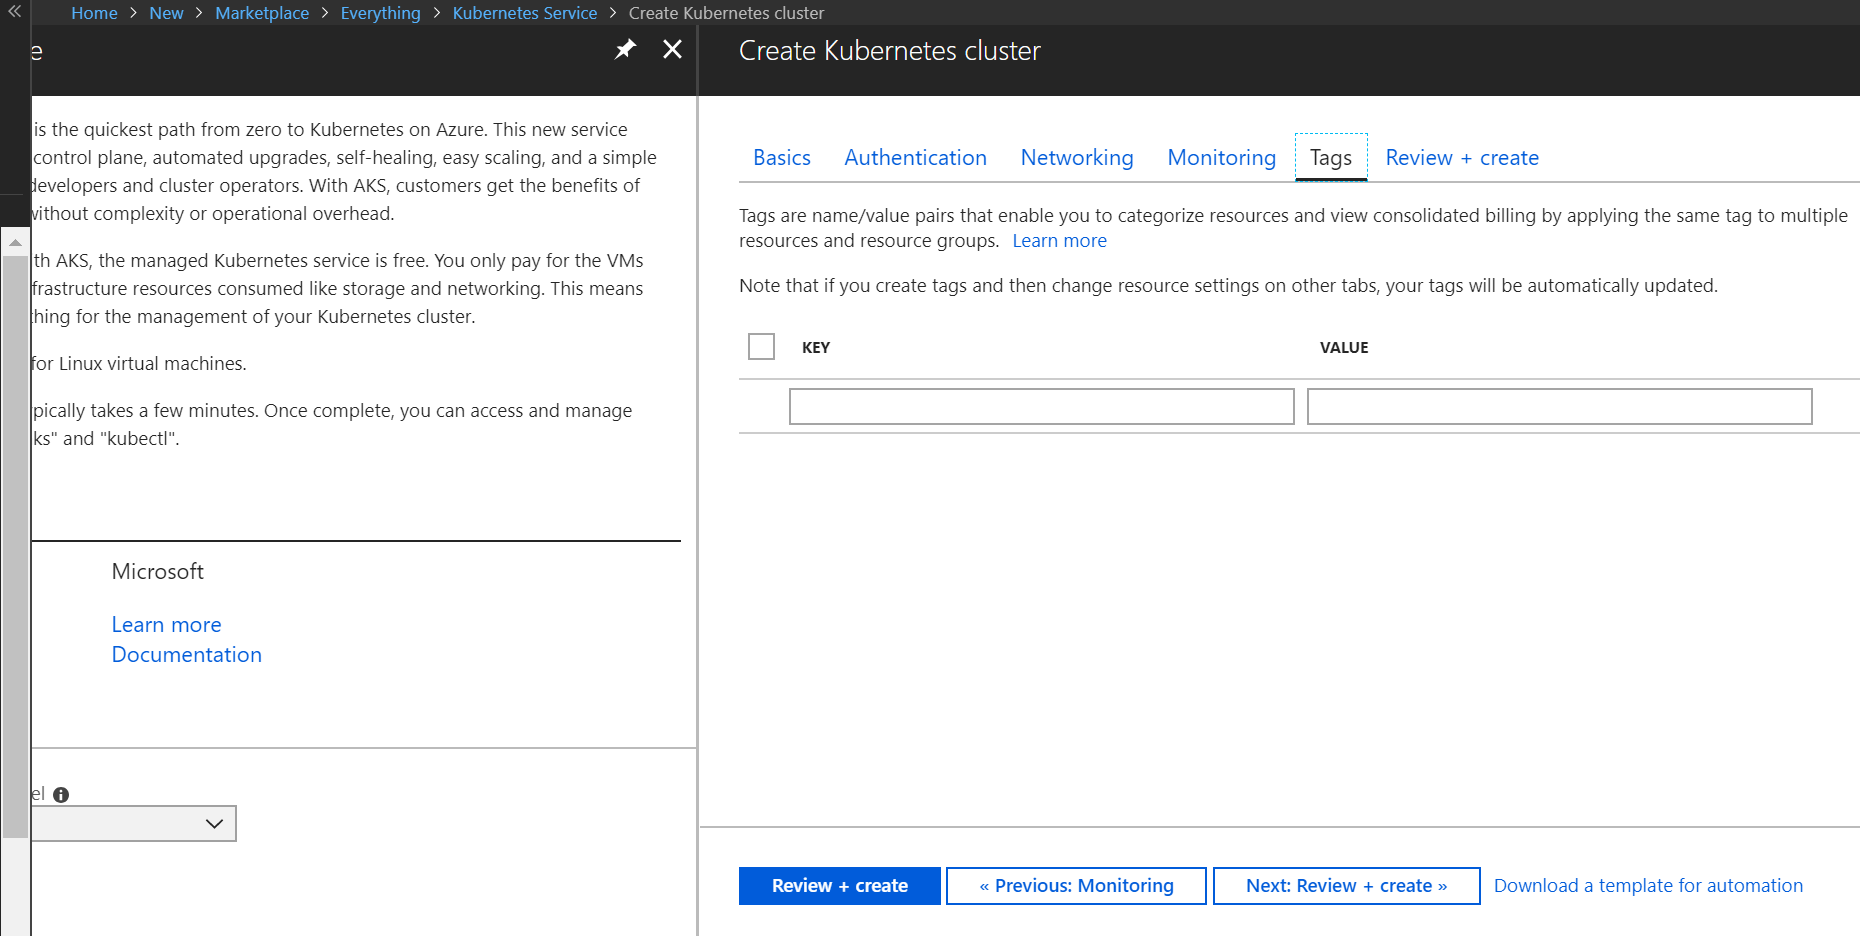
- Finally, the validation will check for any misconfigurations and create the Azure ARM template for the deployment. Clicking the Create button will start the deployment phase, which could run for several minutes or even longer depending on the chosen feature, and scale:
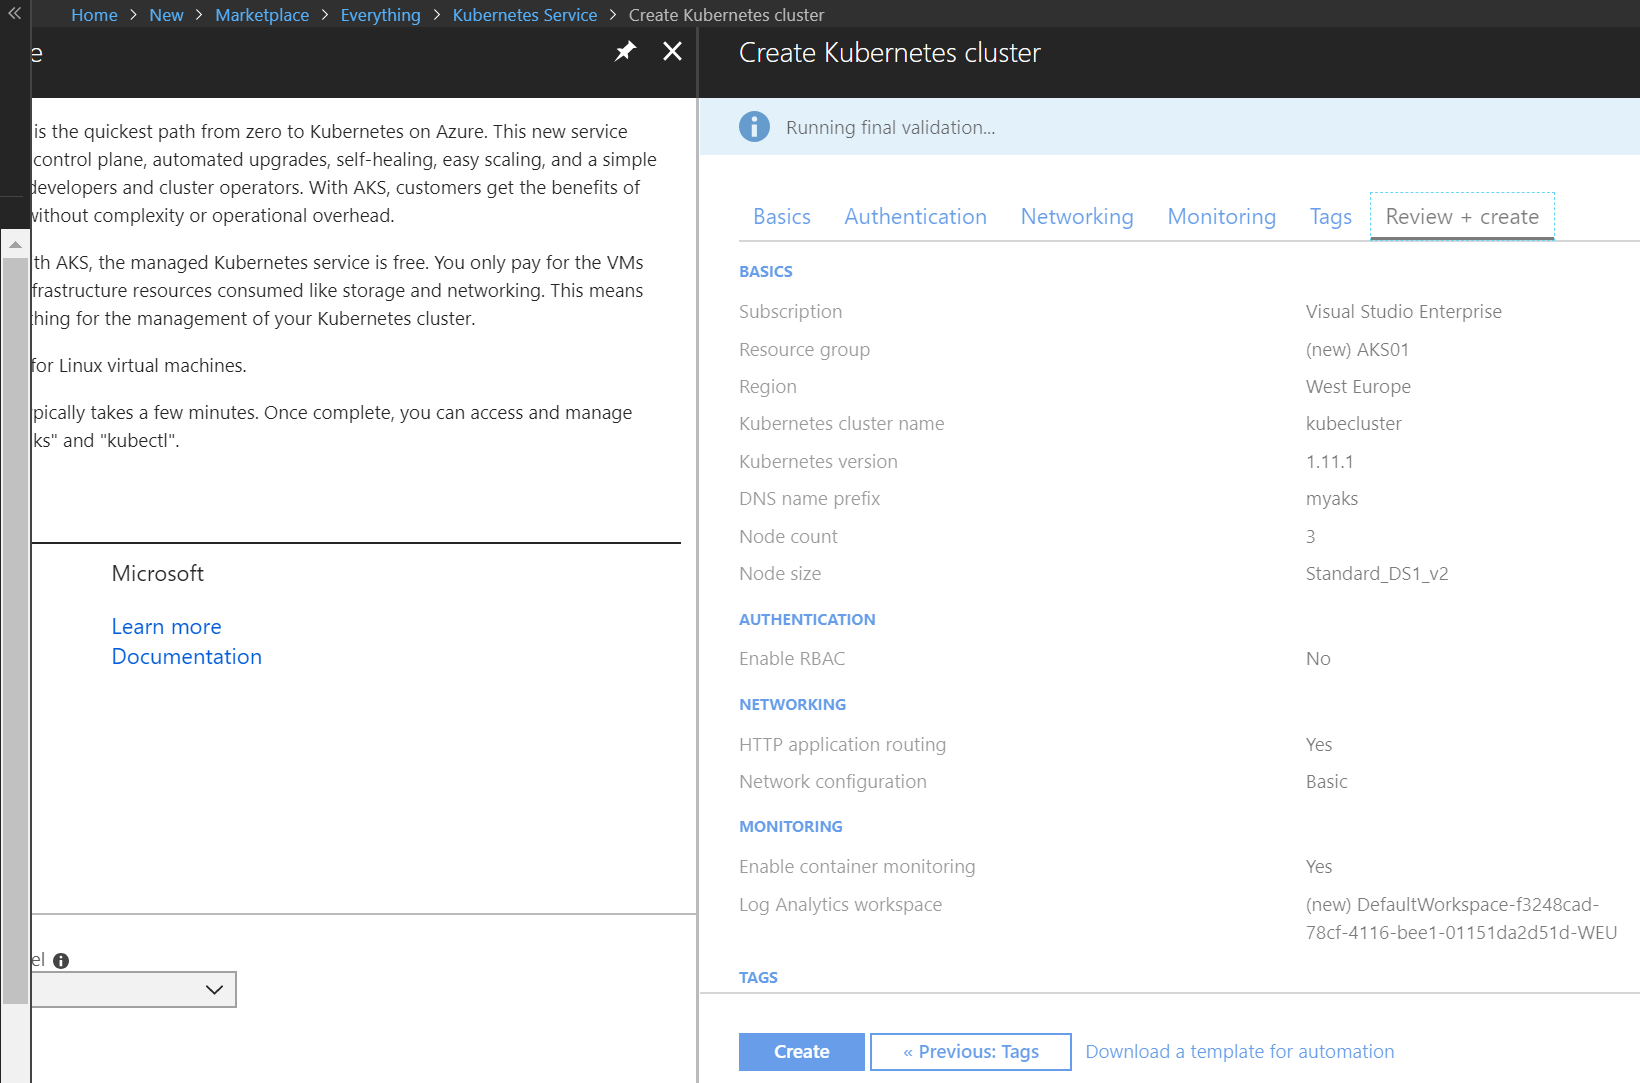
- After the deployment has finished, the Kubernetes dashboard is available. You can view the Kubernetes dashboard by clicking on the View Kubernetes dashboard link, as shown in the following screenshot:
The dashboard looks something like the one shown in the following screenshot:

- As you can see in the preceding screenshot, there are four steps to open the dashboard. At first, we will need to install the Azure CLI in its most current version using the statement that is mentioned in the following screenshot:

Afterward, the AKS CLI needs to be enabled. It is called kubectl.exe.
- Finally, after setting all the parameters (and when you have performed steps 3 and 4 from the preceding task list), the following dashboard should open in a new browser window:

The preceding dashboard provides a way to monitor and administer your Azure Kubernetes environment, in general, from a GUI.
- If a new Kubernetes version becomes available, you can easily update it from the Azure portal yourself with one click, as shown in the following screenshot:

- If you need to scale your AKS hosts, this is quite easy too, as you can do it through the Azure portal. A maximum of 100 hosts with 3 vCPUs and 10.5 GB RAM per host is currently possible:

- To enable autoscaler with AKS, the following URL will provide detailed information: https://docs.microsoft.com/en-us/azure/aks/autoscaler.
- If you would like to implement AKS using the Azure CLI, the following link is a great source of information: https://docs.microsoft.com/en-us/azure/aks/kubernetes-walkthrough.
With all the steps done, you can now upload your containers to your AKS-enabled Docker, and have a huge scalable infrastructure with a minimum of administrative tasks and time for the implementation itself.
- If you need to monitor AKS, the integration with Azure monitoring is integrated completely. By clicking the Monitor container health link, you will be directed to the following overview:

The Nodes tab provides the following information per node:

This not only gives a brief overview of the health status, but also the number of containers and the load on the node itself.
- The Controllers view provides detailed information on the AKS controller, its services, status, and uptime:

- And finally, the Containers tab gives a deep overview of the health state of each container running in the infrastructure (system containers included):

- By hitting the Search logs section, you can define your own custom Azure monitoring searches and integrate them in your custom portal:

To finally get everything up-and-running, the following to-do list gives a brief overview of all the tasks needed to provide an app within AKS:
- Prepare the AKS App: https://docs.microsoft.com/en-us/azure/aks/tutorial-kubernetes-prepare-app
- Create the container registry: https://docs.microsoft.com/en-us/azure/aks/tutorial-kubernetes-prepare-acr
- Create the Kubernetes cluster: https://docs.microsoft.com/en-us/azure/aks/tutorial-kubernetes-deploy-cluster
- Run the application in AKS: https://docs.microsoft.com/en-us/azure/aks/tutorial-kubernetes-deploy-application
- Scale the application in AKS: https://docs.microsoft.com/en-us/azure/aks/tutorial-kubernetes-scale
- Update the application in AKS: https://docs.microsoft.com/en-us/azure/aks/tutorial-kubernetes-app-update
AKS has the following service quotas and limits:
| Resource | Default limit |
| Max nodes per cluster | 100 |
| Max pods per node (basic networking with KubeNet) | 110 |
| Max pods per node (advanced networking with Azure CNI) | 301 |
| Max clusters per subscription | 100 |
If you already have ACS in place and need to migrate to AKS, the following URL should help: https://docs.microsoft.com/en-us/azure/aks/acs-aks-migration.
As you have seen, AKS in Azure provides great features with a minimum of administrative tasks.